And in this tutorial of how to remove objects in lightroom, I’ll be showing you some awesome hidden gems in Lightroom that I think was overlooked. We will show you how to remove unwanted objects using Lightroom presets. I’ll teach you how to install Lightroom presets.
If you are comfortable doing things with Photoshop, it’s good, however, if you wish to learn more, this guide for removing objects in photos or images is for you.
I’ve talked to friends about these sorts of hidden gems, just sharing ideas and stuff and I’m always surprised when I mention a few of these and my friends are like “awe cool, never knew that!”
So let’s get into it and start with the first one.
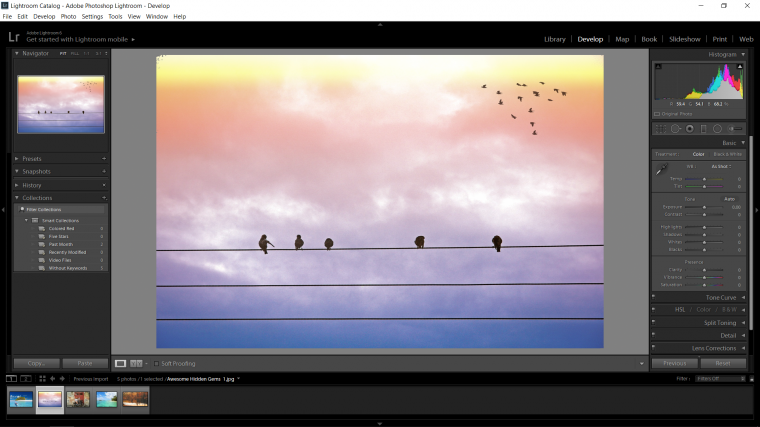
So my Image here looks cool but I would like to remove unwanted power lines that are below the main one with the birds on it, my aim is to have the image look more isolated for Photo aesthetics reasons. To do that I will go to the adobe Lightroom develop module along with the image.
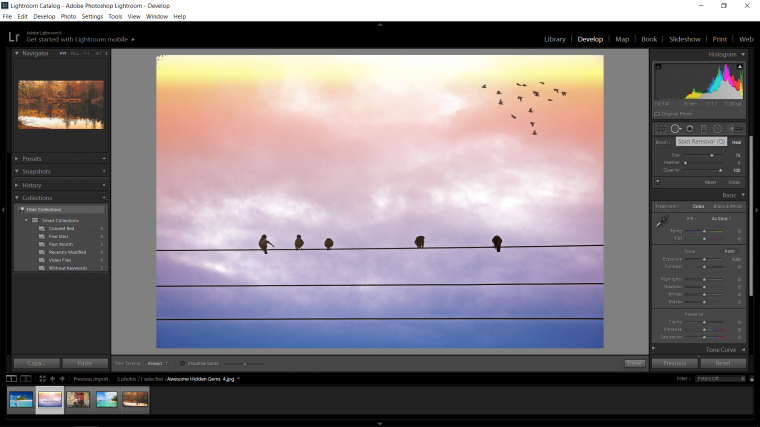
So what I’m going to use for this is the Spot Removal Tool which is best when it comes to removing objects in photos.
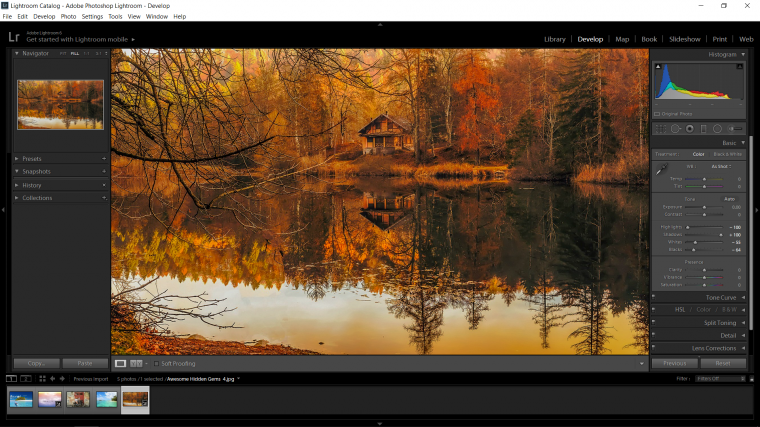
You will find it on the right-hand side of your screen, look for the historiography, that’s the box with all the little colored looking mountains in it.
When you find that look just below it and you’ll see six various little icons just above the basics panel, the one that we are going to use is the second one across.
If all fails and you can’t find it then I permit you to cheat by using the Keyboard Shortcut by pressing ‘Q’ on your keyboard.
With this Tool what you can do is to just click on the starting point of whatever line it is that you want to remove and drag it along using your mouse, now this can work well in many situations but you would need a pretty steady hand for most of them which at times might not be so easy unless you are an elite master mouse user 🙂
But an easy way to do this there is! as a very smart master Yoda type once taught me, namely the internet…
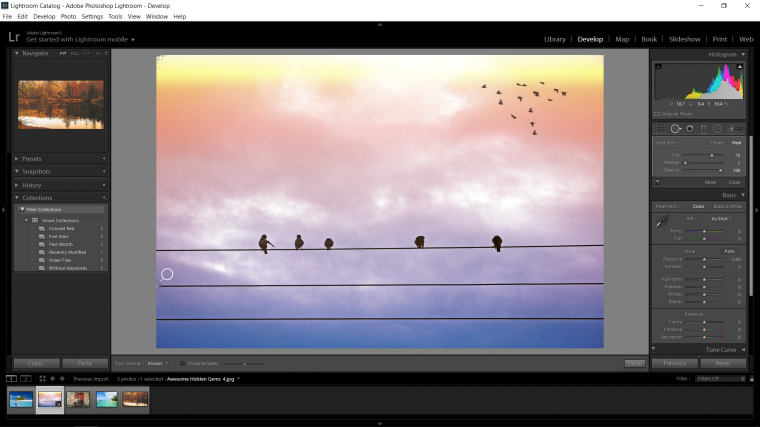
So what you do is you click at the very start of the bit where you want to remove objects, you will then see that there is a little-blurred circle with another circle indicated with a white border around it, this is the area that the Tool uses to clone over the area that you want to hide, when you hover over it you will be able to see a little hand appear that you can use to click and move the area designated for cloning use.
Ok so with that little brief cleared up what next? Well, all you have to do now that you have made your first click is to go to the other end of the object, hold shift on your keyboard and then click it.
You will now see that the entire line has been cloned over, and cool, look how good that works, very quick, very underused and very easy so I hope you remember to apply it when you can.
Ok cool, let’s move to our next adobe Lightroom Gem.
This next Gem is to do with when you are editing an image and you have completely maxed out the slider that you’re using.
Tip: When you want to remove objects from the photo, you always need to change the brush size. Now the fastest way to change the brush size would be to press the left square bracket key on the keyboard. This will decrease the brush size. Hit the right square bracket key if you wish to increase the brush size.
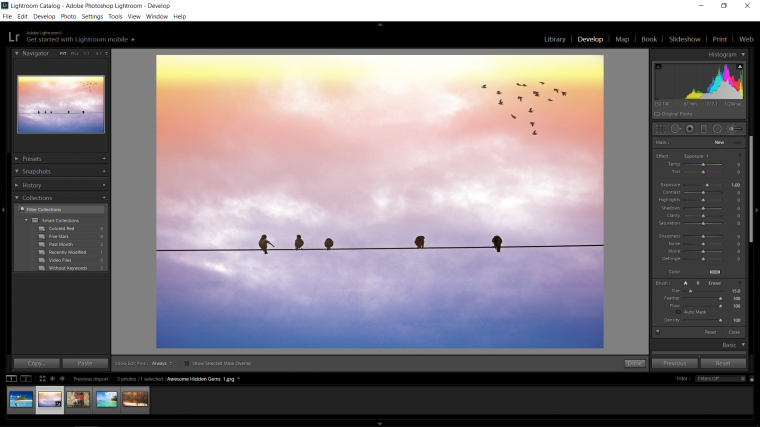
So if you look at the image below you will see that I am in the Basics Panel where most of my editing options are housed, my Highlights and Shadows sliders have both been maxed out as you will see.
I would love to be able to see if I can get just a little bit more out of them just to see if it makes any improvements at all to my image, it looks good and all as is but I can’t go any further with the sliders to experiment if I get any more improvements…apparently…
Well, you can and this is how!
So the way to do this is to use the Graduated Filter in a little bit of a different way than what you would usually use it.
Go to where you got our last Tool…the Spot Removal Tool and look over two more icons to the fourth one across and click on it. The spot removal tool can be found in the develop module. Once you have gained access to this tool, you will also be able to get hold of clone and heal tools in lightroom (for healing) options. If the photo has an imperfection that gets blended in the background then it is better to use the Heal tool as it will create the healing process easy. You shouldn’t try any other tool. Further, you can achieve better results by decreasing the Opacity slider value to 60% as the pixels copied by you will look softer. Also, they’ll blend into a new background better, thereby, giving you photos with better adjustments. Problem fixed!
As before there is a cheat option that you can use by clicking (M) on the keyboard to activate it.
For now, we’ll leave it here for this part and continue in Part 2, but for now, at least we know where the Tool is, so let everything that we have learned so far sink in.
You can just close adobe Lightroom and everything will be saved as is.
Conclusion
We now hope you will be to do the object and spot removal by varying the brush size easily. For any queries, ask us in the comment section. If you wish to read more tutorials, don’t forget to check out more articles on our website.
Graduated from college in 2002 with a degree in Art & Design, I started exploring my way in Graphic Design and Professional Post Production. Full-time freelancer since 2011.
Yeah the extra Feather and having your brush larger as well. You may also have to go over it a couple of times too.
Allan Meadows •
Guest
Good, but not perfect. I can still see two horizontal areas where the power lines were. And increasing the feather of the tool and hoping that solves the problem is the only possibility, I think.
Julian •
Verified buyer
I think it was only an addition to Lightroom 5, thanks for your input Joe
Joe •
Guest
I have LR4.4 your tip did not work, nice tip though.
Julian •
Verified buyer
Happy to 🙂
Jo Daniels •
Guest
Thanks for sharing the experience and valuable tips!


 Facebook
 Google +
Comments (6)
Yeah the extra Feather and having your brush larger as well. You may also have to go over it a couple of times too.
Good, but not perfect. I can still see two horizontal areas where the power lines were. And increasing the feather of the tool and hoping that solves the problem is the only possibility, I think.
I think it was only an addition to Lightroom 5, thanks for your input Joe
I have LR4.4 your tip did not work, nice tip though.
Happy to 🙂
Thanks for sharing the experience and valuable tips!