
One of the simplest and most important ways to speed up your photo editing is by using shortcuts. Lightroom has hundreds of shortcuts, and it would be nearly impossible to memorize them all. But by learning a key few, you will be able to save hours over the course of your lifetime.We are going to focus on some key shortcuts that every photographer/image processor should know while working on the Library module in Lightroom.
Table of Contents
Lightroom provides us with a number of shortcuts to make our jobs a lot easier and less time-consuming. But what most people do not know is the pop-up window that gives you a list of all these existing shortcuts for your reference.
Ctrl + / on the windows or Command + / on the mac will take you to the shortcut window. Not all of us can remember the keys and codes for all processes, so this one is handy for those of us who need to refer to the shortcuts guide once in a while to brush up our memory. More specifically, using the keys “Ctrl + Alt + /” or “Command + Alt + /” while in a particular module will show you the shortcuts window for that particular window that you’re operating on.
For example, using the keys “Ctrl + Alt + /” or “Command + Alt + /” while in the Library module will show me the shortcuts applicable for the library module only. 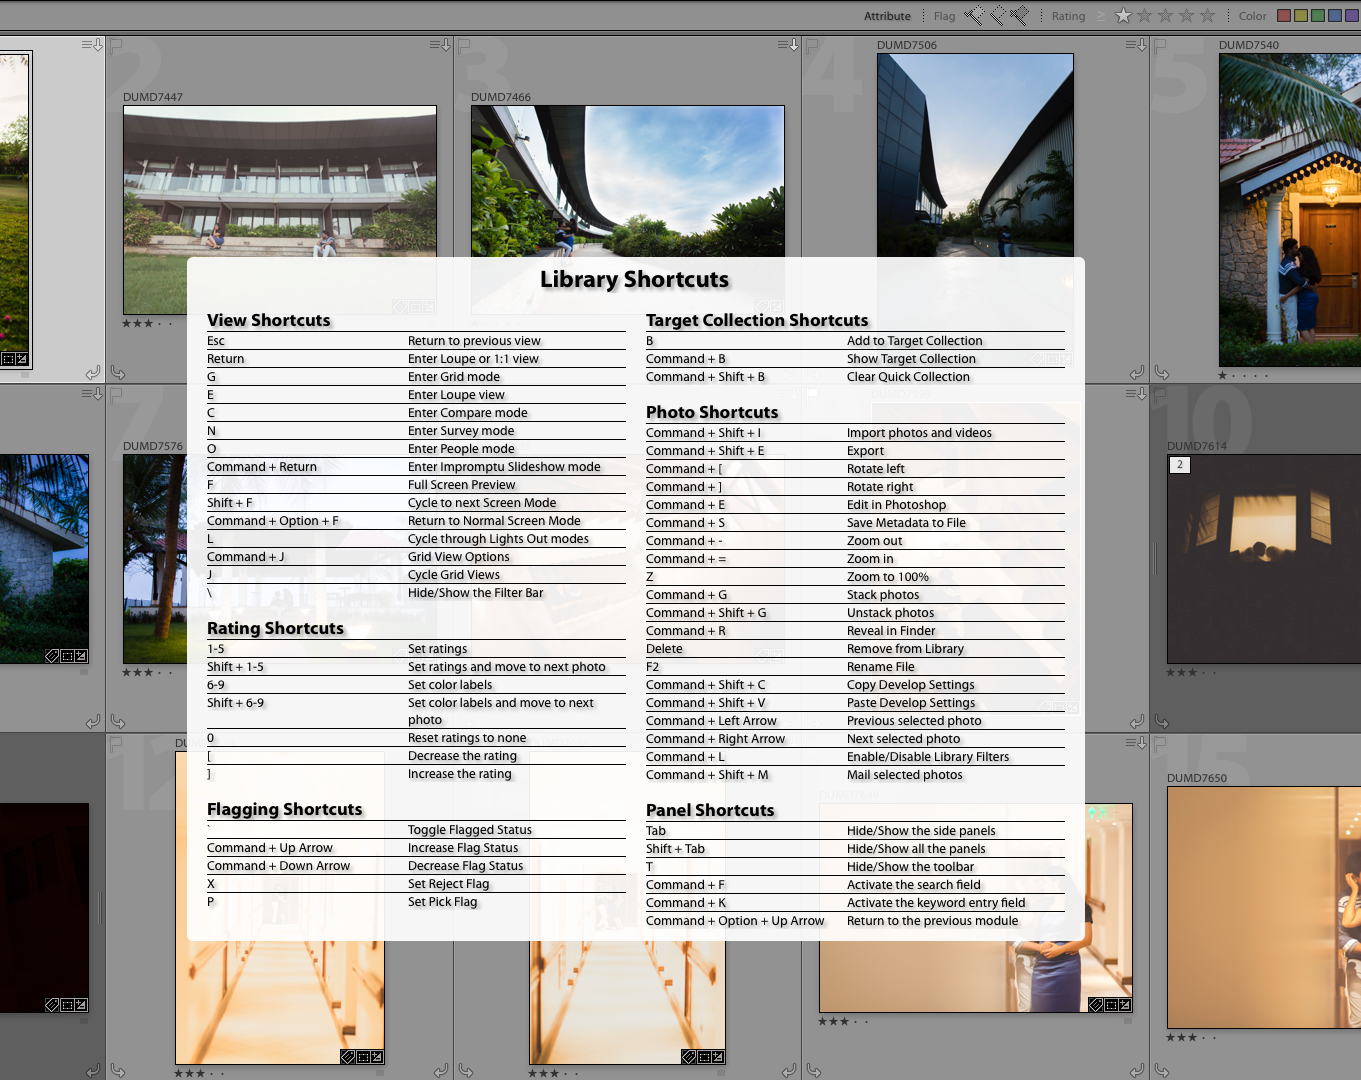
While in the library module, use Ctrl+Alt+/ or Command+Alt+/ to view the shortcuts applicable for library module.
Sometimes, we’d like to rotate images to view them from a different perspective – either portrait or landscape. But do we always have to open up the image in Loupe view to rotate it clockwise or anticlockwise, or do we have to press the little rotate icon every time? No. To rotate your images to the left, hit “Ctrl + [”. To rotate your images to the right, hit “Ctrl + ]”
To rotate multiple images at once, go to the Grid View (“G”). Once you are in the Grid View, select your images by holding down “Ctrl” while clicking on your images and rotate by using the same shortcuts.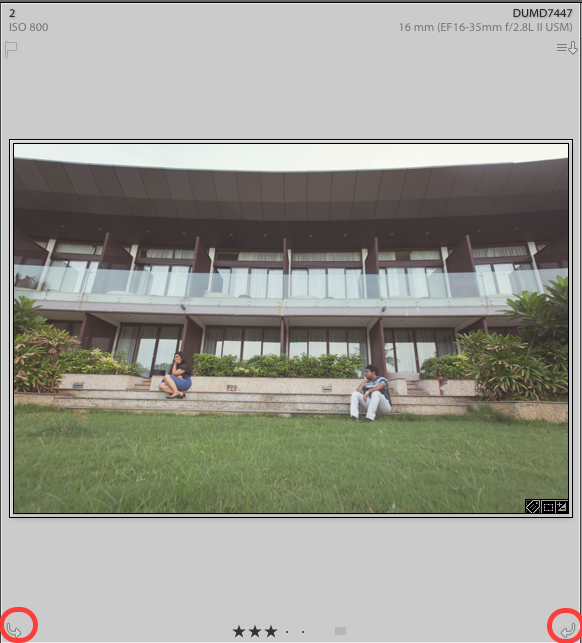
An image thumbnail showing the clockwise and anticlockwise rotate icons.
P: For picking images to be flagged.
X: For rejecting images that are already flagged.
U: For unflagging images.
Numbers 1 – 5: For star rating
Numbers 6 – 9: For color labelingTip: If you want to delete all the rejected images from Lightroom, use “Ctrl + backspace” or “Command + backspace”. A separate dialogue box will pop asking if you want to either delete it from Library or from harddisk itself. 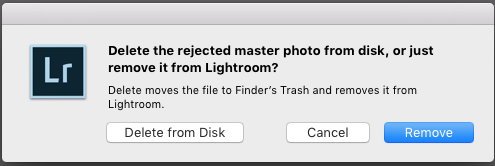 A dialogue box pops up upon deletion of a rejected image.
Whether you use stars, flags, or colors, rating your photos is an important step in Lightroom workflow. Going through and rating every photo accounts for a significant amount of time. You can cut down on some of that time by using the Caps Lock Auto Advance. Within the Library Module, turn on the CAPS LOCK key (or go to Photo -> Auto Advance). After rating a photo, rather than using the arrow key to advance to the next photo, Lightroom will automatically do it for you. This trick works for stars, flags, and color labels.
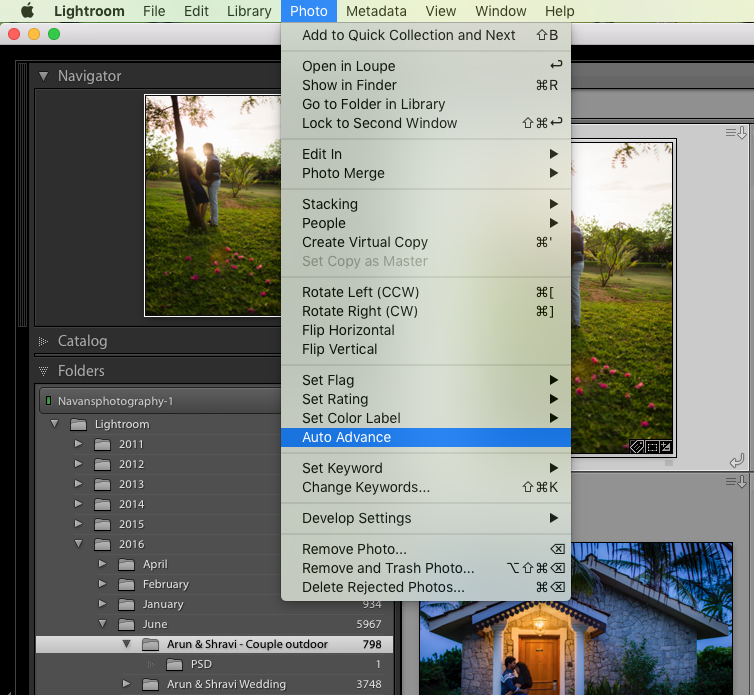
Use the auto-advance feature to complete your flagging and rating process in a jiffy!
There is a total of 7 Modules in Lightroom and each corresponds with numbers from 1 – 7. To switch to a Module, hit “Ctrl + Alt + 1-7” or “Command + Option + 1-7
“.“1” is the Library Module, “2” is the Develop Module, “3” is the Map Module, and so on. For example, if you want to go to the Develop Module, hit “Ctrl + Alt + 2.”
Alternatively, press the key D on your keyboard while in the Library module to move to the Develop module quickly. Saves time and works best.
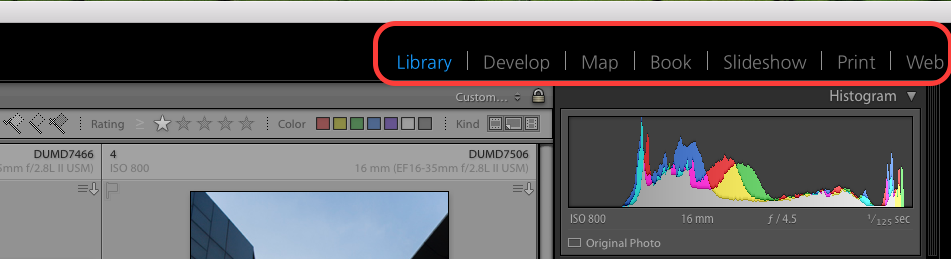 The different Lightroom modules.
Stacking is an important tool that all photographers use to maintain an organised and neat workspace. If you don’t already know about stacking, read our article on the significance of stacking in lightroom.For those who already know about stacking, here are some shortcuts to help you out.
Group into stack :Ctrl + G / Command + G
Unstack : Ctrl + Shift + G / Command + Shift + G
Collapse / Expand Stack: S key
Move to top of stack: Shift + S
Move up in stack: Shift + [
Move down in stack: Shift + ]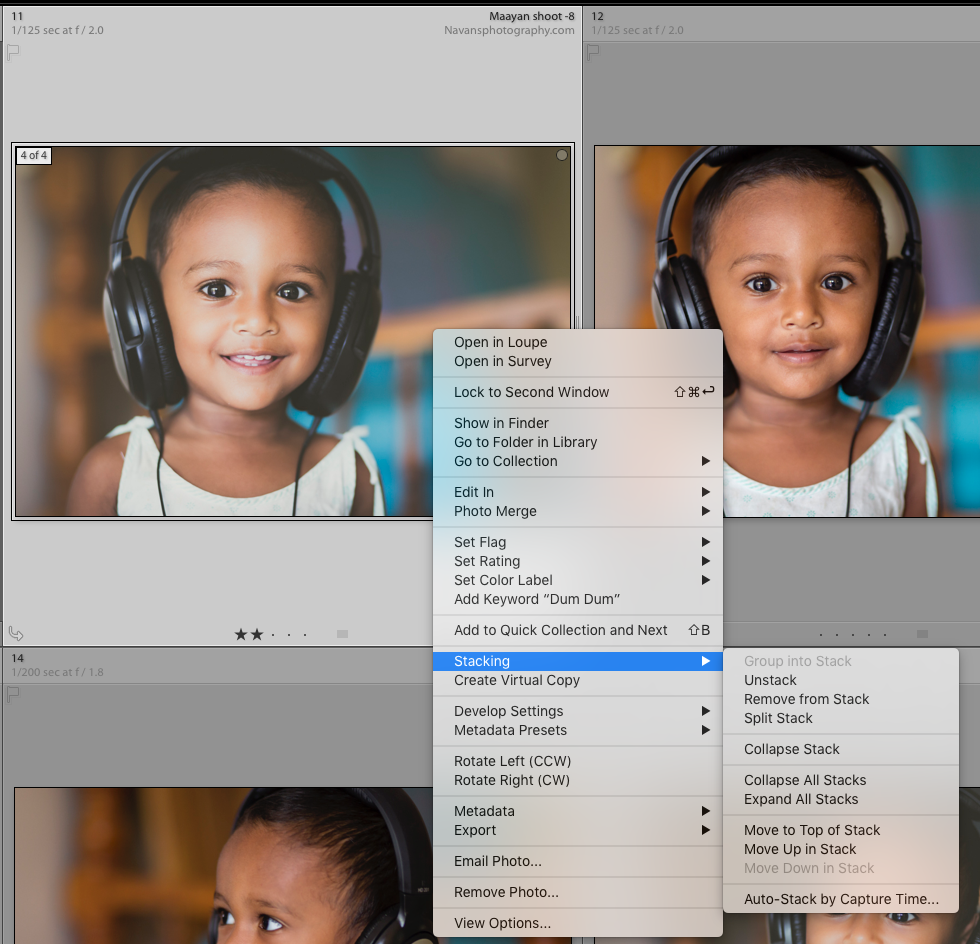
Image stacking in Library Module
To import images into Lightroom, hit “Ctrl + Shift + I”. This will bring up the Import Dialogue Box. Hit “Ctrl + Shift + E” to bring up the Export Dialogue Box to export your images out of Lightroom
We hope these shortcuts prove helpful to you. Let us know in the comments below if we’ve missed you out on any other interesting shortcut, so we can make our jobs a lot easier too.


Please verify your software version before proceeding.
 I’ve verified my software version


 Facebook
 Google +
Comments (0)
There are no comments yet.