Hi all, today I’m going to be showing you how to Black Out eyes using Photoshop.
Why! you might ask, well, I have recently done a Horror Movie Poster for a client and it was one of the tasks that I had to do.
I figured it would be a nice little piece to do a Tutorial on and we could all learn a few things and explore Photoshop in the meantime.
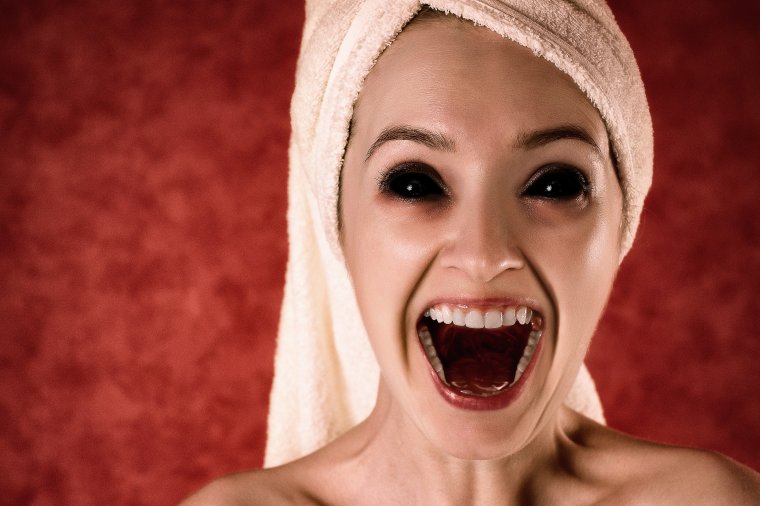
So without further ado let’s take a quick scan of the Image that I’ve chosen to use below.
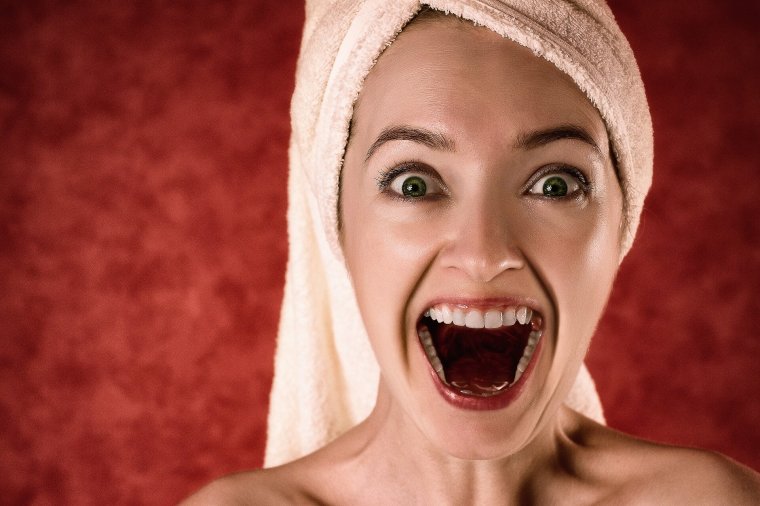
Right now it looks like an excited Girl, but I think we can add a little twist of horror to this image to get our poster effect.
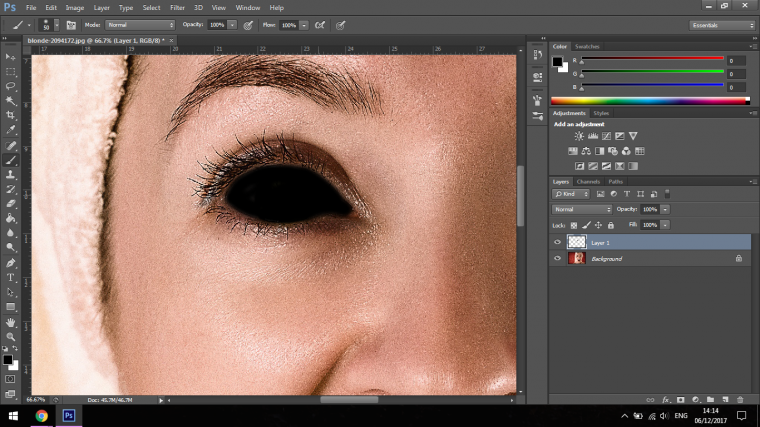
Ok so now take a look at your image and before you do, just remember to try to find an image with reflections in the eyes so take make it look good in the end.
Without those reflections it won’t look as good, so keep that in mind.
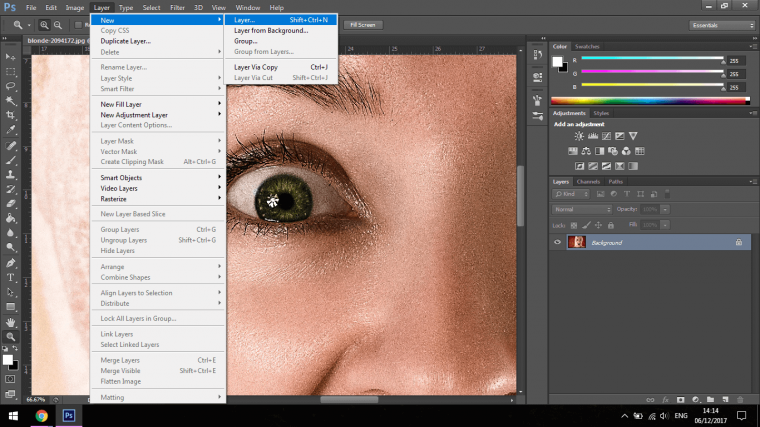
Open up a New Layer, go to Layer-New – Layer…
Then choose your Brush Tool.
By right-clicking on the screen you will open up the Brush Tool Options, click on the first Brush, that’s the soft Brush.
Soft Brush is good for Blending, I use it all the time for this.
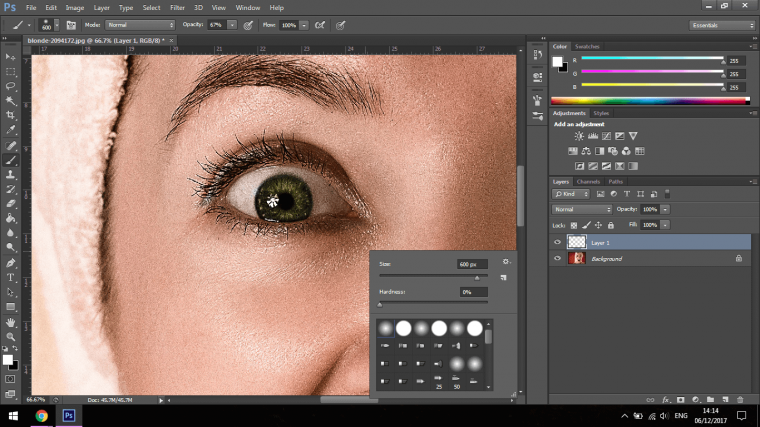
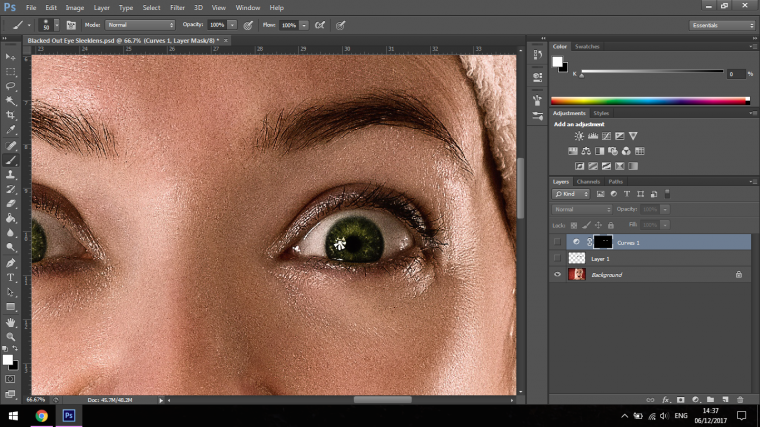
Now just as you see below paint black into the eyes, you want to cover the whites and pupils but not any further.
![]()
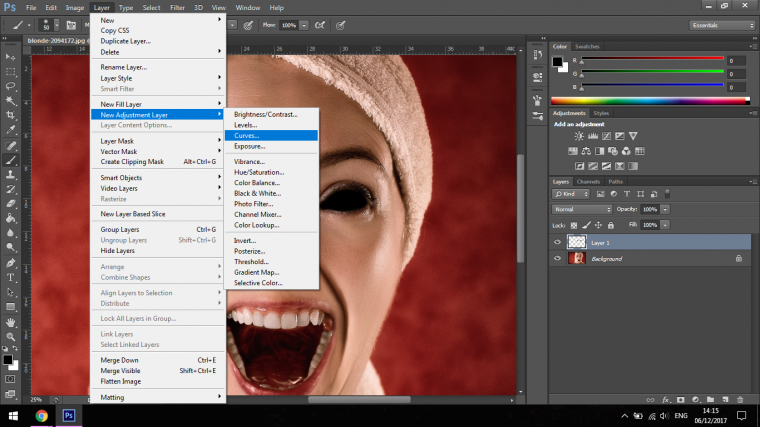
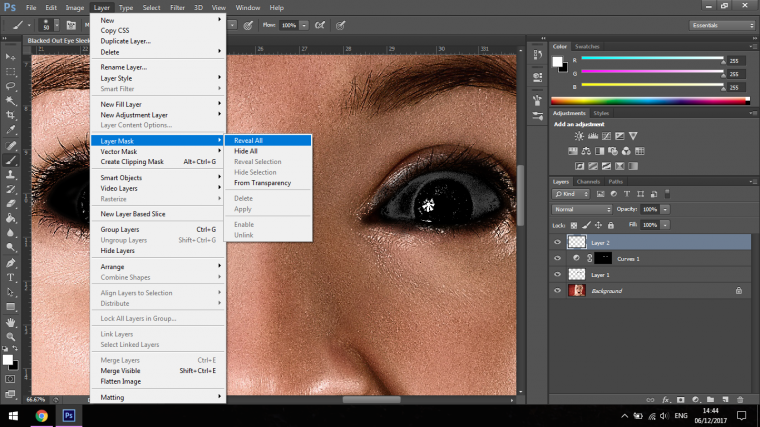
Next click on Layer again in the top menu bar.
Go to New Adjustment Layer-Curves
Click the slanted line roughly in the middle and drag it down to the right matching the image below.
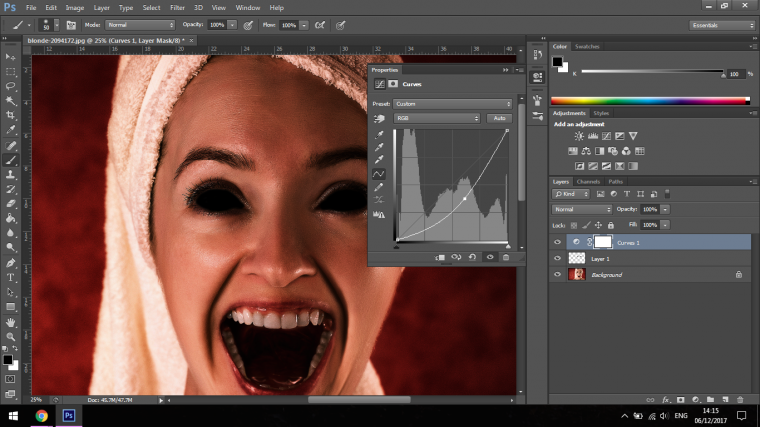
Now click Ctrl I
This will invert the Mask, then around the inside of the eyelids adding to the blend and making the image look natural.
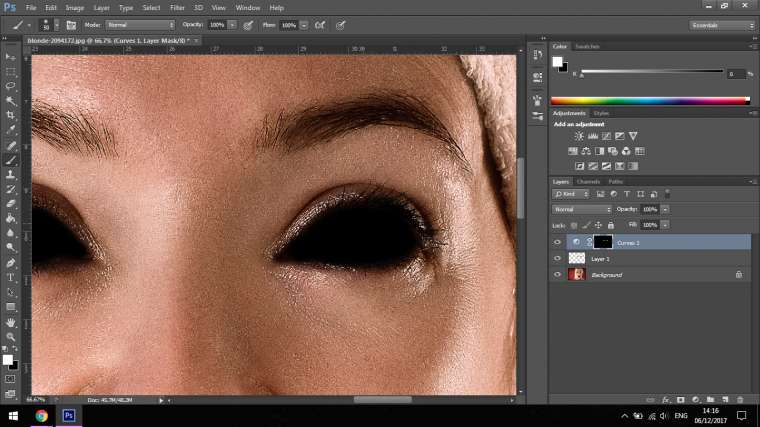
Now if you click on the little Eye Icon on the Layers you will be able to turn them off just for the meantime.
Click on the top two layers.
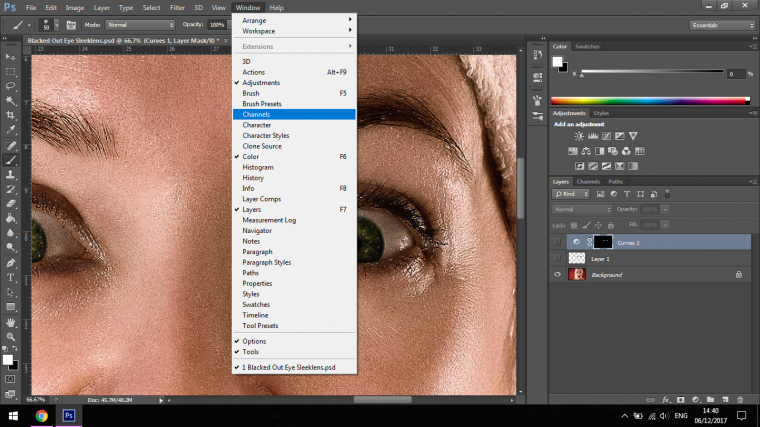
Now go up to the Window option in your menu bar.
Choose Channels
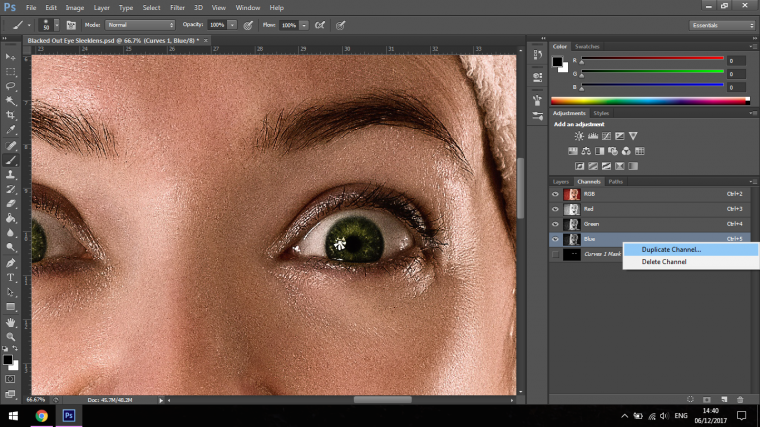
Right-click on the bottom one which will be Blue and click on Duplicate Channel.
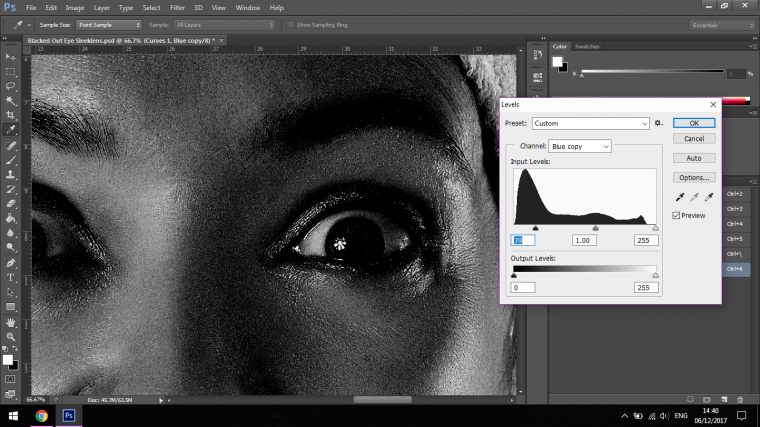
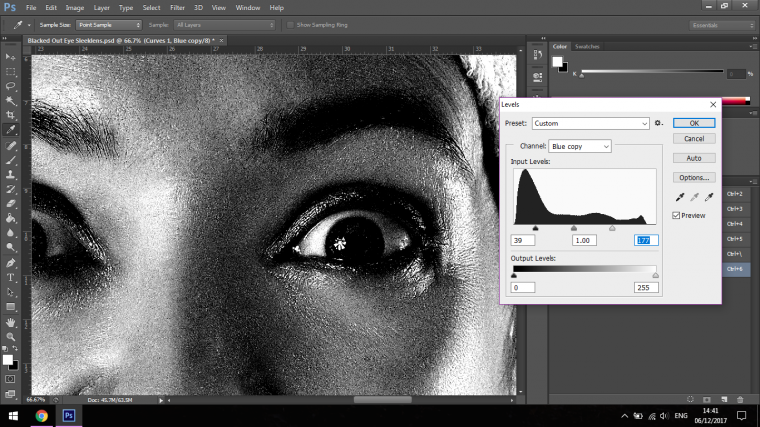
When you have that sorted click on Image on your menu then click on Adjustments – Levels
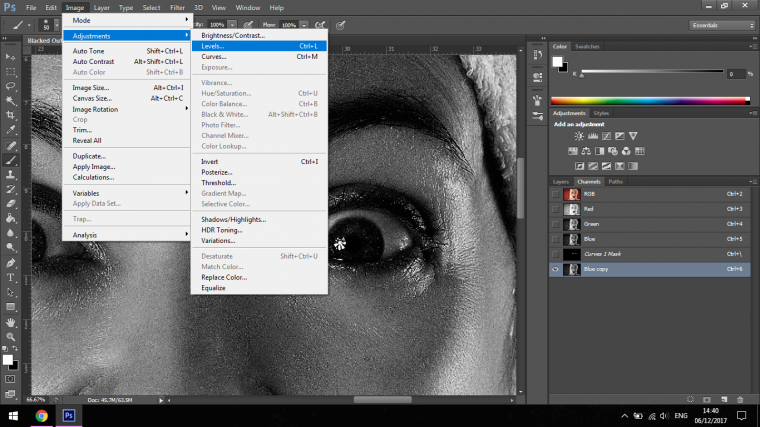
Now what you want to do here if you want to click on the sliders at each end and drag them both towards the center one at a time.
What you are aiming for here is a good contrast between the highlights and the shadows.
Or if you get it looking similar to mine then you’ll be fine.
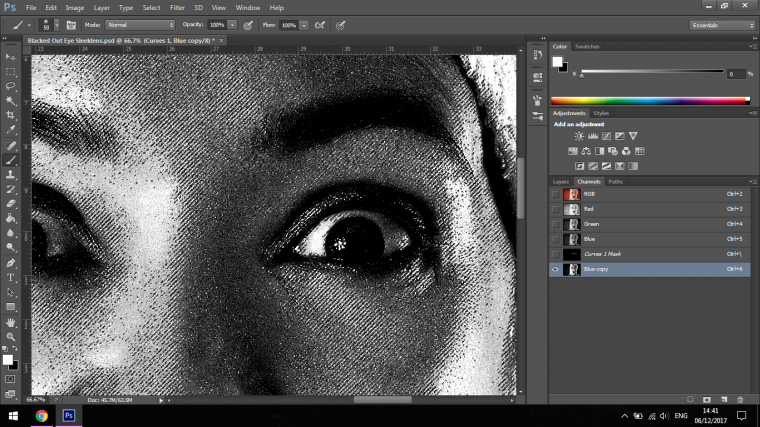
Now hold Ctrl and click on the Blue channel layer to activate the selection.
You will see the marching ants as they are called appear all over your image.
Now go back into your Layers panel, you will find that at the bottom right there… remember where you turned the layers off.
Then go to Layer – New – Layer
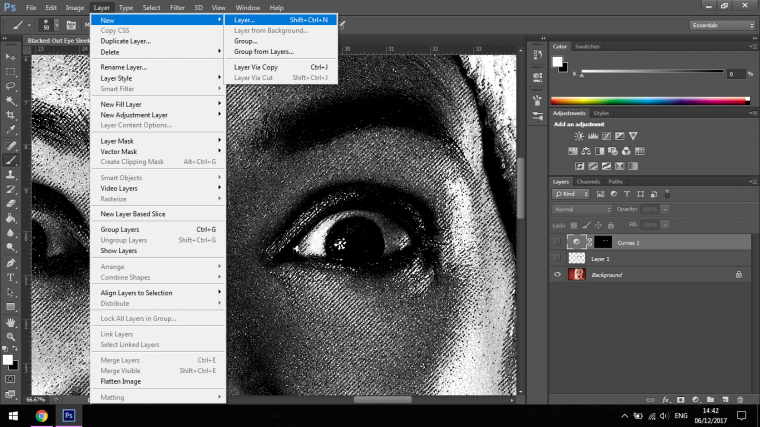
Then Layer – Layer Mask – Revel All
Now go get your Brush Tool and with White paint around where the inner Eye is and try to avoid the whites of the eyes, we will fix this up but better we take a little care now and save ourselves some hassle after but it’s not set in stone, mistakes can easily be corrected so don’t worry too much.
I like my image below happens then you can just create a Layer Mask like we did before and using Black on our Brush simply paint out the white areas.
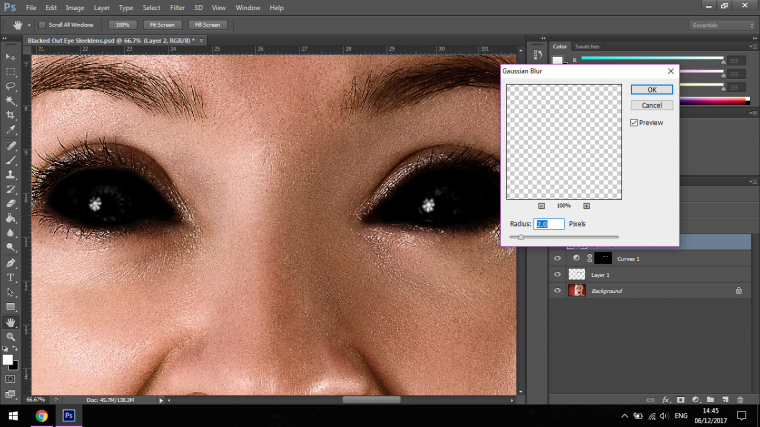
Now my last little touch that I want to add, though this is not totally necessary is to create a Blur to my top layer, the one we just worked with.
My image wasn’t the clearest and it had even though it was a large image, it had a good bit of pixelization there, so to tidy it up a little bit I went to Filter – Blur – Gaussian Blur.
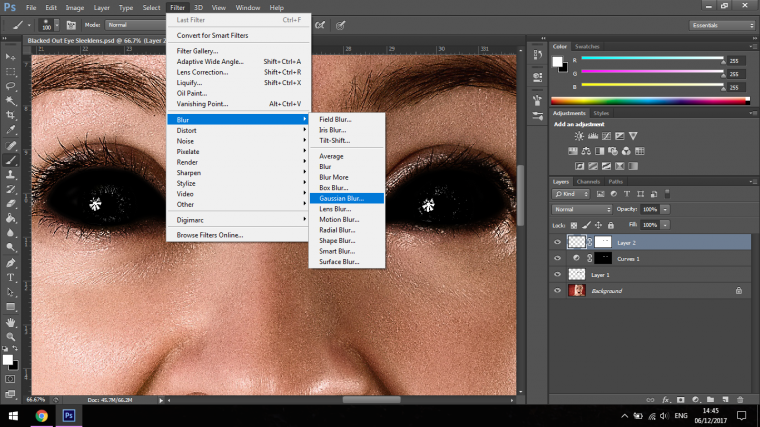
I gave it a Blur of 2.
This is relevant to the image, so always keep in mind it’s what looks good to you, my percentages etc will change as to what images are being used, so a nice rule of thumb is as said “whatever looks good to you”
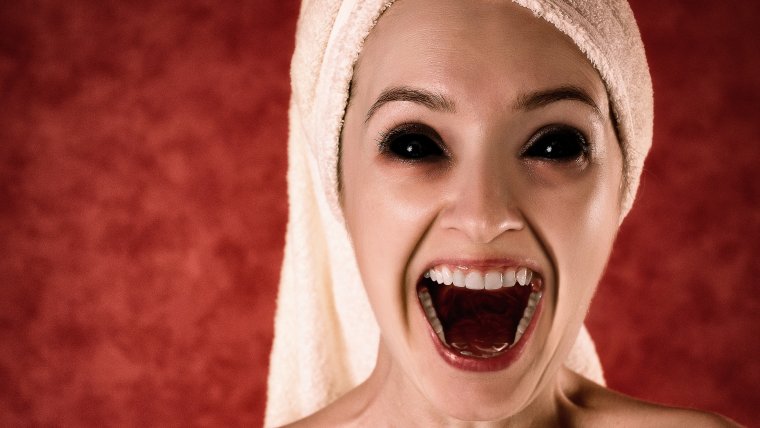
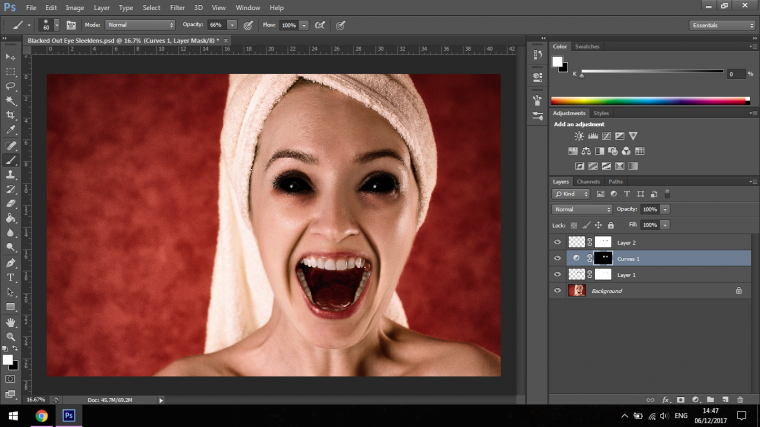
And there we have it, our Horror Poster Images is nicely Complete.
Try not to have any nightmares >:)
You can always learn to clean up seamless backdrops using photoshop.


Please verify your software version before proceeding.
 I’ve verified my software version


 Facebook
 Google +
Comments (0)
There are no comments yet.