What’s your favorite “F” word? Mine is food. If you love food as much as me I can image you’d also enjoy capturing some sweet shots of it also. Food photography can be a very fun, but it’s not only about capturing what’s on the plate. Your viewers should look at your image and get hungry.The ultimate the goal in food photography is to make what you’re shooting look appealing and delicious. There are a number of ways you can get the attention of your viewer and make them drool.
Table of Contents
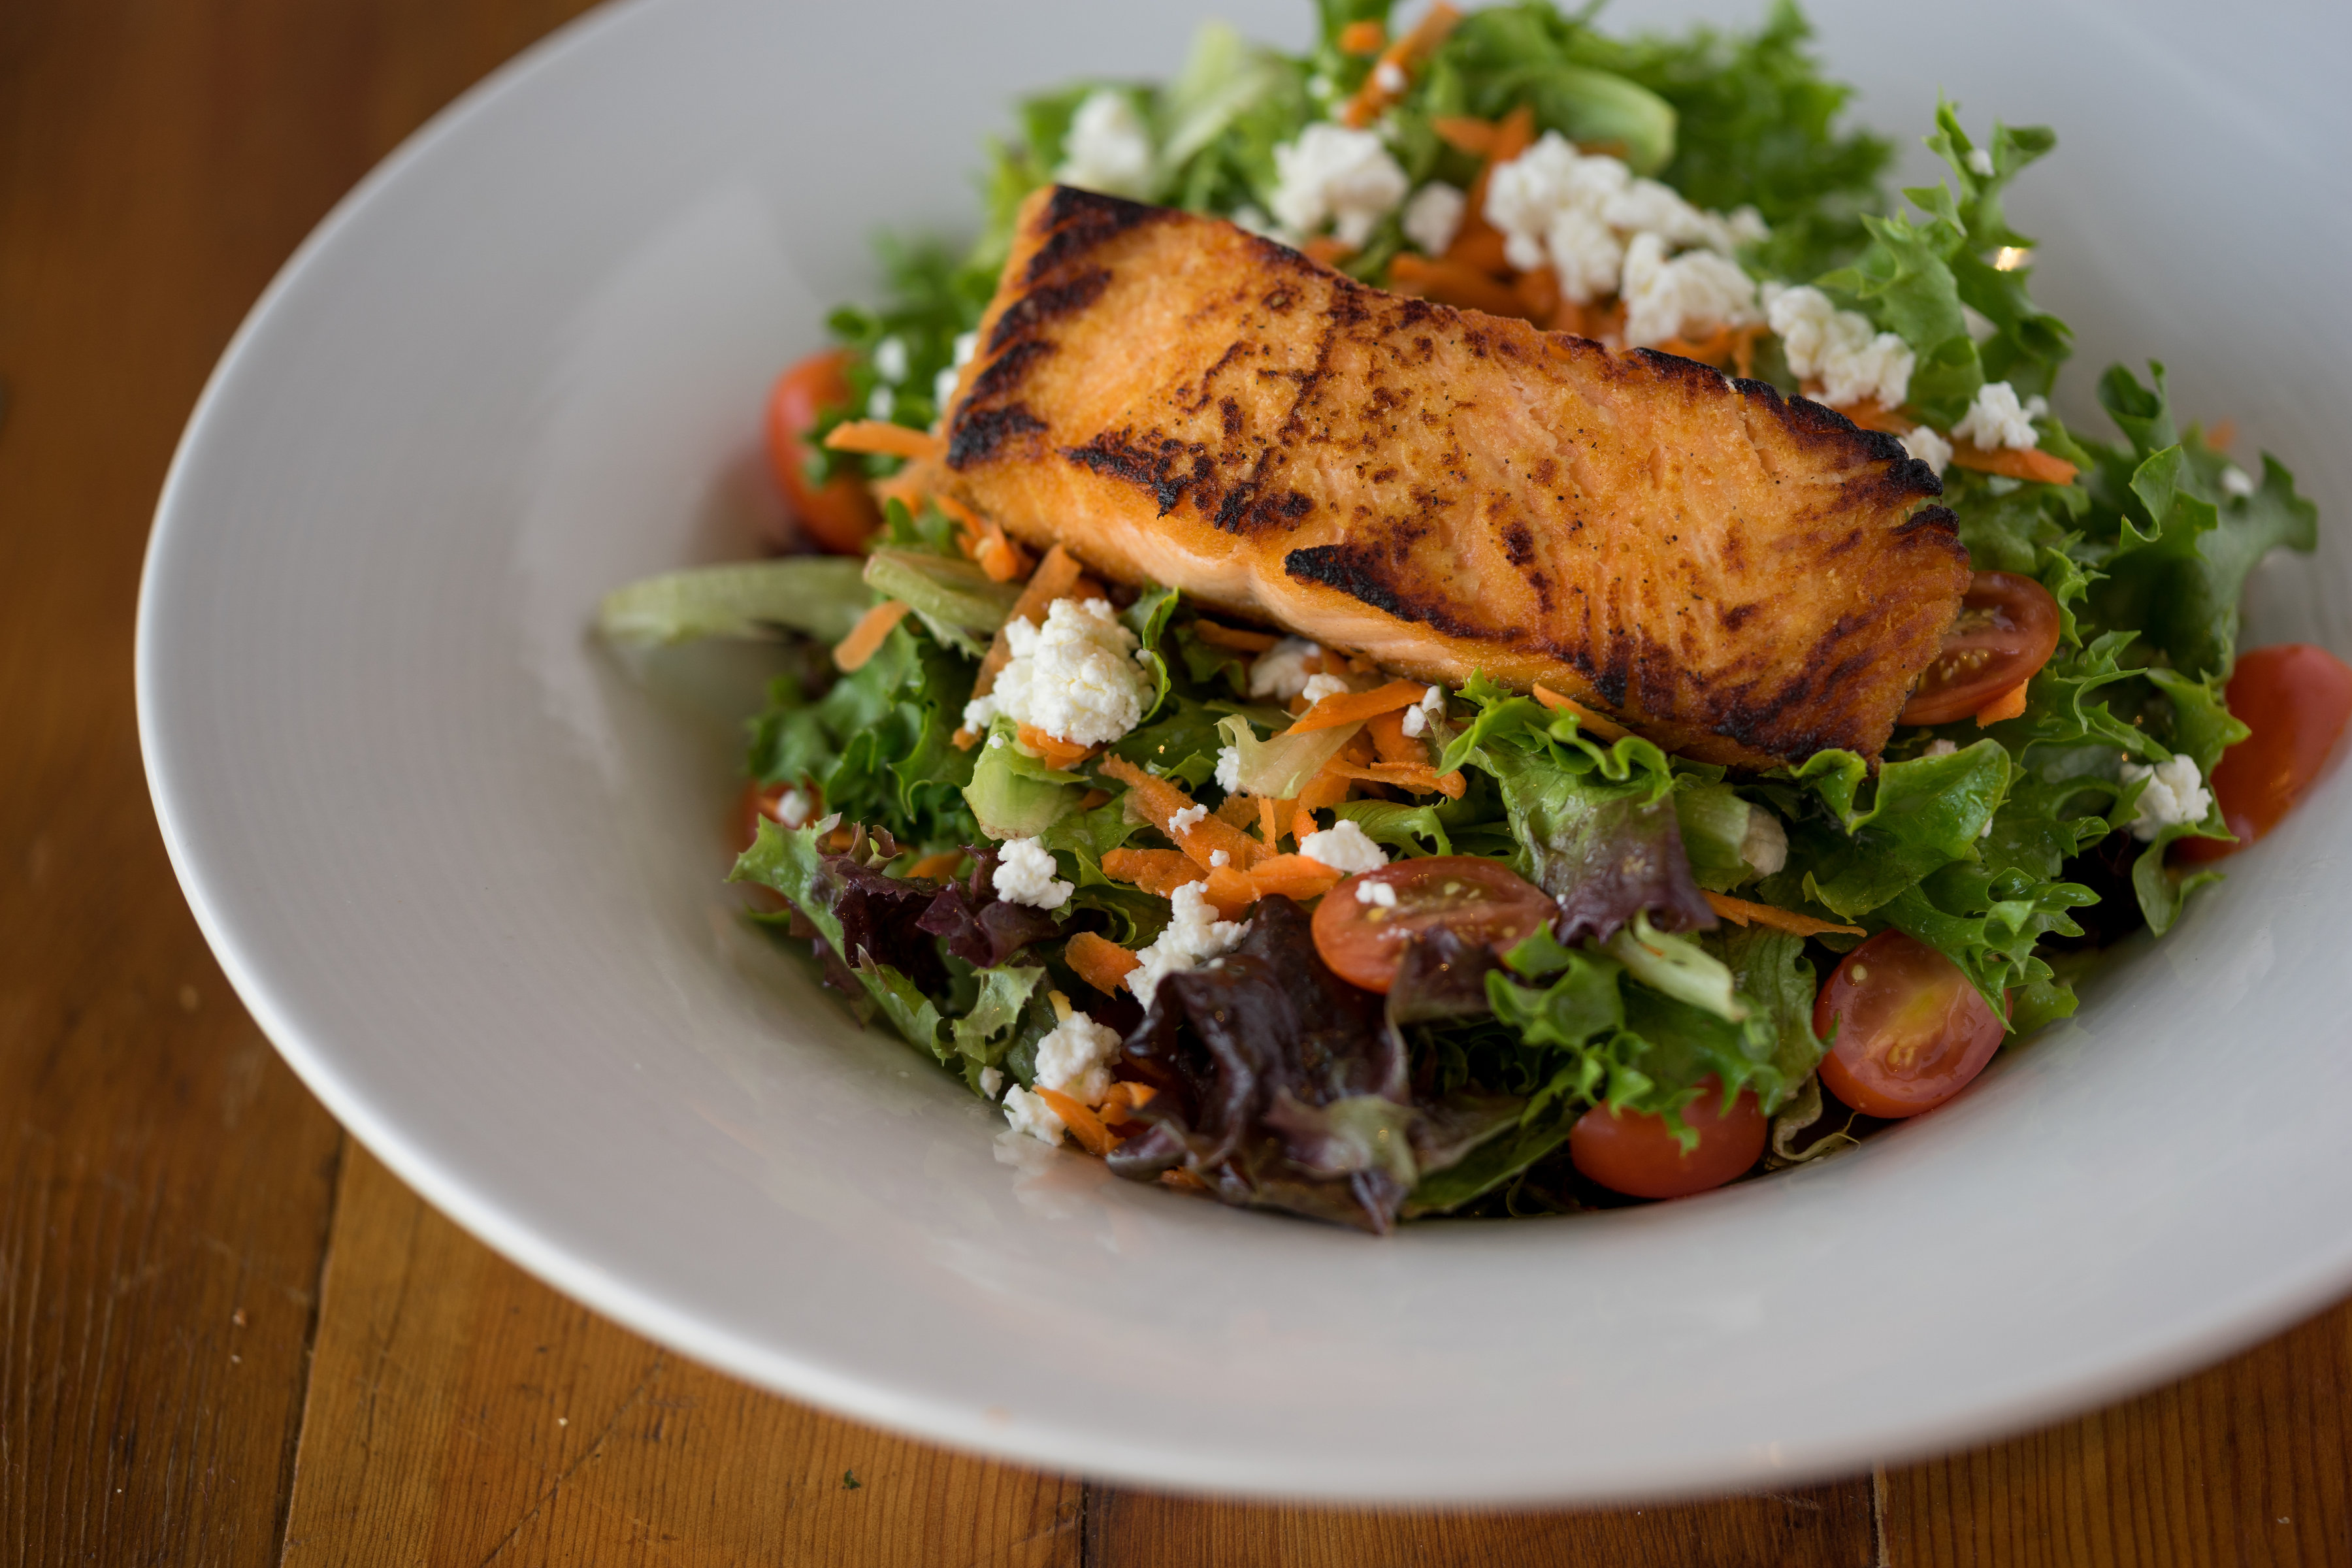
The first food photography tip I’d suggest is to try and achieve a shallow depth of field when shooting your subject. With food photography, you should always aim to capture the most important thing on the plate; once that is made the focus of the picture then you shouldn’t really worry about the background as it will transition into a very soft blur.
Mind you, I’m not saying that your background should be completely out of whack. Still try to keep some elements associated with food in the background such as forks, a napkin etc. To achieve this I would actually recommend the use of a 50mm lens. You’ll end up easily achieving that smooth transition into the background not to mention how close you can get to the subject with a low aperture.
Make your images soft and seductive by using a narrow depth of field. Using a prime lens with a wide aperture (a low f value) will produce a narrow depth of field that will draw viewers into the image. Prime lenses with a narrow focal length will help your images look more intimate than wider angles, and create a softer background without the sharp details created with a macro lens. A fast prime lens will also be helpful in low lighting conditions so that the bits that are in focus are nice and sharp.
Of course, a fast telephoto lens can be helpful too – for zooming in on food while cooking, so you don’t have to get too close to foods that may be spitting burning fat. Safety should come first when taking a food photo that is in the process of being cooked (especially if you’re the one cooking it) so keep an eye on what’s cooking to avoid any kitchen catastrophes.
If you’re using a telephoto lens using a focal length above 50mm works well for creating images with the softer background.
You don’t always need to have a bunch of stuff in your shots. So if it’s not necessary, take it out. When composing your shot always try to keep in mind that less is always more when it comes to food photography, that way there’s nothing else to distract the viewer from the subject. The goal is to create a clean frame as opposed to creating a visual clutter or mess.
Using natural light can be a huge advantage when taking a food photo. I would suggest, if possible, that you even shoot outside. Rather than being quick to add artificial light or even a flash, why not use mother nature to your advantage. Not to mention shooting indoors can sometimes throw off the white balance of your shot and a few other things that can get pretty annoying.
I always recommend this because if you’re shooting indoors, then this would obviously be where your natural light source is coming from. You don’t need to be exactly by the window but at least a few meters–close enough so you can get a substantial amount of natural light on your subject. However, you can make your own estimation as to how far away from the window you would like to be, depending on the amount of light passing through it.
I always suggest taking a food photograph either early in the morning or near the golden hour in the afternoon. My reason behind this is, you get that soft even light when shooting outside or even using natural light through your window. This helps to eliminate shadows while also leaving a subtle evenly lit photo.
In addition to that, it also helps a lot to reduce the amount of tuning you do in post-production as well. As the day progresses and you approach the midday’s direct sunlight, you will notice your natural light is at its highest point and might be a bit too harsh in your photo.
If you’re in a low light situation and natural lighting isn’t available, try to maximize the mood lighting. We’re not necessarily talking about throwing something red over a lampshade, but getting the lighting just right so that the focus is on the food. Use artificial light to your advantage and set up a spotlight on the food. Then, set the food against a dark food photography backdrop for scrumptious shots – think luxury restaurant photography.
You’ll only need one light to create a soft lighting effect. This is true for food photography in general but for this food photography tip, we want the background to be the dark so it’s worth drawing the curtains, finding a darker space to work in, or waiting until the sun goes down.

Experiment with bouncing a spotlight off walls and ceilings to create a bright but diffuse glow, and watch out for creating strong highlights on shiny toppings. If you prefer lighter images think about shooting in the natural early morning light.
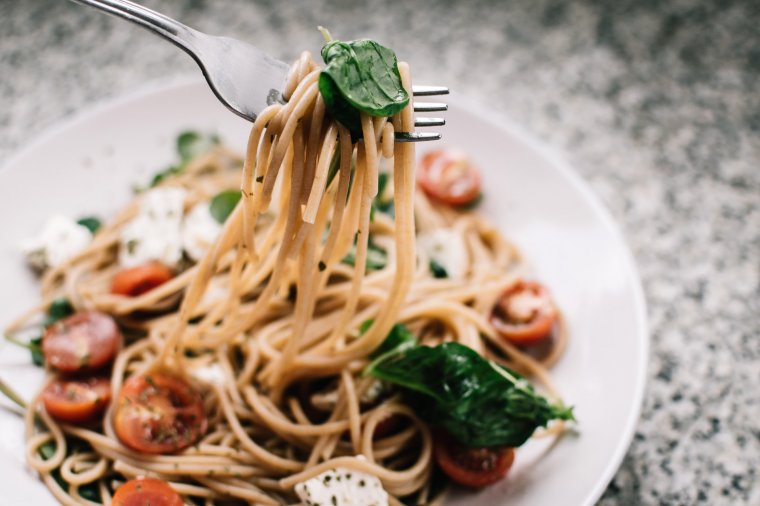
Remember when we were always told not to play with our food? Well, this time there’s nobody to tell you that you can’t do it! Take a bite or get a fork and pretend like you’re about to take a piece and make the shot just a bit more interesting.
Like I said earlier, try to appeal to your viewer’s appetite and make them want to taste it even when they don’t know what it is. When in a restaurant, we also tend to look on other people while they eat and say “That looks good,” let’s create that same result with our images.
This is one of my favorites because it can be so pleasing to the eye and more than likely pleasing to the viewers. Becoming a food stylist isn’t very tricky, but it may require a little patience, especially if you’re out with a bunch of friends.
The technique is essentially lining up everything on the table in such a way that it presents all the key components of your meal and looks so clean and well done at the same time. If forks and knives are provided, I usually align them with the dish by having them vertically straight. I then put the beverages closer to the center of the images but not all on location. Close enough so you can see where each person is sitting at the table but far enough that they don’t overshadow the other elements on the table as well.
I know this sounds a bit technical, but I promise it gets a lot easier after the first few times. When all’s said and done, I try to place my phone directly or make it look like it’s directly over the meals then take a few shots and pick which is best to begin then editing on my phone.
I’ve made this mistake a few times, and I urge you not to do the same. In post production (and even when taking your shots), you should try not to crop out anything important. Keep in mind you don’t always have to show the entire plate, so don’t be timid to take some of the plates out and crop closer into the main part of the dish. Be extremely careful when doing this though. Focus on the textures, colors and the ingredients when considering to crop your image.
This technique is becoming a bit popular on Instagram, where the utensils and action of going to take that first part of your meal are captured. It’s great in some instances but not all cases. For example, if it is done when the meal has recently arrived, and all is still perfect on your plate, then it’s cool to get a close-up overhead shot of your meal and the fork or knife getting ready to dig in, as opposed to a shot where you’ve already had a few bites out of your meal, and the plate looks a bit messy. It would be a waste of time, of course, to try and get your plate neat again, plus it may not be as pleasing to your viewers on Instagram.
However, do not completely rule this trick out, as it depends on the type of meal you’re having. For instance, if it’s cake or ice cream, it can still be an amazing shot. You just have to be aware of what you’re taking and what your viewers might think when taking this kind of shot.
A lot of the final effect will depend on how you set the scene, this means light and clean surfaces are out and dark backgrounds and interesting textures are in. Materials like black foam core, or a meter or two of black fabric (which can be bought cheaply off eBay), make ideal dark backgrounds which look great when out of focus (and can be cleaned and reused).
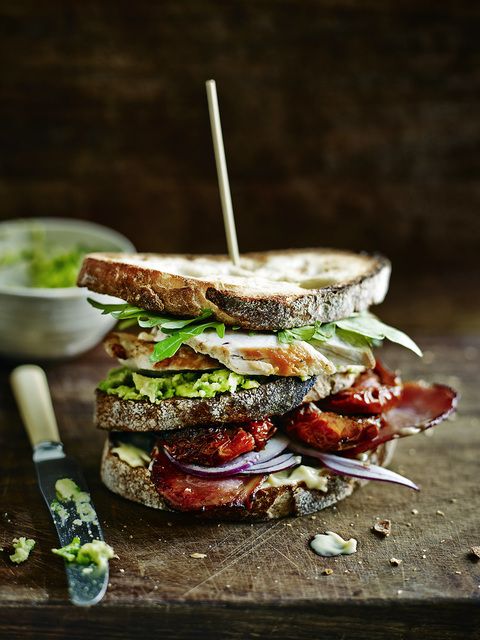
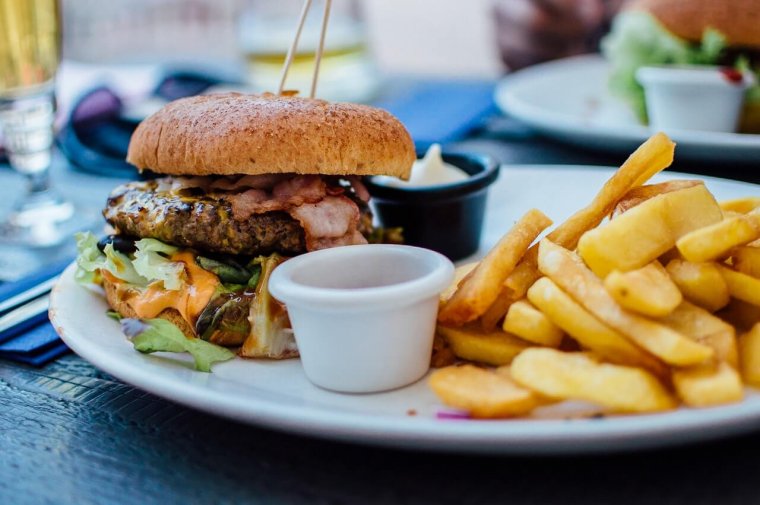
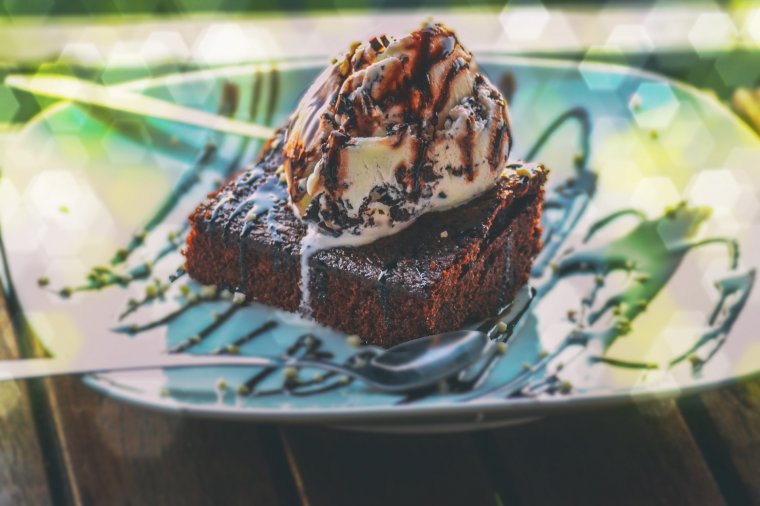
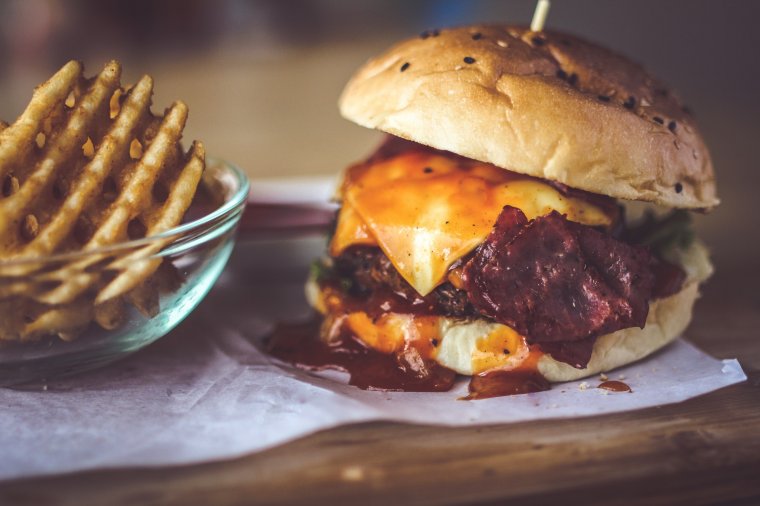
The way you prepare your food is important as well, add oozy toppings for maximum food styling on things like burgers or get artistic with your drizzling on desserts. If you don’t have a dark background on hand, you can create moody food pics just by getting creative with your cooking and creating unlikely, and often disgusting, mountains of food. Burgers, in particular, are perfect for adding extra toppings to and piling excessively high.
Set the subject as far away as possible from the background, and get in close with the camera, to produce a background that’s nicely out of focus. The lower the aperture, the closer the lens is to the subject, and the further away the background is, the greater the blurring effect.
This usually involves getting your surroundings involved in the frame. If there are any interesting elements around you, it may very well add something to your shot. It can also help to give an Idea as to the type of cuisine you are currently having without saying it.
For instance, if you’ve taken a photo of some alfredo pasta, and you have some wine in the background showing the ambience of the restaurant, your viewers may very well then assume you are at a restaurant that caters to Italian cuisine.
Don’t be afraid to toy around with things that can make your food shot that much more interesting and stand out from the thousands of others the restaurant is probably tagged in.
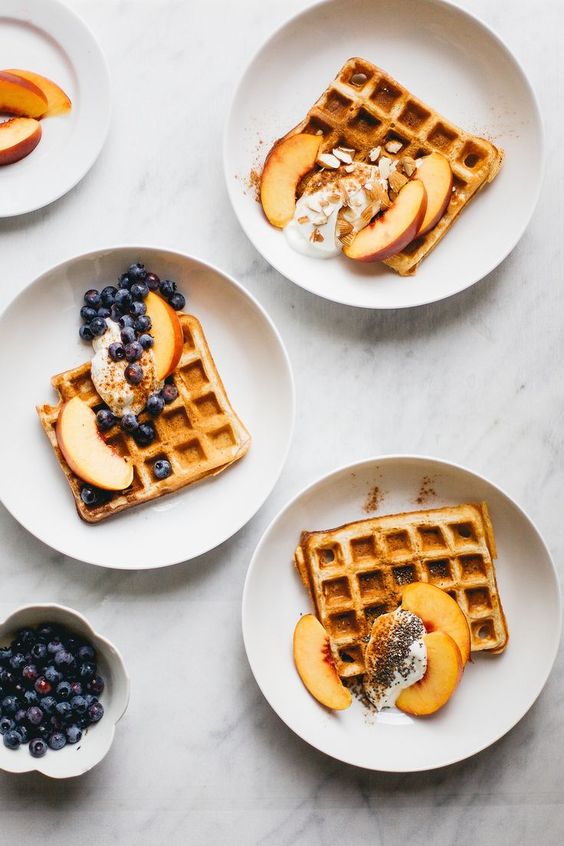
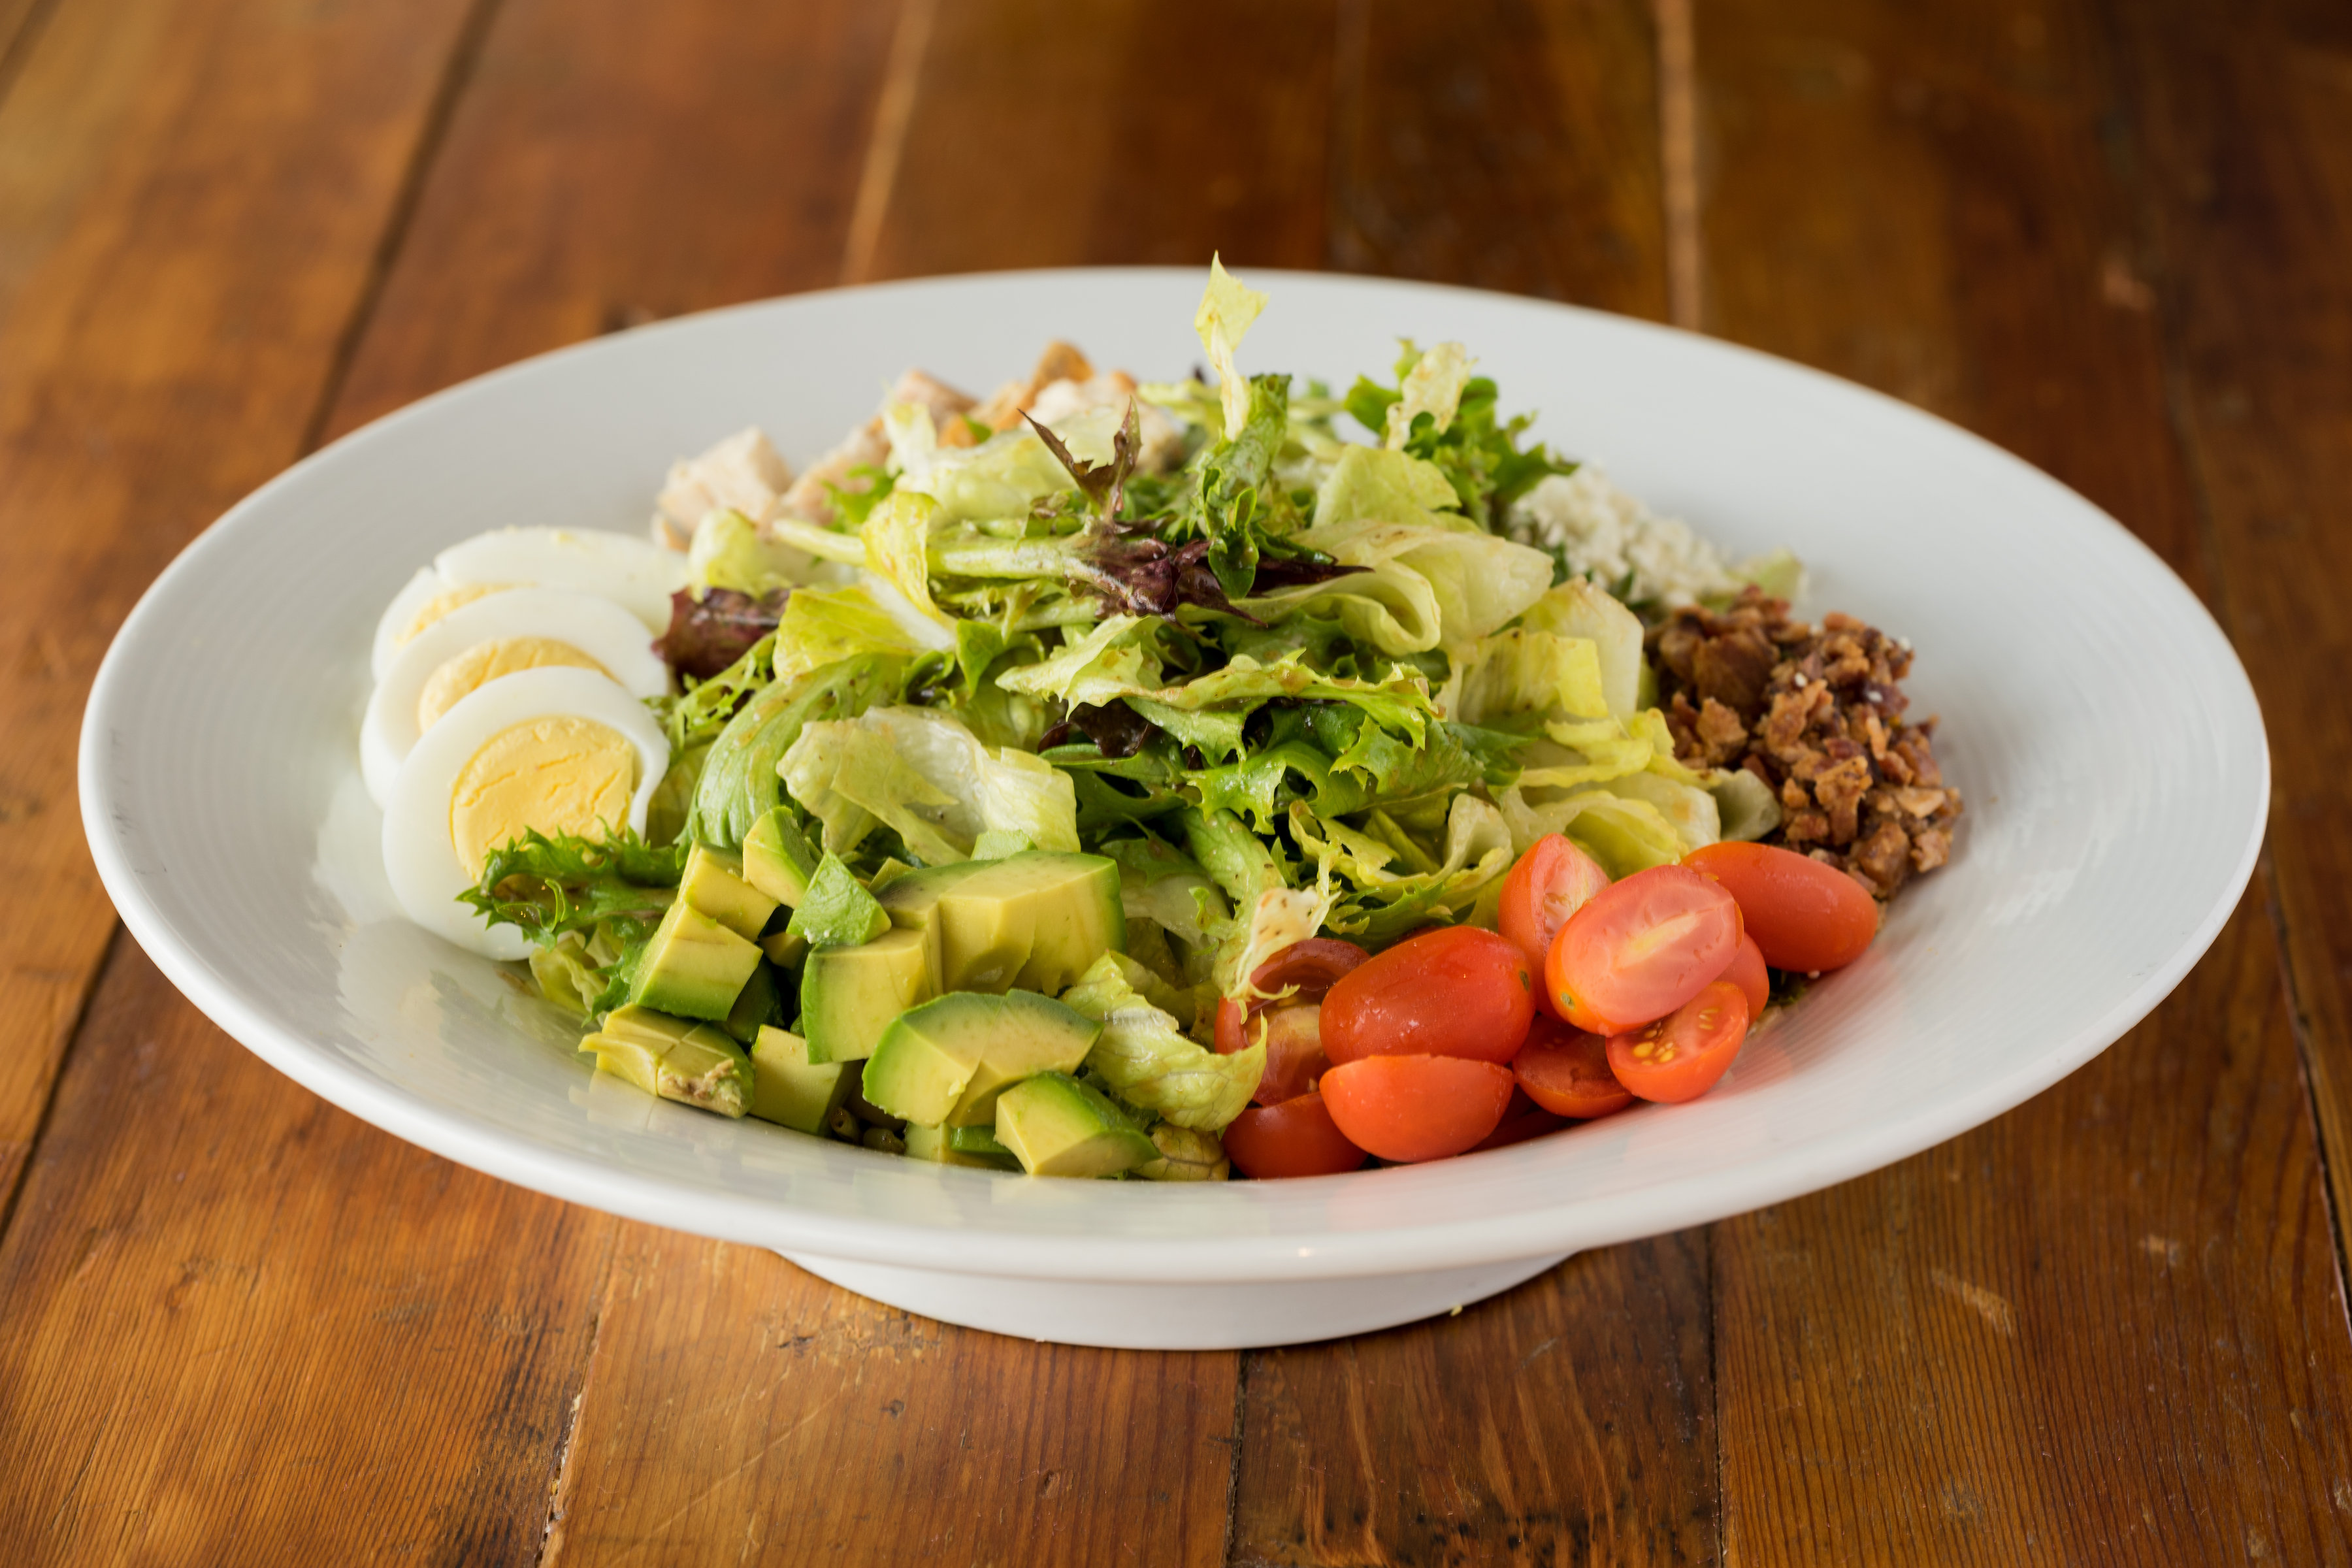
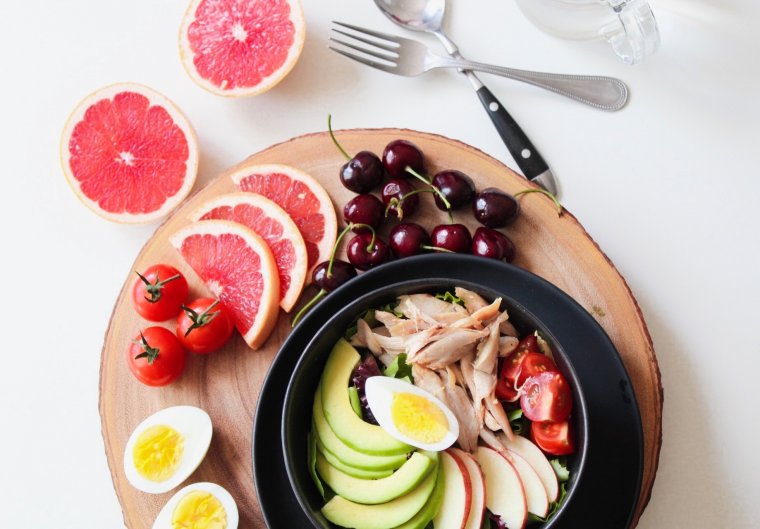
You want to make sure that your food looks fresh, and that means having fresh ingredients because the colors of those fresh ingredients will make your photos look fantastic. The reds, yellows and greens of different fruit, veg, and herbs will really pop on your screen when the food is fresh. There are many ways you can show the freshness of different foods, and some need to be photographed quickly before wilting, melting, or going cold. Capturing bright images of fruit and veg, for example, will be different than shooting foods like chocolate that are darker and need to be photographed quickly before melting.
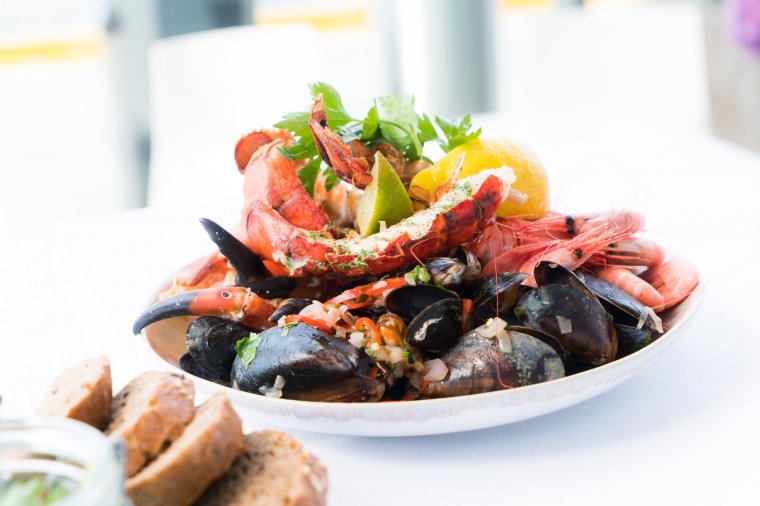
Including a prop or two with your food photos is good, but you want to keep things relatively simple with the food props. The prop should always be something related to eating. This means you can use the raw ingredients of the food you are photographing, or simple plates, cutlery, beverages and things like napkins. Try to have different colored plates and change around how things are placed in the photo to get some variety.
Everyone loves the finished product, but showing the food cooking is a good idea too. It will show everyone the process, and it will also make the other photos look even more appetizing. To that end, you can also show a before and after of the food. Have a picture of all the ingredients mixed together next to a photo of the finished food in a bowl or on a plate.
You don’t want to have a mess in the food photos, unless that is actually what you are going for. You want to make sure that the plates are totally clean, and free of any splashes of liquid, or smudges. You do this because it puts the focus on the food in the photos. It will make the foods colors stand out much more as well. It will make the food look great, without the distraction of anything else around the photo.
Just like having different angles for lighting, you should also try to have different angles for the camera as well. Take photos of the food from above, from the side, at an odd angle. From far back, and from close-up. There are many options to what you can do with camera angles and you can be very creative with it. You may just get a unique angle that changes the entire look of the food and the image for the better.
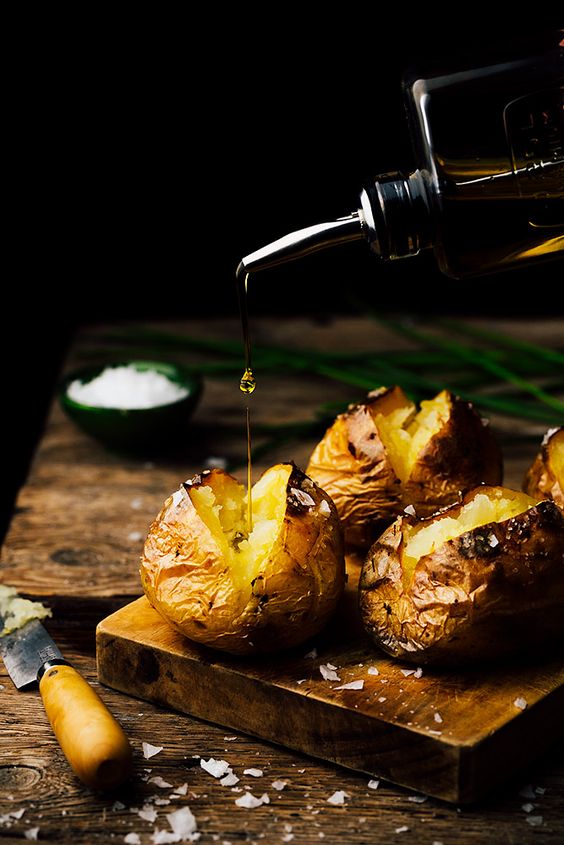
The last tip is to put oil over your vegetables. Not a lot but enough that the vegetables have a bit of a shine to them, and they will really glow when you have the lights on them. That will help to add definition to the image, but it will also make the food look very appetizing. The vegetables will look fresher with that glisten, and your photo will really pop with that extra bit of shining light coming from the vegetables and the fruits.
Food photography does require some basic camera settings that are somewhat universal. The trend right now in food photography is for the entire frame to be in focus. This requires a larger aperture, at least f8 or higher, to get the shot.
In some cases, if you want to focus on something very specific, a smaller aperture is best. You’ll also want to shoot at ISO 100, which will help make the image as clear as possible. You want to avoid any grain in your images, and with the lighting needed to produce good images of food, ISO 100 is your best choice.
Shutter speed is not necessarily a concern in food photography, so it’s best to shoot in aperture priority mode, then you can quickly switch back and forth from small to large apertures as you shoot without having to worry about shutter speed.
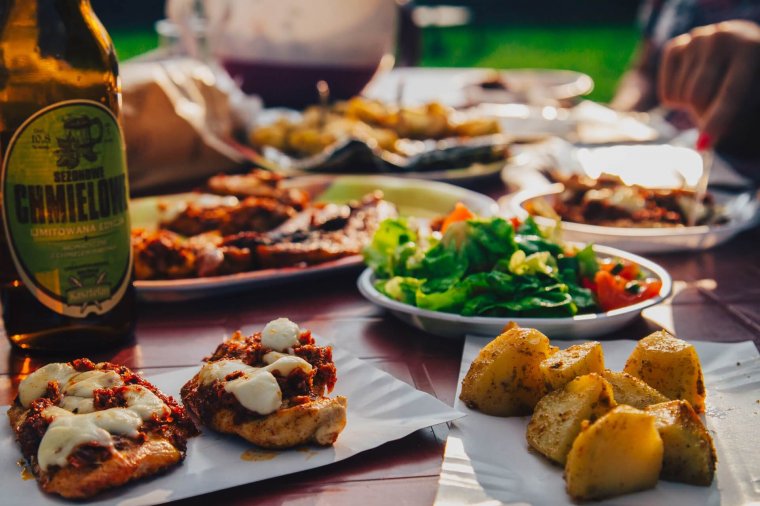
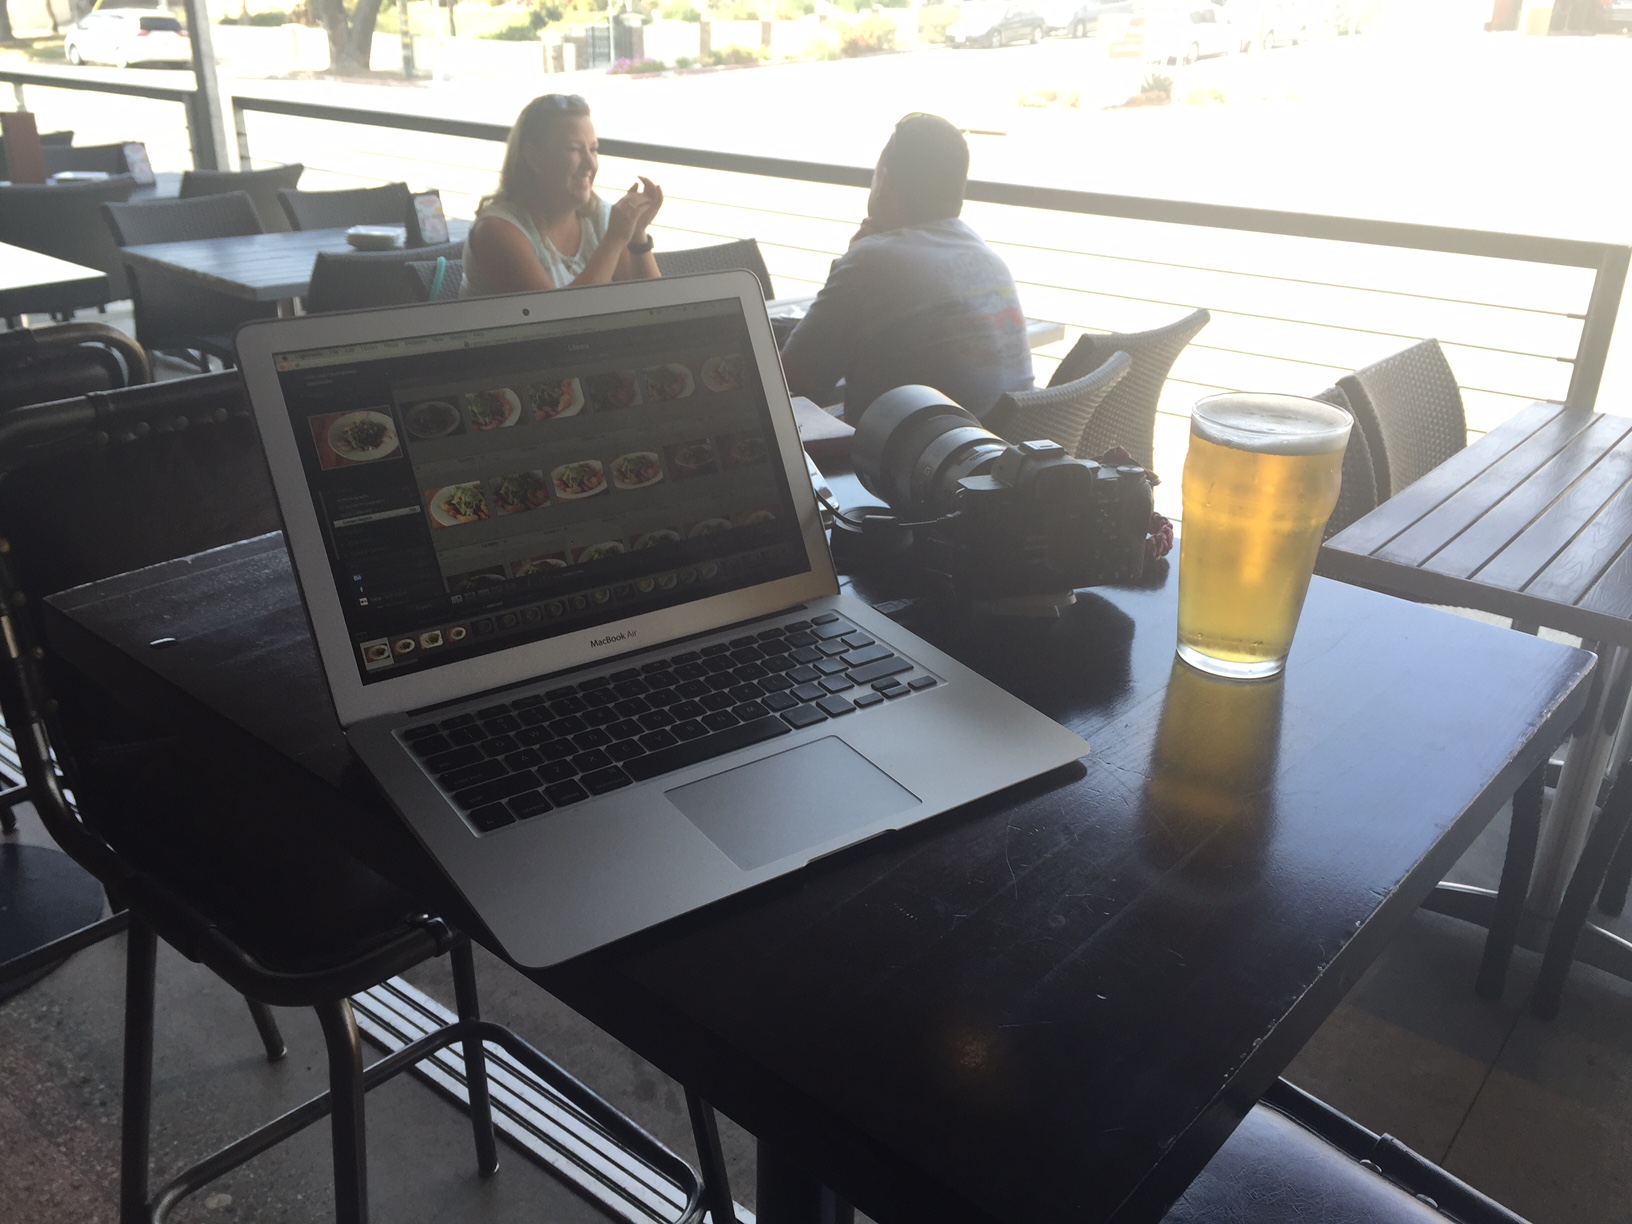
After a day of shooting, there’s nothing like sitting outside, reviewing images, and enjoying a cold beer.
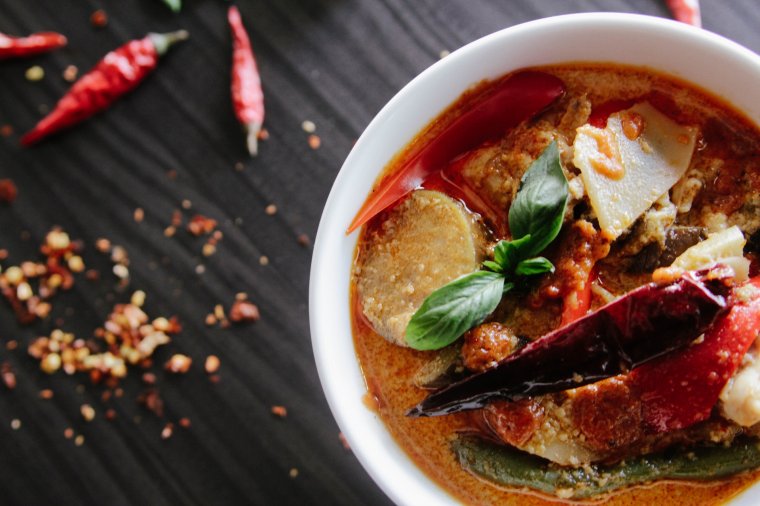
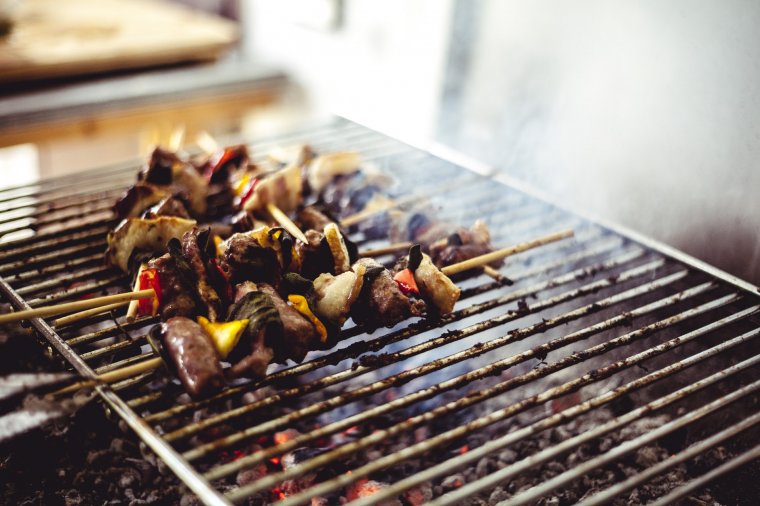
Certain foods lend themselves to creating a provocative food photograph while others don’t. Think sugary and greasy rather healthy and nutritious. If it sizzles in a pan it will probably sizzle on camera and anything made of chocolate, or which has a sweet filling, is usually a safe bet. For tips on photographing chocolate alone check out this guide to chocolate photography.
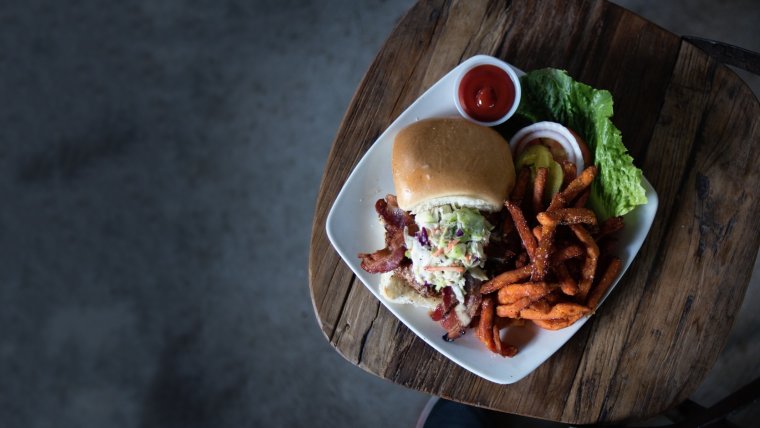
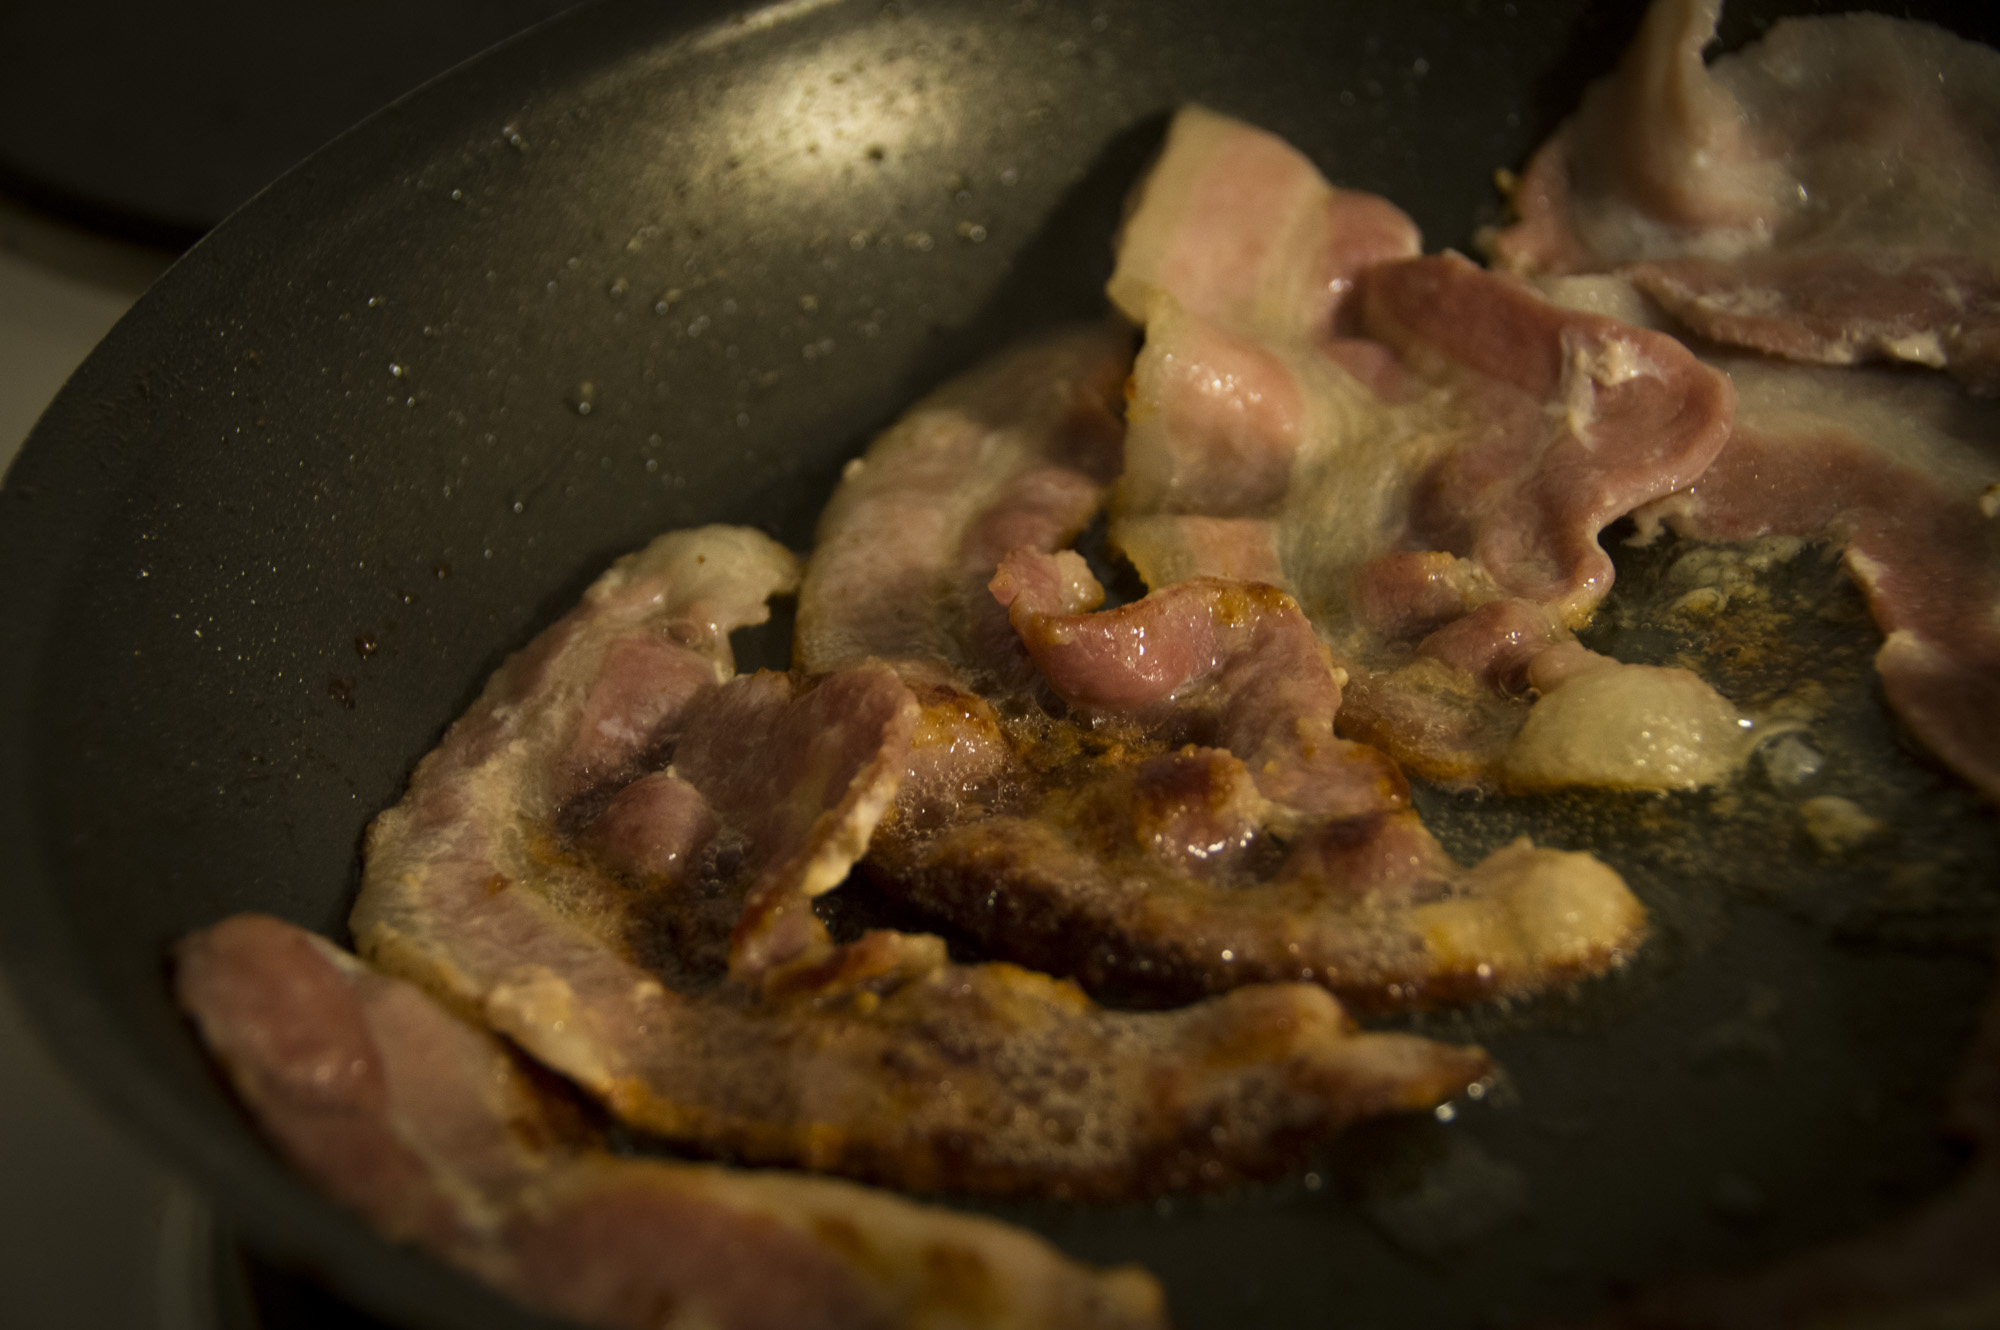
For meat, classic subjects include burgers and hot dogs, which can be added to with other meaty and greasy extras, such as bacon, fried onions, and relish. For sweets pick anything that has a gooey top or centre, so that things are dripping off and oozing out. Pies, donuts, and eclairs are all great options.

For the sweet stuff try topping the subject with something like honey, syrup or ice cream to make the shots more interesting. Ice cream is especially good if it starts melting.
After you’ve captured your shots, process them in Adobe Lightroom or Adobe Photoshop to make your subjects as tempting as possible. Emphasize dark areas by darkening the shadows and blacks, and enhance pictures that haven’t been taken against a dark background by adding a bit of post-crop vignetting in Lightroom.
It’s easy to get carried away with the vignetting, but it works well with this kind of photography. Vignetting can be found at the bottom of the Effects panel in Lightroom or in the custom tab of the lens correction window in Photoshop. For more information on this technique read our guide on using vignetting to improve your photos.
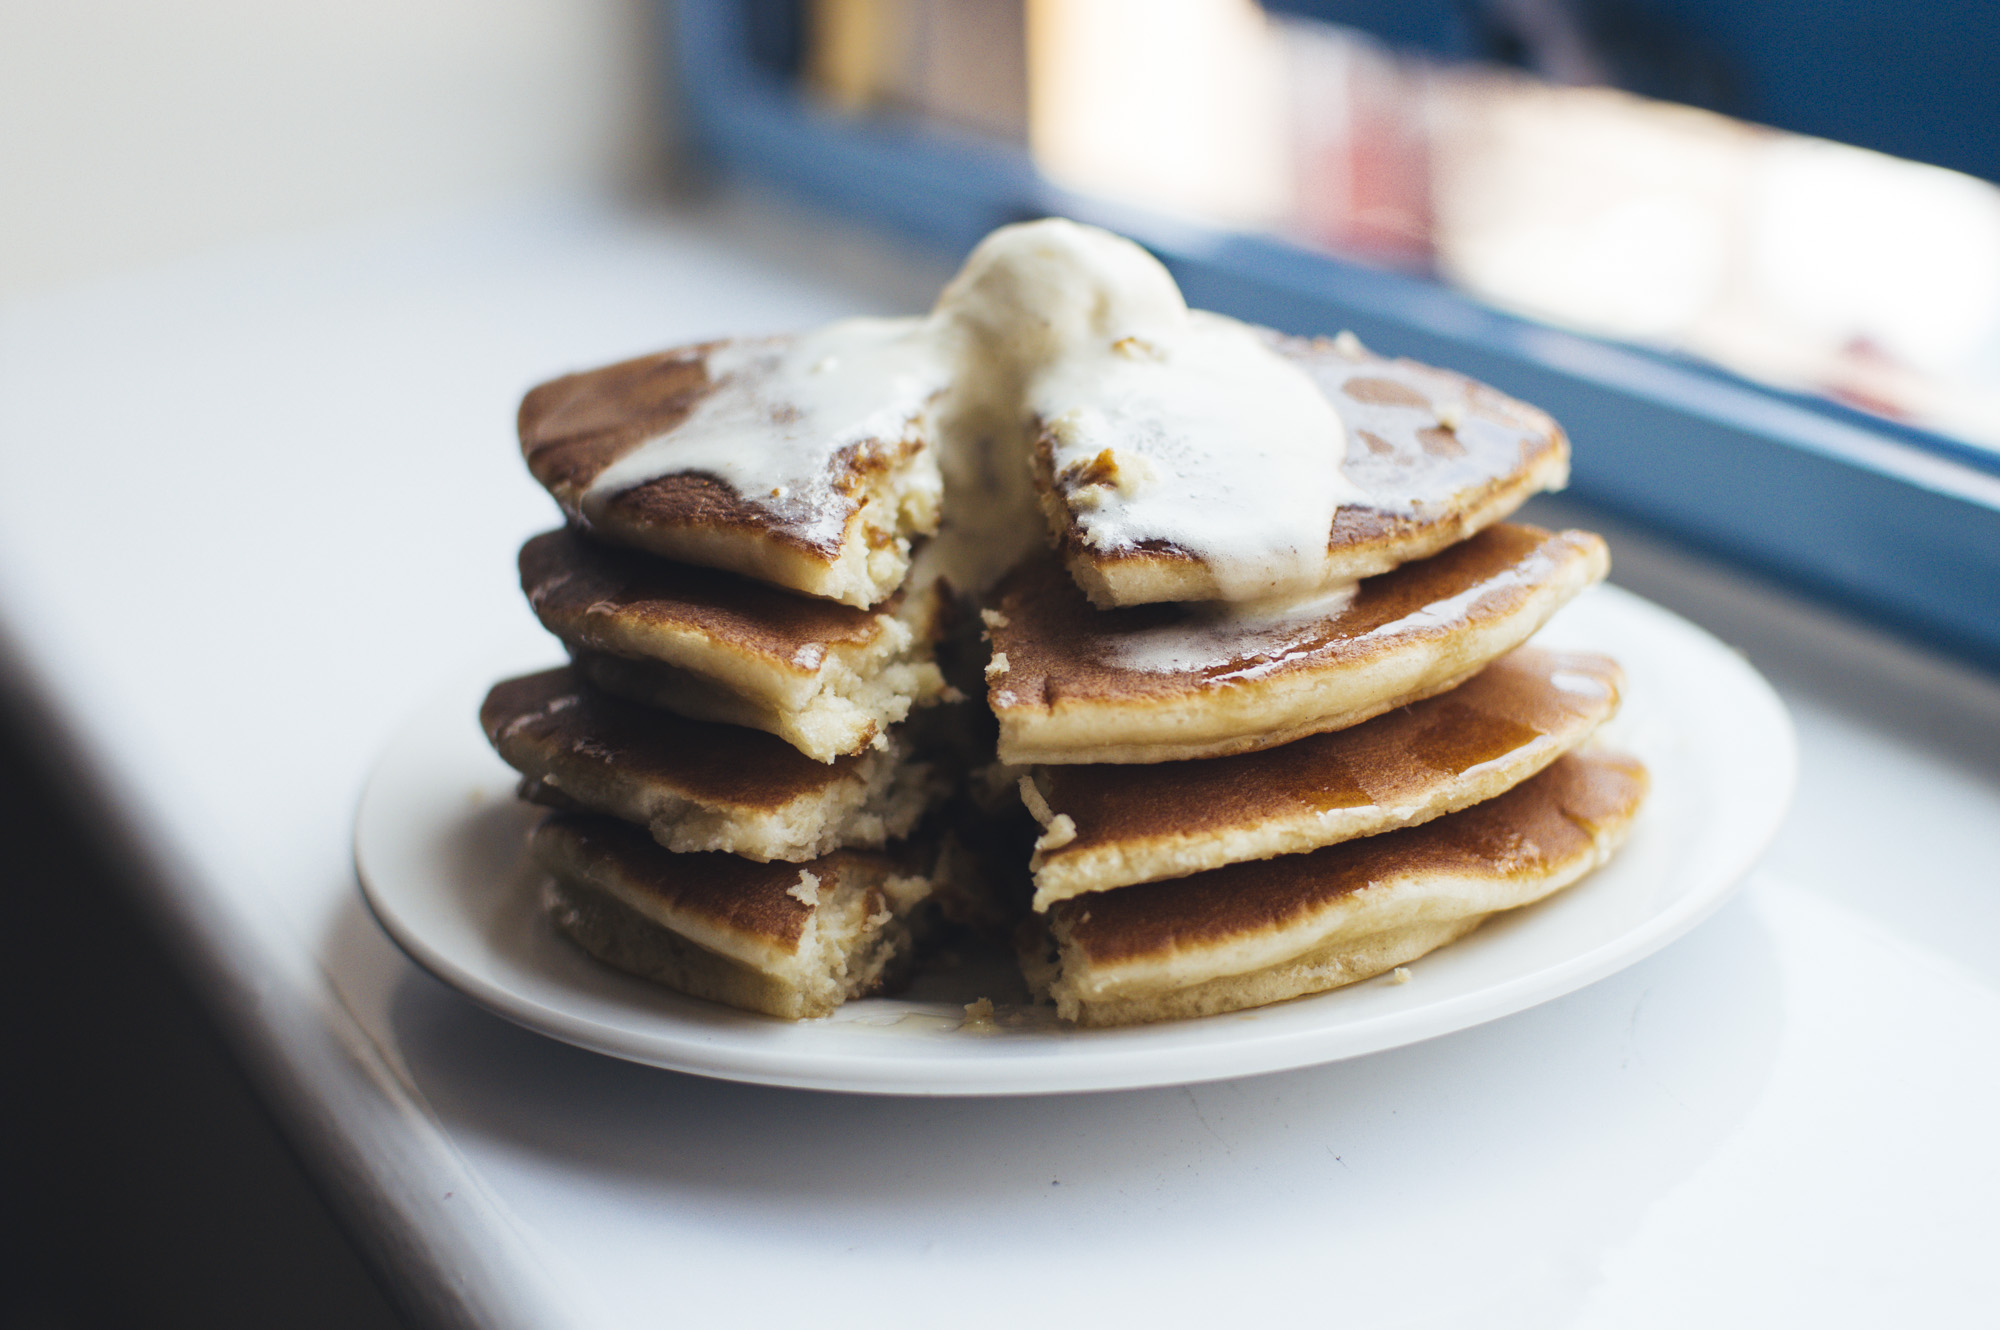
The A La Carta presets from Sleeklens can also be used to enhance your images with many options which can be used to stylize and show off your food’s best side. Check out the pancakes below which use the Tarte Tarte preset.
Food photography may seem daunting to some photographers. Beginning photographer’s may have the assumption that you need tons of equipment and props just to make good photographs. In reality, this is not always true. In fact, there are only a few essential pieces of equipment you need to produce great food photography images. Check out our tips for food photography setup and how to shoot food photography.
f great thing about doing food photography with natural light is it’s something you can do within the comfort of your home without too much equipment or having a huge setup. In addition to that, the best part is being able to finally eat what you just photographed which should give you enough energy and encouragement throughout the post-production period.
The first thing we need to discuss when it comes to taking stunning food photography shots is the camera we’re going to use. If you’re a beginner and looking to be a food photographer or a professional photographer in general then I would always recommend looking into a full frame camera first.
There are many benefits to shooting with a full frame camera. However, if you’re on a budget and would like to just have a DSLR camera to shoot with and get some quality content, then there is no shame in looking into some of the cheaper crop sensor cameras.
There will obviously be a huge difference between the results you get from a crop sensor than that of a full frame but the camera you choose is subjective to what you’re looking for as well as how much you want to spend.
I always recommend using a full frame camera for any project or genre of photography you’re working in because overall using a full frame is always better. Whichever camera you choose, be sure it is capable of shooting in RAW format and has a minimum of at least 12 megapixels. This helps to ensure you get quality images along with the freedom to do whatever you want during post-production.
When it comes to which glass to attach to your camera there are many options that will serve very useful. One of my favorites is the 50mm f/1.8 which help in creating some beautiful bokeh as well as the option to get pretty close to your subject for some detail shots. In addition to that, I’ve always had a special love for a 50mm and I’m sure many other photographers can share the same sentiment. In addition to the 50mm, there are two other focal lengths or lenses I would recommend.

The second on the list would definitely be the 24-70mm f/2.8 as it comes in very useful if you’re in a well-lit environment and don’t want to be changing lenses too often to achieve a certain look. The 24-70mm is very versatile and will come in handy many ways than one to provide some quality shots. Last but not least on the list of lenses would be the 85mm f/1.8. What I love about the 85mm is that it creates a stunning blurred background that gives your image avert professional look while not losing any detail on whatever it’s focused on. The 85mm can also be used for close shots of different meals with an almost guaranteed result that may just have your mouth running.
The style of food photography you want to produce will determine which lens you will need. For the most part, getting a long macro lens works great for food photography. A macro lens around 90-100mm is great for getting in very tight and isolating the food.
See the below image as an example. It can also be nice to have a standard 50mm lens or something similar for process shots or of the venue, kitchen or chef as an overall profile of a restaurant. Even if you think you may not need this, it’s always best to have a few lenses you are comfortable with on hand for different perspectives.
When setting up your shot, to achieve maximum sharpness I’d suggest using a tripod and an off camera shutter release trigger. Your shots will definitely stay sharp and consistent. However, this does not mean to not change your angles, after a while taking a plain overhead or horizontal shot can get boring so at some point, you’ll find yourself with the urge to get a bit closer to your subject.
In food photography, it is nicer when all of the frame is in focus, so you need to use an aperture like f8 or wider. On a 90mm macro lens for example, when at ISO 100 and f8, the shutter speed will be somewhere near 1/2 second, far too slow for hand holding. The rule of hand holding a camera is that the shutter speed needs to be at least the same as the focal length. So for a 90mm macro lens, that’s 1/90, which is tough even at f3.5. Using a tripod and remote shutter release will solve this issue.
I’ve noticed a lot of photographers overlook the how useful a foam core can be in photography. Being that the light from the window would be hitting on side of the dish you’re shooting, you will more than likely end up with some shadows on the opposite end. A quick solution to this would be the use of a white colored foam core.
As photographers, we all know that white bounces light, and if we manipulate natural light enough, we can use it to at least cast out any shadows on or around your subject. Before you run out and get some white foam core, be sure to get a sheet of black foam core as well. Black foam core can be used in instances where you have too much harsh light in one area and you’d like for some of it to be absorbed. Black generally absorbs light so in this case, it can come in handy whenever you end up in a situation where there is a bit too much natural light on your subject and you would like to use some.
Speaking of absorbing harsh light, brings us to our next topic of diffusing it. As I mentioned earlier, you will find natural light getting a lot harsher as you hit the mid-day mark. However, lucky for us as photographers we always have an idea as to how we can manipulate natural light to our advantage.
Of course it would perfect if we could simply turn a dial and adjust how bright we want our natural light to be but, in this case, we have to find some way around that. Diffuser sheets can often be found with four in one reflector sets for little to nothing. They are very useful in harsh light situations and will probably save you a lot of work in the future.
Another tool that could help you diffuse light when using natural light is an umbrella. If you have a photo studio, you more than likely already have one of these and know exactly what I’m referring to.
Umbrellas are also a very cost-effective way as to how you can diffuse light and reduce harsh shadows on your subject. If you have a fairly big umbrella, then that’s perfect as it can no spread the soft light throughout your image making it that much more subtle and amazing.
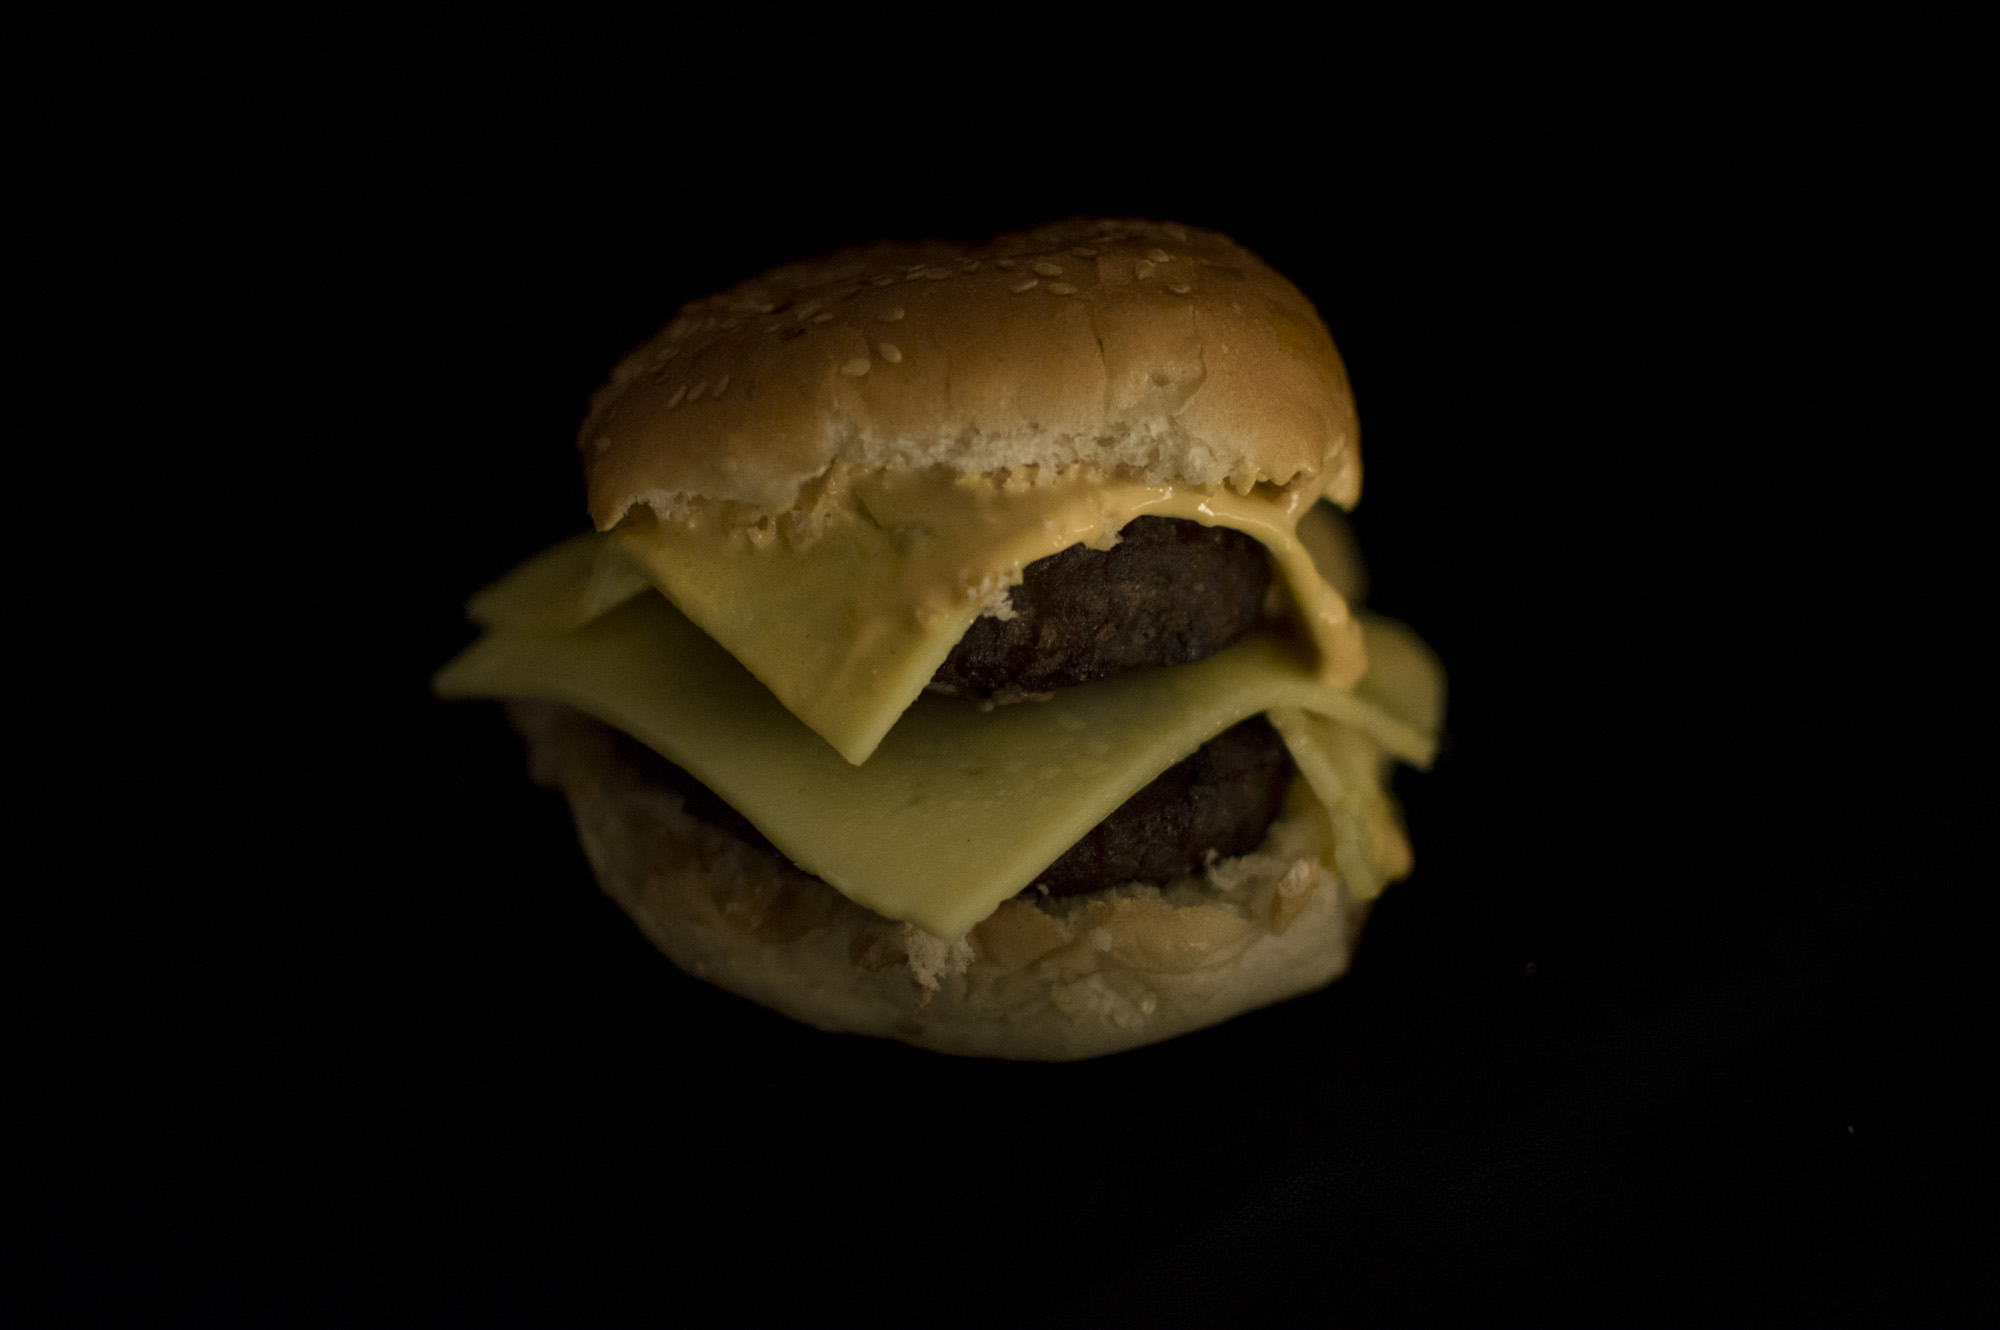
Another essential piece of equipment is the remote shutter release. Without this, you will have to rely on smaller apertures and less of the frame in focus. This is exactly what happened to me on this shoot because I forgot my remote shutter release. You will notice all of the images are not fully in focus for this reason. In food photography, when some of the frame is not in focus, it can be very distracting. Bringing a remote shutter release will ensure you don’t have to face the issue of sacrificing creativity and aesthetic for an in-focus image.
Food photography is a genre of photography that you could say everyone is interested in these days. More and more we see where lifestyle and travel bloggers take great food images with their smartphone or Instagram users overall just sharing what they’re having that day. The smartphone has enabled everyone to be their own kind of food blogger, but unfortunately not everyone is aware exactly of what they’re doing.
In this section, we will be focusing on some of the most common mistakes made by beginners in food photography. You’ve probably already made a few of these mistakes in the past–and that’s ok! We all have to learn somehow.
Using flash in food photography can throw off so many things in your shots and leave you to do a bunch of corrections during post-production. It’s also very disruptive and rude if you’re out and trying to capture some great food shots because it might cause a scene and bother others sitting or dining close to you.
Whether you’re shooting at home or in a restaurant, refrain from using flash as much as possible. When shooting at home, place your dish or subject close to a window where you have a nice even source of natural light to manipulate.
When getting close up shots of your meal in food photography, a shallow depth of field can be so soothing and give your image that well needed professional food photographer look to highlight different elements of the meal. However, a common mistake made is when the camera or photographer ends up focusing on the wrong area of the dish. This can be annoying if not noticed during the shoot, as it is hard to correct or even impossible in post-production. To remedy this problem, I recommend either setting your AF points correctly to capture the fine detail in the area you need or simply switch to complete manual focus.
If you’ve never used complete manual focus before then it can seem a bit intimidating, but I promise after practicing a few times and exercising patience you will grow to appreciate it.
Focusing on the right area of a dish during food photography is basically the selling point of the dish itself. People generally love to see what it is exactly you’re eating or they’re about to eat.
There are some dishes you don’t want to get too close when capturing them due to the nature of how they’re made. Not every dish is worth getting close and capturing details, as they might not be visually appealing on camera.
For example, when I started in food photography, I learned that there is a reason why most restaurants don’t have close up pictures of their BBQ chicken or other selective meals. This is because when taken on camera, it does not look as appetizing and tempting as it might taste.
Be very selective and careful in regards to the dishes you decide to capture close-ups of. Not all of them are worth it or will be appealing in photos. When you run into dishes like these, try a different angle or change your perspective up a bit in such a way that if you were to see the image you took, as a customer you would want to buy that meal yourself. I usually use that to gage as to if the image is visually appealing or not. Always remember that the key thing in food photography is to visually appeal to your viewer’s stomach.
In general, when it comes to photography, the angles are pretty much very important. When doing food photography you to make sure you’re not capturing too much of the same thing. It is always good to have options but having essentially the same shot over and over is not beneficial.
Try different angles and perspectives as much as possible so that you have a wide variety of shots to choose from rather than just a handful of good shots. This mistake would happen to me very often when I started food photography as I would find a sweet spot and then be reluctant to move from that spot and try different angles.
Good food photography in my opinion, of course, doesn’t need much editing aside probably a few color corrections, sharpening, and maybe playing with your basic tools such as contrast etc. Try not to do too much editing when it comes to stunning food photography because that has the capability of enhancing or completely ruining your image. Be mindful of what you’re doing and try not to do an excess of one thing.
Food photography can be a fun and rewarding way to capture your culinary creations. By following these great tips, you’ll be on your way to taking stunning food photos that will make all your friends and family members drool with envy. And don’t forget – if you need help processing your photos, we’ve got you covered. Download our free Plated Perfection Lightroom Presets Collection today and take your food photography to the next level!


Please verify your software version before proceeding.
 I’ve verified my software version


 Facebook
 Google +
Comments (0)
There are no comments yet.