
Hi Guys,
For today I want to show you how to use the Layer Mask, not to be confused with the Clipping Mask which is a whole different tutorial which I will address at a later date in one of my future Photoshop Tutorials.
Sleeklens Photoshop Actions here!
Ok so to start with I’m going to explain what the Layer Mask is exactly and why you would use it instead of just cutting the image out and deleting the back ground.
That is what we call destructive editing, destructive editing is when you completely change the image file to a stage when you can not go back and edit in the future, so it’s permanent.
In general you never want to do destructive editing, it might be ok if you are doing work for yourself but if you are working with clients doing freelancing or whatever your job is that requires these skills it really is unforgivable to do destructive editing, because if your client comes back to you a month later looking edits and you can’t edit those files I’m sure you can see what the problem would be, especially if you have to go back and redo work you could have edited non destructively.
So doing it this way, saves you and your client of course a whole lot of heart ache in the future if a scenario arrives when you have to go back into a PSD (Photoshop Document) file and do adjustments.
Now you know all that lets get to the real meat of this tutorial.
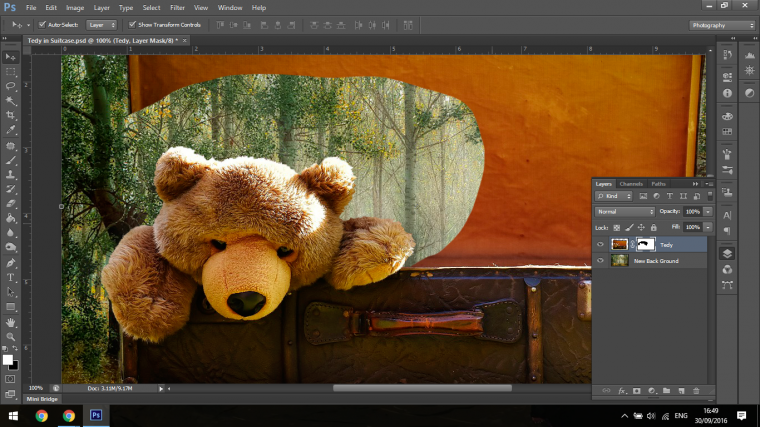
This is the image we are going to be working with today, which have already pre-cropped using the Polygonal Tool.
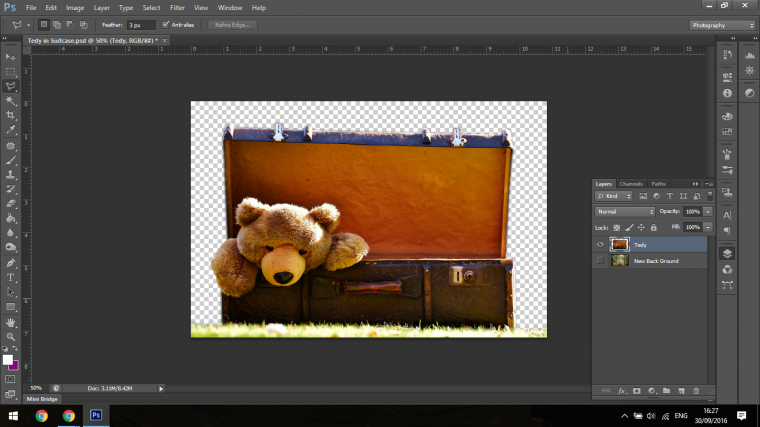
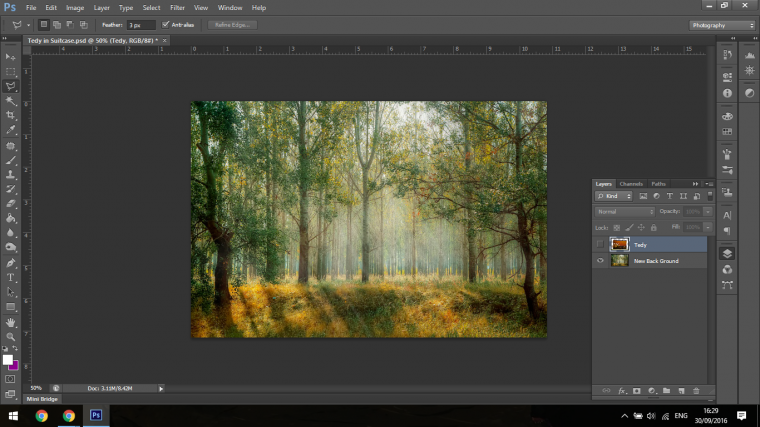
What we are going to be doing with this image is adding the Background below to it.
Ok so this is the scenario we’re going to be working with today.
By the way this is not a practical scenario but merely for learning purposes
Our hypothetical client wants us to add the Teddy Bear to a cooler more dramatic background than the plain walled background that the image was photographed against.
The problem is for their calendar they still have to clear it with their editor who is still on holiday, no doubt somewhere awesome.
But to save time and money they want us to provide one edit minus the back of the Suitcase but they are still unsure weather the head editor will approve of the image.
The also do now want the Editor to see two versions of the image in case the Editor starts to change His or Her mind which I am told they are prone to doing!
So they have asked me to provide an image that if needs be they can edit in the future but one that hides the back of the suitcase.
This is where the Layer Mask will come in.
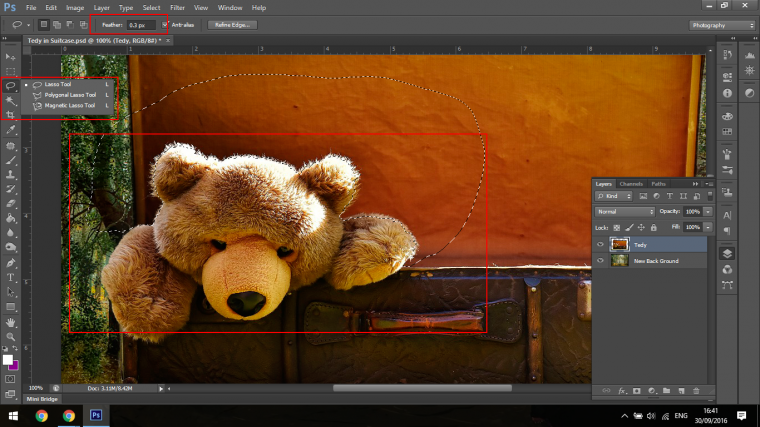
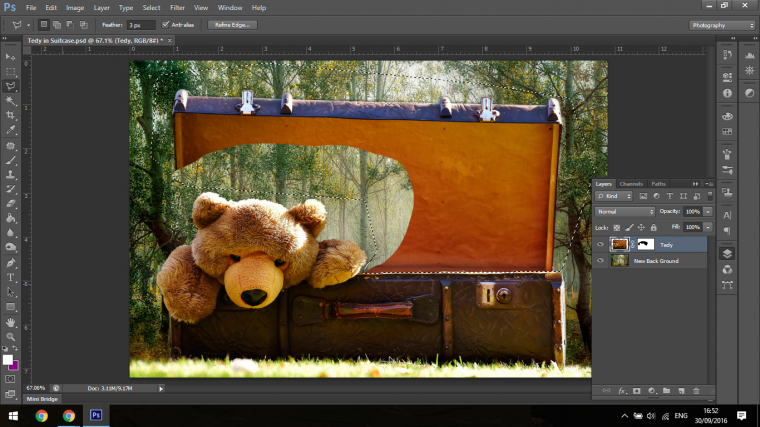
The first step here is to now create the Mask by selecting the and removing the Teddy Bear from it.
So I first do this by using the Lasso Tool (L) to create a selection around the Bear, I use the Lasso Tool because it is faster and more free flowing because of the hair on the Bear so I can go along and simulate the Hair, I also have a pixel feather of 0.3 on that.
To now create the Layer Mask you must click where I have indicated below.

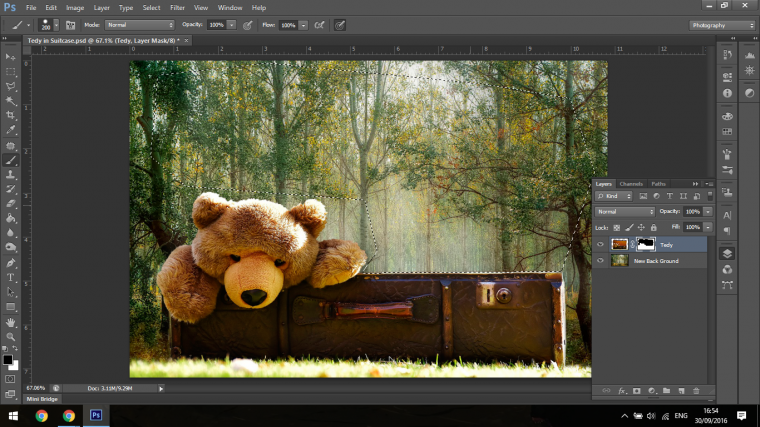
Now if you look at the image below you will think oh my, where has the Bear went something must have went wrong, no, I am showing you this in case it happens to you.
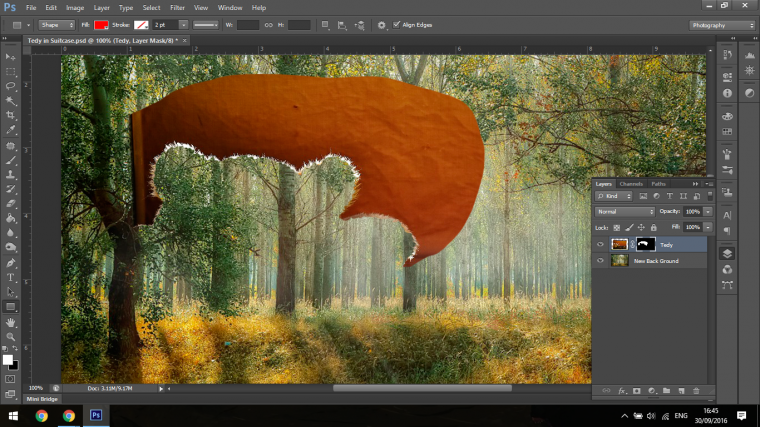
The easy way to rectify this is to click on the Box in the Layer that says Tedy.
Then you key in on your keyboard (Ctrl + I) to invert the Layer Mask.
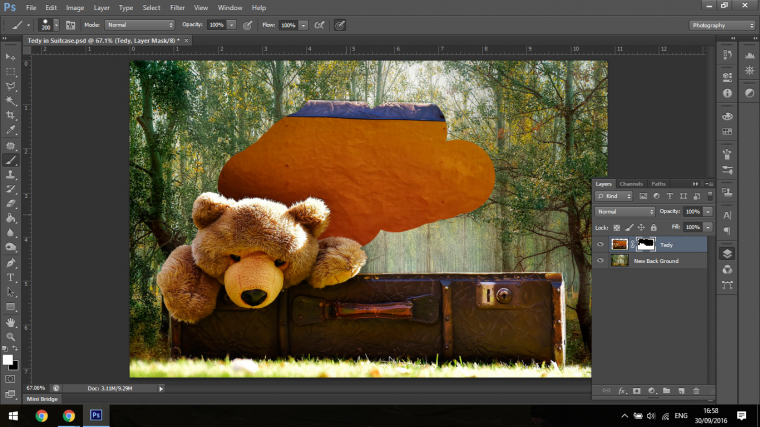
Now to complete the rest of the mask all you have to do is create another selection around the area you want gone.
This time I’m going to use the Polygonal Tool as the image has more straight edges.
Remember, you must still be on your Layer Mask Box for this to work.
Now you take the Brush Tool and Paint in the Selection Black and it will erase it.
I use the Term erase very lightly, the image is not really erased at all.
If you ever wanted to bring it back all you would have to do is click on the Layer Mask Box in the images Layer and pint over it with the opposite colour, White.
Do take note though that you should make a duplicate layer, one with and one with out, because remember this is only a fictional scenario for learning purposes.
So check out out final image.

Learn here how to use photoshop’s history panel to fix editing mistakes.


Please verify your software version before proceeding.
 I’ve verified my software version


 Facebook
 Google +
Comments (0)
There are no comments yet.