How to remove Tan Lines using Photoshopwww.sleeklens.com
Hello everyone hope you are all doing well.
Yet again I’m here to drop some knowledge on you Photoshop style and help you achieve Photoshop greatness and possibly progress on to becoming a Freelancer and Improve you images.
What I have for you today is fitting in the theme of the summer, walking down to my place of work today, strolling along already I could see lots of people out walking around with their brand new tan…. and tan lines and I was thinking, that could very well be me very very shortly if this nice weather keeps up as I walk back and forth from work.
Which I hope it does but!
What happens when I getting photos taken at up coming social events, like my friends wedding in a week.
Am I going to have big sunglasses tan lines?
So, what better time to learn how to remove those tan lines from your images and kind of cheat a little with our “great” photogenic tans.
There will be no tan lines in my Instagram account this summer break that’s for sure.
I mean like who is going to know in a few years anyway, and you’ll have your photo with no tan marks to add to your social media.
Aren’t we lucky we do Photography and have free Sleeklens tutorials to learn from.
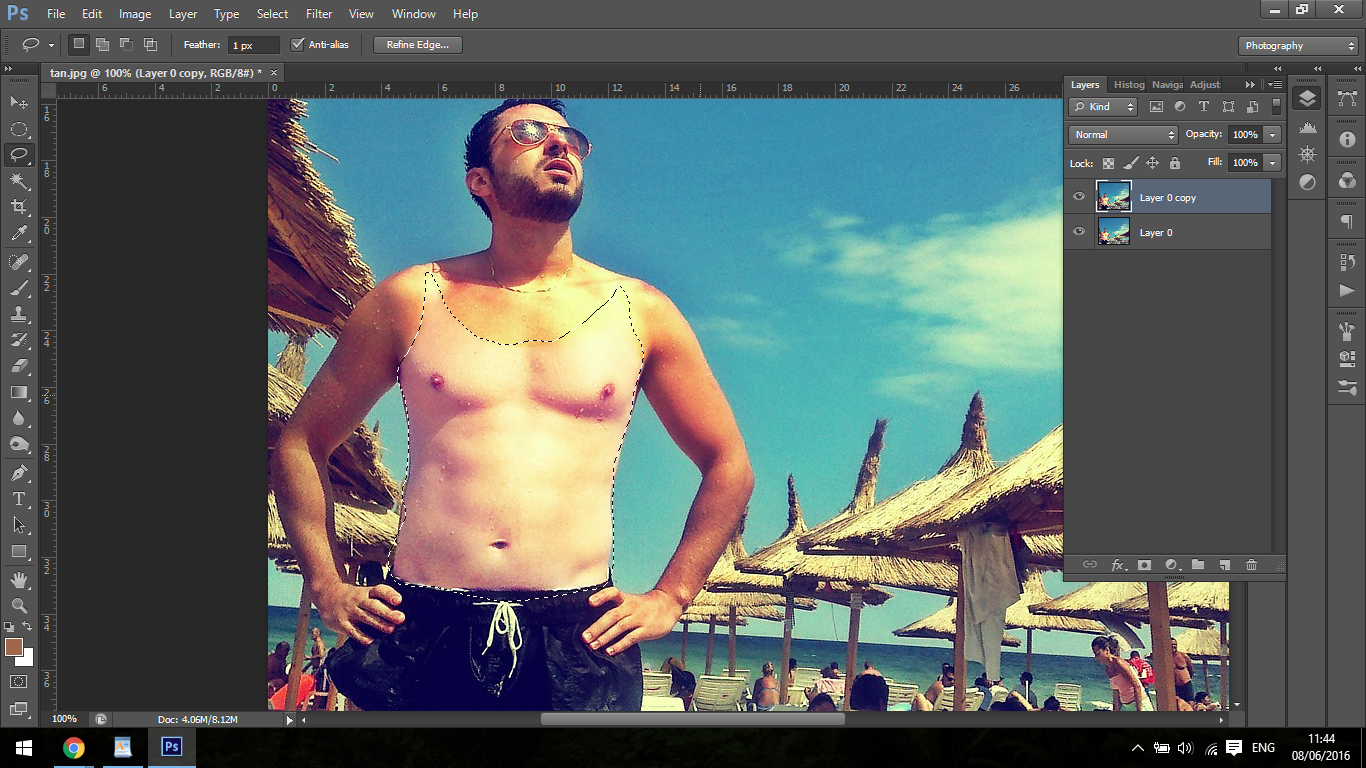
First mission is you want to make a selection of the tanned area, then you can adjust it so that it will be close enough to match the non tanned area, then you can bring the two closer and match them in the middle some what if needs be.
This is extremely easy to do and by the end of this you will be a master of it.
So open yourself up a new layer with the shortcut Ctrl J.
You will then see a new layer appear above your original layer.
Make your selection, I was able to use the standard Lasso Tool (L) with a 1 pixel feather.
You can use what ever method fits the image that you are working with, if the Polygonal Tool works for you then use it.
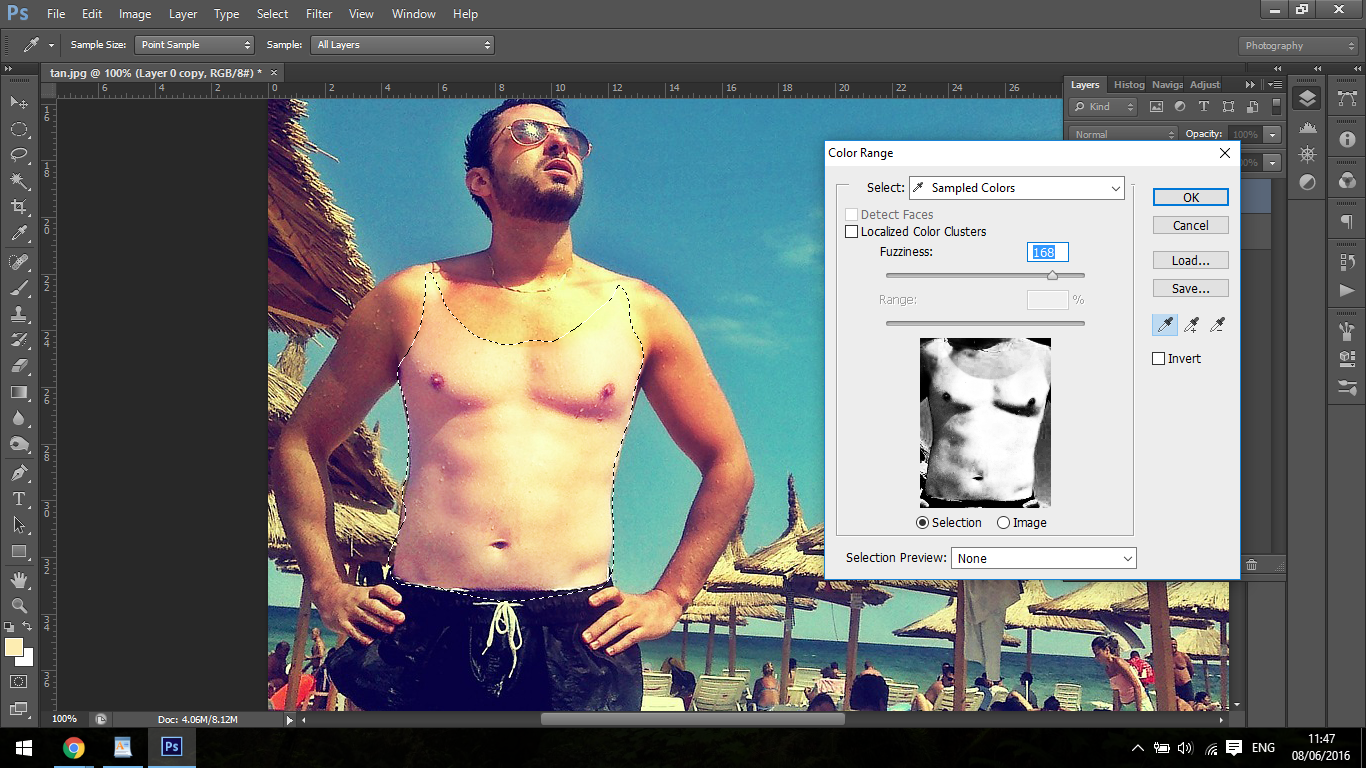
Then make your Selection and choose colour range.
Once this is up you then sample the area of the tan by clicking on it using the Eye Dropper Tool.
If colour range is selecting far too much, in other words not just the area with the tan lines on it but other areas as well, you can then adjust the range slider underneath the fuzziness slider.
This will reduce your range selected if you need to do so, and you can then do the same with the fuzziness slider.
So bare in mind range is the size of the area selected and fuzziness is the amount of colour and if you need to add more, then you can use the plus dropper tool to add more selection.
The Plus Dropper is next to the standard Eye Dropper, you will see those below Save.
Click ok and you will see your areas now selected then copy and paste.
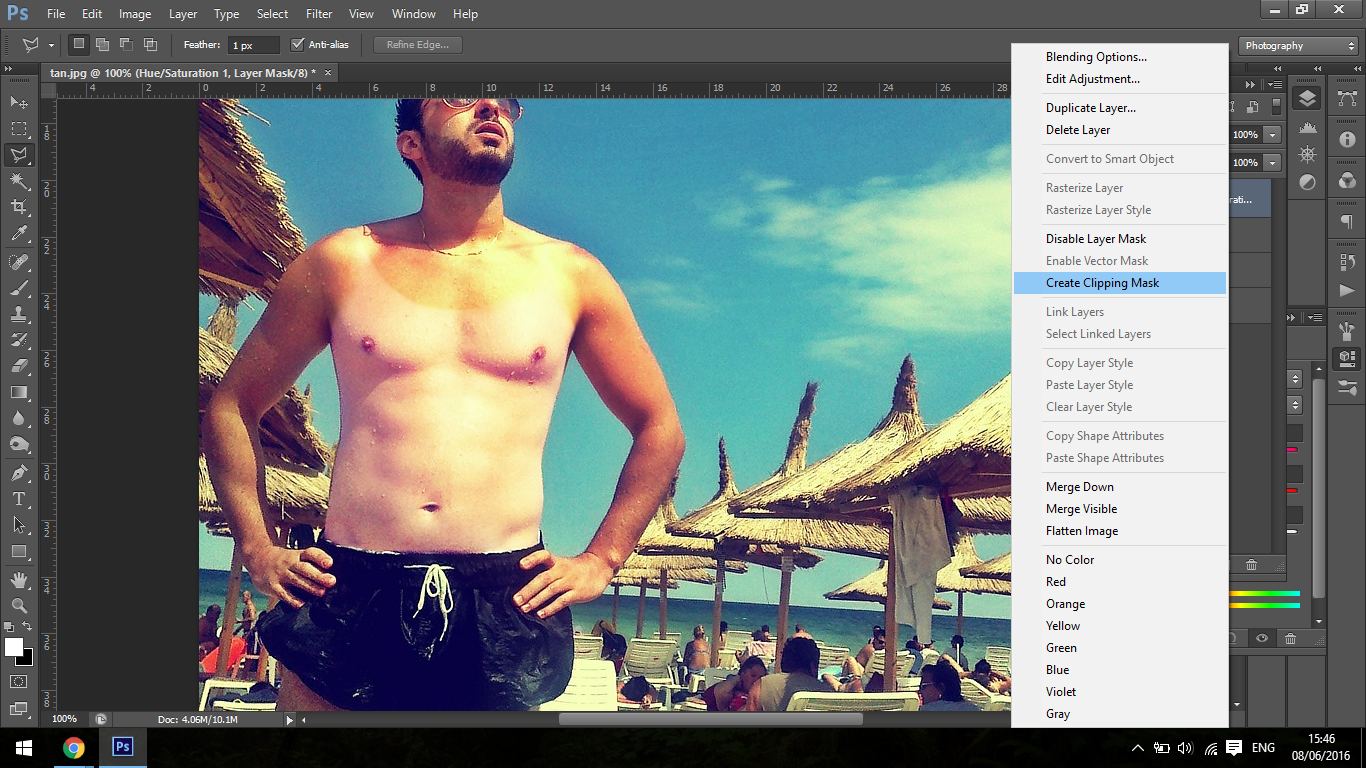
Now we have to change these areas so they look similar to our unaffected areas.
So now grab a Hue Saturation Adjustment layer and because your selection was active it will create a layer mask.
Right Click on it and click on Create Clipping Mask.
Now you can adjust your Saturation and Lightness Slider.
Then you can adjust using the Hue slider then use your other two sliders and you should be able to get extremely close.
It may not be perfect right away but as long as you can get pretty close to it, we’re all good for now.
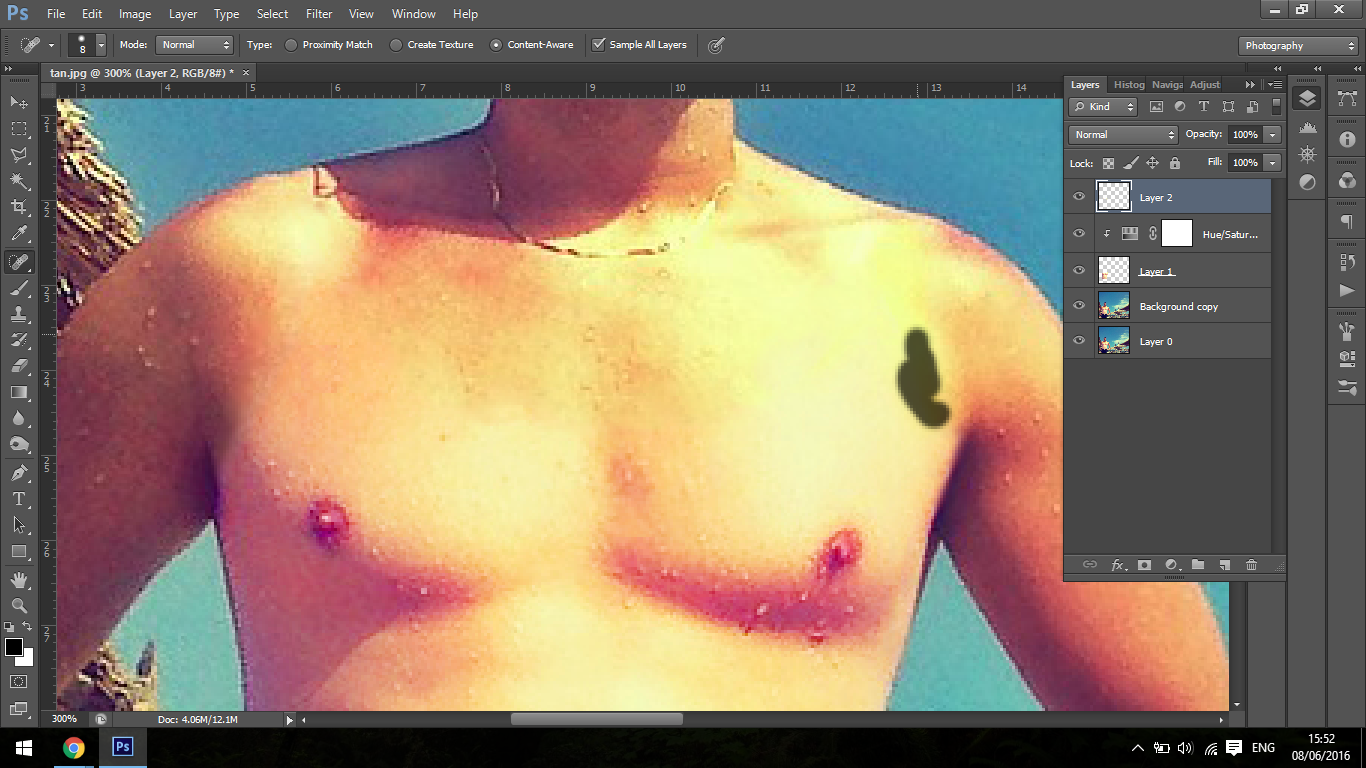
No doubt you will probably still be able to see some of the tan line, so what we do to fix this is to open a new layer and then we grab our Healing brush tool and start to paint over it, this will blend the areas and it should start to look pretty flawless.
Once you have taking these steps you should have a nice clean removal of the tan line to the point were it should not be noticeable in any shape or form.
Graduated from college in 2002 with a degree in Art & Design, I started exploring my way in Graphic Design and Professional Post Production. Full-time freelancer since 2011.


 Facebook
 Google +
Comments (0)
There are no comments yet.