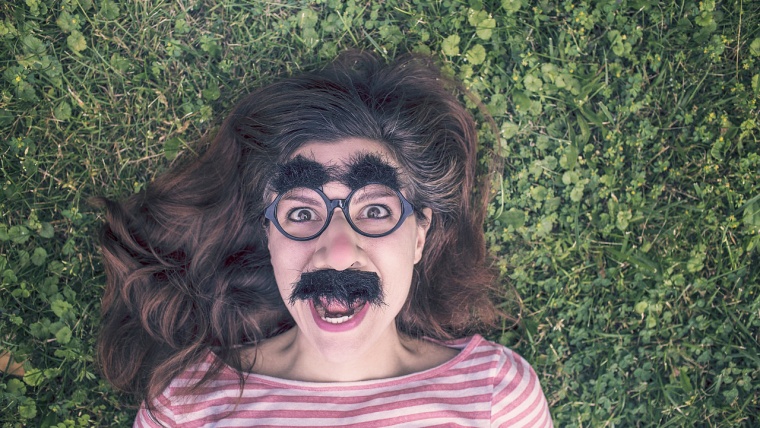
Hi everyone, so summers here at least in my neck of the woods it is and I’m sure many of you will be hammering out the selfies and beach photos with your friends, or you are just taking photos of someone wearing glasses for whatever reason.
Now the problem with glasses in photography terms is that you often get some glare on them from a studio light or some other light source in the house or wherever you are and it can show up pretty harsh on the image when printed, so I’m going to show you how to get rid of that glare and even out the glasses so you will be able to see both eyes without any issue or you can use some Photoshop actions.
To make this work you really need an image that has glare only on the one side of the glasses, now I’m not saying it’s impossible to do without this because you can always borrow from other pictures if you took several on the same day with the same person, you could make it work and adjust the image a little but say we’re working with just one image then it’s best that you have one side free of glare.
First thing I want you to do is for you to hit S to activate your Clone Stamp Tool. make sure to have opacity and flow set to 100% and that you have Current & Below selected.

Then open up a new layer
Shift Ctrl + N or just click on the icon if you know where that is, I show this in many of my other tutorials so if you’ve checked those out you’re probably very familiar with the whole process.
So how the Clone Stamp Tool works is you hold Alt and click on an area, then if you start to paint, it will copy that area to the new layer so that you can move it around, manipulate it and so forth, so it’s a really handle Tool!
The next step is to go to Window, and click on Clone source.
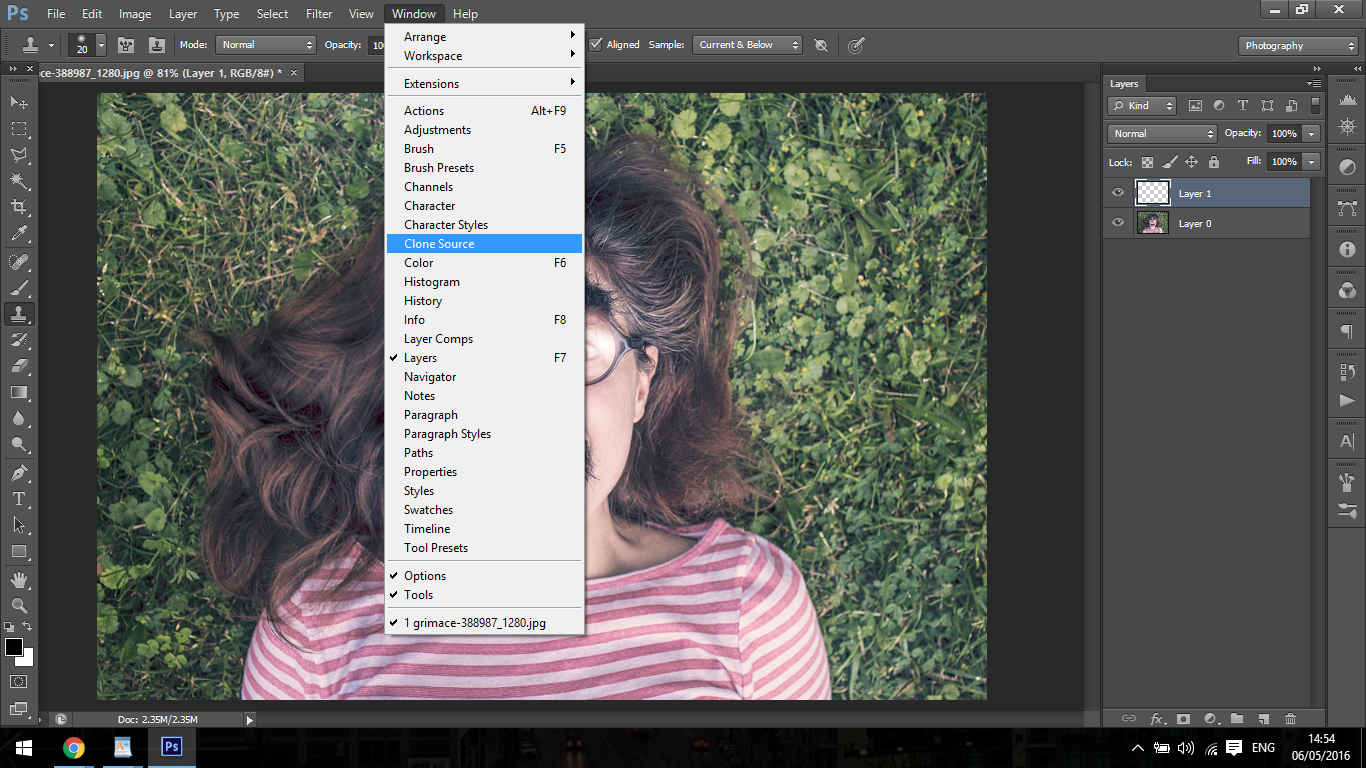
Our main goal here is to sample the opposite side area on the glasses with no glare and then replace the one with glare so that it looks natural and unweird for somewhat lack of a better word.
On your Clone source panel I want you to click on Show overlay.
That way when you sample an area it will show it right away and give you a preview of what it will look like.
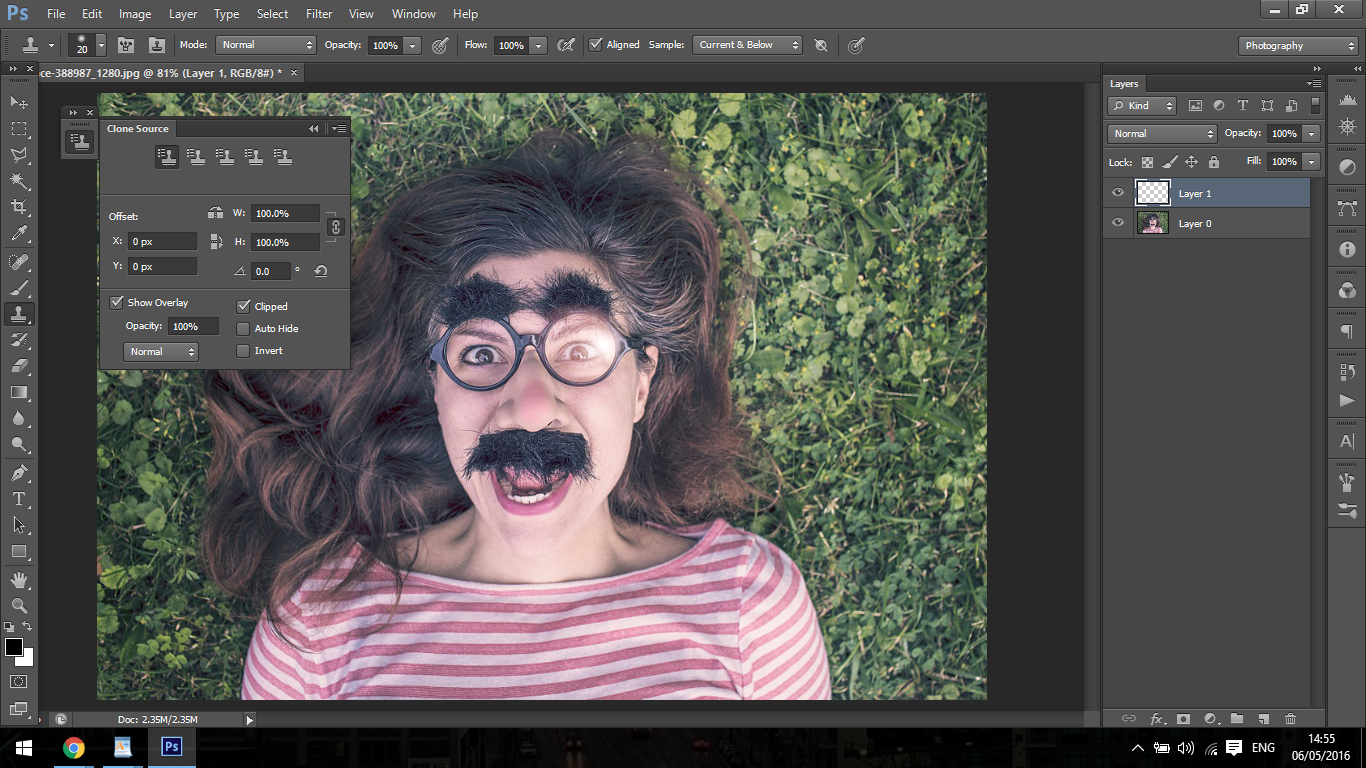
Now click on the Icon that I have indicated below.

What this does is it flips what you have sampled around so that you will see the opposite of what you have.
This will be broken up into several parts, first you want to paint in the glasses as best you can over the glare so that it matches up, in general there’s no way that this will be perfect right off the bat so you’re going to have to go back and forth sampling different areas to match, like the side of the eye for example.
This takes a little bit of practice, it’s really something that you will have to explore yourself and work at it, but those tools will get you started at least, for the rest of this tutorial I’ll talk you through the rest of my process and show you where I cloned my other areas to complete the whole process.
This is not an easy process because there is a lot of fine details that you have to be aware of so that it looks realistic, but with time you’ll get it, who knows you may get it first try especially if you have experience with painting portraits or something similar.
So I have my area Sampled I want to move it over the area I want to cover.
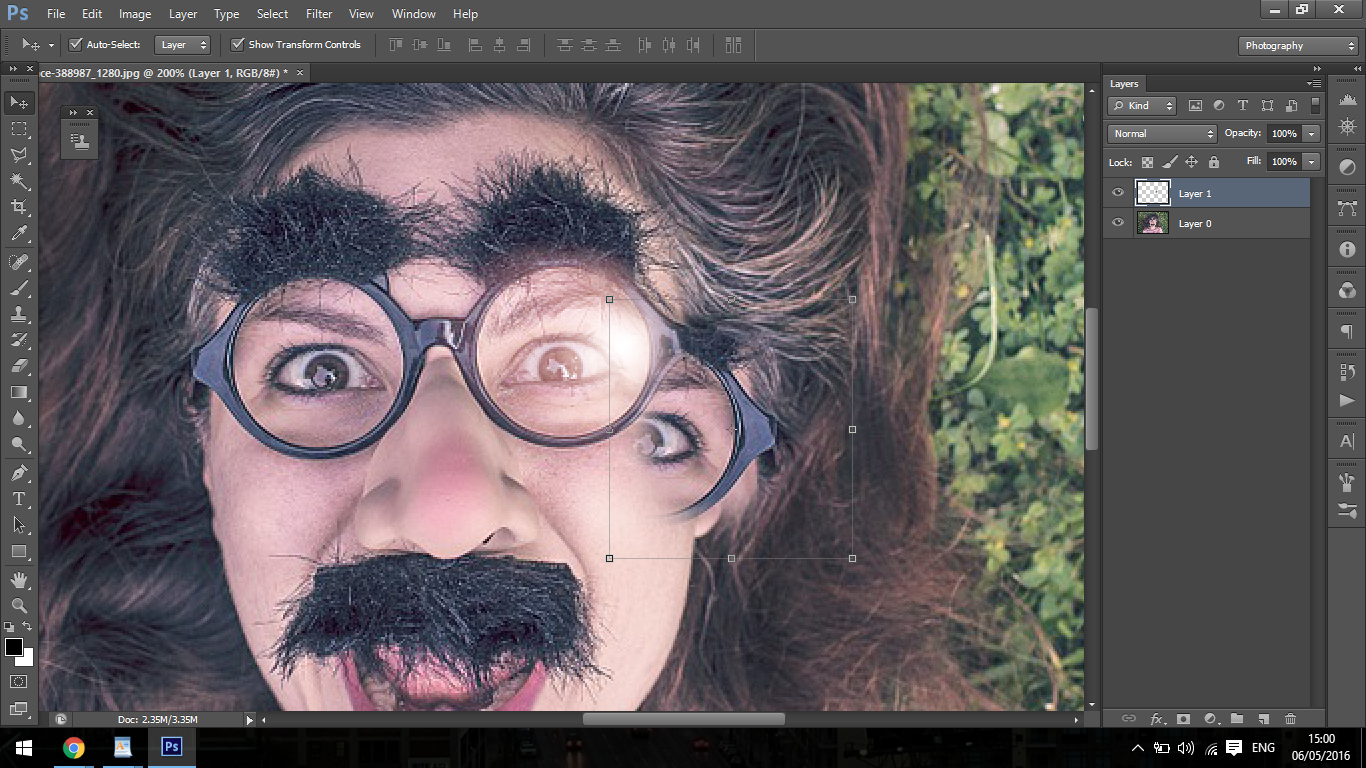
Then place it over to try to match it up, you will probably have to rotate it a little to get it to match.
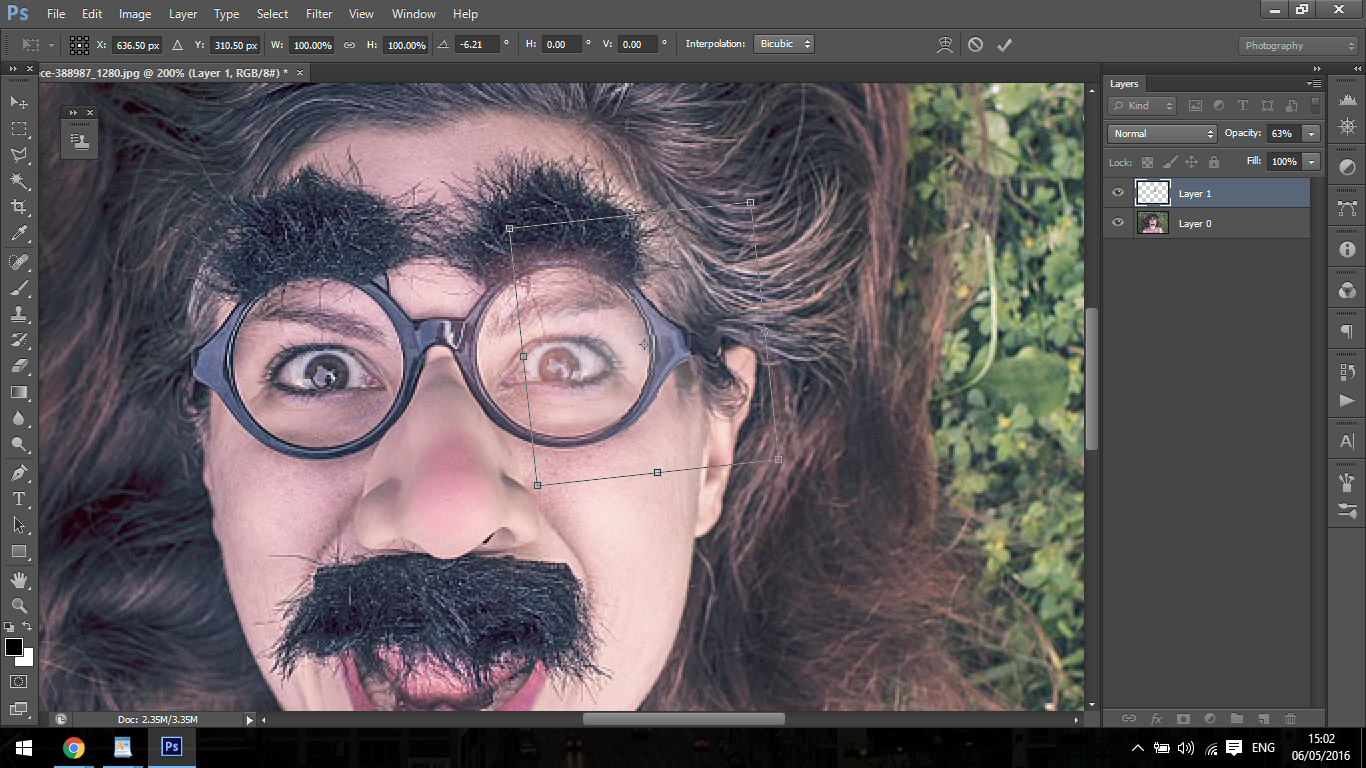
Then going back in I have cloned the areas in the eye to match using the skin colour and the actual eye colour until the glare is undetectable.
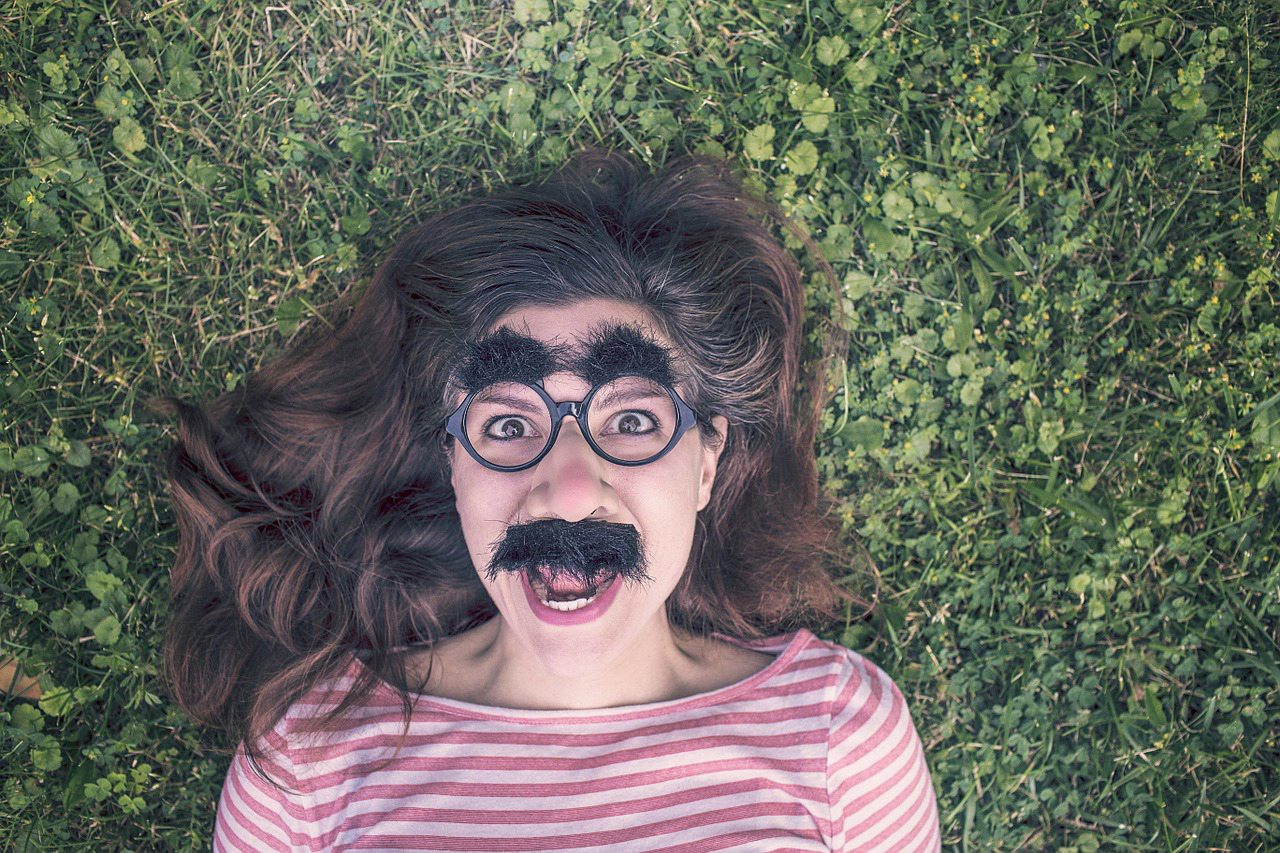
You will end up with a bit of practice your image looking similar to mine below.
Next learn how to create 3 x 3 grid collage in Photoshop, pretty cool tutorial


Please verify your software version before proceeding.
 I’ve verified my software version


 Facebook
 Google +
Comments (0)
There are no comments yet.