How To Improve Eyebrows In Portraits Using Photoshop
0
1
2
3
4
5
5.00 based on 2
Ratings
How To Improve Eyebrows In Portraits Using Photoshop
www.sleeklens.com
Hello there.
Today I’m going to be working on some eyebrows and you are invited to join along with my workflow.
So let’s talk a little on the background of this tutorial.
Peoples eyebrows are all very different and unique and sometimes in a photo shoot the model my not be prepared etc.
Lighting can also be a huge factor when it comes to the final result.
Especially when people have very fair eyebrows.
Therefore the finished image may need some touching up and eyebrows added depending on the product.
It could be some sort of before and after.
This is where this tutorial comes in.
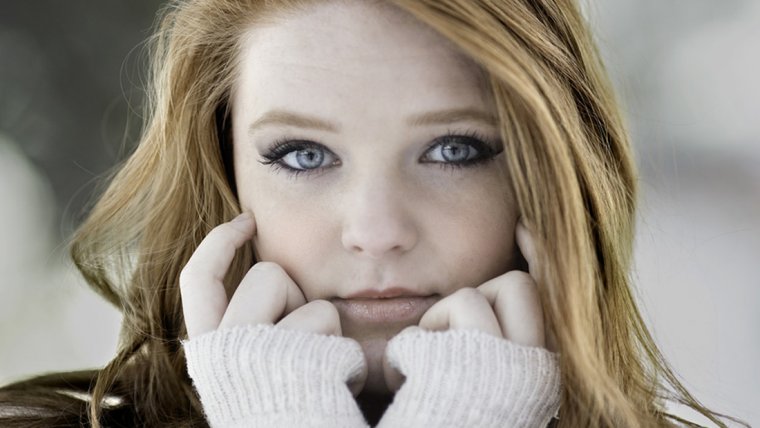
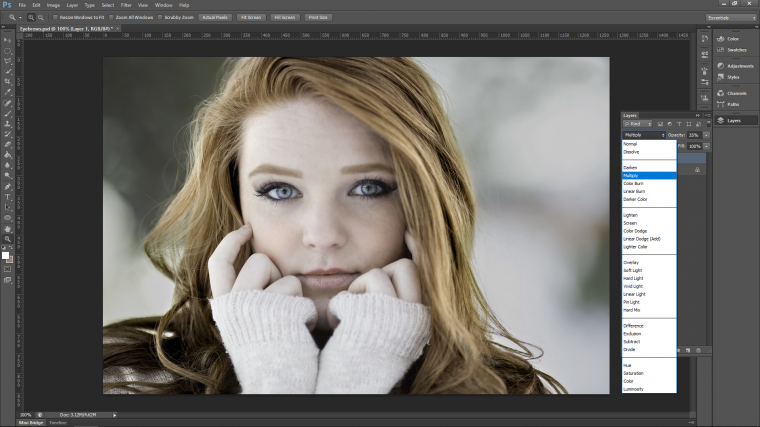
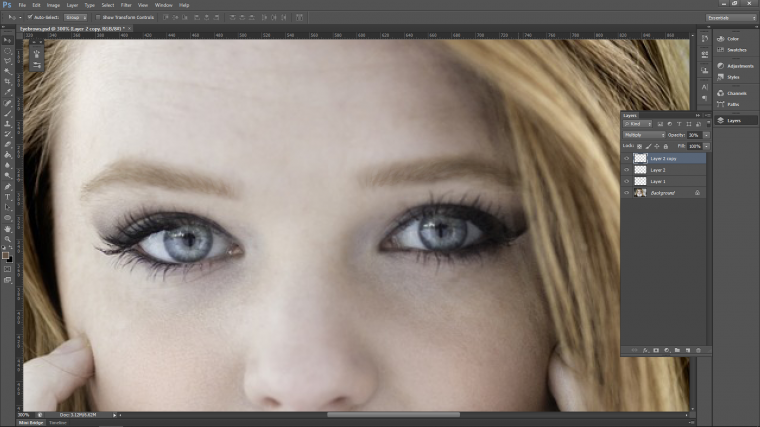
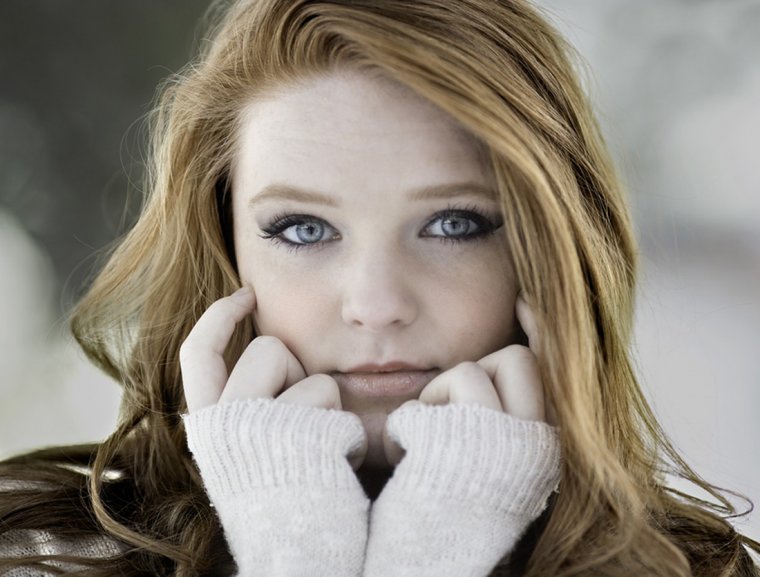
Let’s look at my image.
Now when I look at this Image I’m immediately thinking there is not enough definition in the eyebrows.
They are a bit blurred for what I want to achieve.
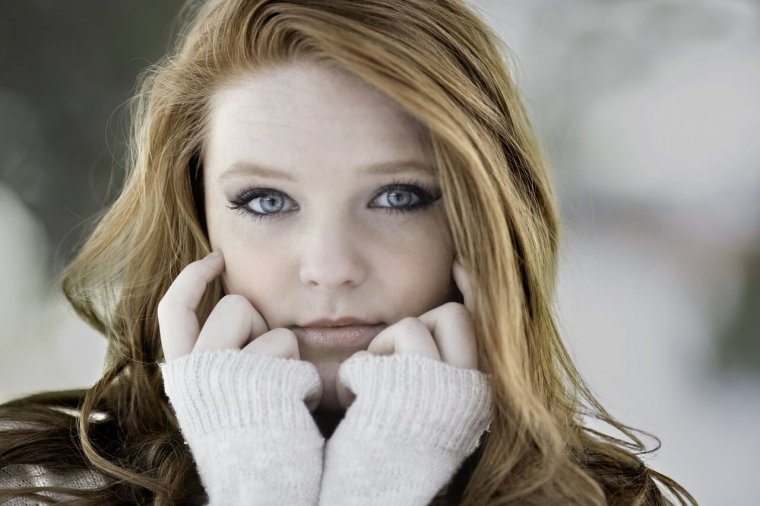
Because of shifting styles, strong eyebrows come in and out of fashion.
And at this particular period of time, I see that in a lot of models portfolios they have heavy eyebrows, so I’m going to update this image.
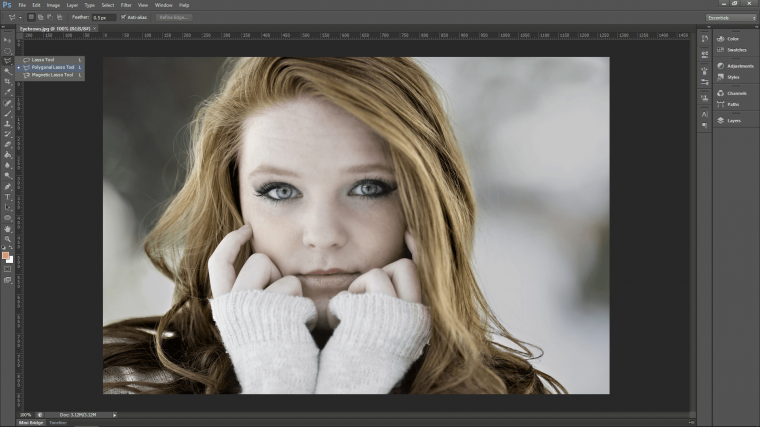
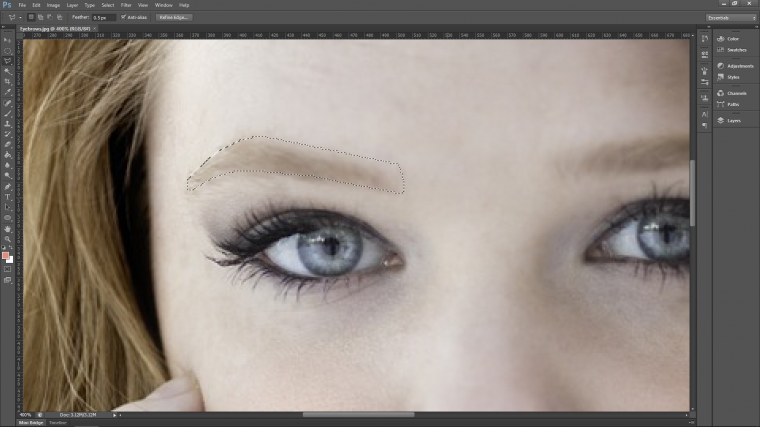
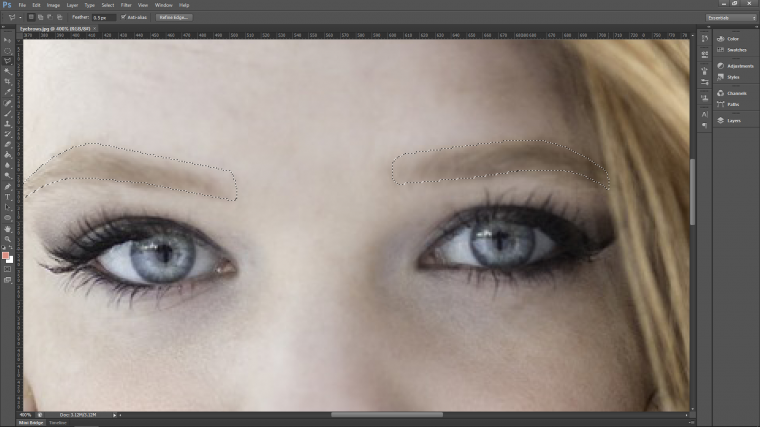
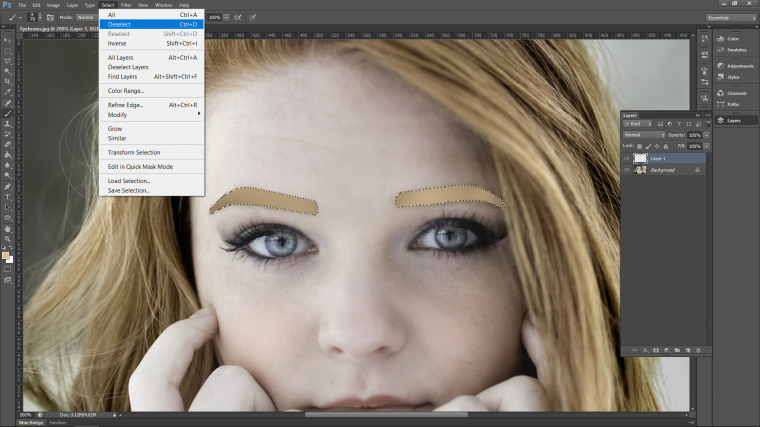
The first thing that I’m going to do is to grab my polygonal selection tool.
I’m going to draw a selection around my eyebrow.
The selection is going to represent exactly the shape that I want to finish off with.
Now just click around the shape that you want to create.
Don’t forget to do the opposite eyebrow as well.
And remember, eyebrows are sisters, not twins, so you don’t have to have them looking completely identical.
There is a little bit of giving with this so don’t stress.
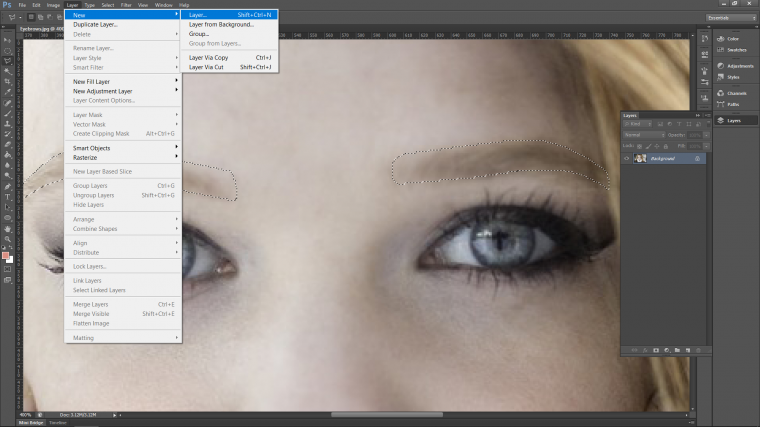
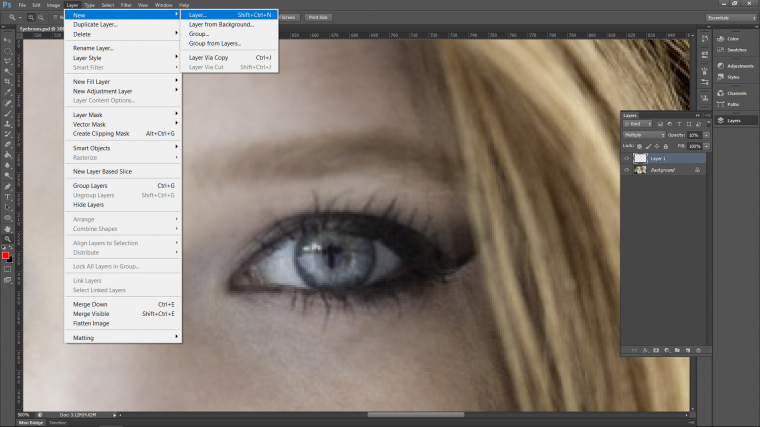
Now let’s create a brand new layer by going to Layer – New – Layer
You’ll see it appear at the top of your layers panel to the left-hand side.
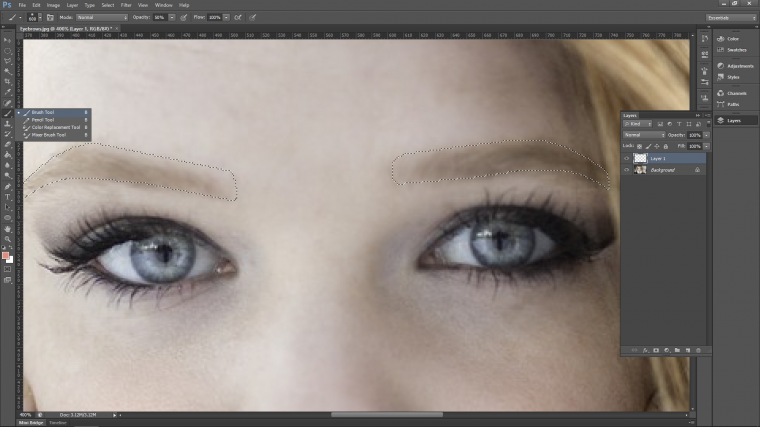
Then let’s grab the brush tool, the settings don’t matter.
Hold Alt on your keyboard and you will see the little eye dropped appear.
This means you can click on any color to use with your brush.
Then simply just paint over your selection, don’t worry about how it looks, we’ll fix that.
They will look like big crude blocks to start with.
Doesn’t matter just fill the selection with your color.
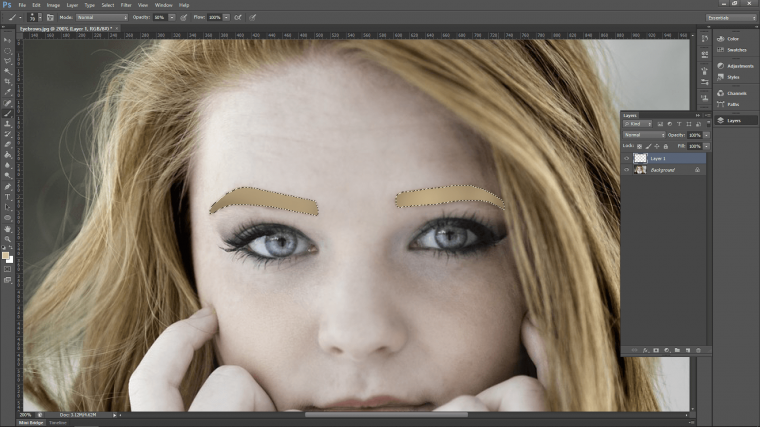
When you have that done then deselect (the shortcut for this is Ctrl + D)
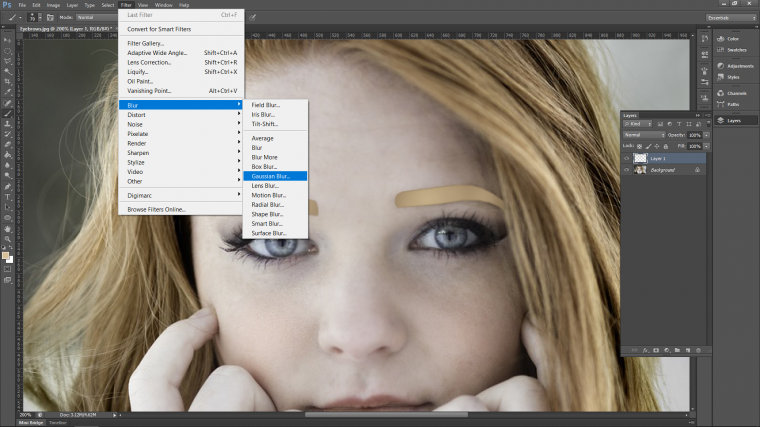
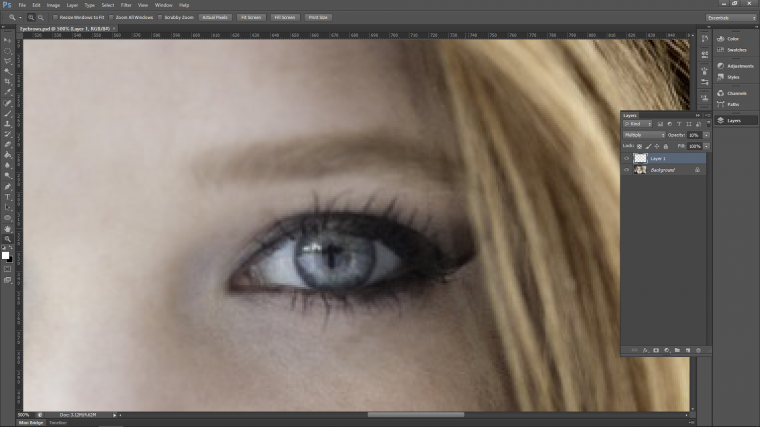
Let’s soften those eyebrows up a little because as we talked about they are a little bit sharp and harsh at the minute.
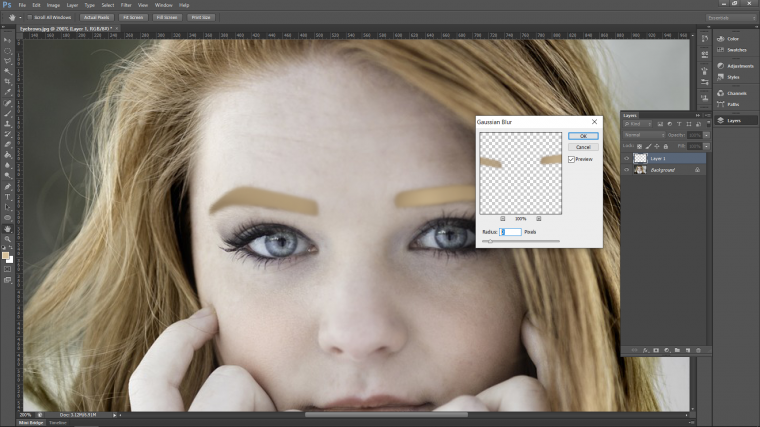
Go to Filter – Blur – Gaussian Blur
Then when the panel appears you will see that you have a slider, you can use that or just type either into the radius box.
For me, 2 worked.
But you may have a larger or smaller image so the number will be relevant to your image.
All you want to do is get it to the point of where I have it below.
So just a medium blur should do the trick.
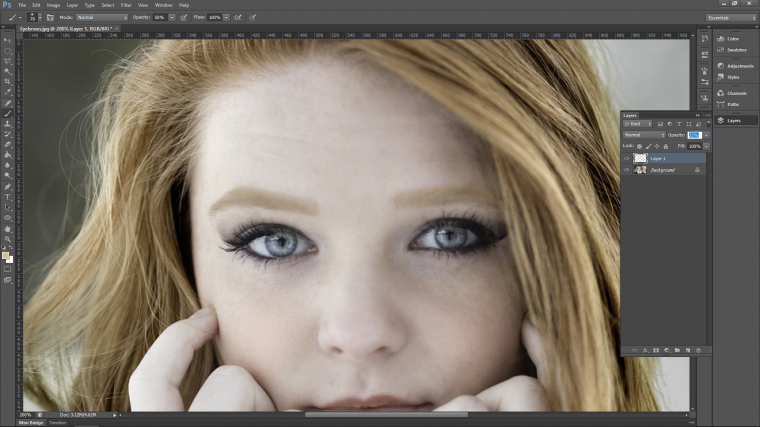
When you have your blur and you’ve pressed Ok the next thing is we want to lower the opacity on that layer so it blends in a little better.
I’m sure it still looks a little off.
So on the left-hand side of your Photoshop screen, you will see the layers panel.
(if you don’t go to Window in the top menu, it’ll be in there)
In the panel you will see your layer, above that, you will see the word Opacity.
You can now highlight the number beside it and type in your own.
35% worked perfectly for me at this point but I can change this at any stage.
Let’s also change the blend mode to Multiply
The way you do this is if you look on your layers panel you will see the word ‘Normal’
It’s just beside ‘Opacity’ you can’t miss it.
Click on that drop down box and you will see all the blend mode options.
Find Multiply and click on it.
The eyebrows will now be a little bit darker.
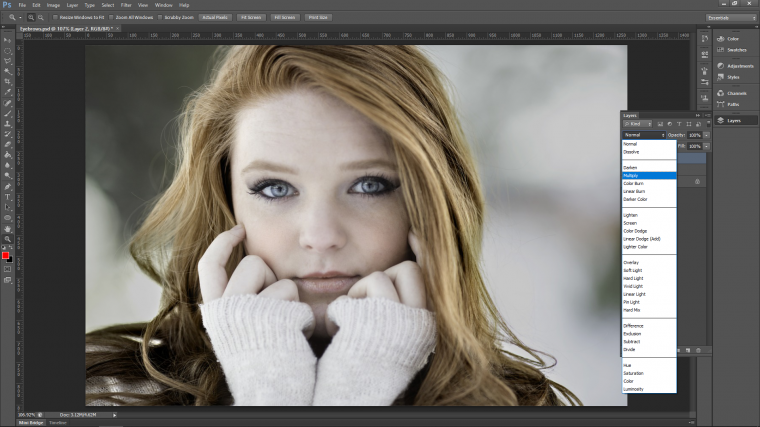
You can now play with the opacity again to see what results you get.
I was able to lower mine a little further to 10%
Next, we are going to be building up the individual hairs slowly so that it hides the color block some what.
At this point the eyebrow color block once the hairs have been created will look like it is actually makeup.
The more you fade the opacity the more natural it will end up looking.
And the more opacity you increase it by will look more like a makeup effect.
So if you wish in the end you will have the best of both worlds.
But for now, we are good as we are, as long as we have that base to work on first we’re good.
It will help us see better.
Ok so at a distance the eyebrows don’t look too bad, but when you zoom in they don’t look great.
Next, we are going to be filling this in over the top with hairs so that it looks real.
There is a few ways that you can do this.
You can create a brush or go on your search engine and look for brushes that you can up load etc.
But there is a much simpler way to do this.
Let’s open up our Brush Tool.
Now we are going to make sure that brush is a soft brush.
At the top left-hand corner of your Photoshop screen.
Under ‘Edit’ you will see there is a drop down box, it’s the one with the number on it.
When you click into that you will see the options, click on the first one, that’s the soft brush.
You will also see to the right-hand side of the drop-down box, opacity.
That will make the brush more transparent to help with blending.
Let’s create a new layer.
Change that layers blend-mode to Multiply.
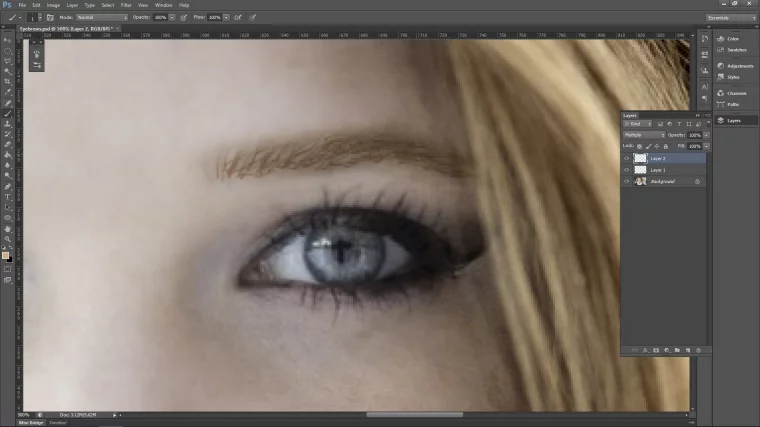
Activate your brush tool again.
Hold Alt on the keyboard and take a sample of the hair, pick an area darker than what you have your eyebrows at.
Make your brush roughly the same size as one of her hairs/what you think the size of a single eyebrow hair would be.
You can do this using the keyboard shortcut, which is using the bracket keys.
My photo wasn’t too big so I was able to go right down to 1 pixel which is fine.
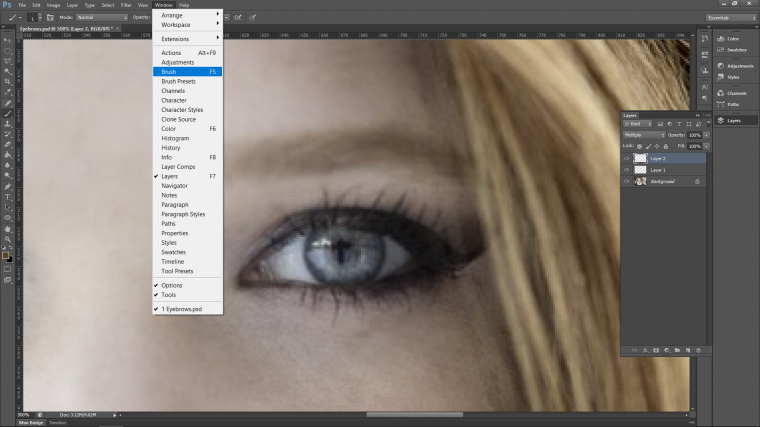
Next, open up the menu ‘Window – Brush’
Or F5 for the shortcut.
You will now have a large panel that appears with loads of cool options for your brush.
We only need to deal with a very small portion of this.
If you want in future I would say it would be beneficial to go back and check out these options and just have a play around.
But for now, all we have to deal with is the option ‘Shape Dynamics’
When you click on that you will see the option ‘Control’
Click on its drop box.
When it opens up to choose the option ‘Fade’
This will now create a tail for your brush head so you can mimic a hair.
There is a number beside that, I’d say keep it to around 25/30.
But by all means, experiment with other numbers for that, it may benefit your image.
For me, 25 had the correct size of the tail.
Next using your super artistic skills, just start to draw little hairs over your eyebrow.
Build it up as you go along and try to recreate what an eyebrow would look like.
If you make a mistake or it doesn’t look good, simply hit ‘Ctrl + Alt & Z’ to step back one.
You can do this a few time to go back each step.
When you have finished the hairs may look a little bit harsh, but don’t worry.
Remember we have the layer opacity option to fade it back a little.
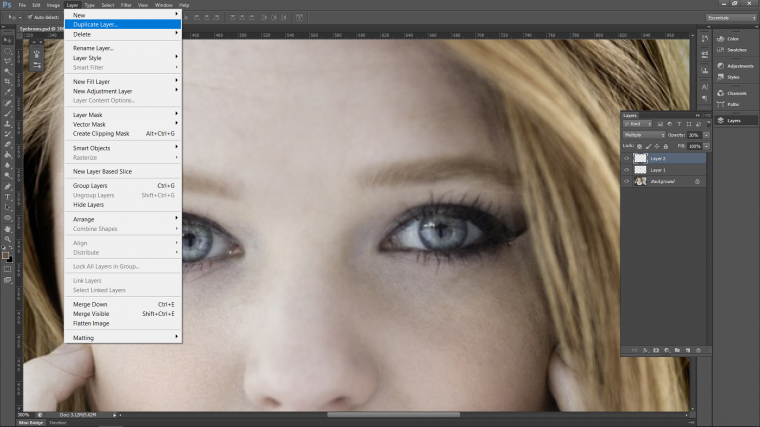
So when I am happy with what I have created, I can then make a duplicate of that layer.
This will save you a little bit of work.
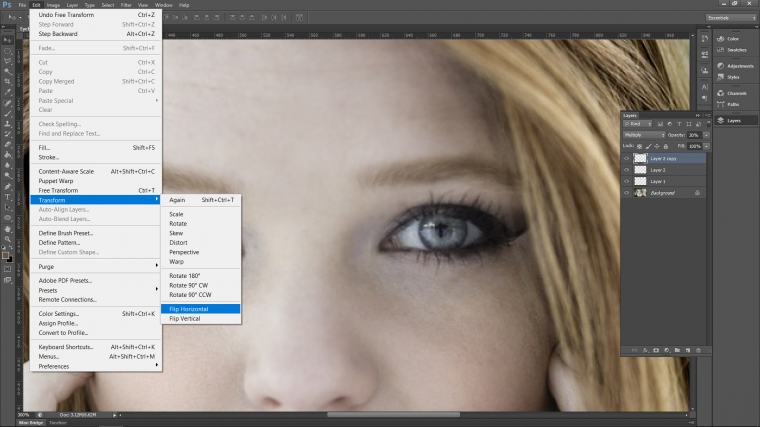
When the duplicate is created go to ‘Edit – Transform – Flip Horizontal’
Then you can place it over the other eyebrow to keep them looking similar.
The new layer will already be pre-prepared with the same settings you used for the other eyebrow.
With that placed nicely, we are done and our model’s eyebrows should be looking pretty good!
0
1
2
3
4
5
5.00 based on 2
Ratings
The following two tabs change content below.
Graduated from college in 2002 with a degree in Art & Design, I started exploring my way in Graphic Design and Professional Post Production. Full-time freelancer since 2011.
Most popular posts in April


 Facebook
 Google +
Comments (0)
There are no comments yet.