Learn How to Create Freckles using Adobe Photoshop CCwww.sleeklens.com
Hi all.
I’ve got a fun tutorial for you today, we’re going to create Freckles using Photoshop, not for any particular reason but just for the heck of it to have a little fun and explore a few more possibilities with Photoshop.
Who knows you may be able to adopt this for other projects or you might want to take a photo and completely change your appearance to a different colour of hair and give your self some freckles, maybe tell people you have a long lost twin or something for a laugh 🙂
So we’ll be making a custom brush and using a picture of stone to create our freckles, sounds good? ok it’s go.
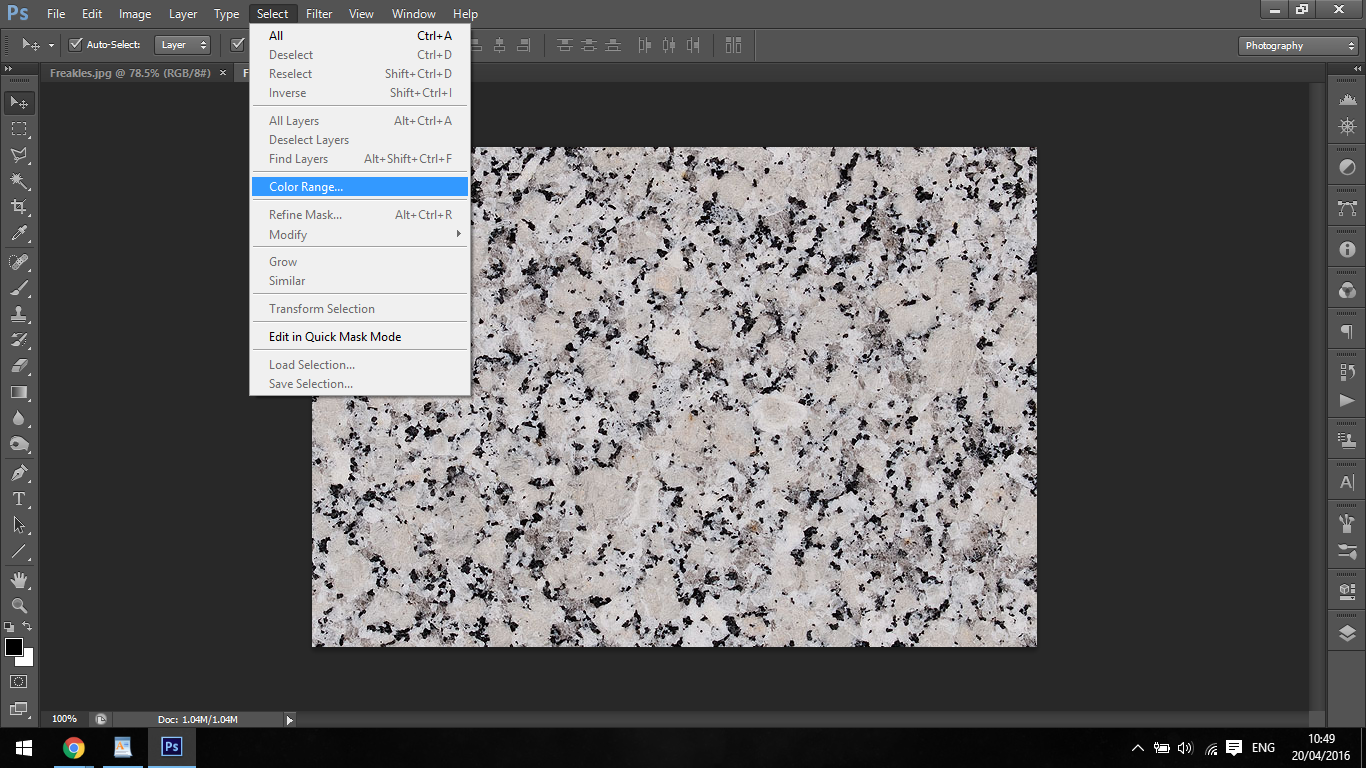
When looking for a picture of stone you want to get one that is similar to the one below, you want it to have lots of speckles, if you can get one that is similar to mine then you should be good.
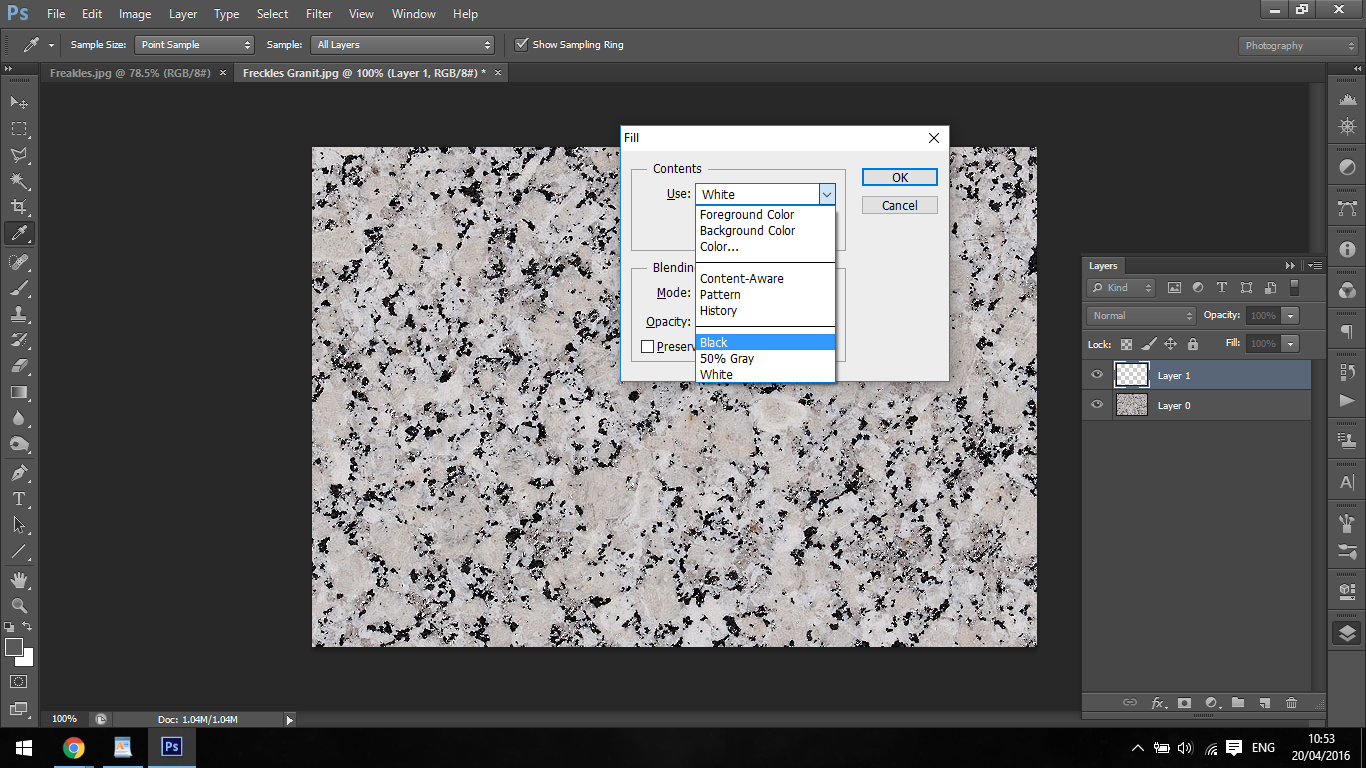
Once you have your picture and it’s loaded onto Photoshop go to Select – Colour Range
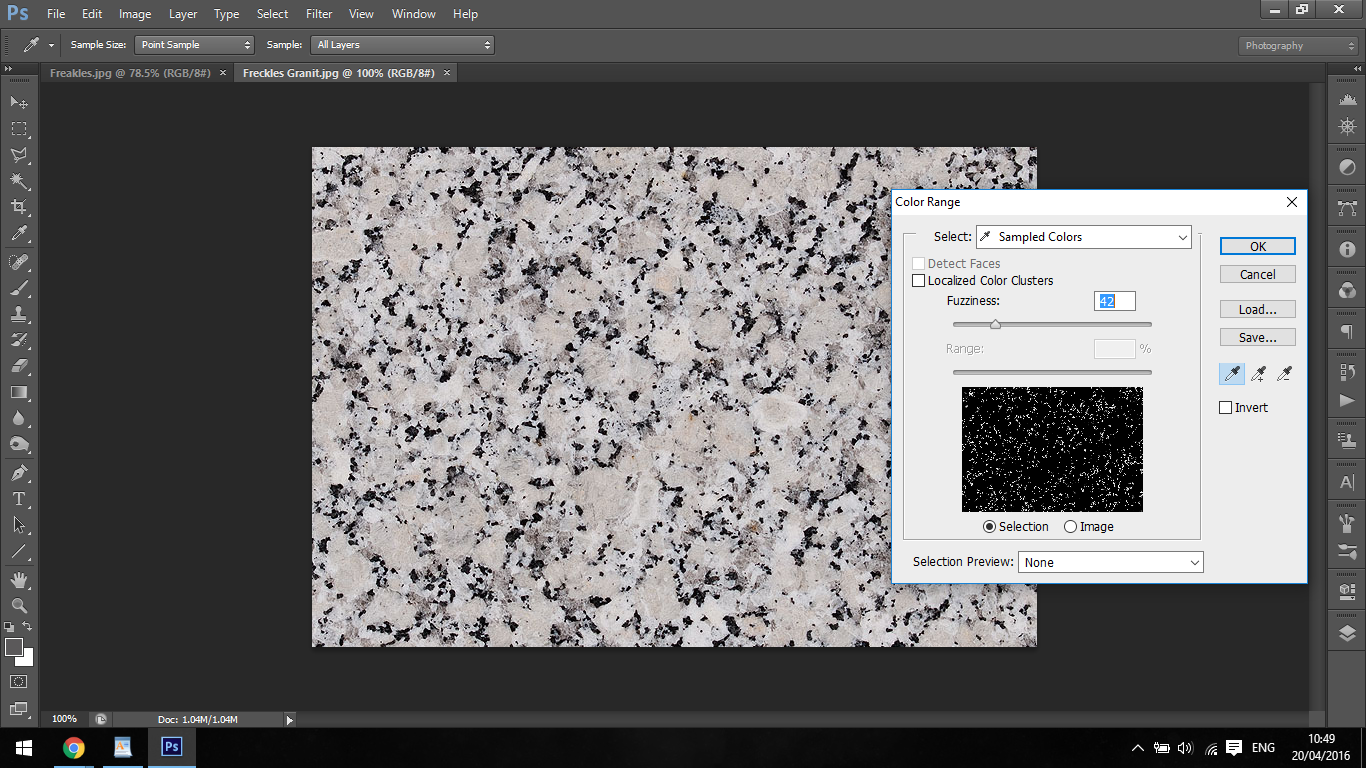
Then using the Eye Dropper Tool click on the dark speckles and using the Fuzziness slider slide it to the left to make your selection more refined and click ok.
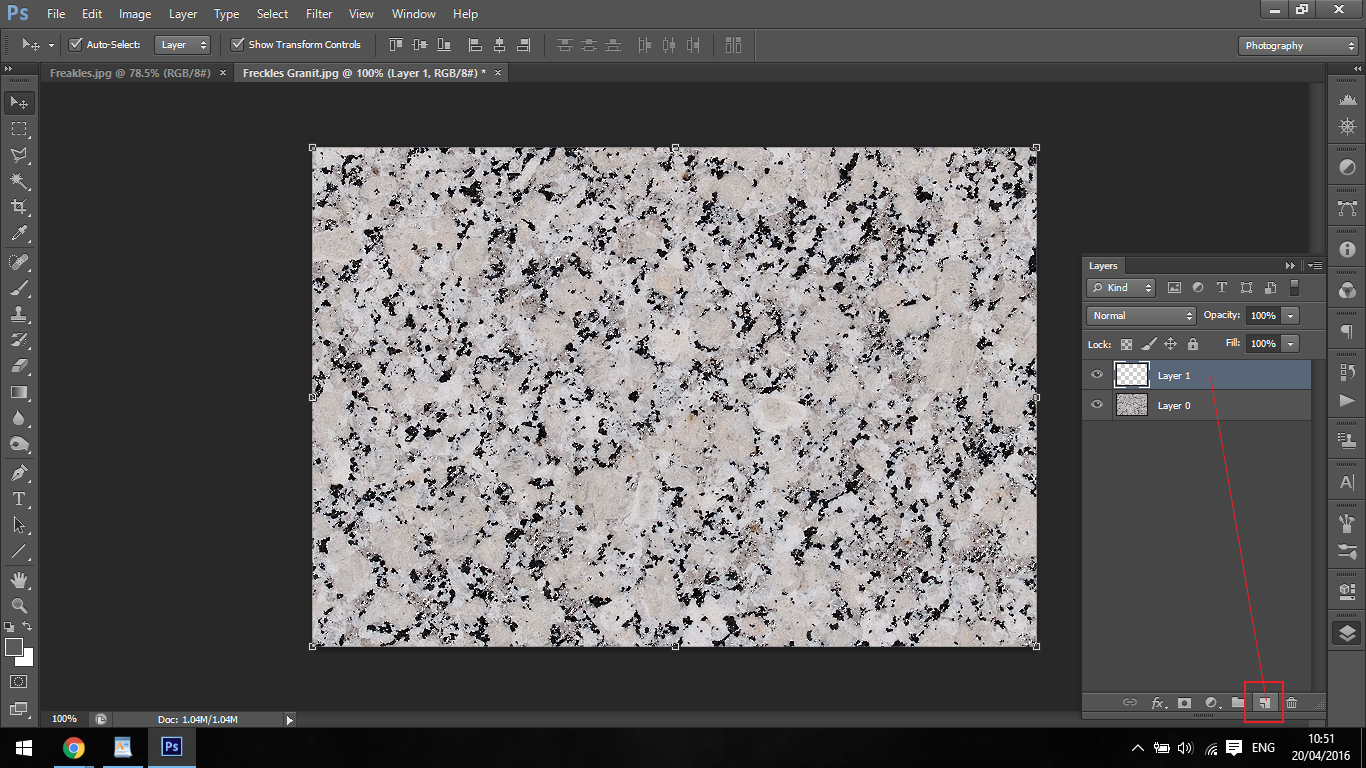
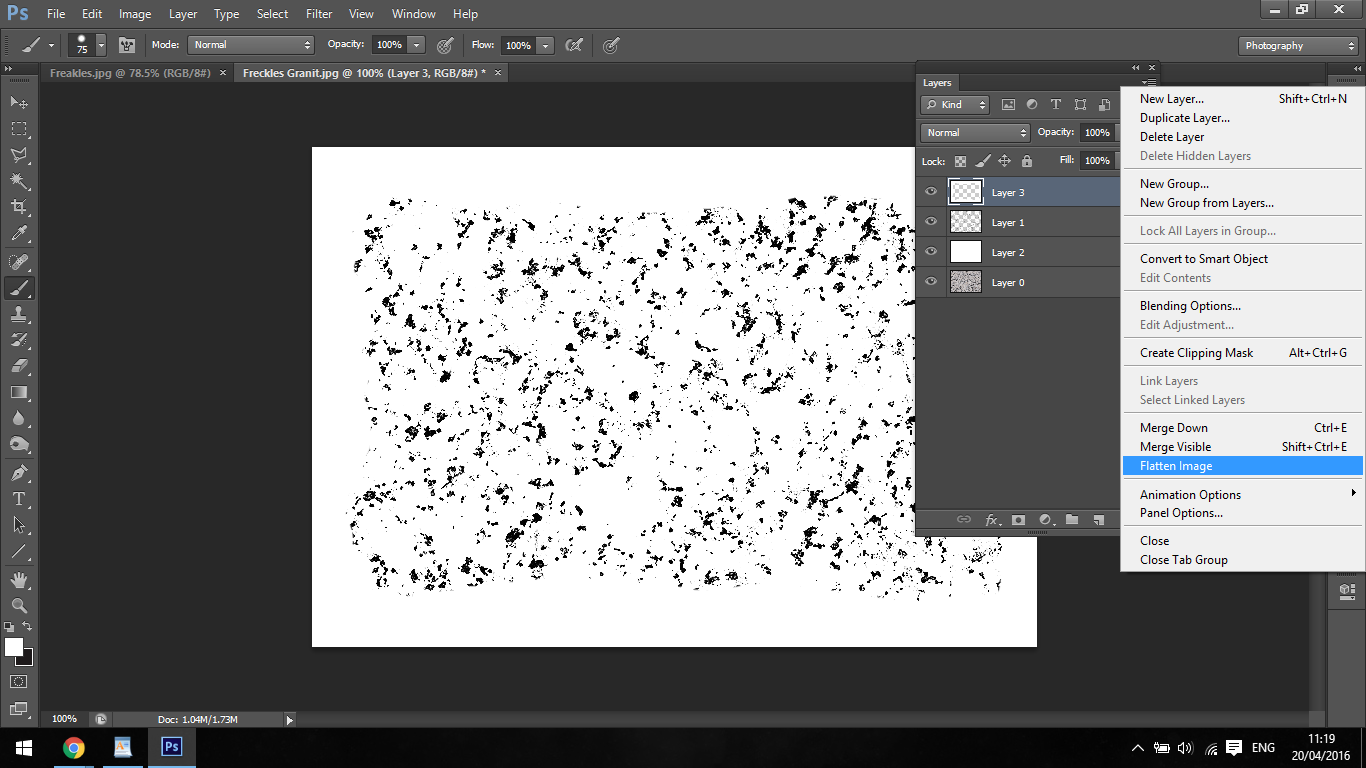
In the image below you will see the icon that has been highlighted, click on that to create a new layer then click Shift + Delete and your selection will fill with black.
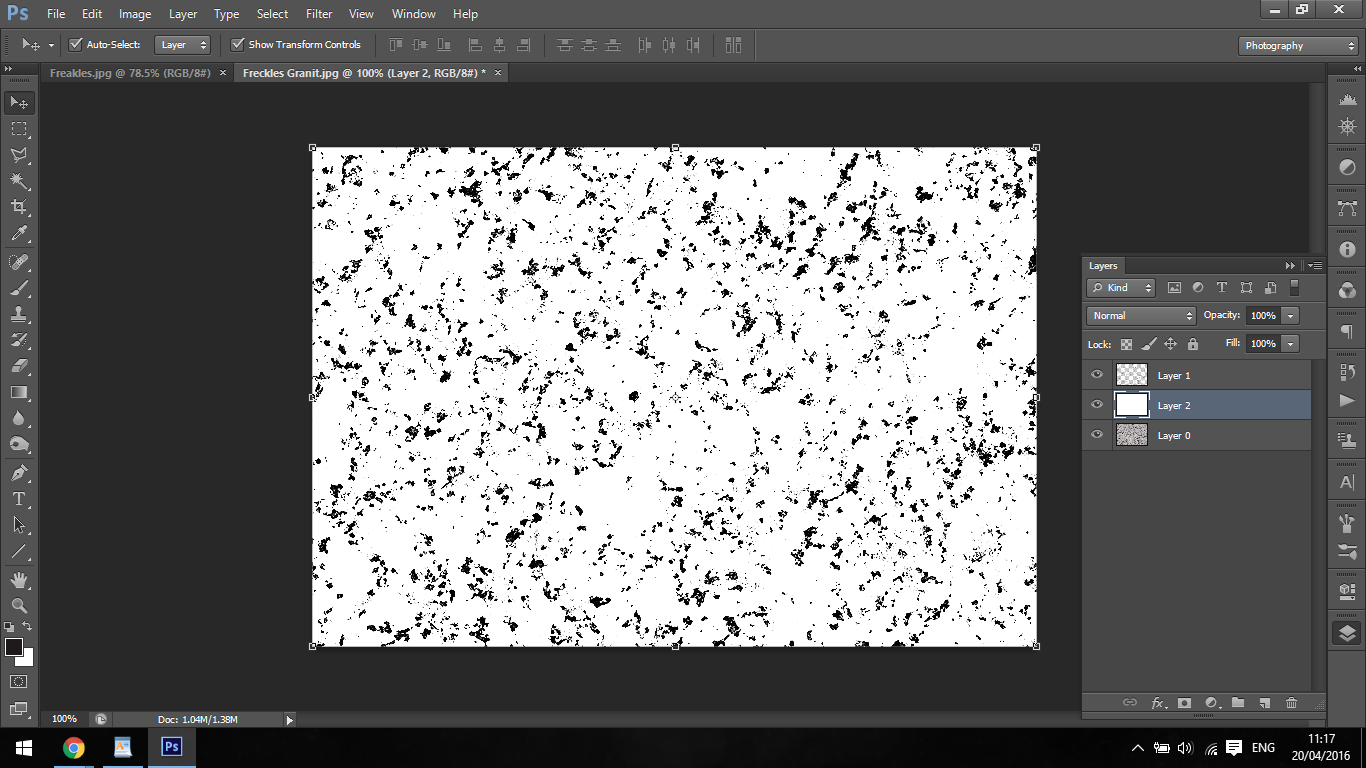
Now Deselect (Select – Deselect) create another new layer below the layer with black on it using the same process as before only this time fill that layer with white.
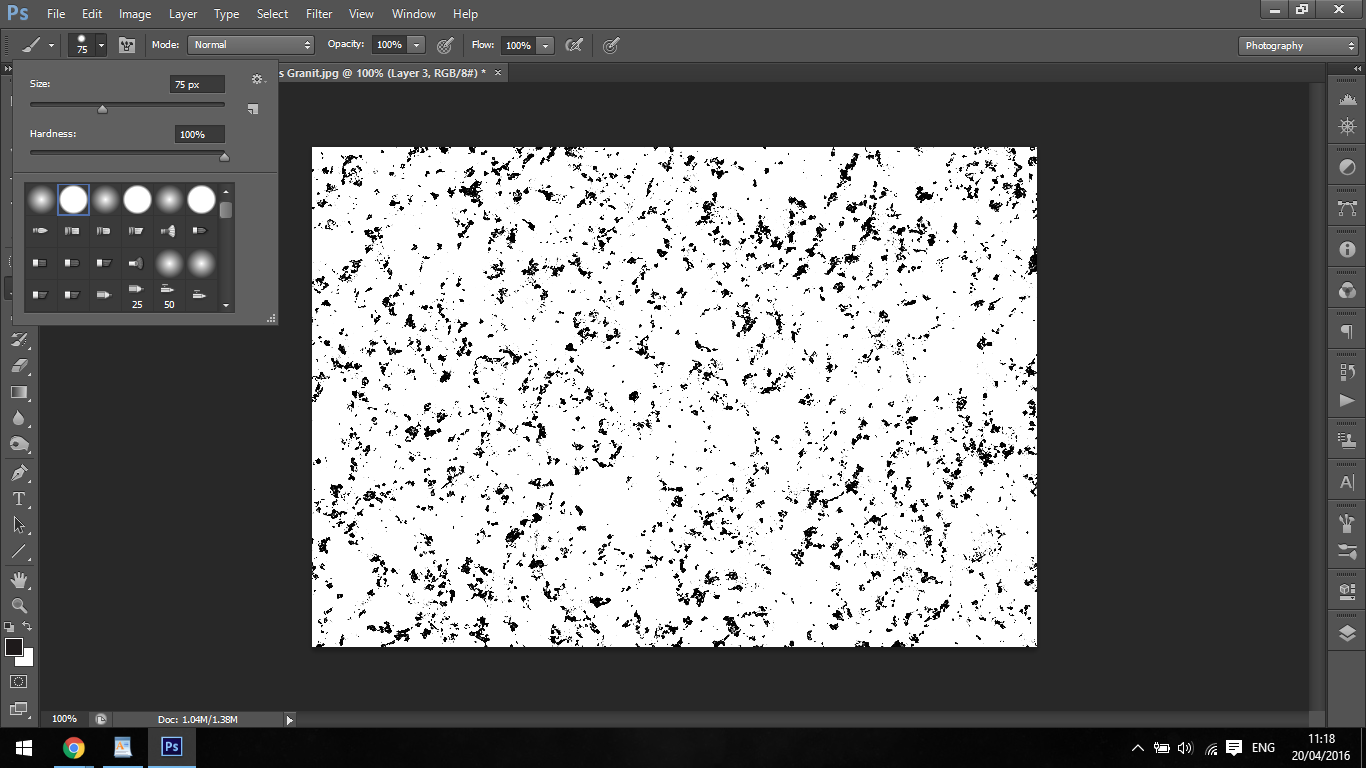
Create another new layer only have it at the top of the stacking this time, take a hard edge brush and paint around the edges using white so you don’t have the squared cut off point so it looks natural.
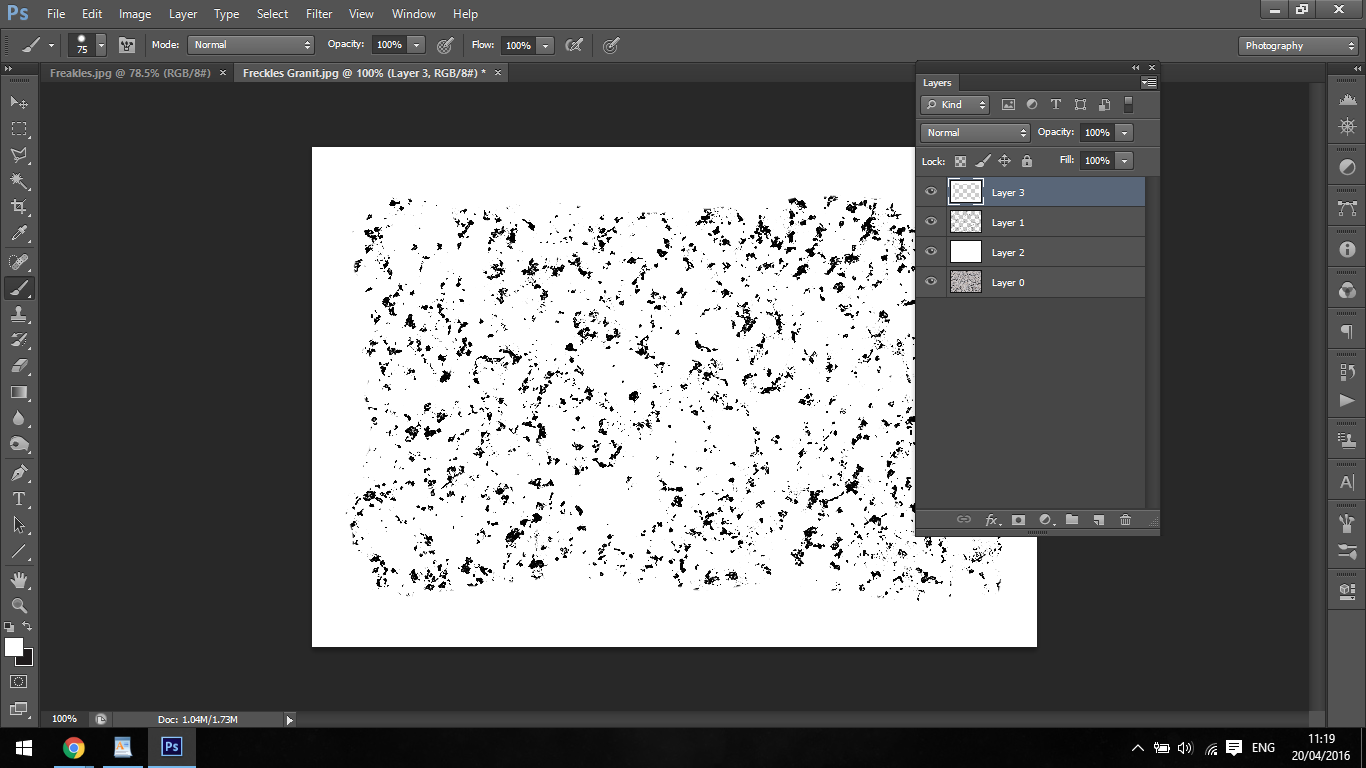
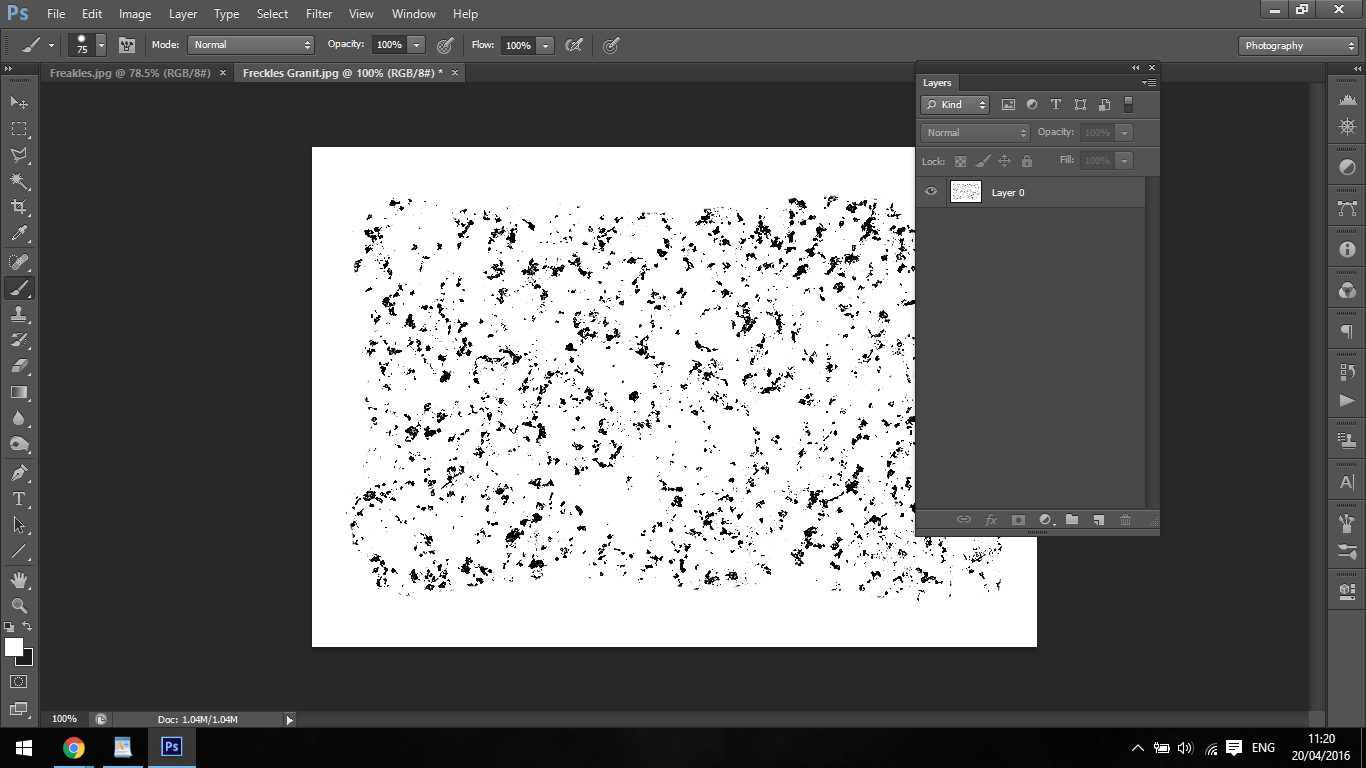
Now Flatten the layers.
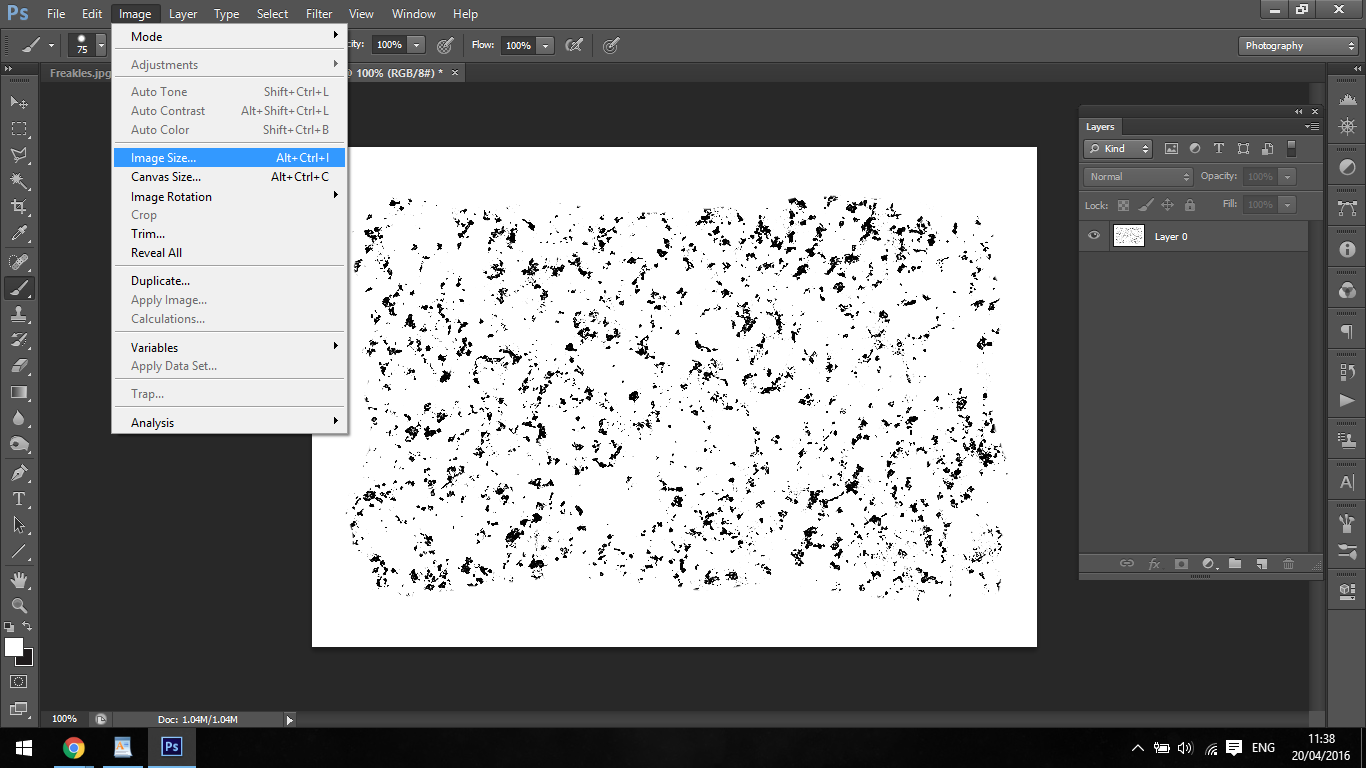
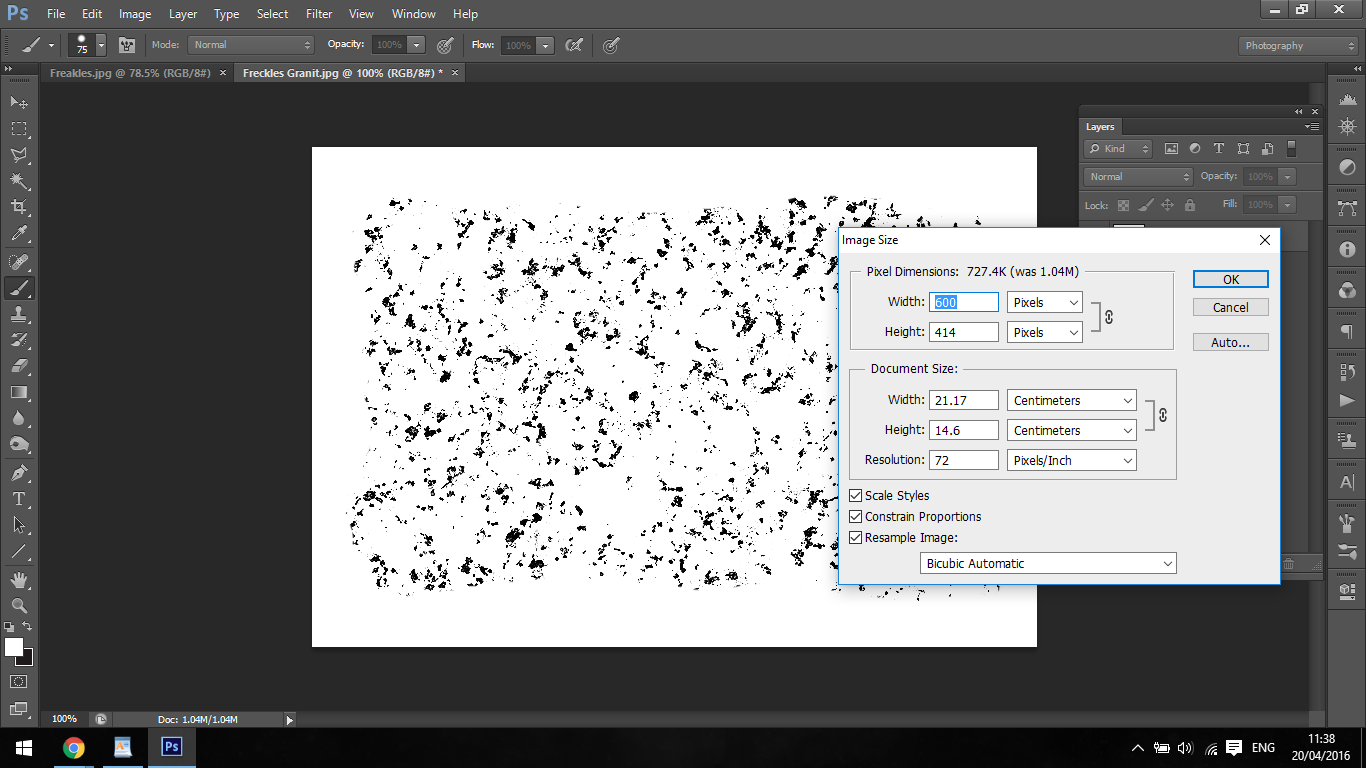
Next up we have to scale the image down, so go to Image – Image Size and type in 600 where I have shown you, everything else will update accordingly.
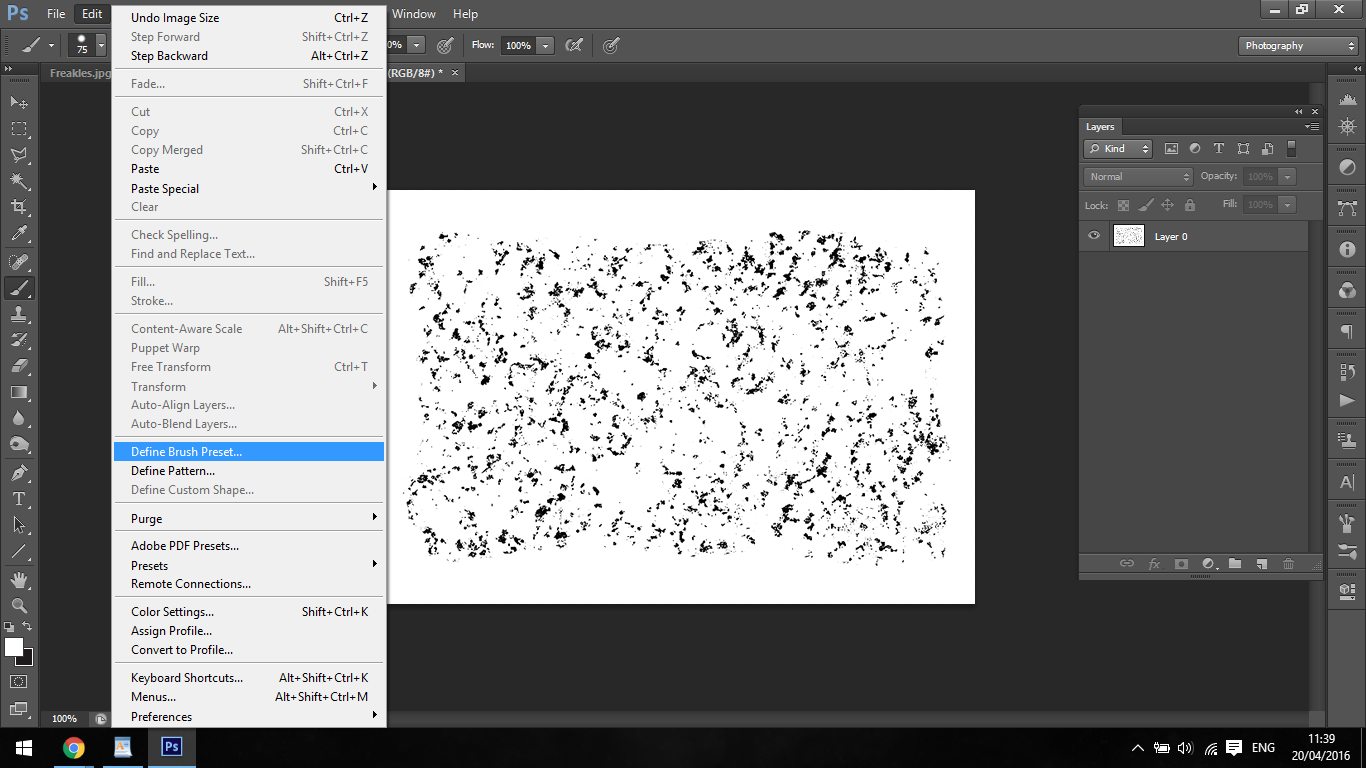
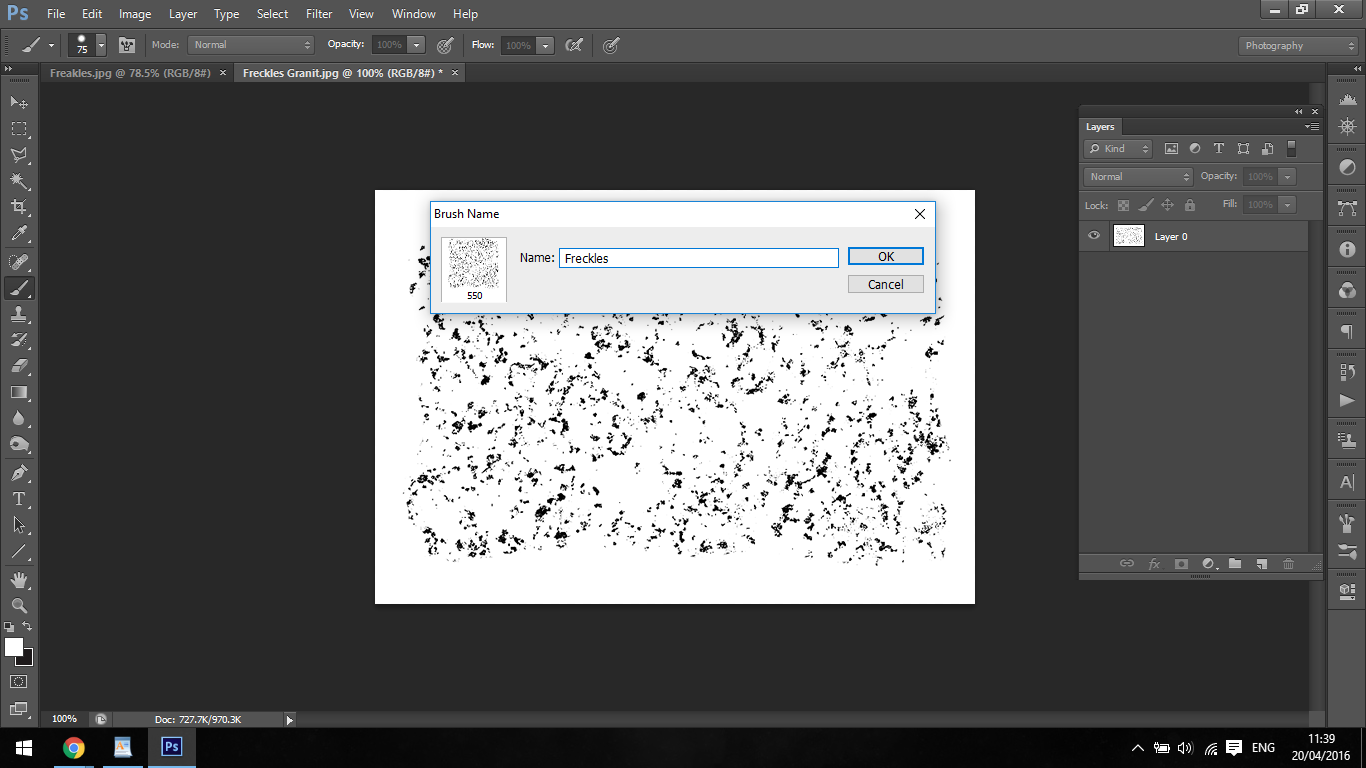
Now go to Edit – Define Brush Preset and name it Freckles and click ok.
Your brush should be ready to rock, if not just double click on your brush tool, and you should fine it at the bottom of the list.
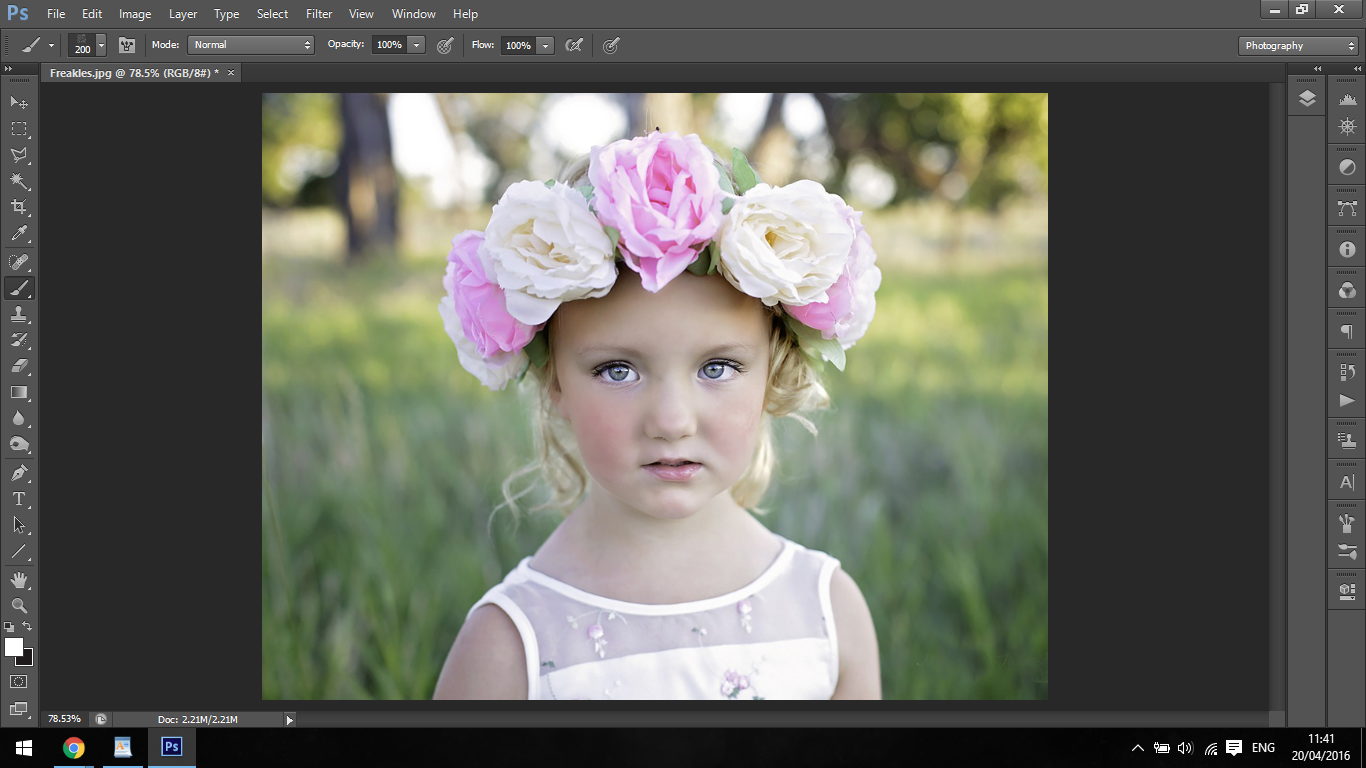
Click that and open up the picture you want to add the freckles too.
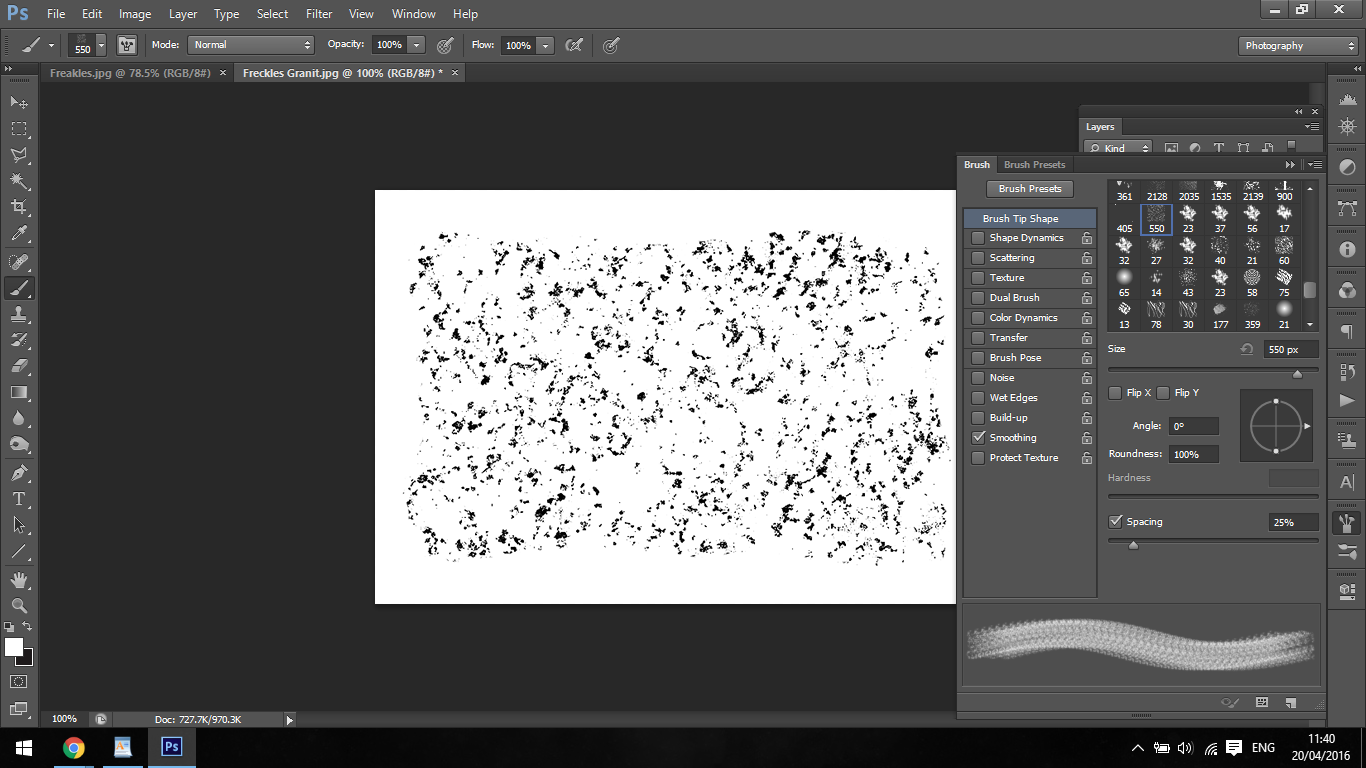
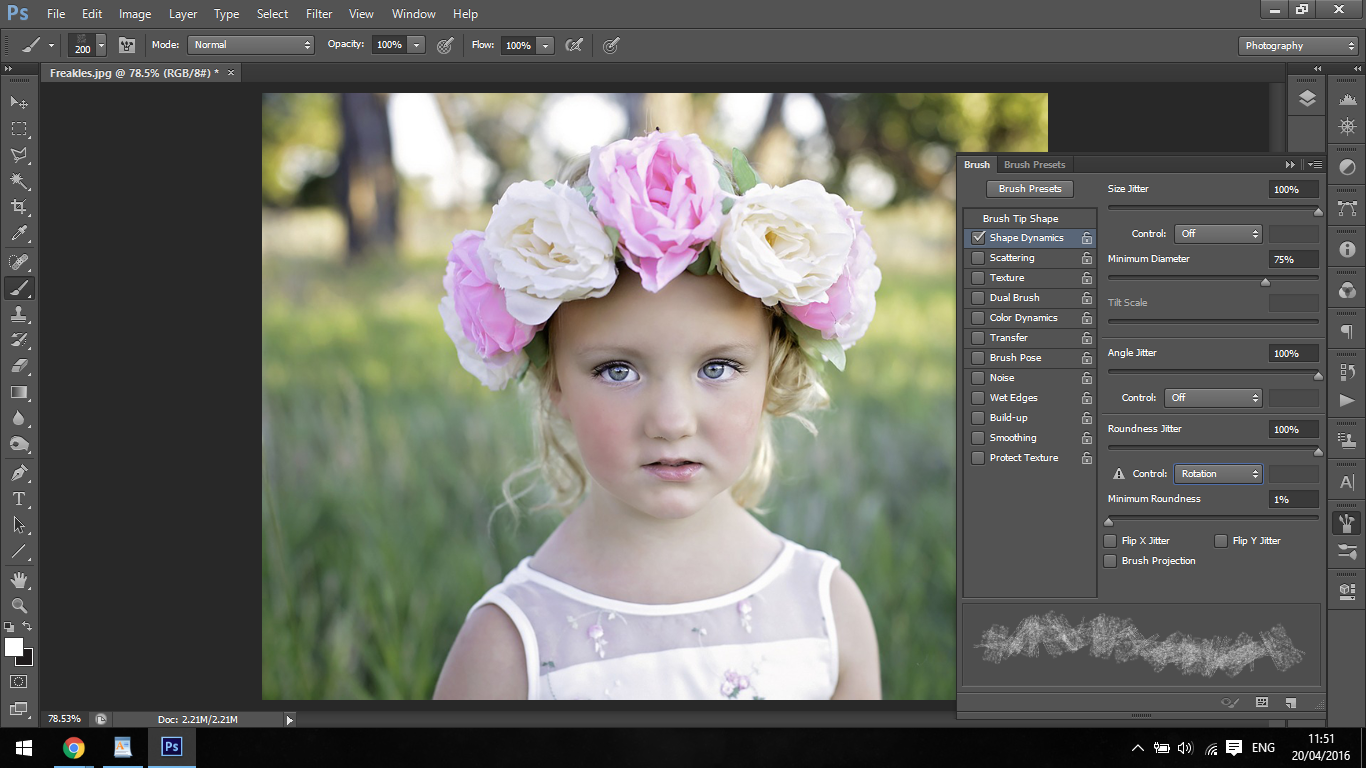
The next step is we have to change a few settings on our brush menu so when you use the brush tool it will look all the more real.
First up, Shape dynamics
Turn up Size Jitter to full, that way it will vary the size, next size diameter, turn it up to about 75.
Now push your Angle Jitter up full, this will rotate your brush so it will not be the same and it will randomize which is awesome for randomness.
I will also slide my spacing up to throw a bit more randomness into the mix.
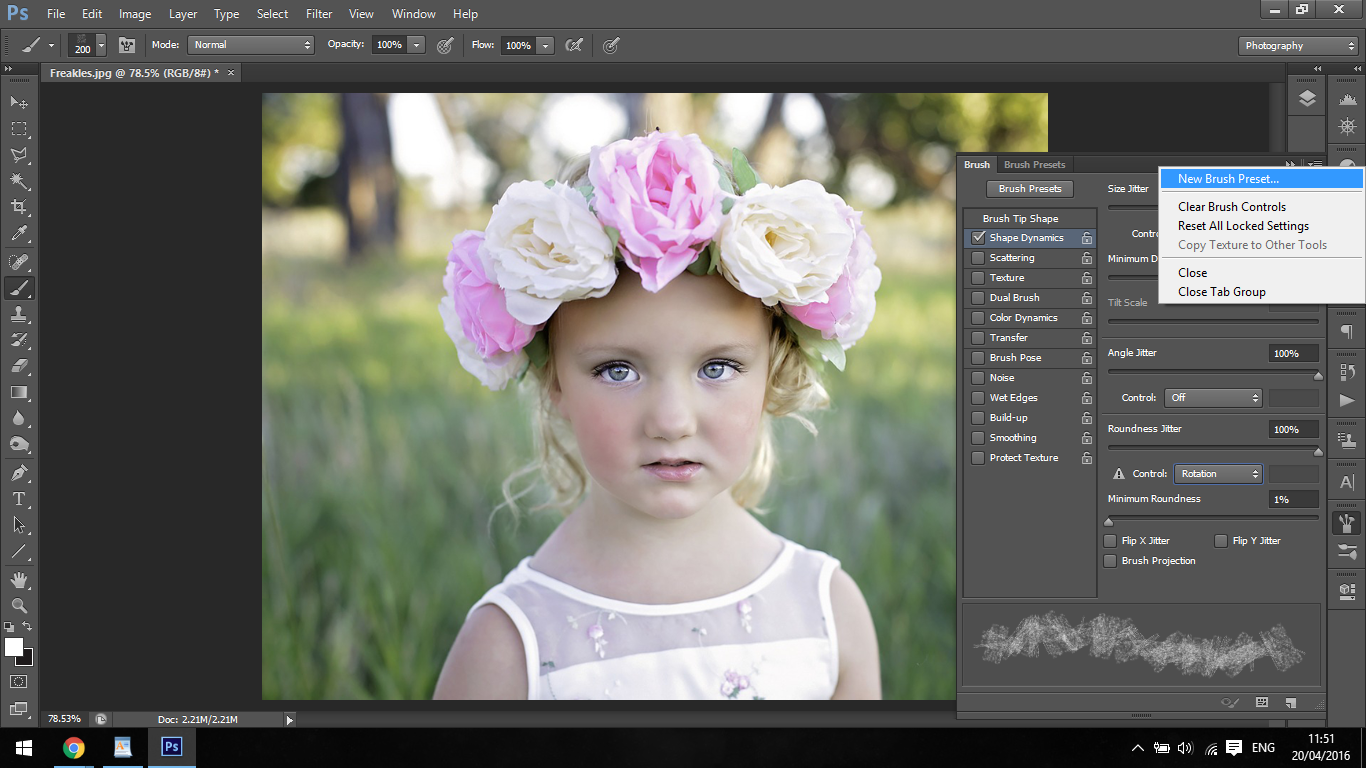
In the brush menu click on the drop down at the top right hand corner and go to new brush preset, you can save the name as Freckles Randomized or something along those lines so you know what you’re looking for.
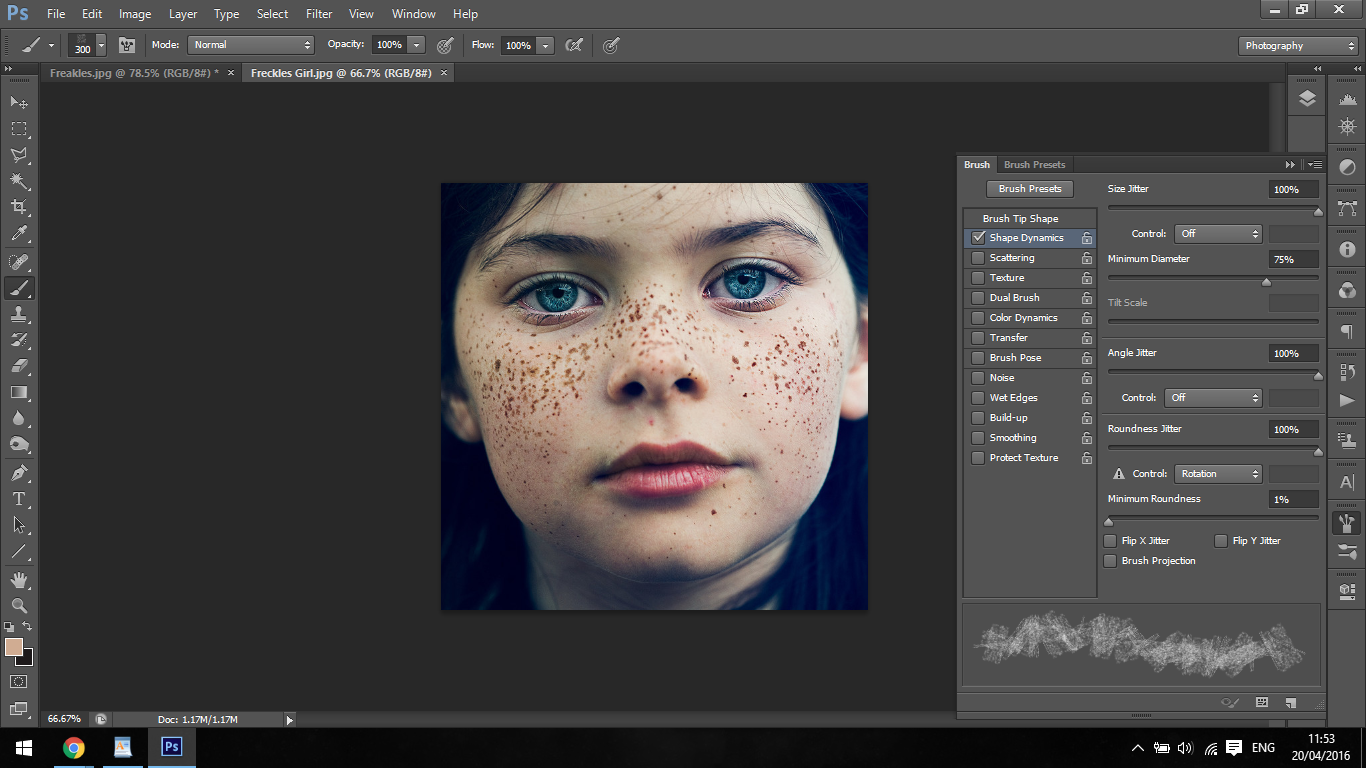
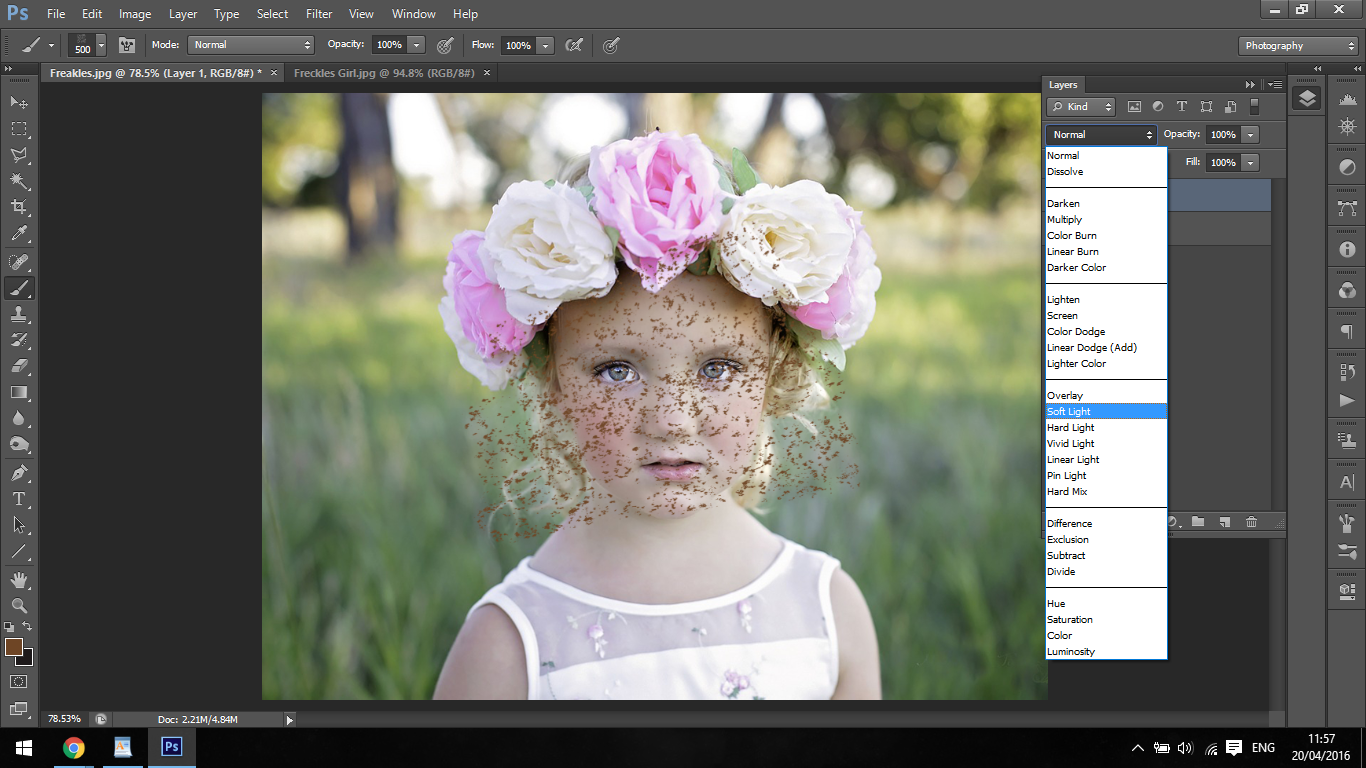
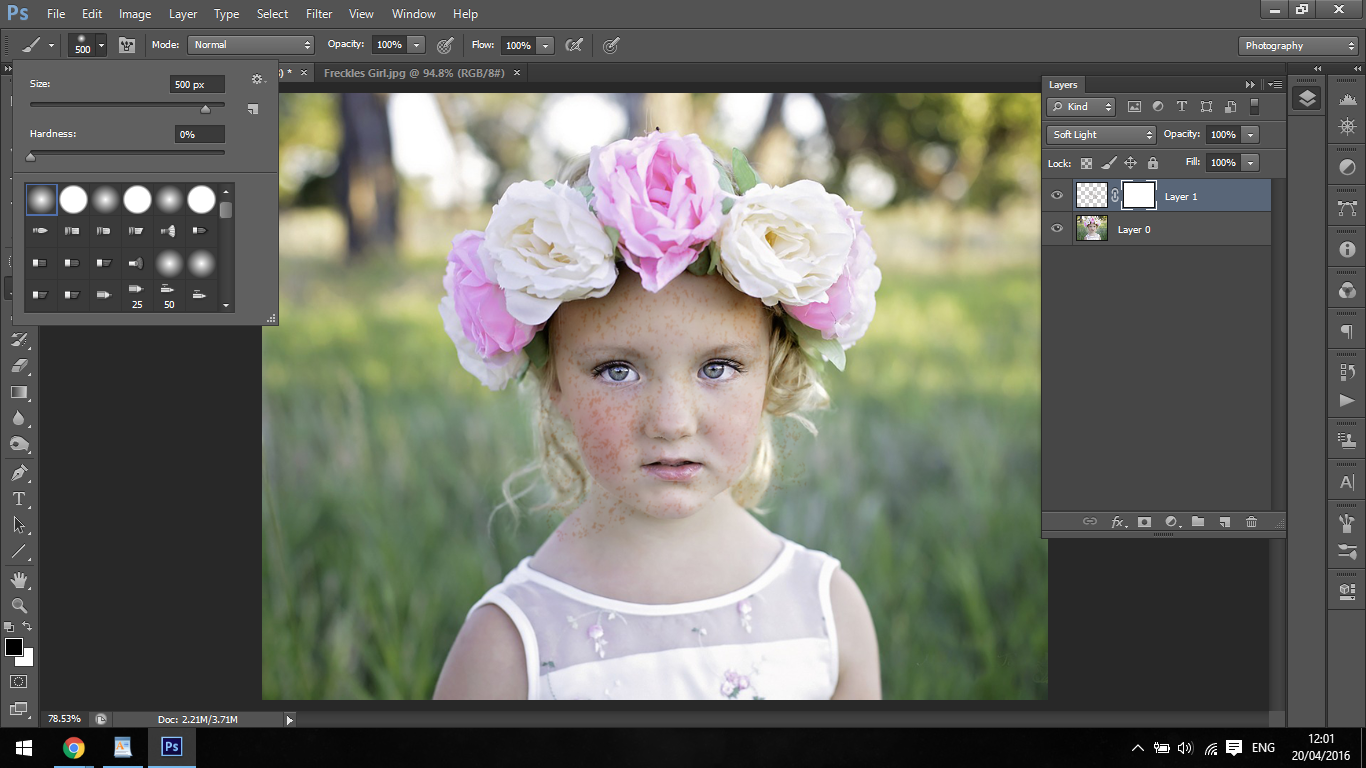
Now get a picture of someone with the same colour hair as our subject only with freckles. use the eye dropper by clicking on Alt to sample the colour, then you use that colour to paint over the subject by clicking them only on a new layer, change the size of the brush to vary it up a little using the bracket keys, once you have the face covered change the blend mode to Soft Light.
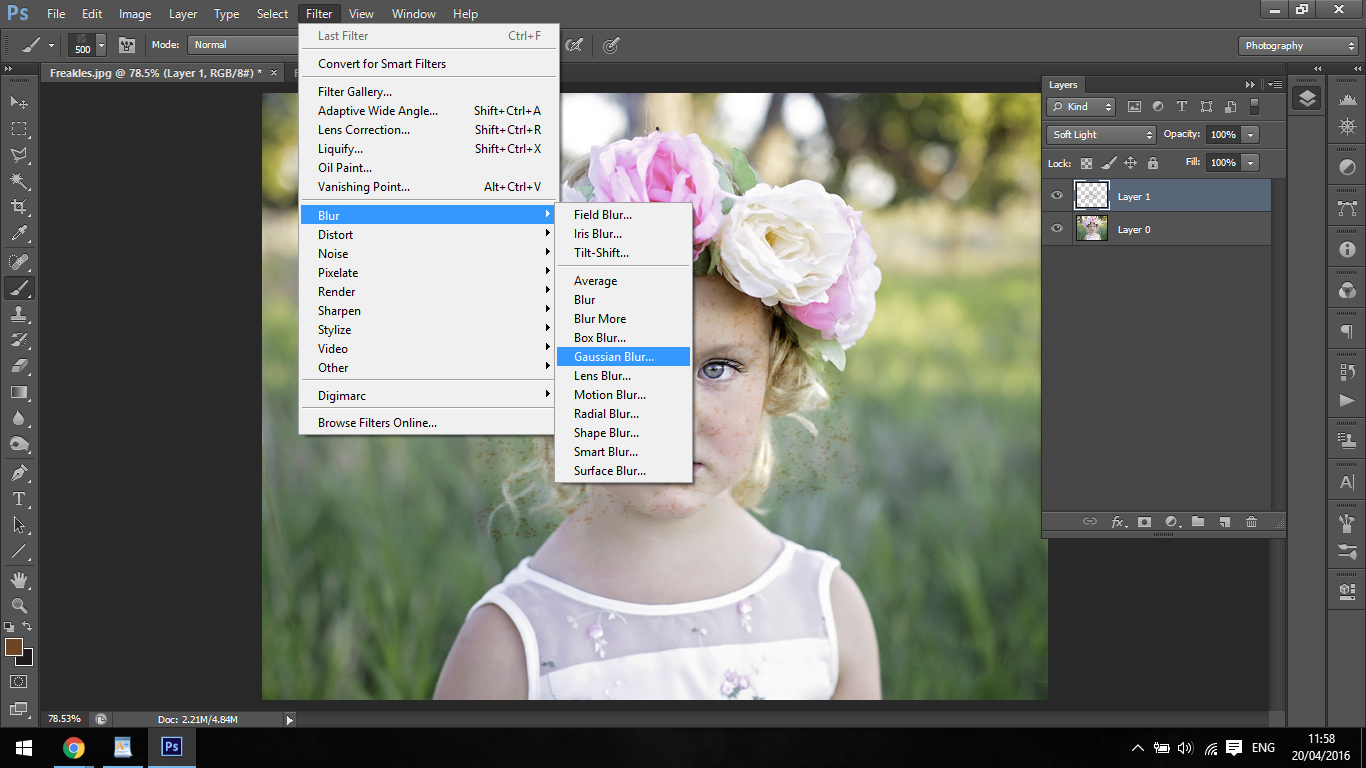
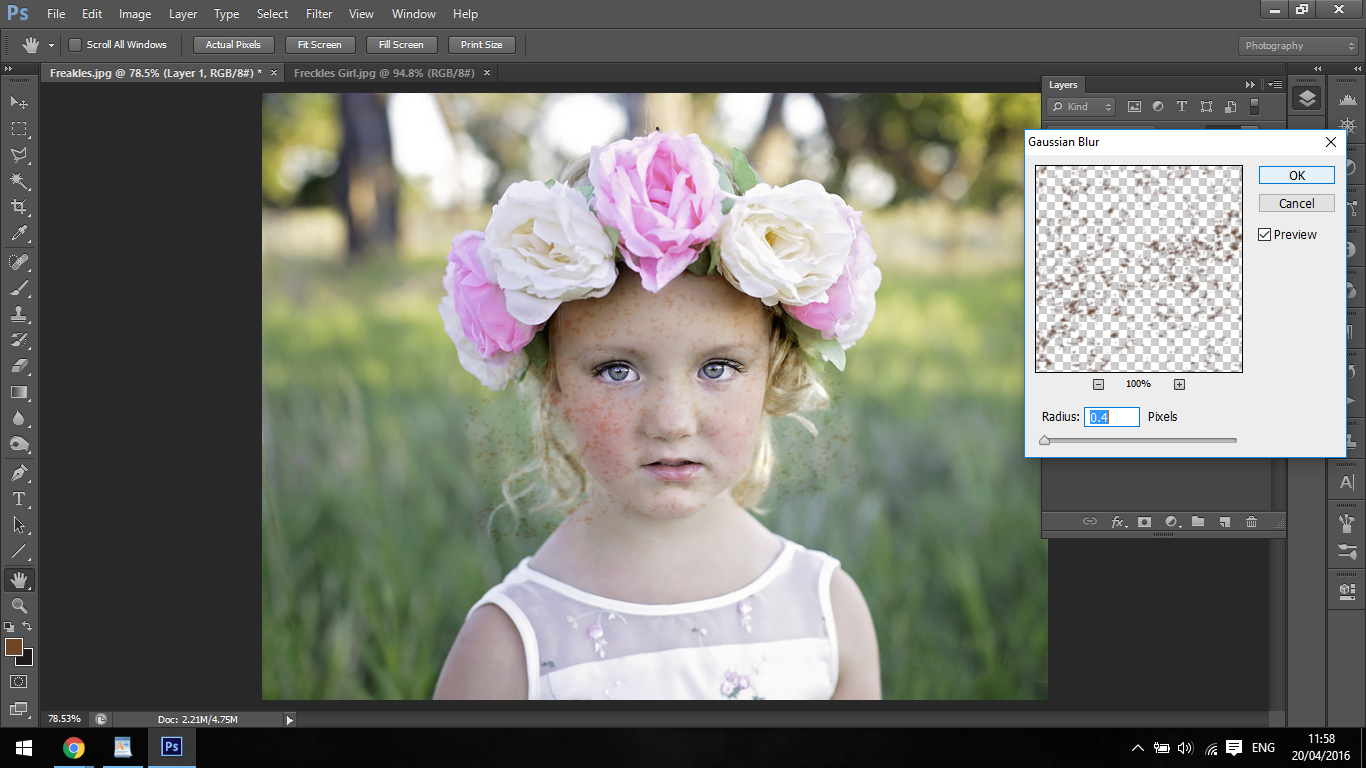
You will also want to give the freckles a little blur, you can do this in Filter, Blur Gaussian Blur.
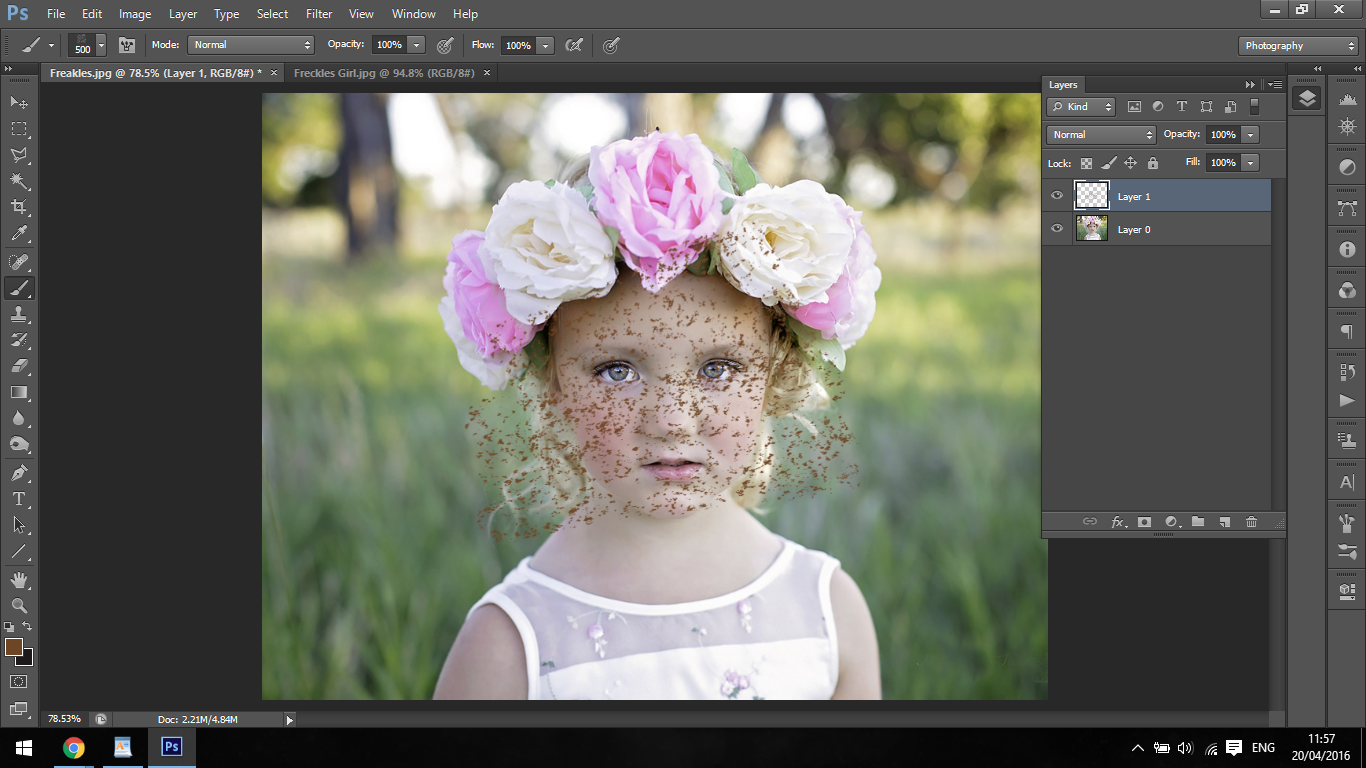
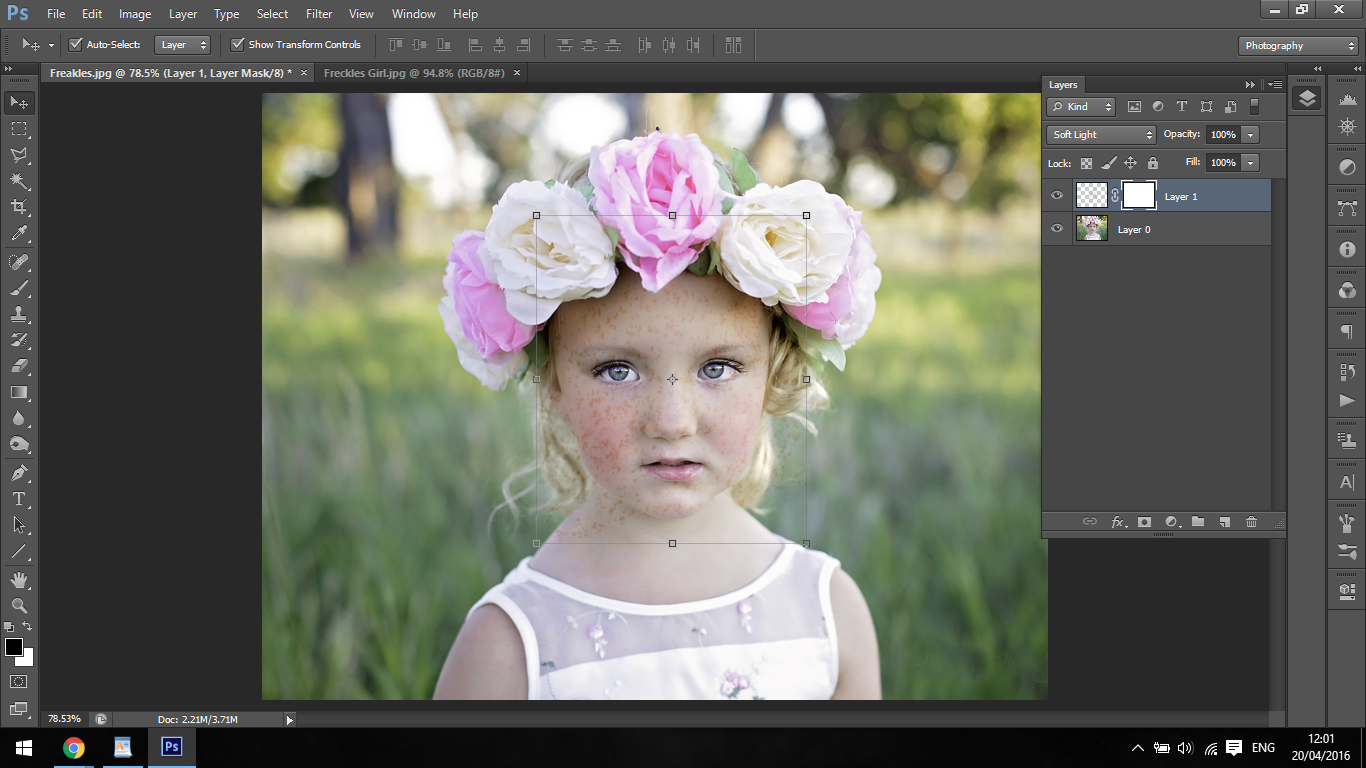
Next you will have to create a layer mask, click on the icon shown below to create this, and remember that Black erase and white makes it re-appear.
I would say use the image of the person with freckles as reference as to where you should mask out and where you should leave the freckles on, you do this and your image will come across as very very natural.
Do two or three layers and work with the masking brush using a soft brush, and build up the layers, use your artistic judgement on this and work at it till you feel happy with it.
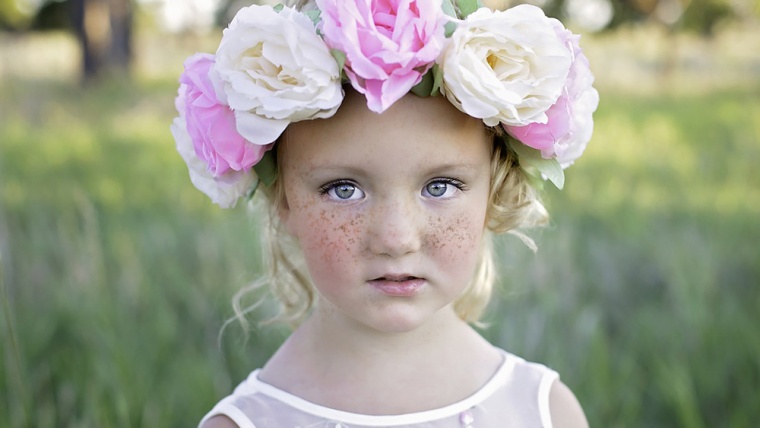
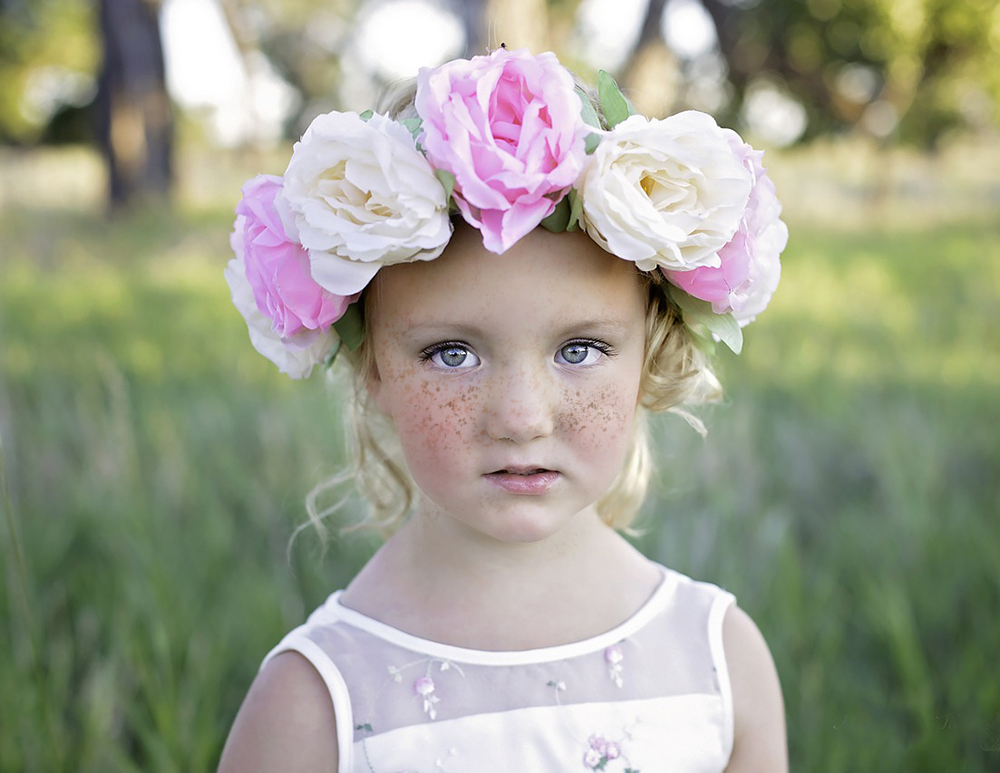
Remember to mask out the freckles from eyes and mouths etc, and at the end you should have something that looks similar to mine 🙂
Graduated from college in 2002 with a degree in Art & Design, I started exploring my way in Graphic Design and Professional Post Production. Full-time freelancer since 2011.


 Facebook
 Google +
Comments (0)
There are no comments yet.