
Good day or night or even morning and welcome one and all to an awesome new Free Photoshop Tutorial for you all.
What I’ll be showing you in this tutorial is how to create a Bokeh effect in Photoshop, just as the title suggests…
So what is a Bokeh Effect?? well if you don’t already know a Bokeh Effect is according to Wikipedia “is the aesthetic quality of the blur produced in the out-of-focus parts of an image produced by a lens. Bokeh has been defined as “the way the lens renders out-of-focus points of light”.”
Ok… so to define it more simply a Bokeh Effect is basically blurred round specks, so say if you took some Photos of Glitter being blown your way you would see some of that glitter completely blurred and transparent.
So Bokeh is transparent blurred circles to put it in it’s absolute simplest term.
But hey! it looks great when added to the correct type of Images such as Portraits with dramatic lighting.
So check it out this is how you create it.
Ok, the first thing I’m going to tell you is that you can get Bokeh stock that already exists online add it to your image and change the Blend Mode to Screen which will remove the already existing Black background that the stock image will come on.
Then you will be able to play with opacity and change the color using a Hue and Saturation Adjustment layer if you so wish.
Ok so to go through it first I can open up my Bokeh stock and then copy and paste my Bokeh Stock onto my main image.
If you know how to Place an image then you can do that too, you can find ‘Place’ on File – Place…
You just find your image and go through the motions there.
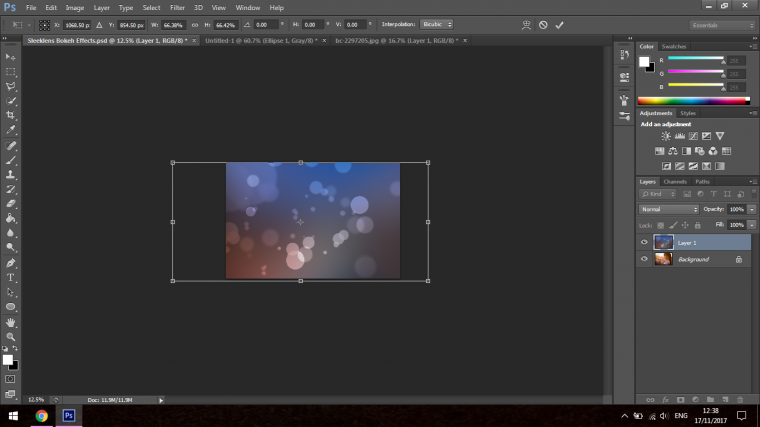
Once I have my Bokeh stock onto my image I may want to adjust the size by clicking and dragging the edges out, you can hold shift while you do this to keep the same dimensions as the Bokeh stock is enlarged or decreased in size.
Then click Ok when you’re happy.
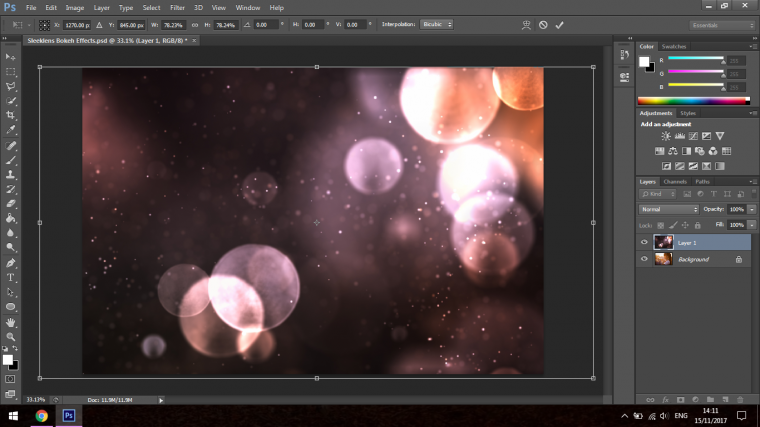
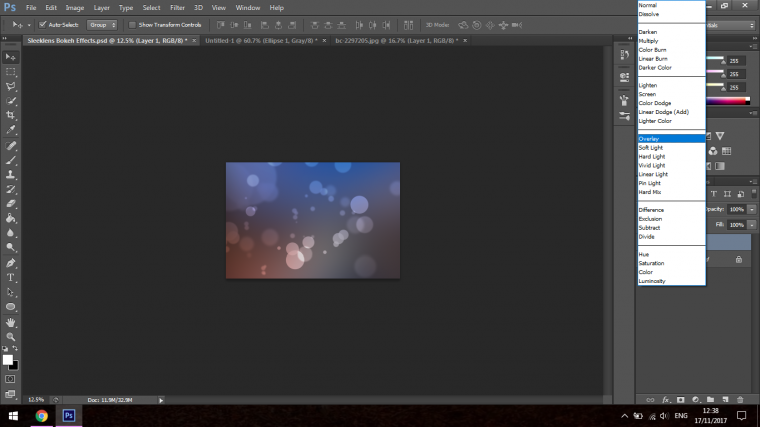
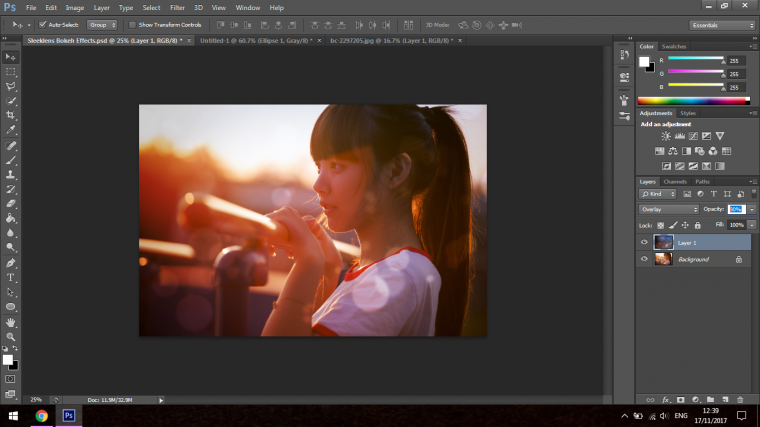
Next we’ll change the Blend Mode, so you find the Blend Mode on the right-hand side, take a look at our image above (by the way I’m making you look on purpose as this will help you remember it better because you had to do a little work to find it) so look at the layers panel, that’s at the bottom right-hand half of your screen.
You will see the words Opacity and Normal and various other things.
Blend mode is the drop down box to the left of Opacity.
It should say ‘Normal’
Click on that until you see Screen.
Select that just by clicking on it.
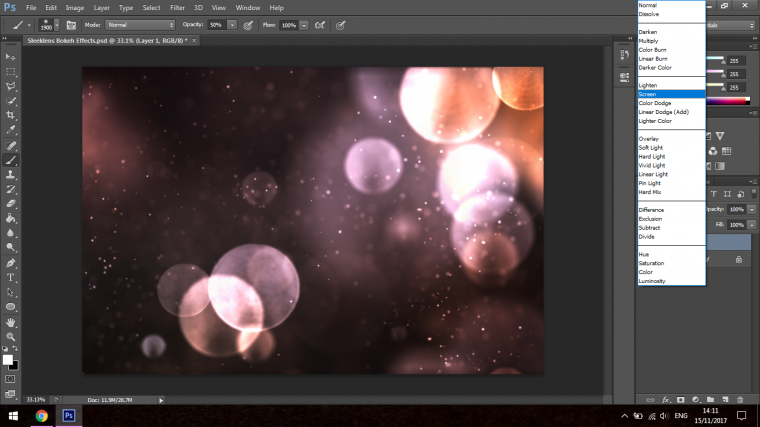
You will now notice that the black background is gone and the Bokeh is transparent.
Mine wasn’t placed particularly good so I when to Edit – Transform – Flip Horizontal to change the sides it was on.
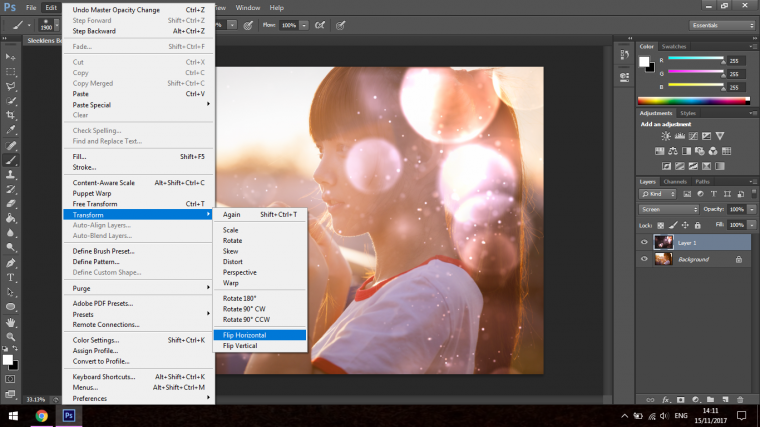
Then I created an Adjustment Layer, for this I’ll use Hue and Saturation.
You can also use the likes of Colour Balance if you wish but we’ll just stick with the simple Hue/Saturation for this one.
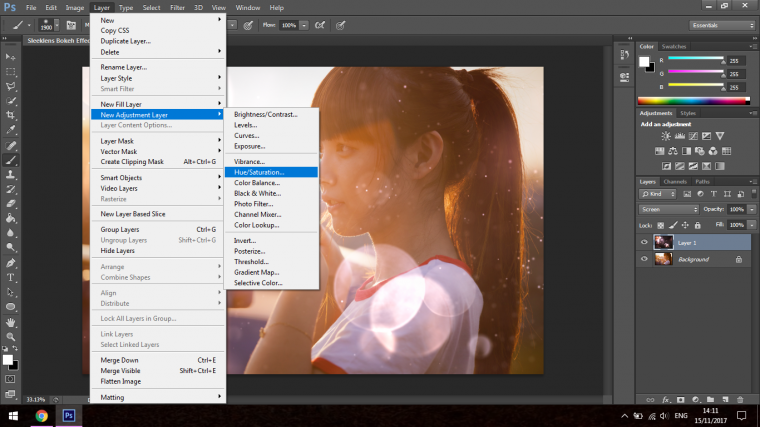
The panel will now appear, now first go overt o you layers panel and right click on the new adjustment layer, you will see some options appear, look for ‘Create Clipping Mask’
When you click this it will mean that only the layer below will be affected.
You will now see the three bars.
The top one is the one we want to change when you slide this either right or left you will see the colors all change on the Bokeh Layer.
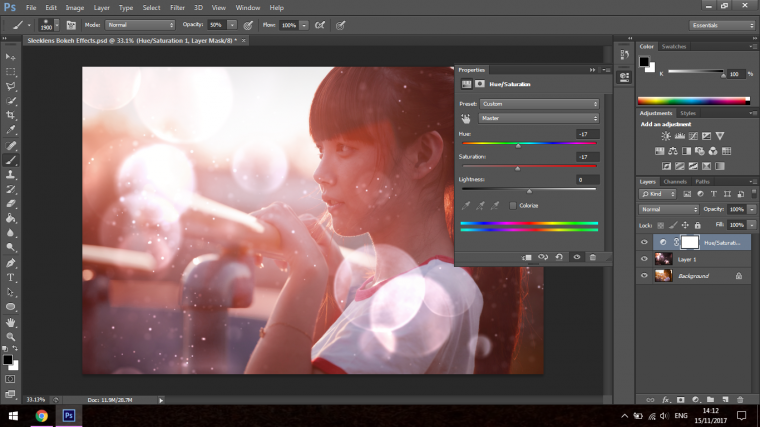
Now you can start to play around with the Opacity of the Layers and see what we like.
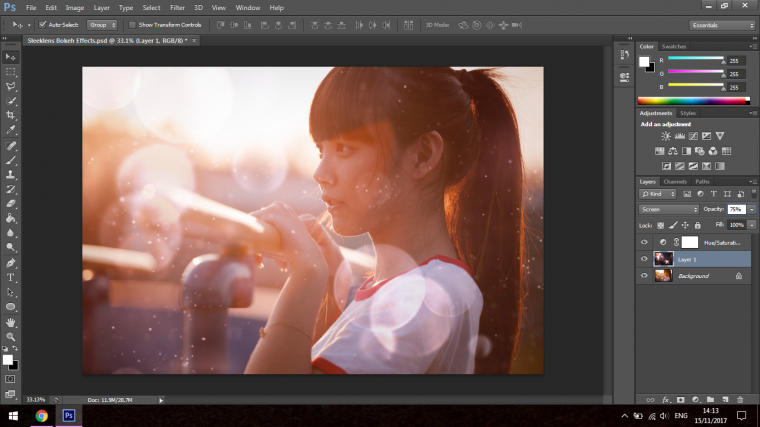
So this is just the very basic way you can achieve a Bokeh effect without having to create your own Brushes and things like that, but wouldn’t you rather know how to do it on your own without relying on Photography Knowledge and Stock images that could cost you money?
But that’s the easy way and were more up for a bigger challenge than using just stock images, let’s figure out how to create this for ourselves so we’ll have a totally unique effect.
The first thing I’m going to do is to create a brand new document.
So go to File – New
Change the Width and Height to 1000
Change the Resolution to 300
Change the Colour Mode to Grayscale and 8 Bit
Then click ok and you’re good!
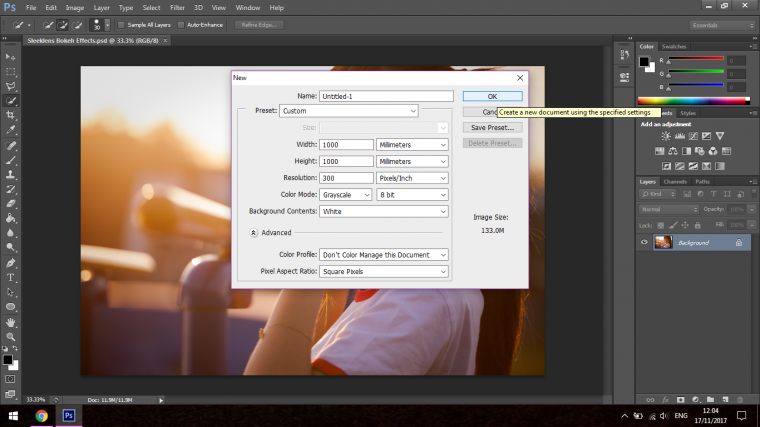
Now we’ll activate the Ellipse Tool
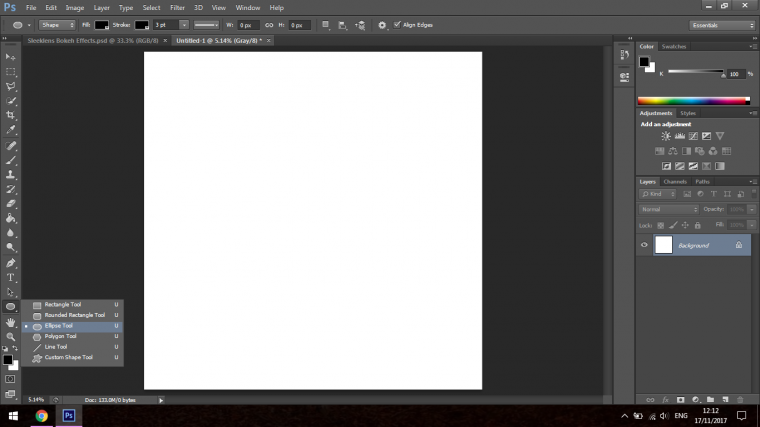
Now if you look at the top of the screen you will see that there’s a few options, it’s right under File and Edit etc
Change the Fill to Black, the Stroke to Black and change that to 30 pts, there is a drop-down box beside that with a line, click on that and make sure to choose the top one.
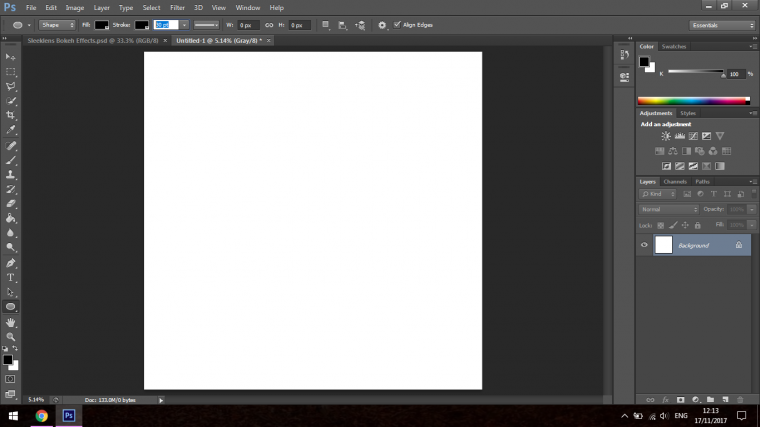
When you go to create the circle click as close to the top as you can but leave a little bit of space.
Then holding Shift on your keyboard click and drag out the circle and try to reach as close to the bottom point as you can just like the top.
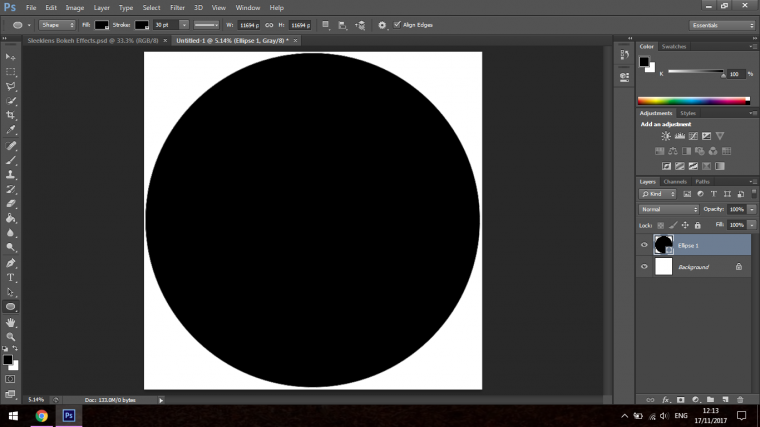
Then in the layers panel, you will see the thumbnail for it, that’s on the right bottom hand side, you will see Opacity and Fill, Fill is what we want to change, so do so and drop it to 70%
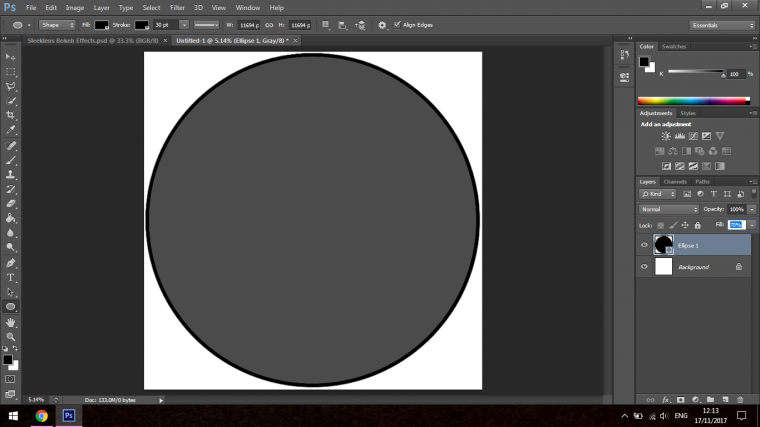
Now click the little eye icon on the bottom layer as we want to hide that.
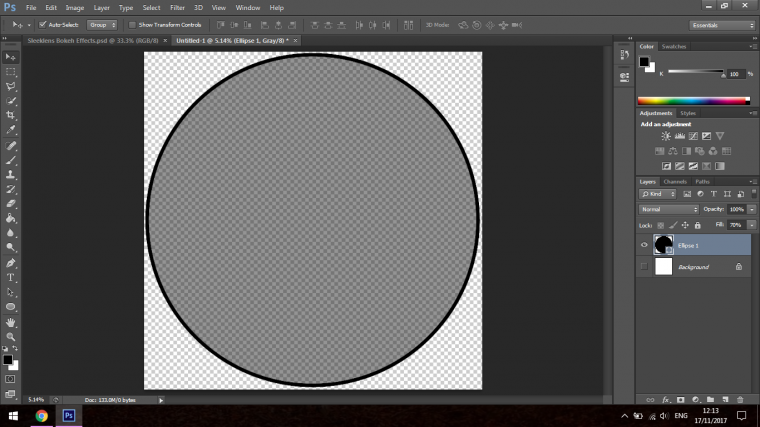
Go to Edit
Choose Define Brush Preset
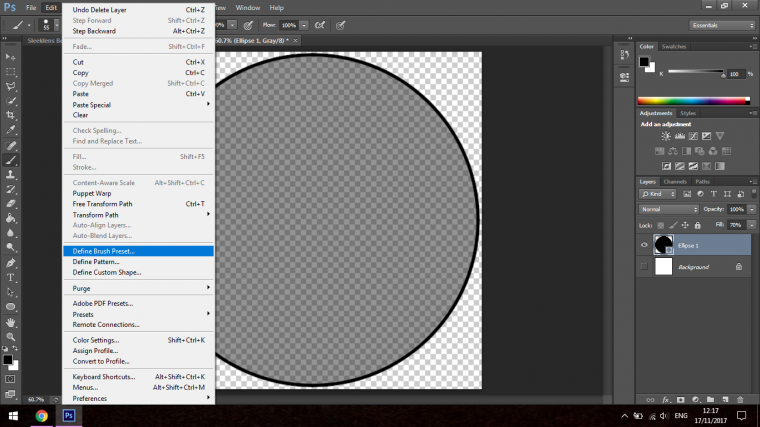
Give it a suitable name.
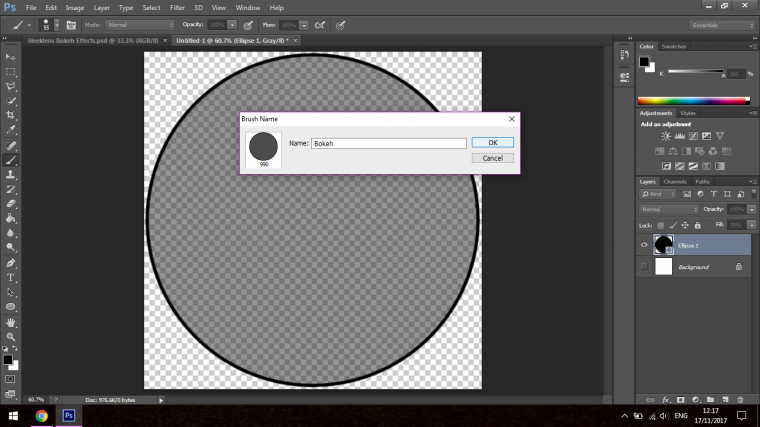
Press OK and cool we have our Brush.
Now let’s create a background for it.
I choose a random night scene, doesn’t matter what, the image was about 5000pxs in size and about 2000 high.
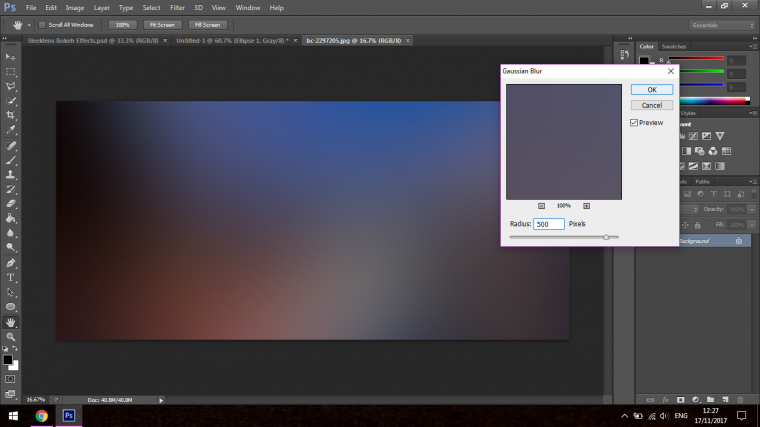
I then went to Filter – Blur – Gaussian Blur
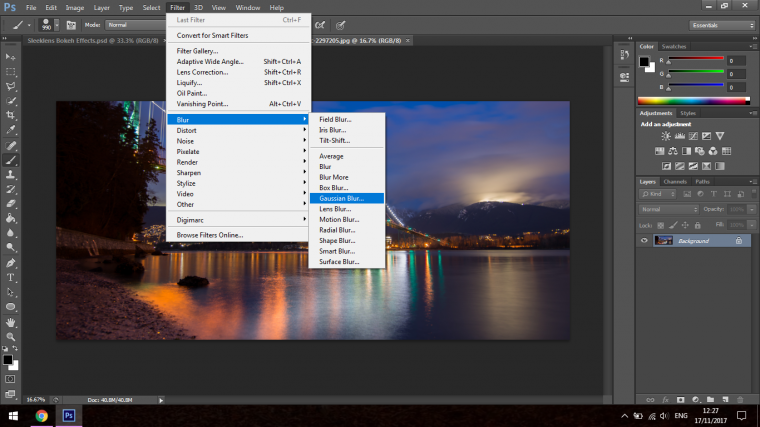
500 Pixels is the mark that I felt worked perfectly for what I wanted.
Open the Layer Tab and create a new layer, we’re going to be painting on this.
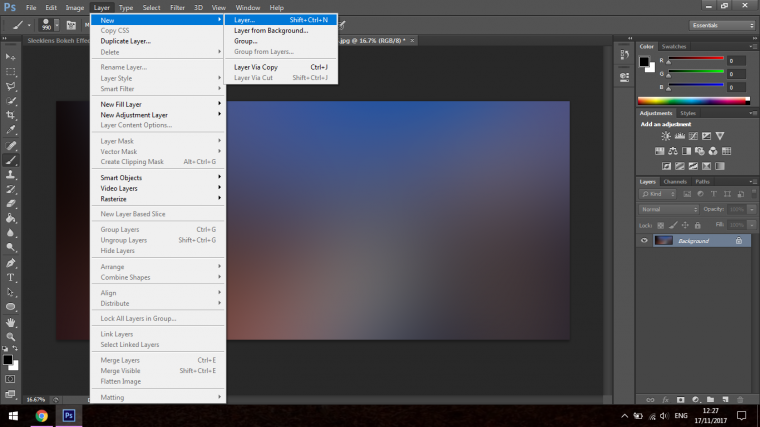
Right, click on the screen and at the very bottom, you’ll find your new brush.
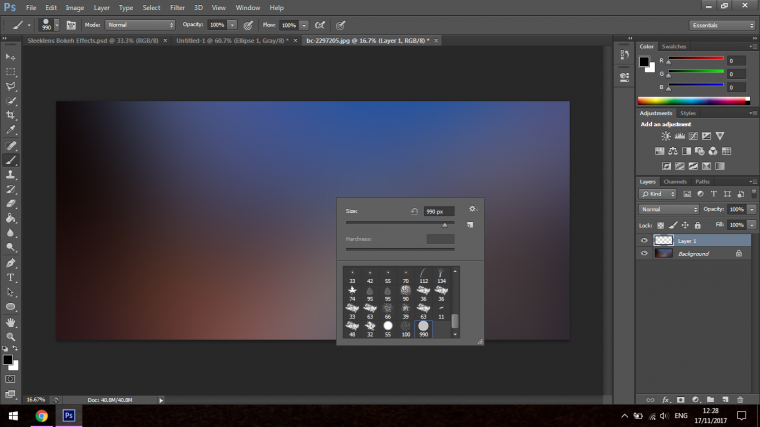
Now we’re going to change a few setting to our brush, you will see directly under Edit a little folder icon, click that.
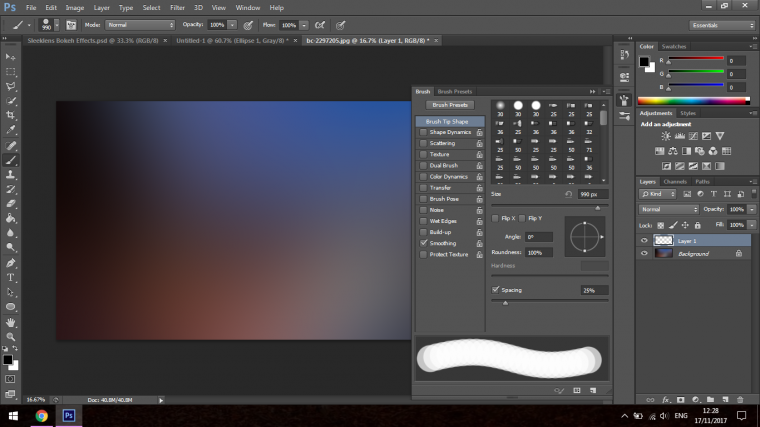
First, go to Shape Dynamics set you sliders to what I have in the image below.
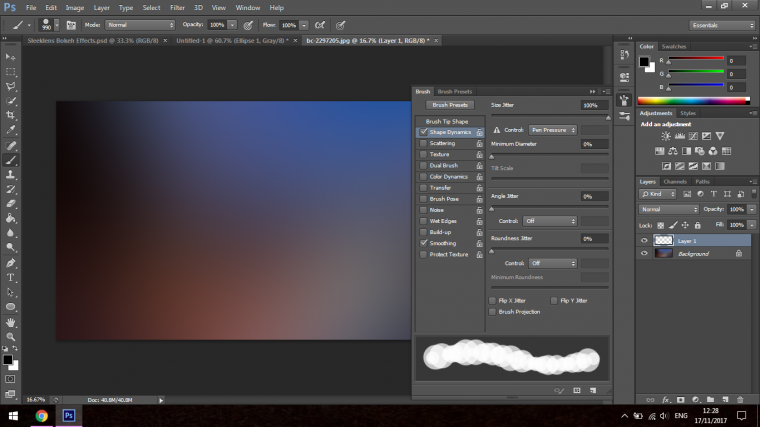
Now go to scattering, do the same, copy my settings.
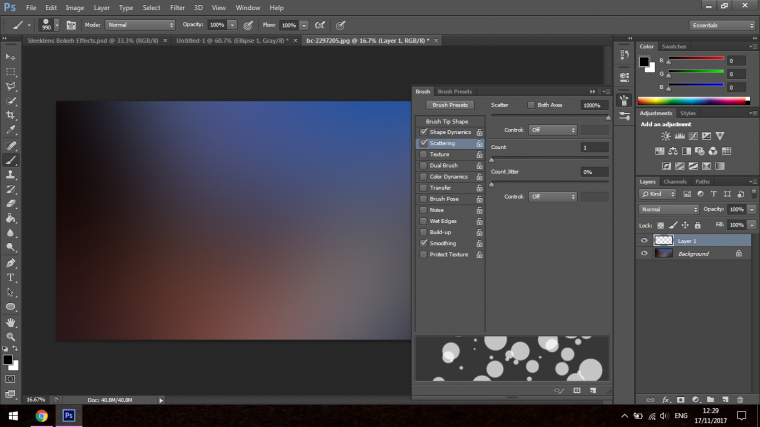
Now go back to Brush Tip Shape
At the bottom, you’ll see spacing, slide that to about 25%
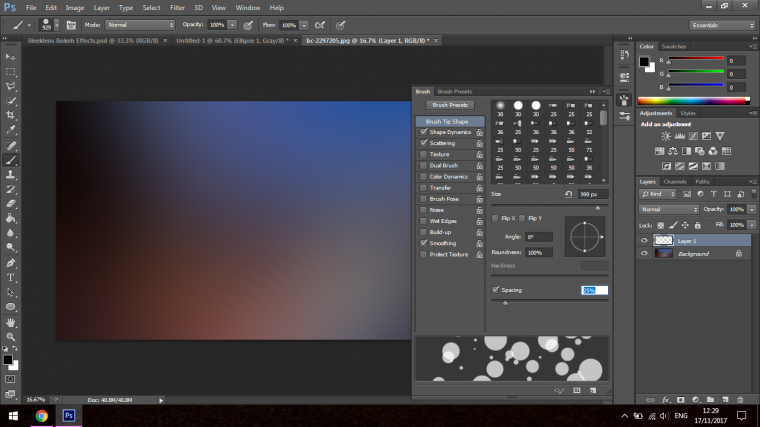
Oh and before I forget, go back to Shape Dynamics, click where it says Control, change to Fade and set it to 5
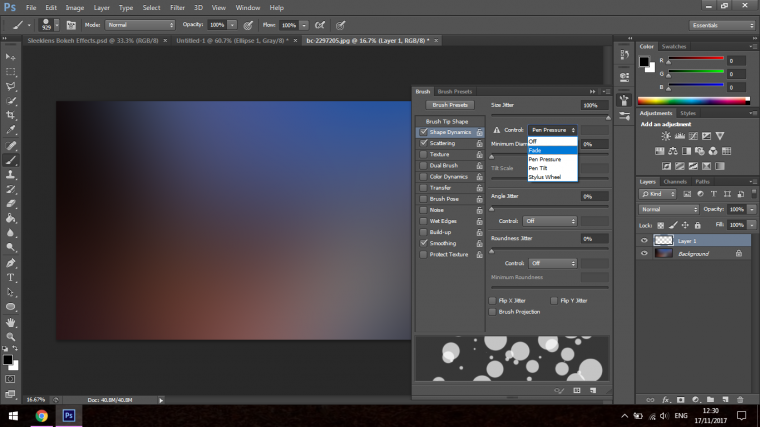
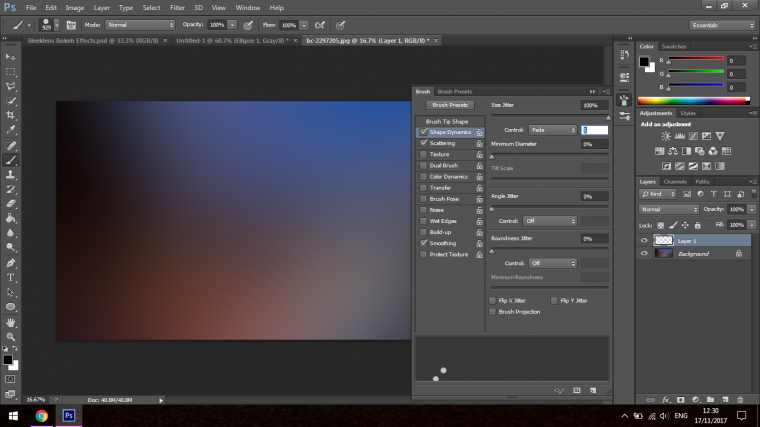
Cool, we’re good to go.
We need our Brush to be White so remember to change that.
We’ll be painting on one layer with a large size Brush, then a middle layer with a smaller Brush then one last layer again with smaller again, try to mimic what I have below.
Then change the bottom layer to about 30% Opacity, middle to about 60% and the top layer to about 80%
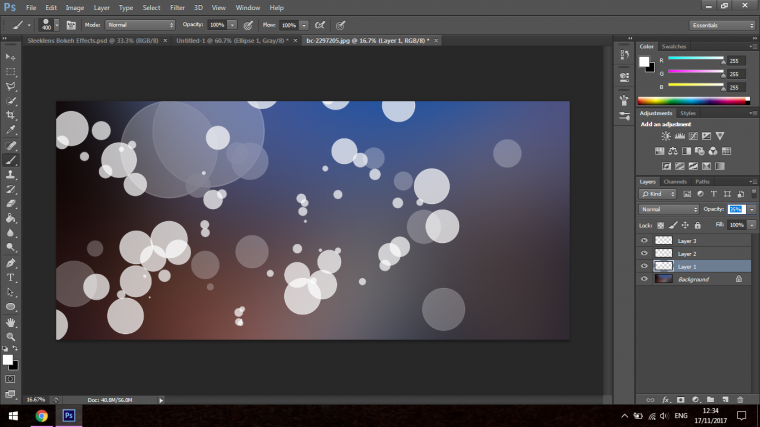
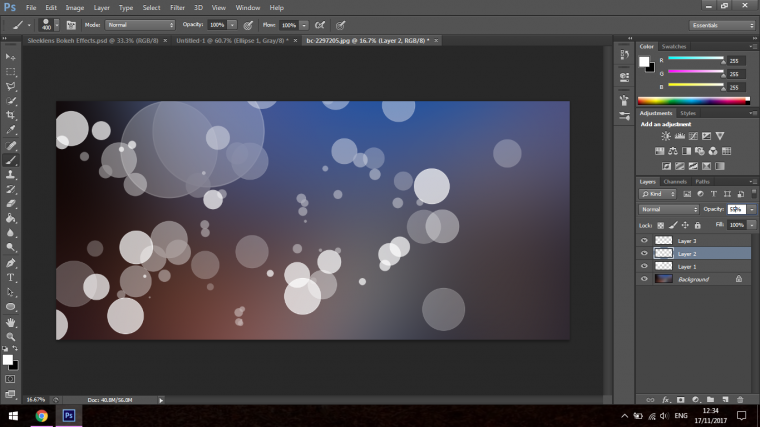
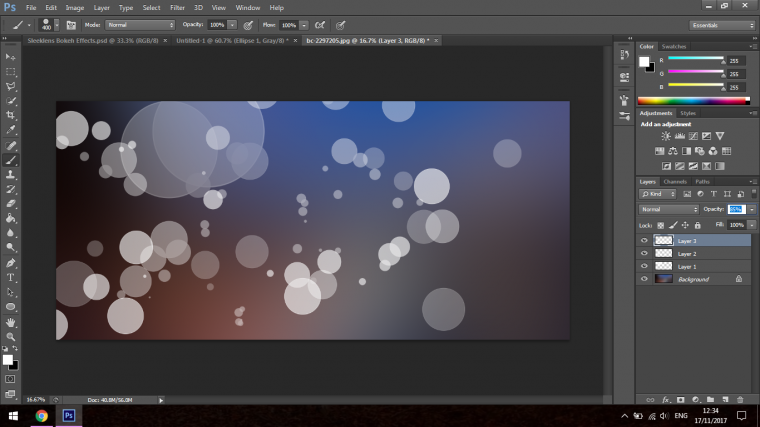
Now using the same formula add Filter – Gaussian Blur
Make the bottom more blurred and gradually getting clearer, my setting were 30 10 and 3 I believe.
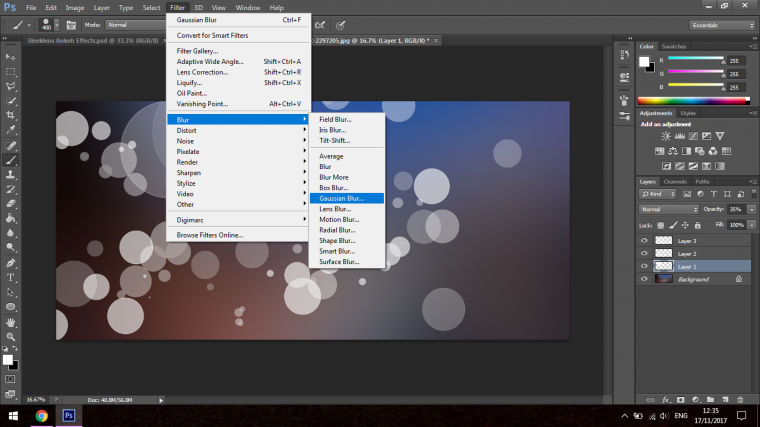
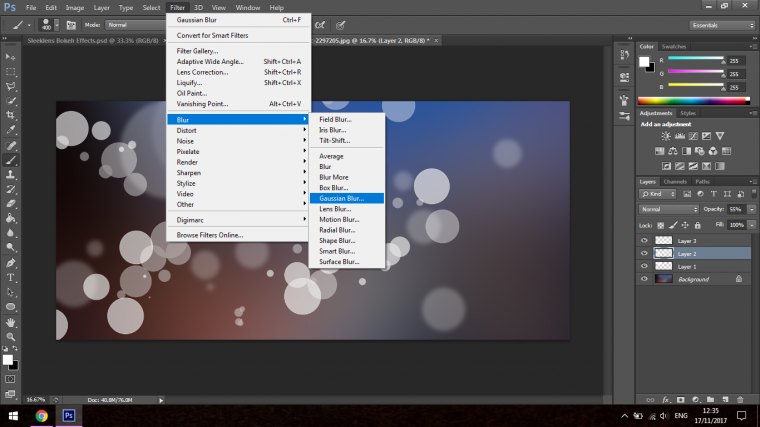
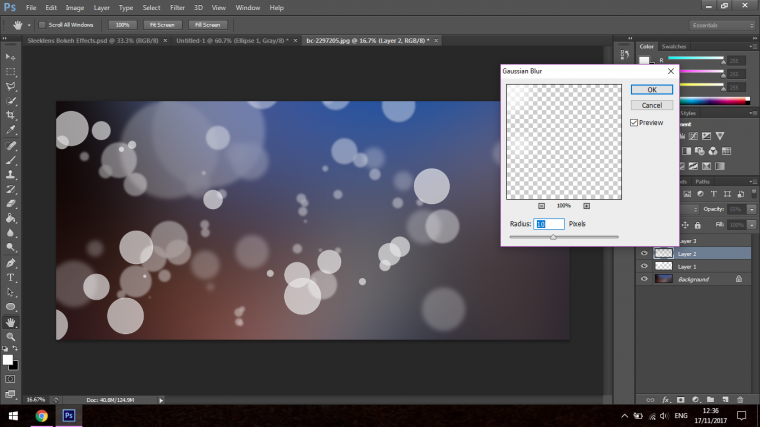
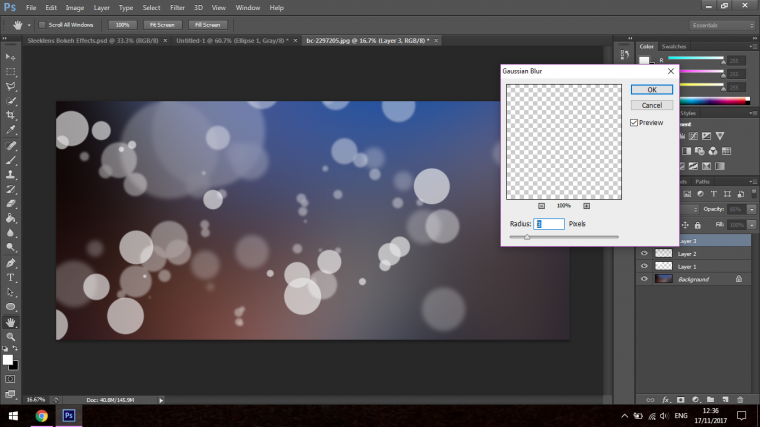
Awesome, we now have our effect, you can do a few tries at this and see what you can come up with and what you like better in terms of pattern.
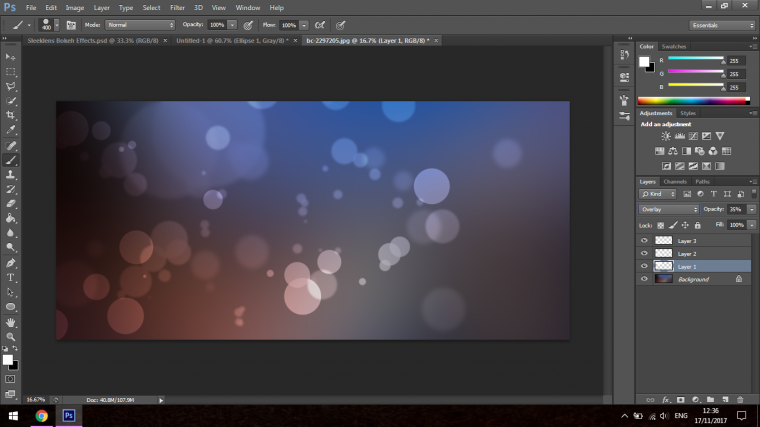
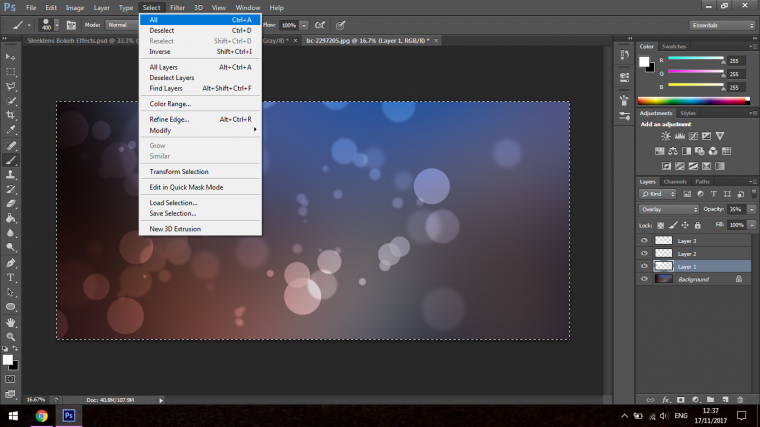
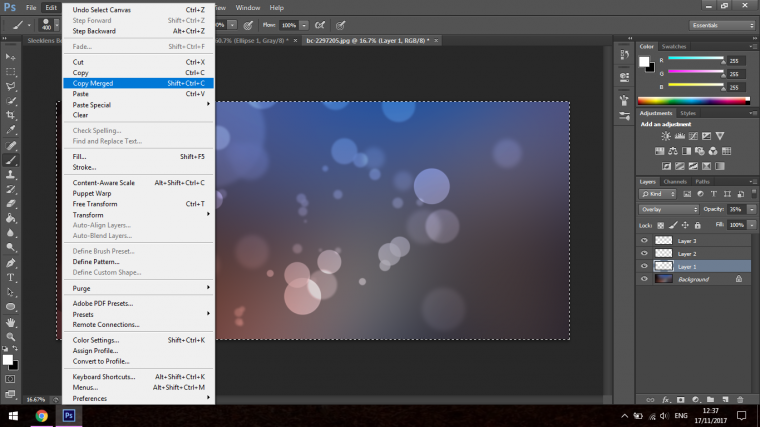
I then select all and then go to file copy merged.
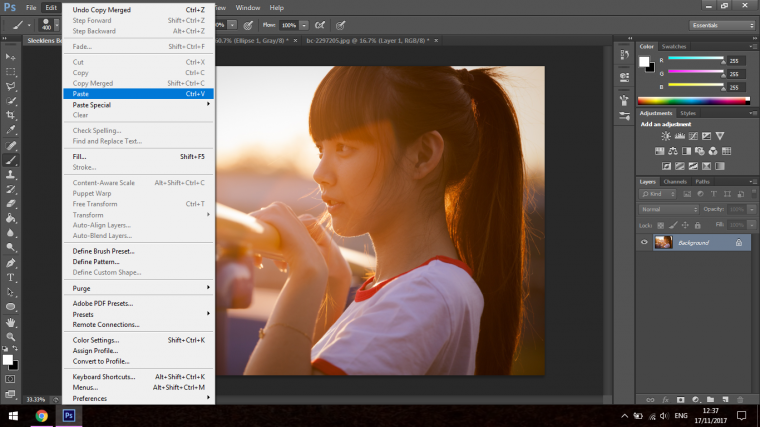
Then paste it into your image.
Now it’s simply just a matter of going through the steps discussed in part one.
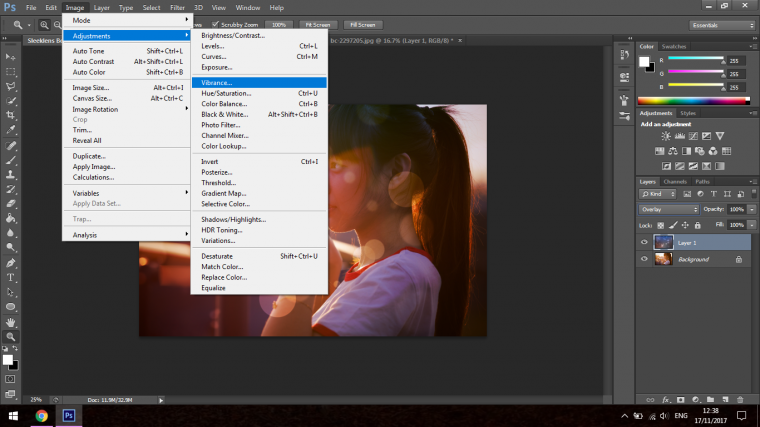
Again you can play around with some Adjustments if you’d like
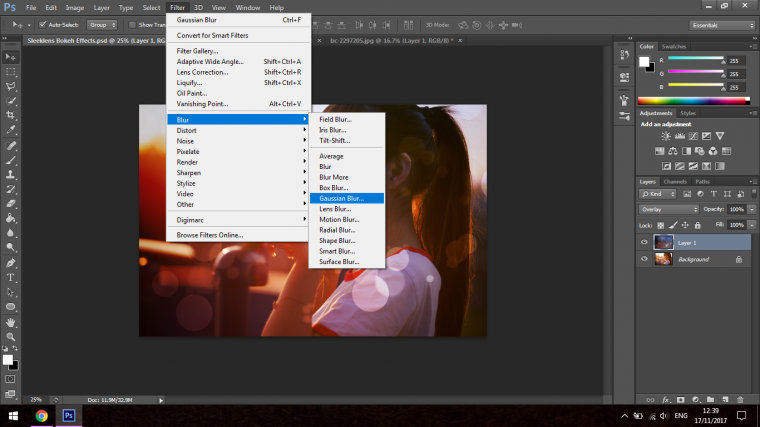
Perhaps a little Blur can be added?
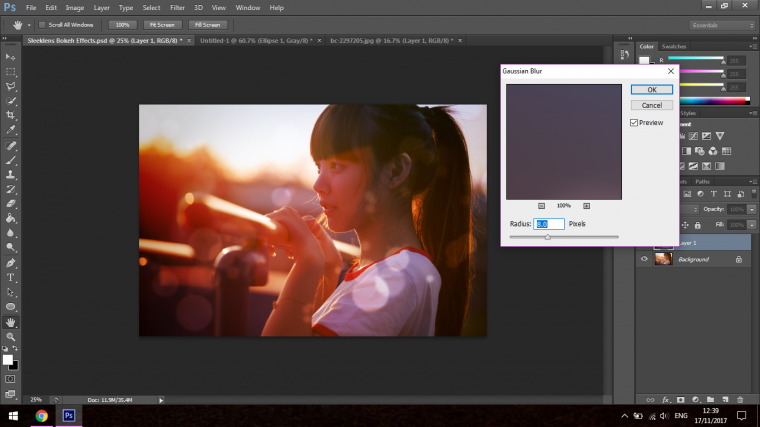
The last touch if you want as well is you can drop the opacity of that layer just so see if it does anything, I went for subtle and felt it looked right for my image.
Hope you enjoyed!
PS: Do you want a faster way to create this effect? Then take a look at our Let’s Bokeh Collection for Photoshop

You can also learn how to use the Select and Mask Tool in Adobe Photoshop CC easily with us.
Comments (0)
There are no comments yet.