Hello again, let’s get going with another awesome Photoshop tutorial.
So I did a tutorial previous called ‘How To Make Someone Look Sad In Photoshop Using Liquify‘ therefore I’m going to flip the script on that tutorial and decide to go the opposite route and add an extra smile to the person this time.
Now I’m sure, plenty of times you have taken photos and either you or someone else in the photo smiled a second too early or stopped smiling a second too late
Thus capturing a somewhat neutral facial expression, you know the one that you can’t quite figure out if they are smiling or not.
I guess kinda like the Mona Lisa.
So now we’re going to look for a professional looking image that falls into that category.
For this, I’ll be going through Pixabay.com, the site I use for free stock.
Another site as well I like to use just so you know is Pexels.com.
These sites are great for free stock, so if you’d like to use them too just know that they’re totally free to use.
If you know any others then please add to the comments as I’m always open for suggestions for free stock sites to expand my variety of images I can use for my work without having to pay big bucks and I’m sure other readers would appreciate your input also.
I would suggest just use an image that has a bit of a slight smile on it.
If the face if highly distorted through emotions then it’s going to be an uphill struggle to set it right and generally in my experience, this type of retouching never really looks realistic.
What we are aiming at here is to go from a slight smile to an extra smile, putting the cherry on top so to speak, you don’t want to move from one extreme to the other when retouching if possible so bear that in mind.
If you had other images similar then you could composite them together but if you’re limited to a few images that are not in the same pose then we want to improve, not totally change.
Anyway, with all that being said let’s get going with the hands-on part of this tutorial.
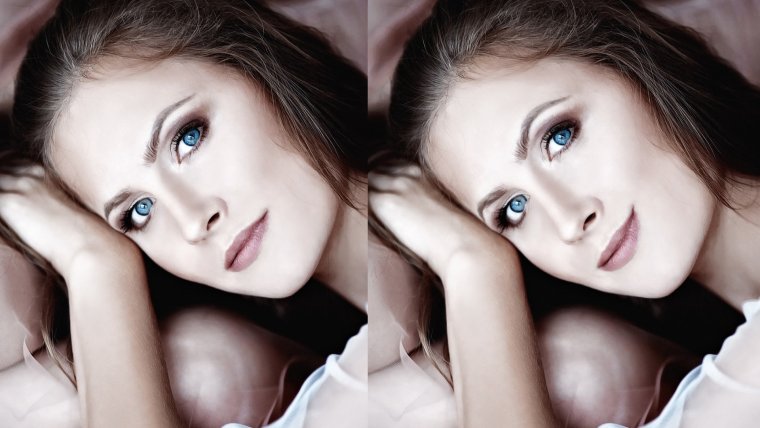
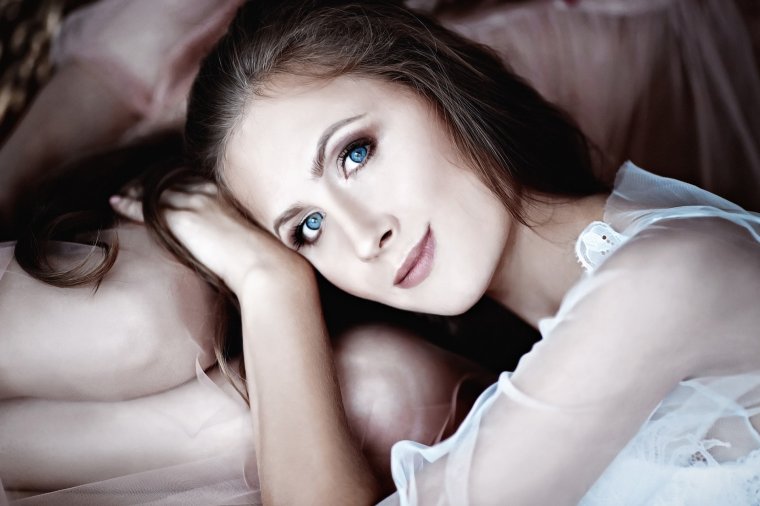
Ok so let’s take a look at the image I’m going to be using.
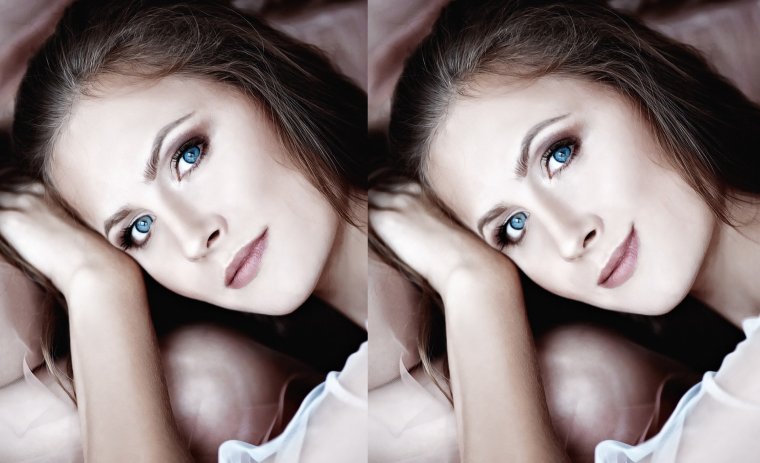
As you can see from my image, the model has that Mona Lisa look on her face.
The one were you think, is she just about to smile or has she just finished?!
This we can easily manipulate!

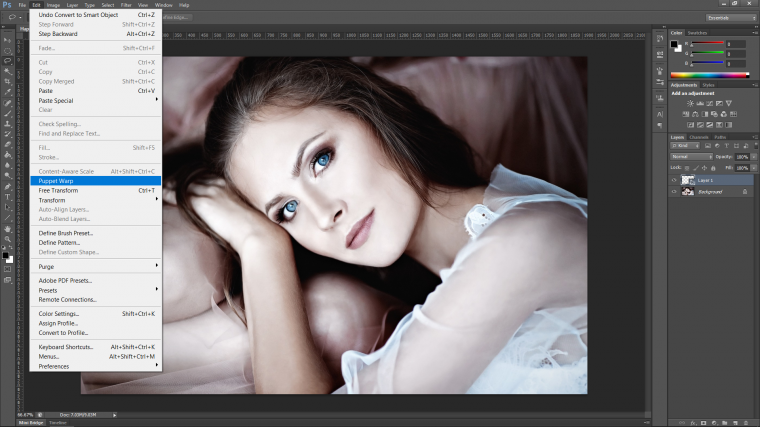
To start we need to select our Lasso Tool, you’ll find that in the Toolbar on the left-hand side.
You can also key in (L) on your keyboard for the keyboard shortcut.
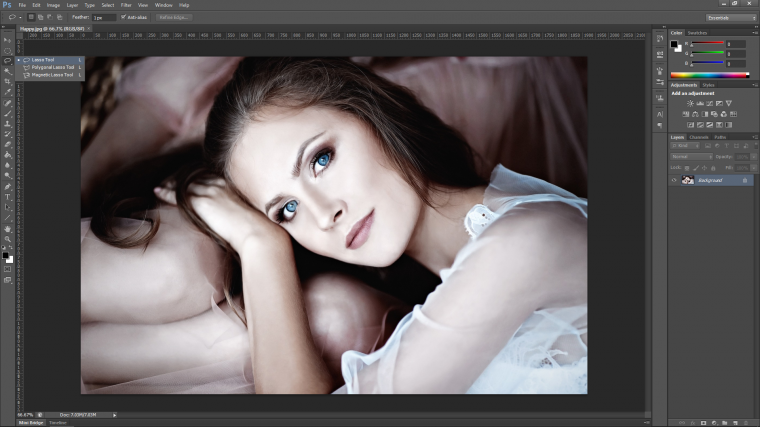
When you have that, click and draw a circle around the model’s mouth just as I’ve shown below, when you do that and release the mouse button the selection will join.

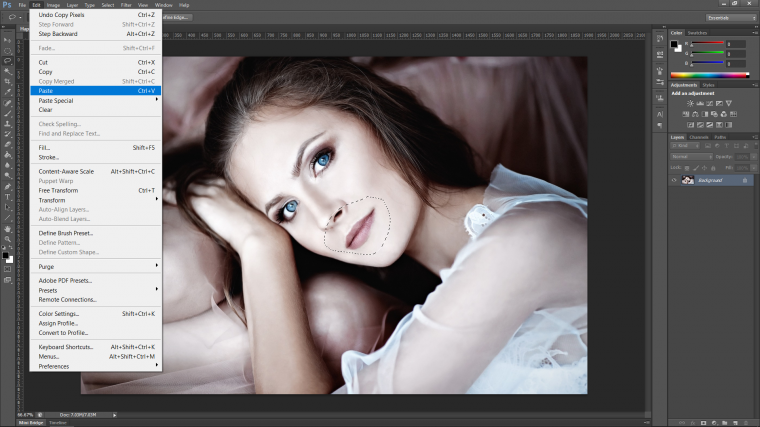
Go to Edit in the top menu and click on copy, you can also key in Ctrl+C to copy for the shortcut.

Now you have your copy made we can run through the exact same action only this time click on Paste or Ctrl+V for the shortcut!
[Just a quick side note on the shortcuts, they are not necessary so don’t try to actively remember them, you will only really be able to do so through repetition…
Yes they are somewhat faster in the long run, but you can happily go through your Photoshop experience never using them as long as you know the fundamentals, which are, where the tools actually are, when you know that
Then you can start to think about keyboard shortcuts, I’ve been doing this for years and I still don’t remember them all so don’t sweat it!]
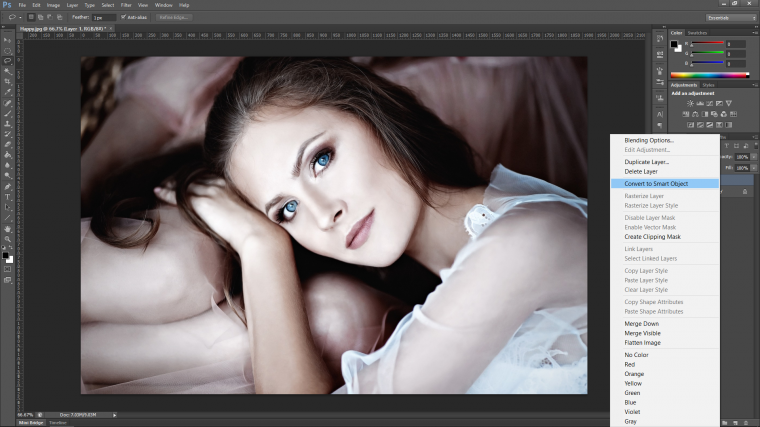
The next thing that we will have to do and the reason we have to do it is we have to now convert our new layer that you will see appear in the layers panel on the right-hand side above the background layer, is to convert it to a smart object.
So the reason why we must do this is that if you start to warp and change the shape of an image that hasn’t been converted to a smart object then it will start to lose quality and the deterioration will become very noticeable over a few edits.
To do this right click on the top layer, a pop up will appear, scan down it until you see Convert to Smart Object and click on it.
The Tool that I’m going to introduce you to now is a little-known Tool called Puppet Warp!
I think this Tool is awesome! you can get some amazing results when you use this Tool correctly and when it is used correctly, it is used subtly!
If you go too far with Puppet Warp it can look a little bit crazy, but used right it will look great.
So what this Tool let’s you do is to click on specific areas,
Then you can manipulate those areas as if there is some sort of hinge attached to it, pretty cool right!
Open that up as shown below.
You will now see a strange grid appear over your selection that you made.
Take a look at the curious little mouse pointer that you have…
It looks like a tack doesn’t it, well that’s sort of what it is, the areas that you click on will now become the hinge.
So our mission then is to create the curve of a smile, to do this I first clicked on the two edges of the mouth.
But we have to add more because these are not enough to pin the other parts of the lips, if you were to start to try to move things now it just wouldn’t work.
Add another 2 points on the bottom of the bottom lip to split it into 3 parts.
Then click on the three bits of the cupids bow on the top lip, so that’s that little-curved part below your nose.
You can see on my image below exactly where I have placed my points.
Now you can click on the points at the edge of the mouse and start to move them up so that it creates a curve in the mouth so it starts to look more like a smile.
You will have to move the other points as well to compensate most likely, also, if needs are, don’t be afraid to add some extra points.
If you make any mistakes, key in on your keyboard Ctrl+Alt Z to backtrack one step, then you can go at it again until you’re happy.
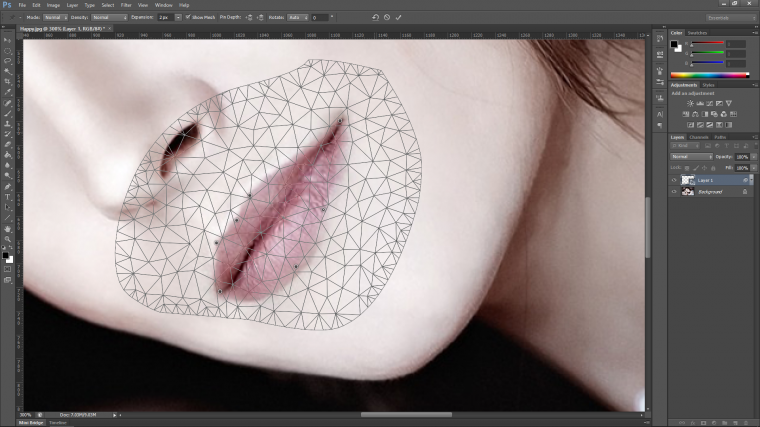
When you are happy with the mouth, hit return.
Now we are going to work on the eyes, so click on the original background layer and follow the exact same steps with the eyes.
So draw the selection as I have shown below.

But this time create your points on the eyebrows, I did 4 points to split them each up into 3 sections.
This will enable you to manipulate the edges and the center.
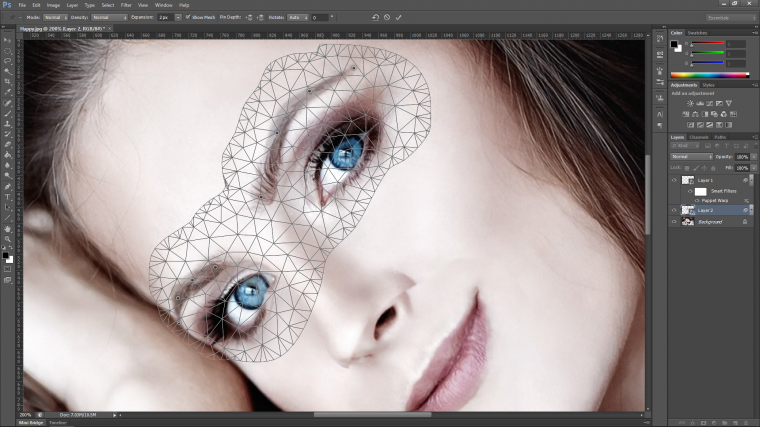
I then started to pull the center points up and slightly out away from the center to create a more friendly look.
Don’t go too far with this or your subject may start to look more surprised than anything, just a little touch will do nicely.
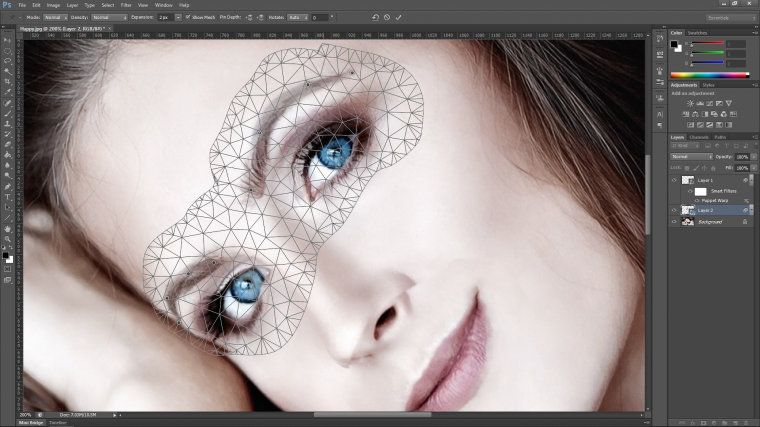
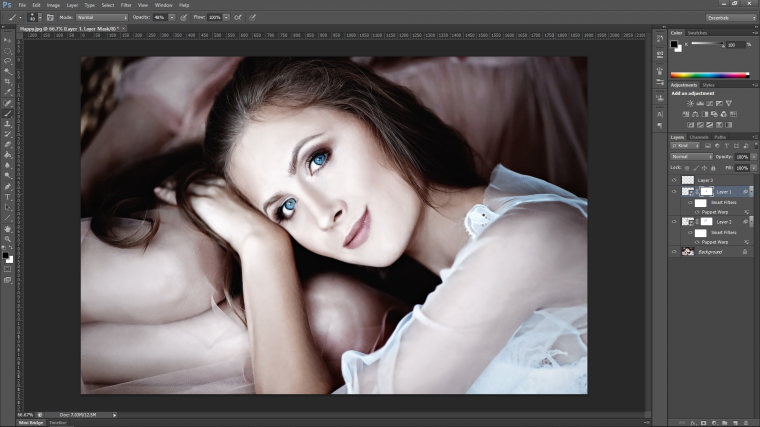
So by this stage, we should have the expression that we want, but in the process of making the expression, there will be some little inconsistencies.
As you can see from my image around the nose and under the eyes are very noticeable.
the way we are going to fix this is by using a mask.
The way to create a mask is to click on the layer, then go to Layer – Layer Mask – Reveal All
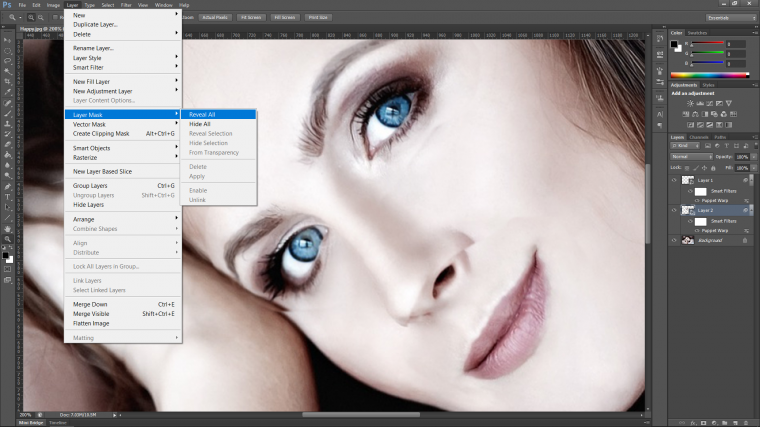
You will then see a little white box appear next to you images thumbnail when you click this you can then use the Brush Tool to hide what’s on that layer by painting on your image.
Using Black Hides.
White Reveals again.
So paint out those inconsistencies to reveal the background layer.

Another little trick we can do, is to create a brand new layer on top of everything.
Layer – New – Layer then click and drag it to the top.
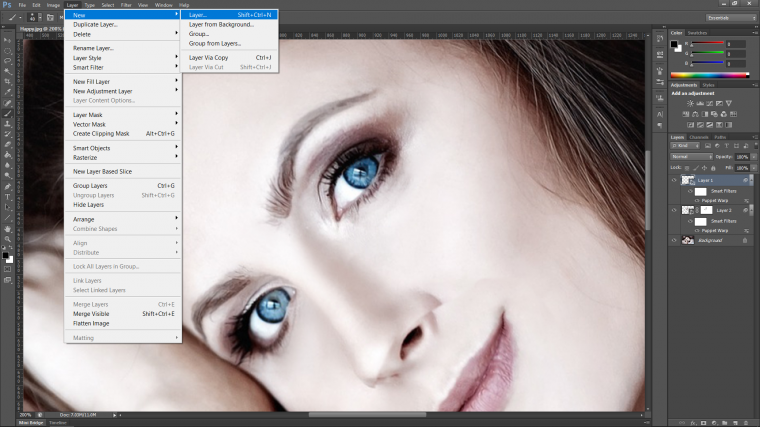
Then using your Spot Healing Brush Tool paint on the areas and let the computer do the work to complete your image.


Please verify your software version before proceeding.
 I’ve verified my software version


 Facebook
 Google +
Comments (0)
There are no comments yet.