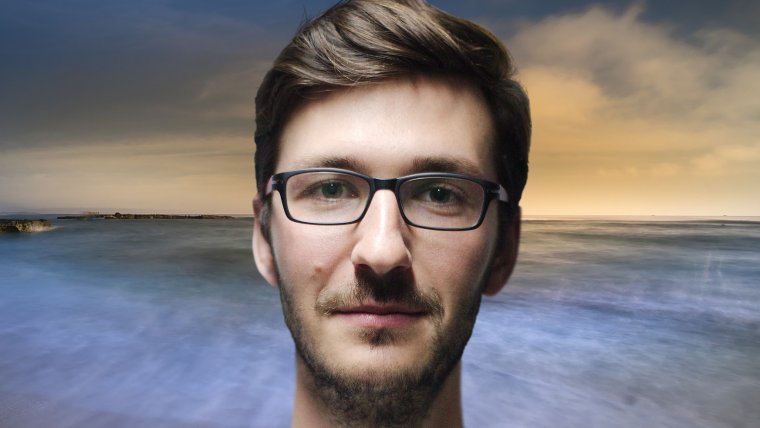
Hi, welcome, I think you’ll get a MASSIVE amount of value out of this tutorial and I believe this is the best solution to cropping hair on the net that I’ve seen.
This tutorial is going to be slightly different than most of the other tutorials that you may have seen on this subject, Out there right now there is endless tutorials on this subject but unless the hair is pretty standard a lot of them don’t really work that well, believe me, I’ve tried quite a few of these.
Most of these videos show you fancy ways using selections and using different channels which can be quite daunting to someone who has never used Photoshop before or has just started.
My way is a little more practical and a little more hands-on and I guess a little more simple…
So what I do is I make good use of FREE resources.
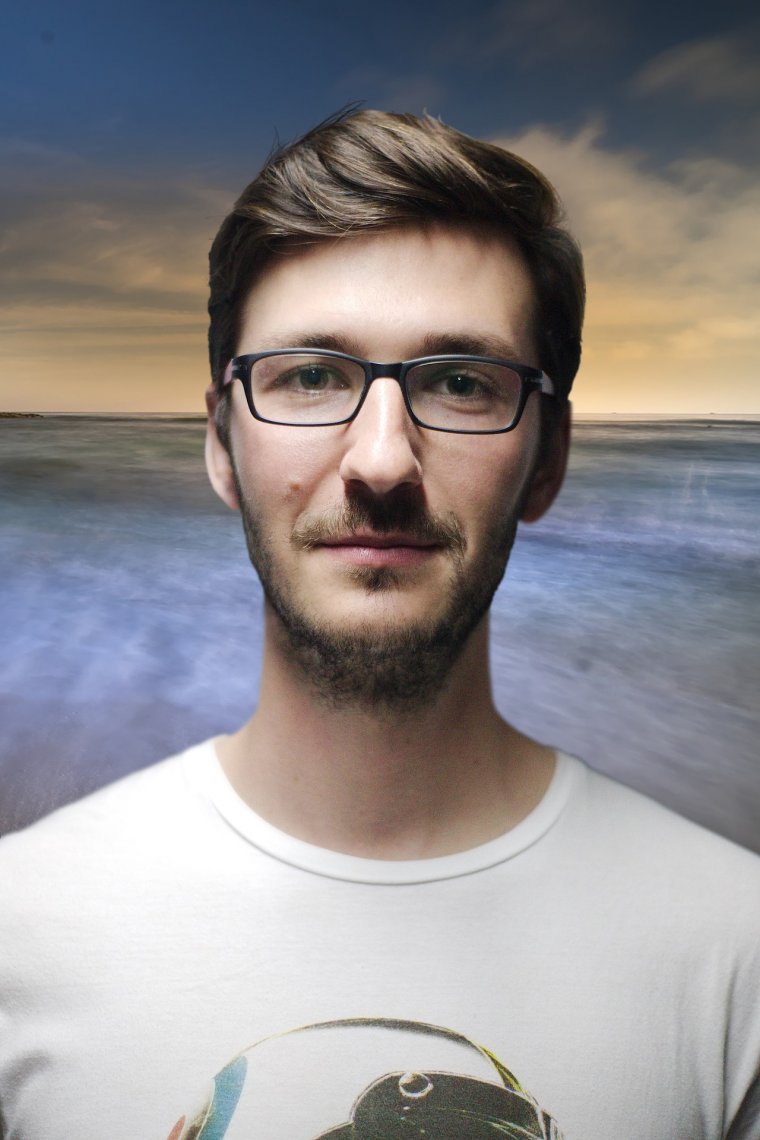
Take a look at this image below.
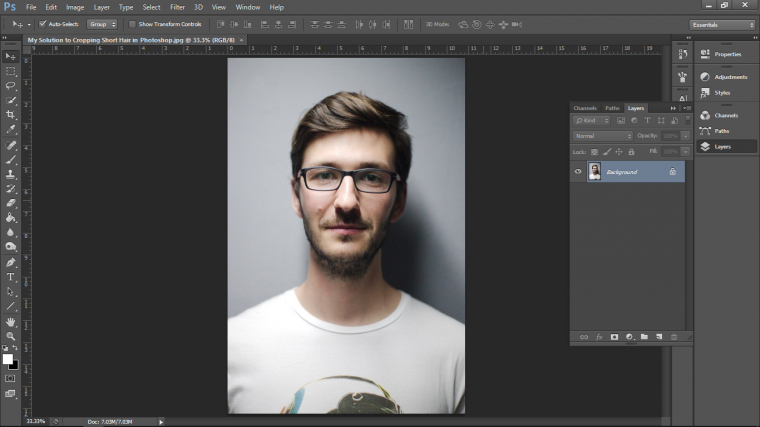
His short hair is mid-range so I’m going to use that as an example.
Be aware that different types of short hair will take varying degrees of attention but the solution is always going to be the same, just some will be easier than others and some will be a lot harder, but if you put the time in and use your foresight this technique will work with all and any hair.
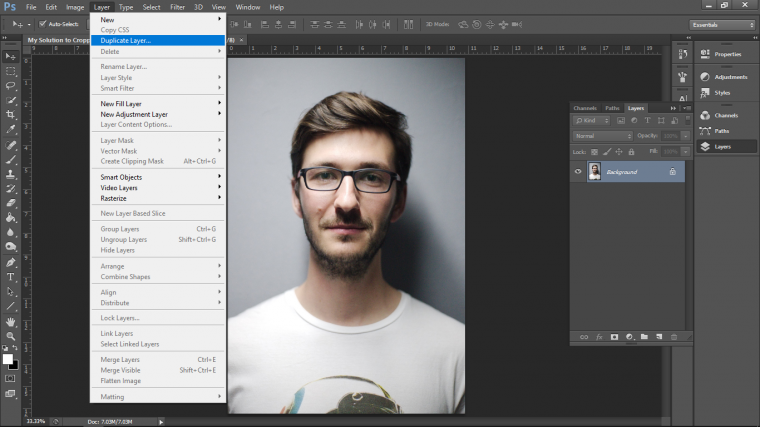
So first I’m going to duplicate this layer so the original is a backup.
Go to Layer – Duplicate Layer
Now zoom right in.
You can do this by using your keyboard, key in Ctrl + or –
Also by holding the space bar, you will be able to click and drag your image about freely.
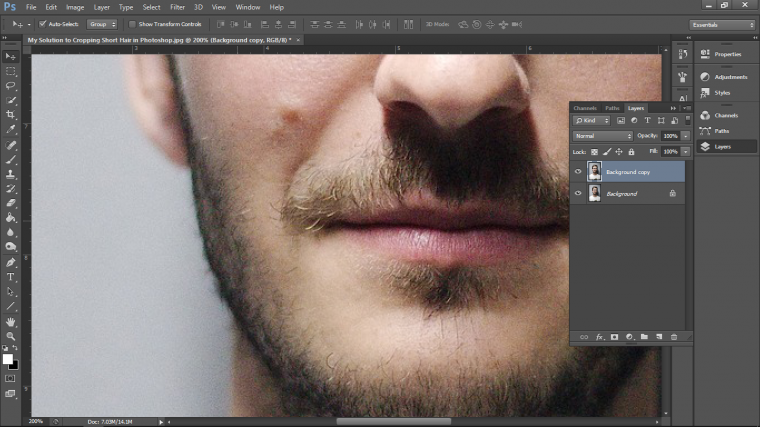
Now for a sec just use the space bar and have a look at the image, you will notice that the edges of parts will be more blurred than the others.
So keep this in mind because when we go to crop this will be a factor that we will have to change as we go along.
Before we get to the hair we first must crop the person.
I always crop the person first, but before I do I want you to create a New Layer between your two layers.
So click on the bottom layer, then go to Layer-New – Layer
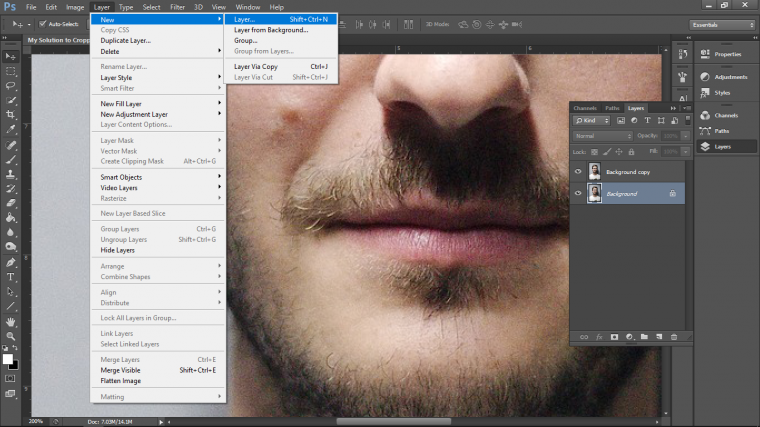
Then I’m going to select my Paint Bucket so we can fill that new layer in.
At the bottom left-hand side, you will see two boxes Black and White overlapping each other, double click on the top one to open up the color options and choose red.
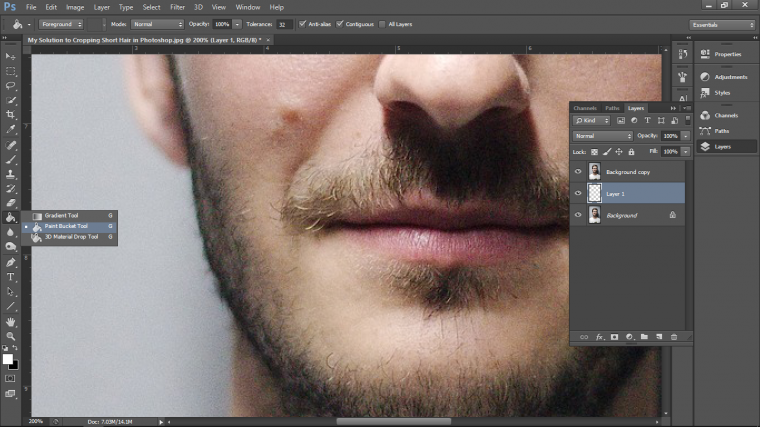
Then click on your screen making sure you have selected your layer to fill it in read.
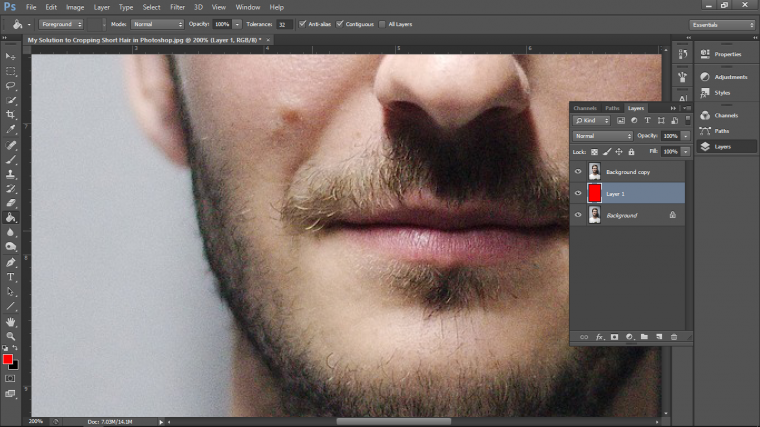
The reason behind this is because I want to have a strong background behind my image so when I start to remove the original background I will be able to see clearly how my cropped image is looking.
Now click on your top layer again.
OK!
So!
The area that I’m going to start is the shoulders and work my way up.
For this, I’m going to grab my Polygonal Tool
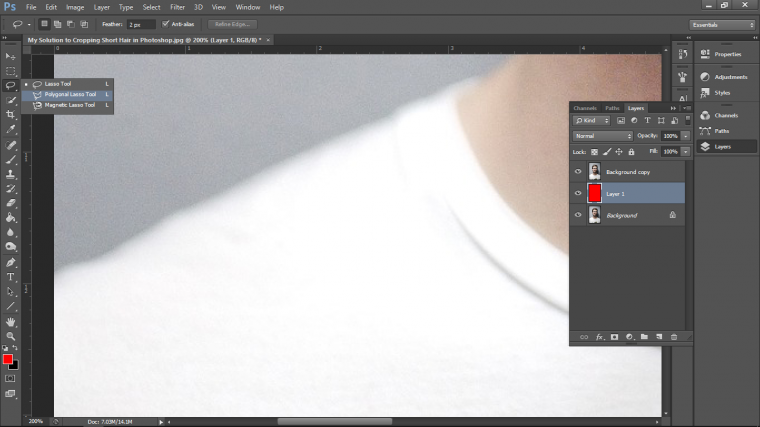
Then at the top left, I’m going to change it’s Feather to 3
The feather can be tricky so you just have to use your best judgment, you can do a little tester first and the key in Ctrl + Alt + Z to step back.
For this 3 was good.
The more blurred I get I go round about 3 the sharper I’d go to 0.5 but never below unless it is a totally crisp edge.
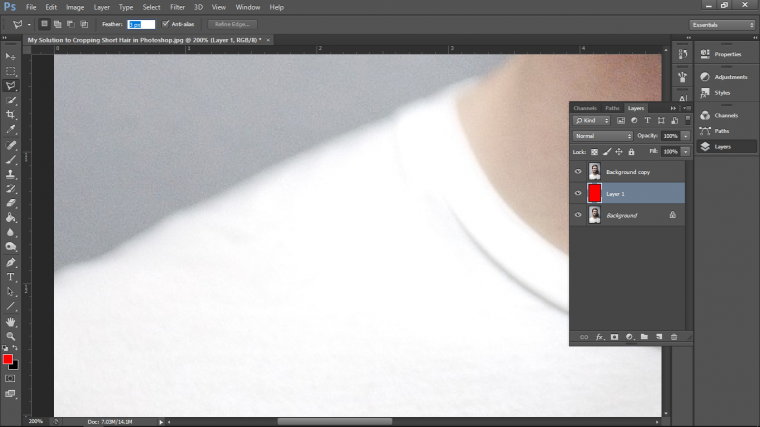
Now you just click and follow just within the edge in little steps so the cropping doesn’t look all angled and unnatural.
I use the polygonal Tool for the Clothes, Neck, and Ears changing the Feather to suit, again using my best judgment with the Feather.
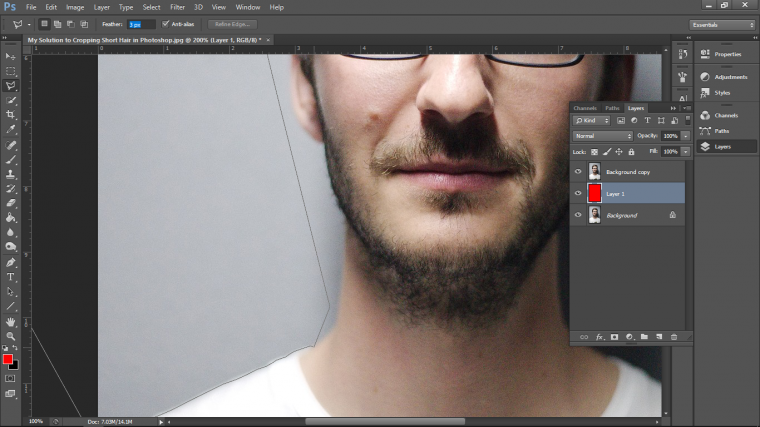
Then just hit Delete on your keyboard to remove the background.
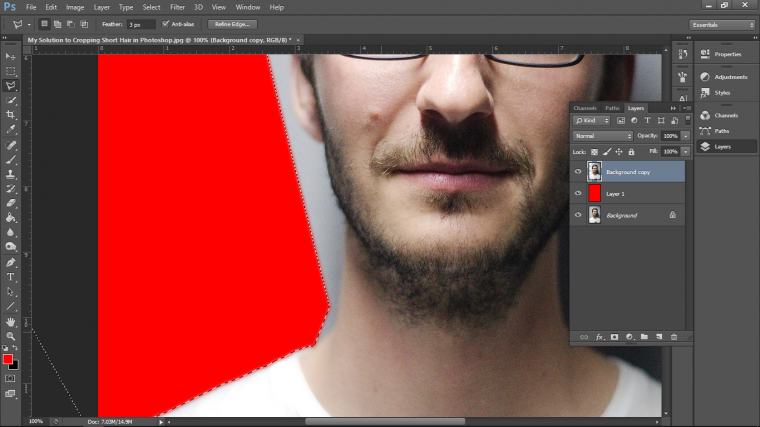
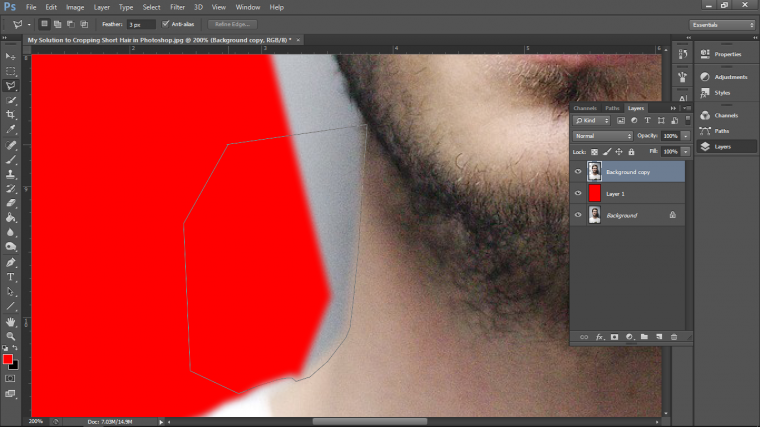
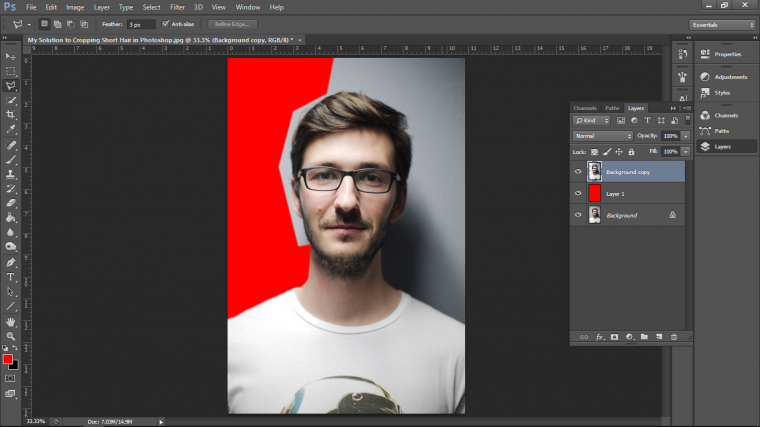
Now for the Beard, for this, I tend to use the Lasso Tool and draw my selection directly on.
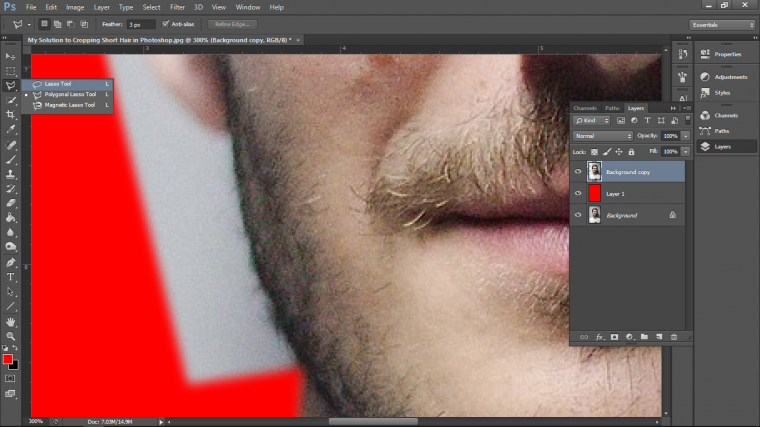
The edge of the beard is generally lumpy so I just follow along to give it that impression unless the beard is similar to the hair with strays out everywhere then we can get away with just doing this.
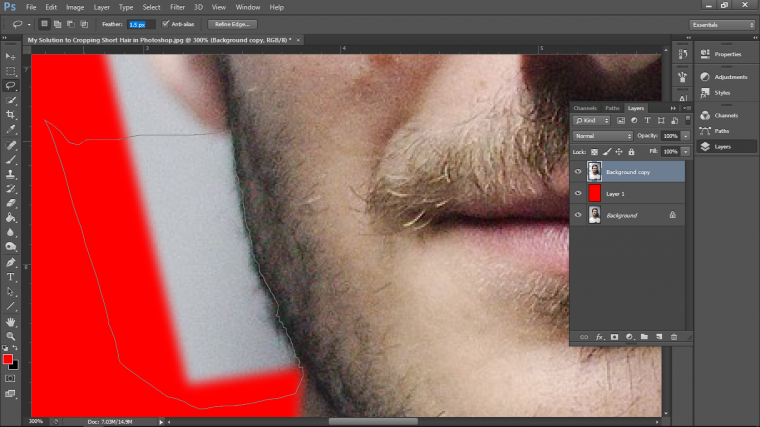
So far we have cleared the preparation and the only part left now is to remove the hair in terms of cropping.
But before we do that one thing that I do after every section I clear is to grab the Blur Tool, then I look at my edges up close.
I’m looking for any kind of pixelation or sharpness that looks unnatural.
Then I click and drag along the edges to give them a slight blur, a once over is generally enough to make it work.
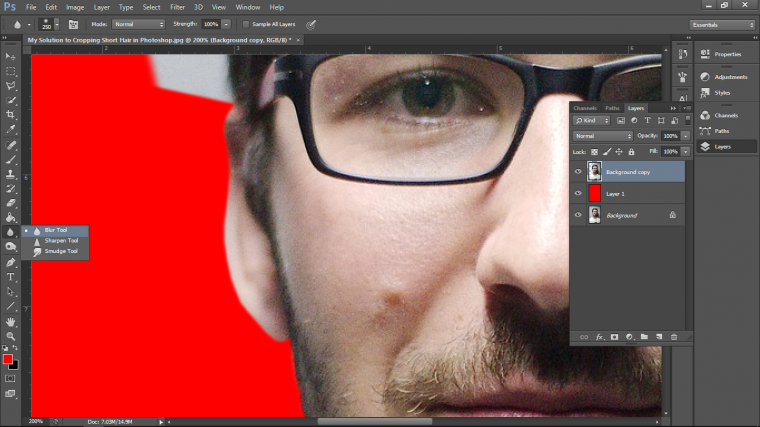
If you want also just for a bit of background variety you can also just in the same way we created the red background you can create a white one or whatever main color your replacement background will be just to check how it looks and if anything unsightly sticks out.
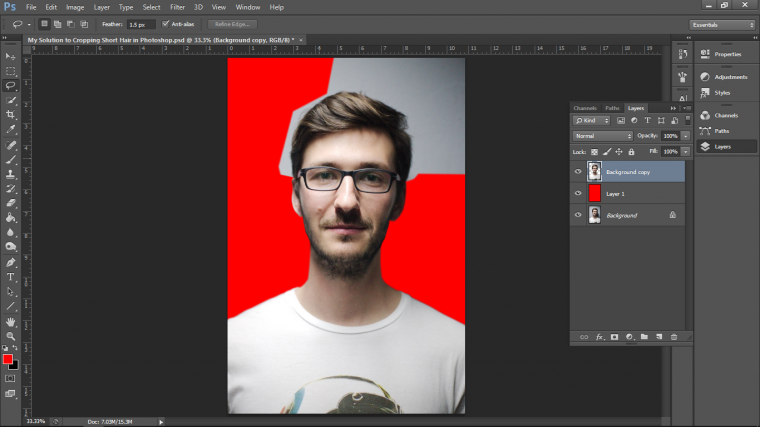
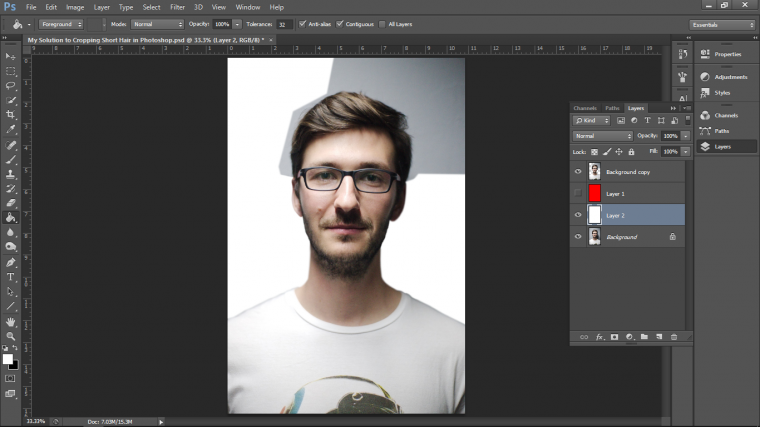
Ok, now this is the real meat, what we have been waiting for!
The hair!
Right so what I do is as stated is I make use of freebies out there to replace the hair, there are unlimited resources out there on the web of hair that has already been cut out and added to a PNG, it is just a matter of use to take those blend than to make them look natural and to have them the same colour.
There is also already made free source Photoshop Hair Brushes out there too, but I’ve found them to be annoying to work with and generally find this was more appealing to me, but if you want to give the Brushes a try too the give it a shot, but for this we’re going with the replacement hair.
So go to whichever search engine you use and type the Keywords “Short Hair PNG” and go to images to see what there is…
Choose the largest size in the search options or one that matches the size of your image/just slightly below.
You also want to look for something similar to the hairstyle you are working with.
The ones that you want to target are the ones that are high quality, so in other words you want to see through strands etc.
Also, it doesn’t have to exactly match the hairstyle, just the way it looks zoomed in, so you could lift a small section from long hair that would match the short then you just remove the rest, which you will see shortly.
When you have done that it is time to crop the hair.
What I do here is I try to get as close to the hair as possible using my Lasso Tool, then I delete little bit by little bit.
Also, you may use several different files to achieve your final image.
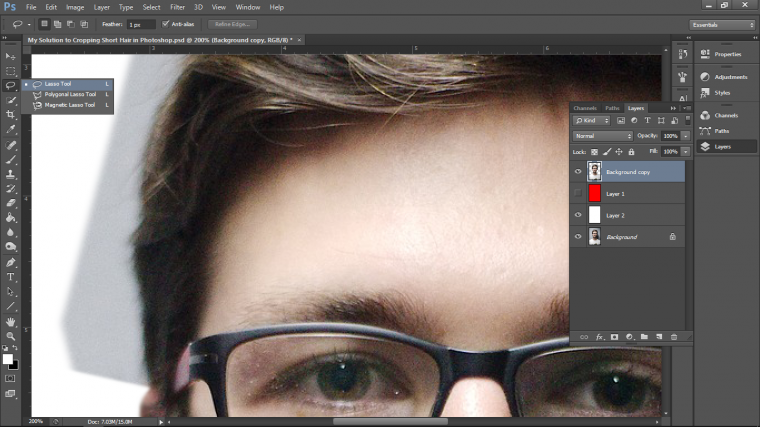
When I make my selections I will also draw a sort of basic hairline which will in the long run help my to blend the replacement hair.
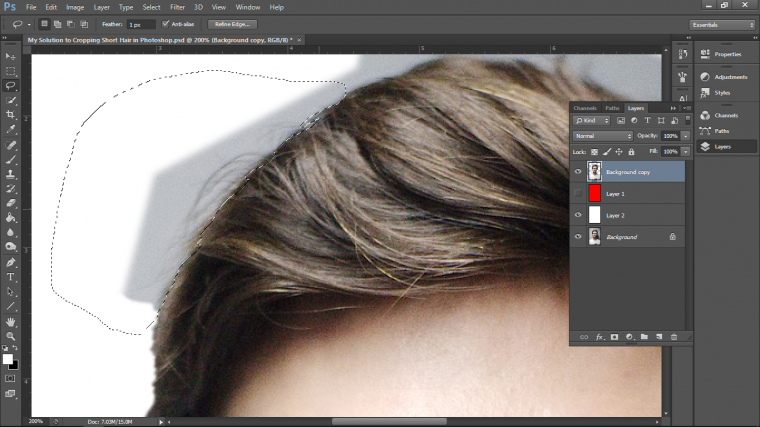
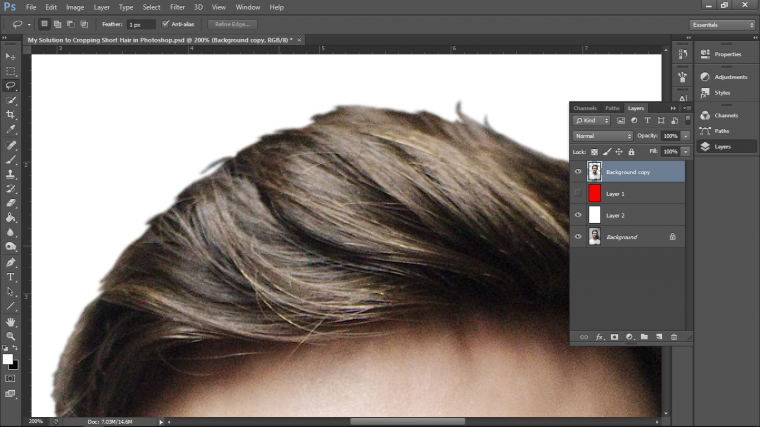
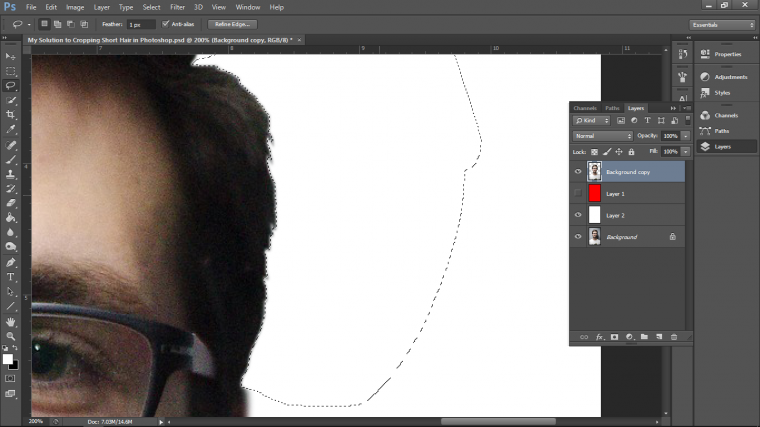
As you can see from below, once you have completed the hair line it should be looking very similar to the image that I have below.
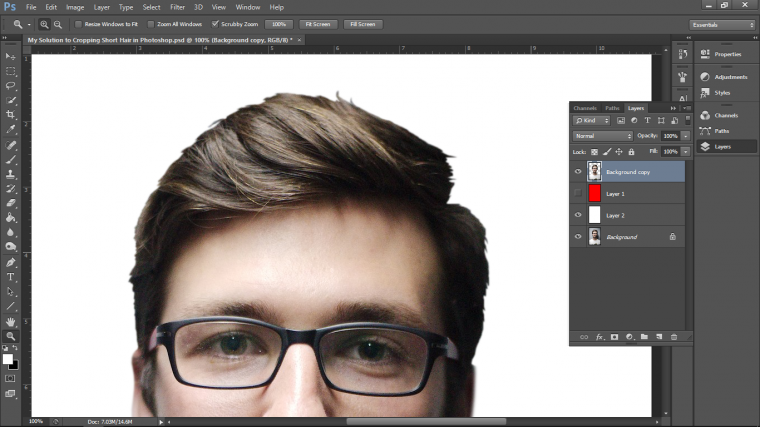
Now I take my hair PNGs and I’ start trying to match up the hair as best I can, use your best judgement on this, it can be hard to see what it will finally look like in the end right at the start so you will have to adjust back and forth until you are happy with it.
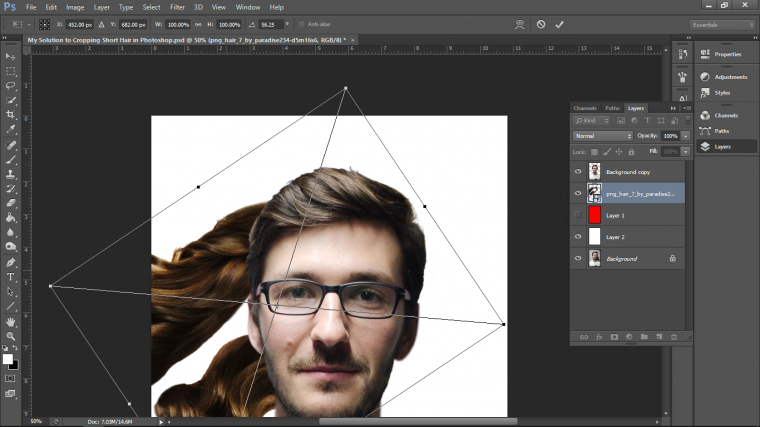
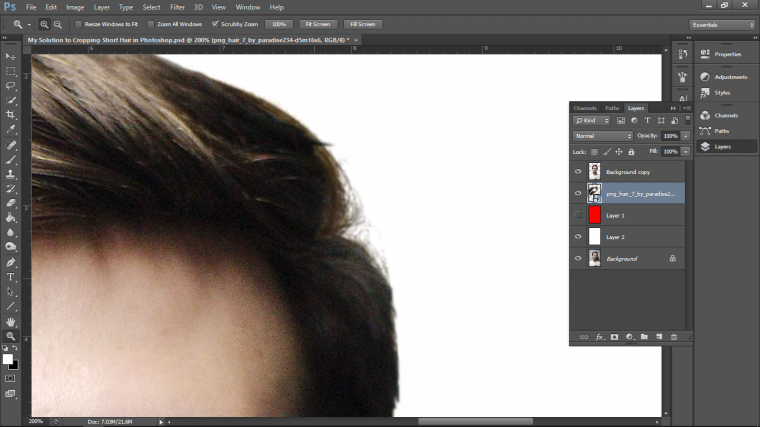
I will do little bits at a time and if the original hair permits then I may be able to do larger portions, like perhaps a quiff.
Once you feel that the positioning is good to go to Layer-Layer Mask – Reveal All
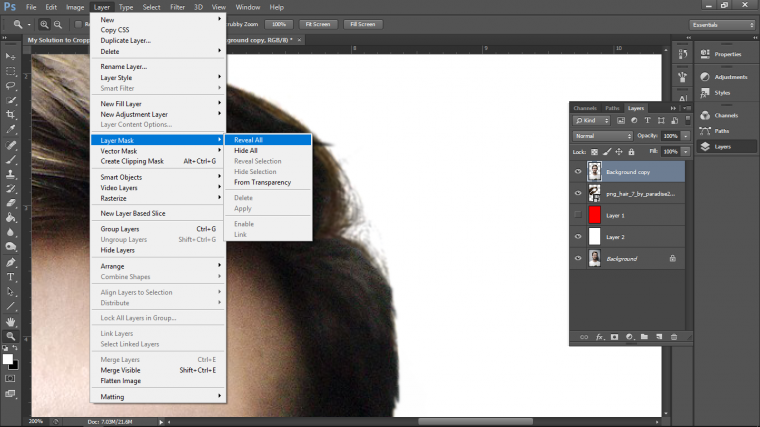
Then select your Brush Tool, and click on the options below Edit that open up the Brush Tool, it’s the second in with the circle.
When you open this up choose the first Brush, which will be your soft brush.
Then make sure you have clicked on the little white box to the right-hand side of your image in the layers panel on the right also.
Then using Black on your Brush you will be able to erase the areas on your hair PNG you don’t need.
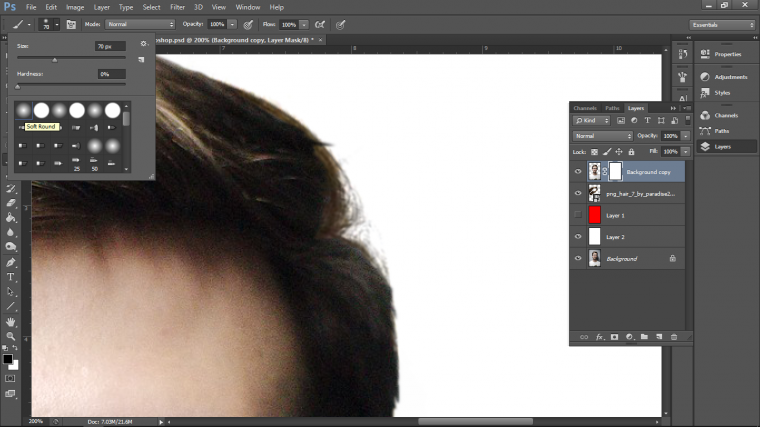
Keep adding new hair to where you think you need it, you don’t need to go crazy you just have to leave the impression that there are hair strands there, a few here and there will be quite enough.
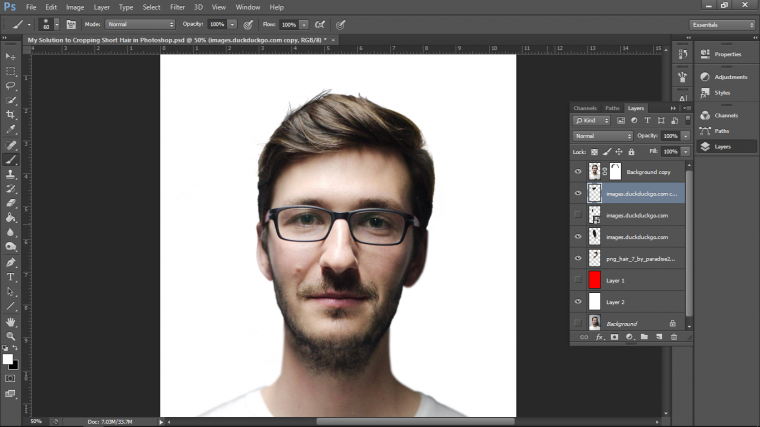
My last bit of advice here is, that this takes practice, you may not get a good result right away so have faith, once you get it, you’ll have it for good!
Now the premise is pretty similar to the way I do things regarding this subject, so pick whichever Tutorial you need and follow along.
The results you get from these will result from the effort and care you put in. So these can be pretty difficult looking but once you get the hang of the technique that I use you will be perfectly fine from then on. It will only be a matter of foresight as to what you will need to do to tackle certain hairstyle, some will be a lot more difficult than others.
Ok so to start off, first I want to cut my subject out.
To do this I must start by Duplicating the Layer.
Go to…
Layer – Duplicate Layer
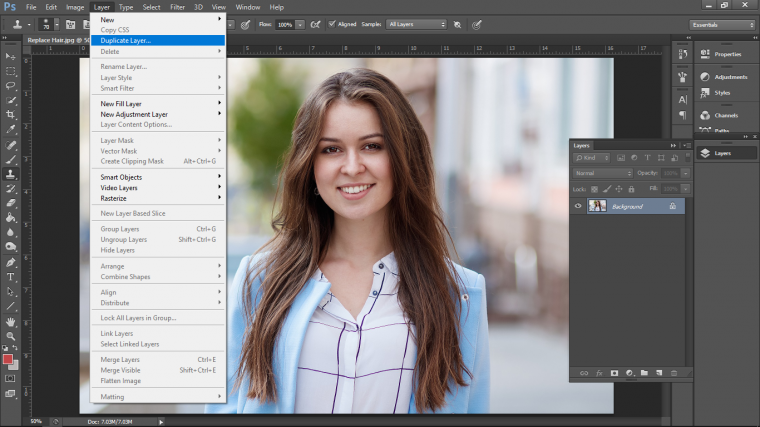
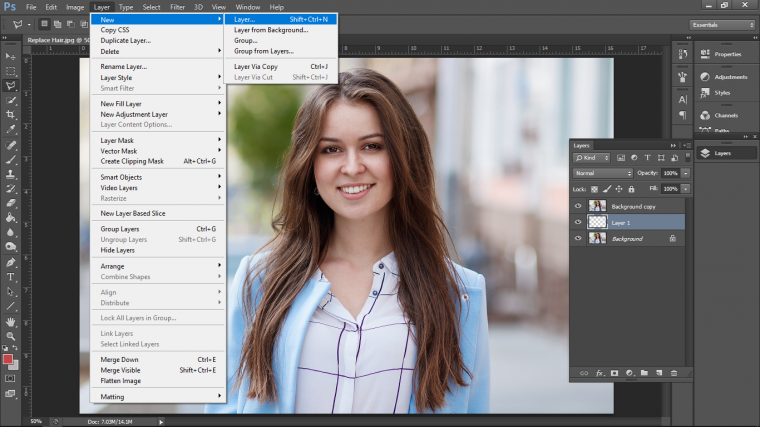
Next, I’m going to create two new layers, you will find these in the same location of Duplicate Layers only at the top.
Make sure to have clicked on the bottom layer first as these two new layers will have to be positioned in the middle.
The reason for this is because the top layer will be the one that we are going to be working with, so as we crop and paste, etc., I want to have a contrasting color behind the crop so I can see what it is exactly that is going on with my editing.
I use Red and White so I get a bit of variety if you wish you can use a similar color to whatever background you are planning on adding your crop to that way you get a better feel of how the final image will look.
Now to fill these layers I will choose my Paint Bucket Tool
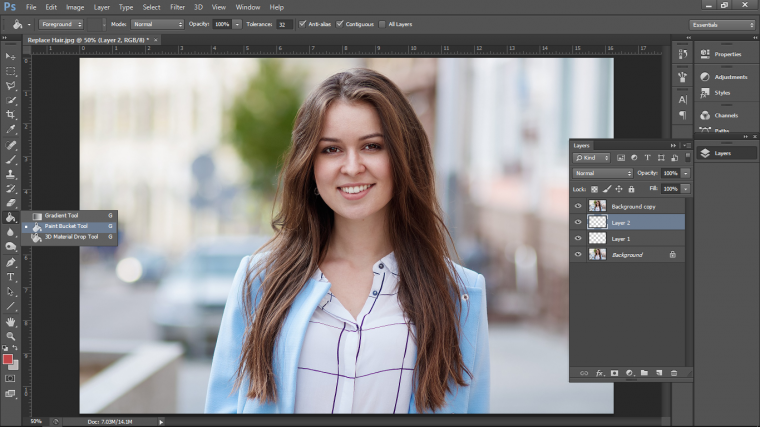
Then select my color.
If you don’t know how to do this then look at the bottom left-hand side.
Do you see two squares overlapping? chances are if you don’t know these then they will be Black and White.
Double click on the top square and the color picker will appear, then simply click on the color you are after, you can use the side slider and then adjust on the main big color square.
Getting the color exact is not an issue because they will be turned off in the end anyway.
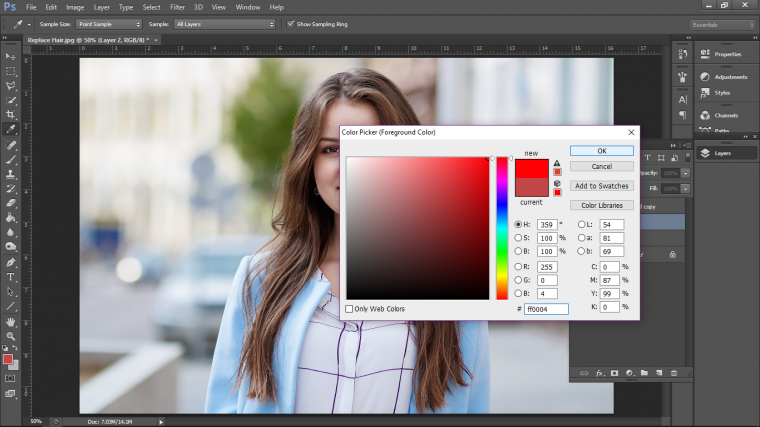
So now we will have to start the cropping process.
For this, I’m going to start off by using the Polygonal Tool.
When you select the Polygonal Tool to look to the top where the menu says File and Edit and all that and you will see the word Feather…
In that where you can see the number with the letters px after click highlight and type 0.5 px
That means that when you make your selection that there will be a little Blur along the edge.
We may have to increase the blur again but there is a Tool for that called the Blur Tool funny enough and you would just go along the edges of your crop to smooth it out a little.
But for now, we are good.
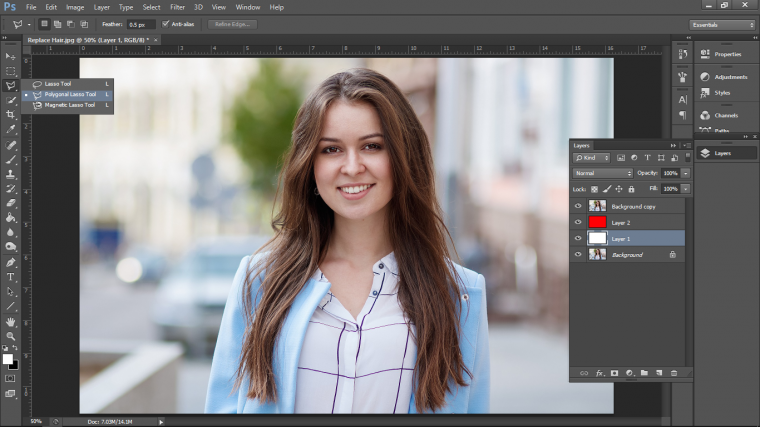
Ok now zoom in using your keyboard, look for the plus and minus symbols which should be beside you Delete key.
Then holding Ctrl and using those keys you will be able to zoom in and out, use this in combination with the Spacebar key when you hold the Spacebar and click and drag using your mouse you will be able to move around your image freely.
Now we will start to click along the edge of the subject to cut it out, make sure to make the selection just inside of the subject so no background is included.
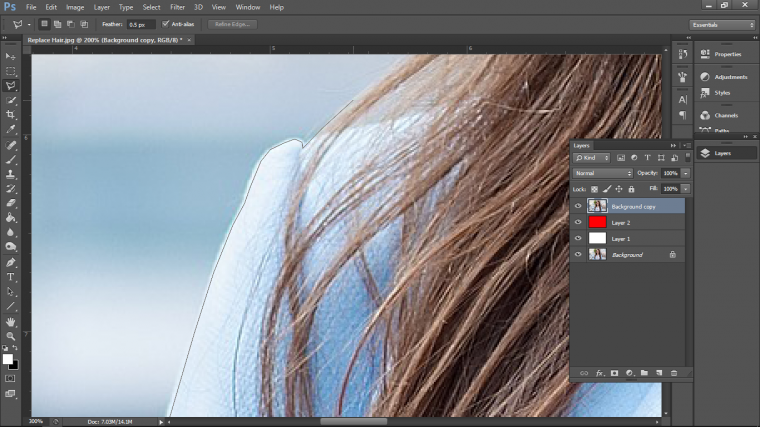
For now, all we will be doing is the 2 sides of the jacket, leave the hair for now as we will have to continue that in Part 2.
When you’re happy with your selection to delete it out.
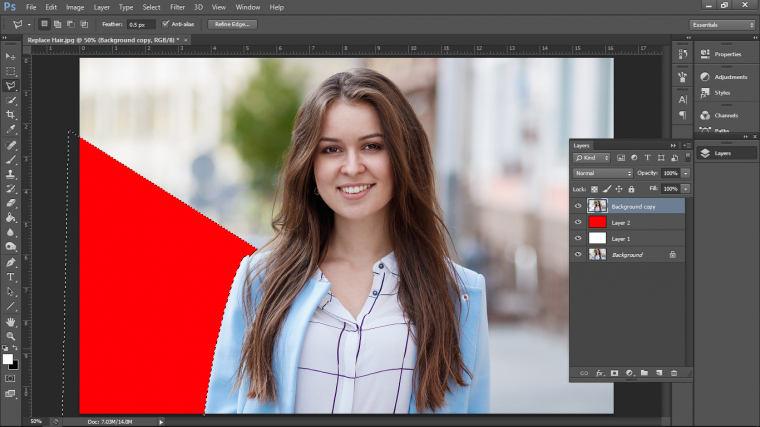
Then you can take that Blur Tool we talked about and run it along the edge.
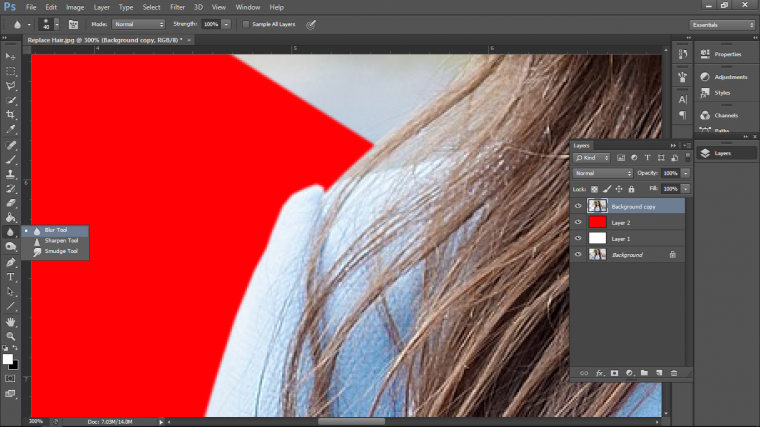
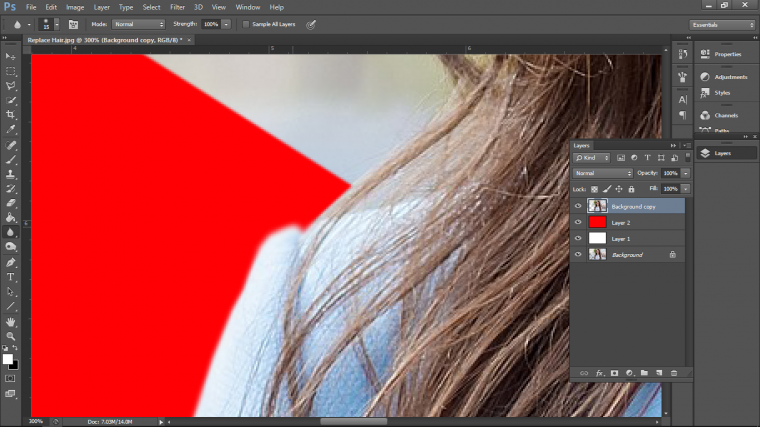
So we are on our way to replacing the hair, and by now you should have something that looks similar to my image below…with the access background removed so the only background that is left is the background with the hair.
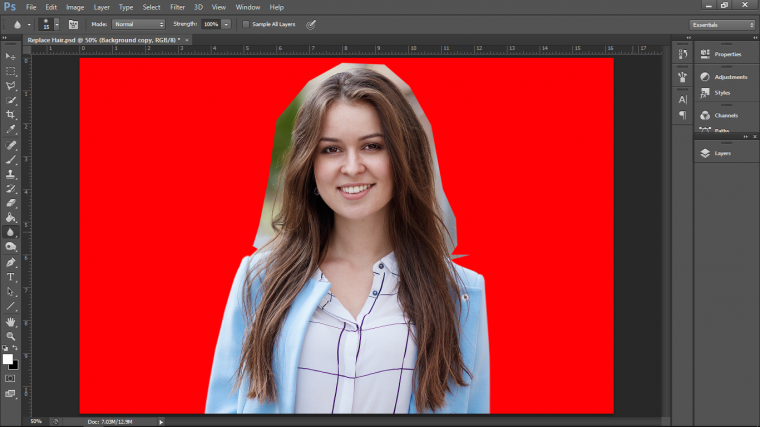
One thing I want to talk about before we progress any further is, that you may have seen some stray hairs that are far out from the main hair and they end up going onto the likes of the shoulders etc
Well when you cut out just ignore those and cut over the top of them, we will be using the likes of the Spot Healing Tool or the Clone Stamp Tool to retouch those up.
So it might be a good idea as you go along to write down some of the things that you would like to go back on and fix up after we have the hair completely fixed.
Ok so now, let’s get to the hard part.
First, click on your top layer and then go up to the menu and select Layer
Scan down till you see Layer Mask, the choose Reveal All
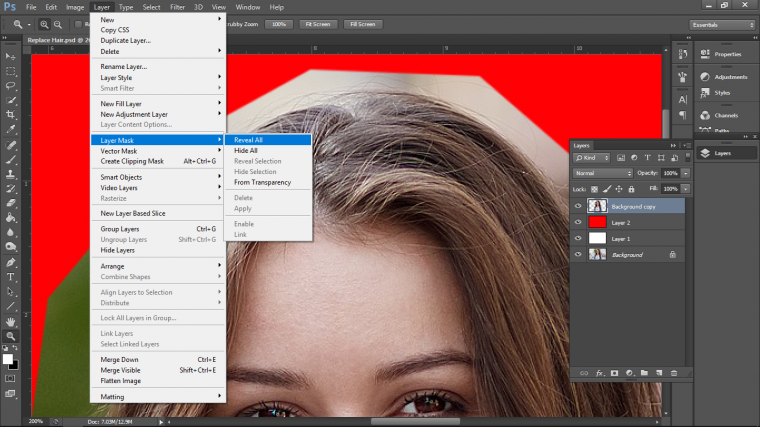
You will now see a little white thumbnail box appear on the right-hand side of your layer.
Now go over to the left and choose the Brush Tool.
At the top where it says ‘File Edit Image’
Click n the little drop-down box with the circle and the number on it to open up your brush options, make sure you are on the first brush, this brush is your soft brush.
Make sure you have clicked on the white thumbnail.
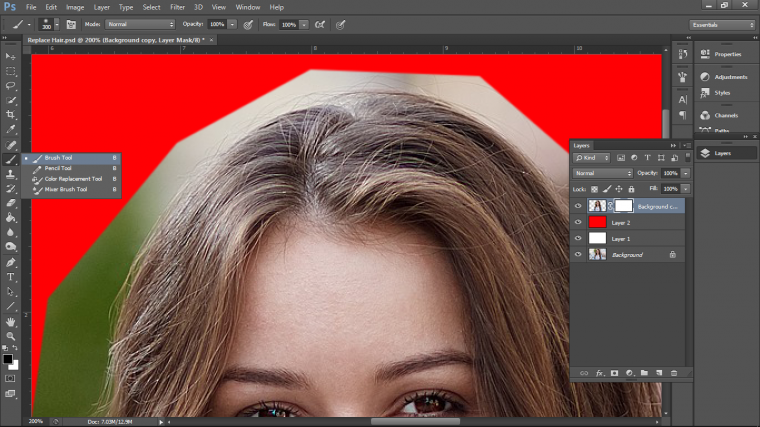
Now with black on our brush chosen we are going to paint out the access background, don’t worry about painting into the hair or the shoulders too much that’s all good we want that, at least with the hair anyway, the shoulders we can fix easy enough, just make sure there is zero background left.
Your image should now look something like the one below.
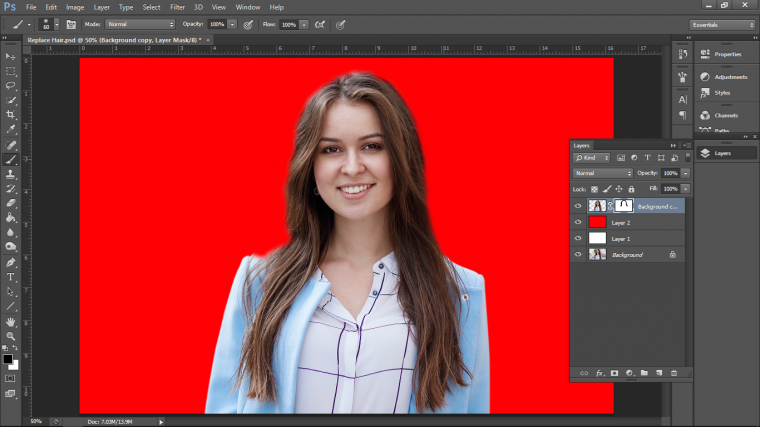
Ok, the next step you will have to use your best judgment on this, you will need to go to whichever search engine you use and search for the keywords.
‘Photoshop Hair Brushes for free’ in the search engine.
With my first Tutorial on the hair cropping, I used an already made PNG cut out that you can find just by searching on the search engine.
The problem with these, unfortunately, is you are very very limited to the stock images out there, a lot are small and most are basically junk.
Because they’re short hair we can get away with a lot, I think the best solution is a combination of both.
So we’re going to figure out how to create our own so we never have to worry about this subject ever again!! and look like total bosses in the process when people revel in our magnificent hair creations.
Try to find the best quality file you can find, take a close look at it and see if it has all the individual strands of hair etc so it will be 100% see through.
Vector I found, to be the best.
Ok once you have found a few brushes that you think would work, download them we then go back briefly to Photoshop and create a new layer on top of everything.
You do this by going to Layer-New – Layer
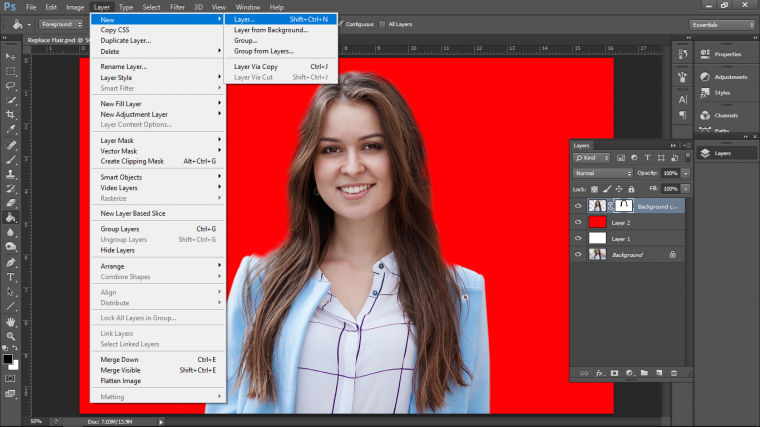
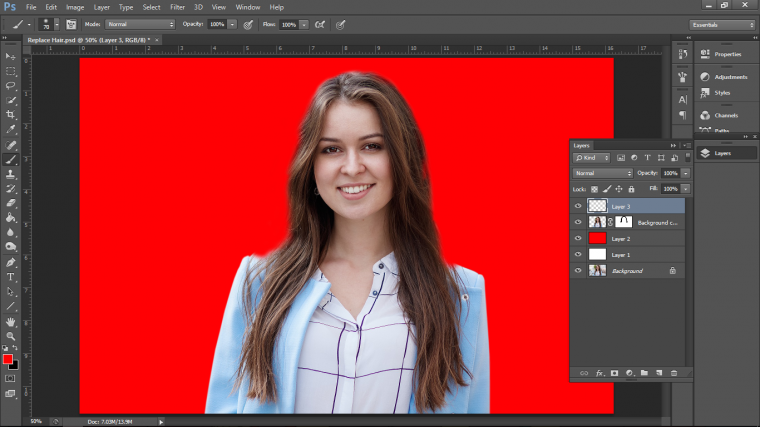
Next click on your Brush Tool again to activate it.
Then under where it says Image in your top menu you will see a little icon of a folder with some little brushes in a pot in there.
This will open up your Brush options.
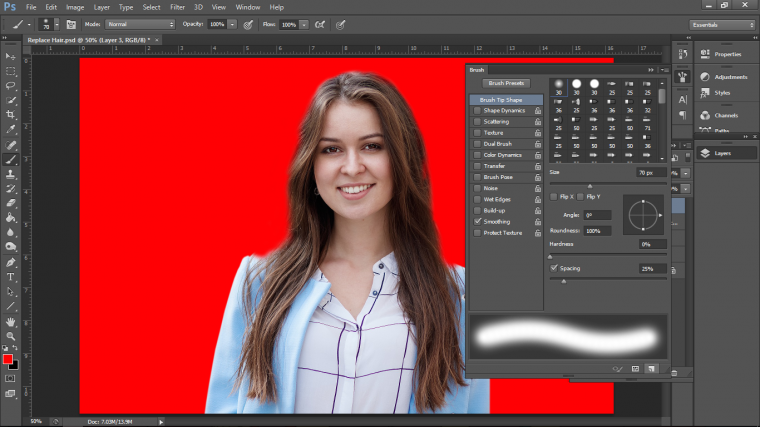
At the very bottom of those options, you will see three little icons.
You want to click on the one that is in the middle, you will see it highlighted in the image below.
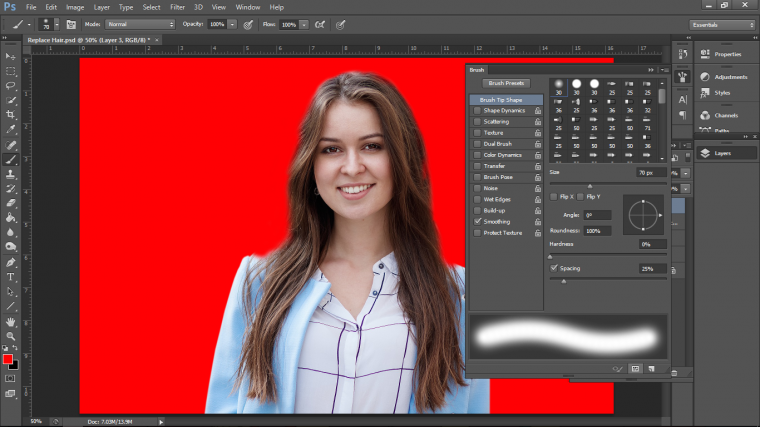
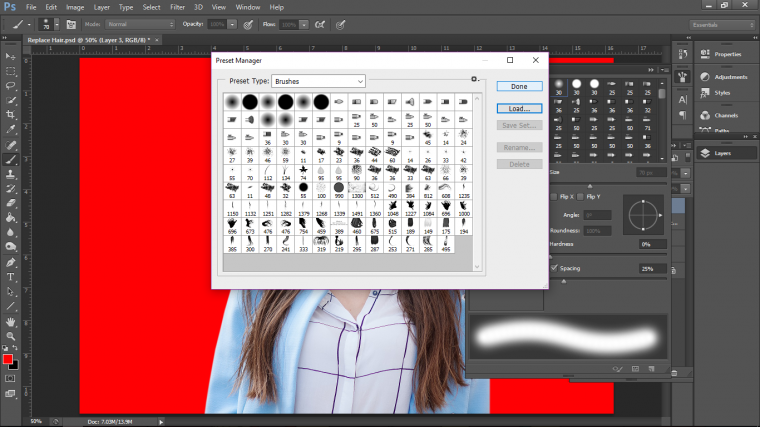
That now opens up your Preset Manager.
Click load and then locate the individual brush files, click and add them.
In total, I had 4 files that I believe should do the trick.
Once you are finished loading up all your files just click on Done and you will be ready to move forward to the final part of this tutorial.
Basically what we are going to do here is use those new brushes to make an impression of the hair, we are going to do this using the Clone Stamp Tool using the actual hair, and if needs are we will use other pictures as well which I’m sure we will!
First thing I’m going to do here is to go back in and tidy up the shoulders.
So go to your layers and click off all the bottom layers, that’s the original layer, the red and the white layer.
This is extremely important because if you don’t you will cause yourself a lot of hassle and rework when you do the clone work.
So with those layers off, I just use my black brush to paint over the areas of the shoulder I want to hide until it looks natural.
If you want it to look a lot crisper you can make a selection just like we did in the first part of this tutorial and then use that blur tool on the edges.
It’s also important here to remember to click on the little white thumbnail first before you start to do this.
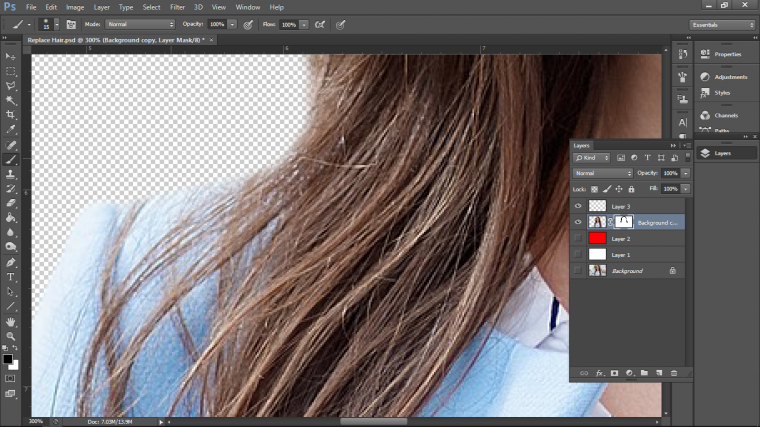
Now we are going to activate our clone stamp tool.
We can use our clone stamp tool in the exact same way as our brush tool, the difference is that when you use your clone stamp tool you hold Alt and then click on the area that you want to replicate.
So I grab my Clone Stamp Tool.
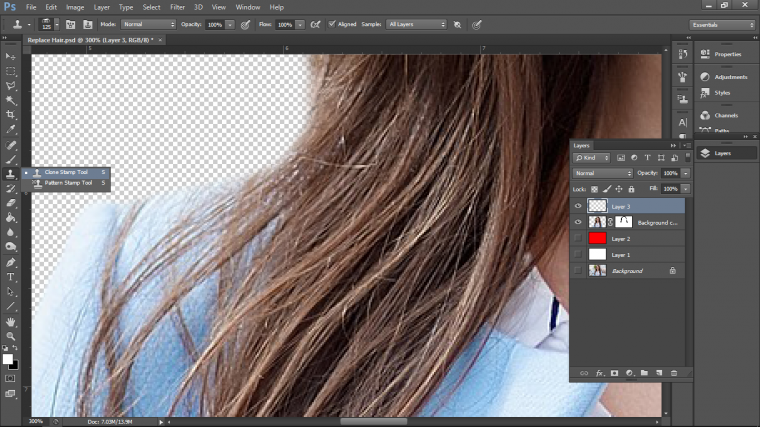
Ok so this may be hard to follow along with to start with and no picture is going to help us here with the explanation so I’m going to have to word this as best I can.
What we are aiming to do here is to take samples of the subject’s hair using the clone stamp tool.
Then with the hair brushes that we added, we are going to use their shape to rebuild the hair as best we can.
So under ‘Image’ in the top menu, you will see that little folder again with the brush icons on it.
Click on that, in the image below you can see the panel that has opened up and I’d expect it is also on your screen at the moment too.
Take a good look at it.
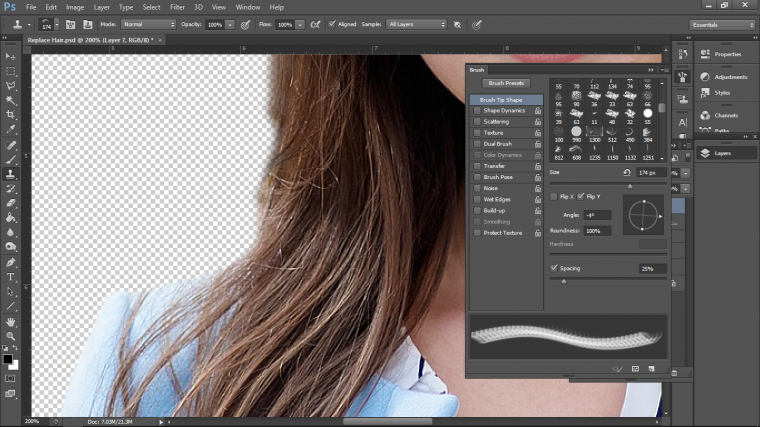
So the only thing that we have to worry about with this panel is the circle with the arrowhead on it, this allows you to rotate the brush, the two little dots on the sides will let you narrow the circle, therefore, thining the brush, I’ll be honest I didn’t use this much at all!
When you get a brush that is working for you, you can click on the little box that says ‘Flip Y’ to change it over so you can use it on the other side, you will try to vary up your Brushes but I was able to do mine with just one.
This will be trial and error as you build, so try all the brushes till you find the golden ticket, change the size back and forth as you go along
So what I did was I would try a brush and do a little section, then I would hide that layer open up another layer so on and so forth.
I built and built and built changing the rotation of the brush as I went along, now this is tedious but the results are that good that it is worth it.
You will see in the images below how I progressed.
NOTE: I have my read background on for easy viewing for the Tutorial, in practice, you will not!
You can even make copies of layers and re-use them to fill in areas and pack the hair out a bit more.
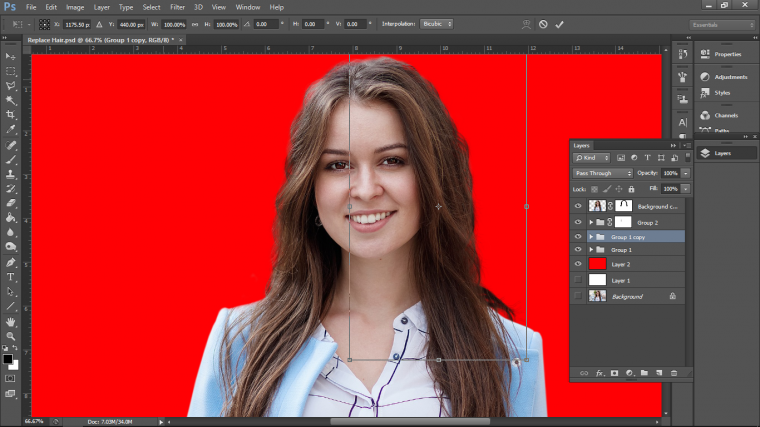
You flip these copied layers with Edit – Transform – Flip Horizontal etc
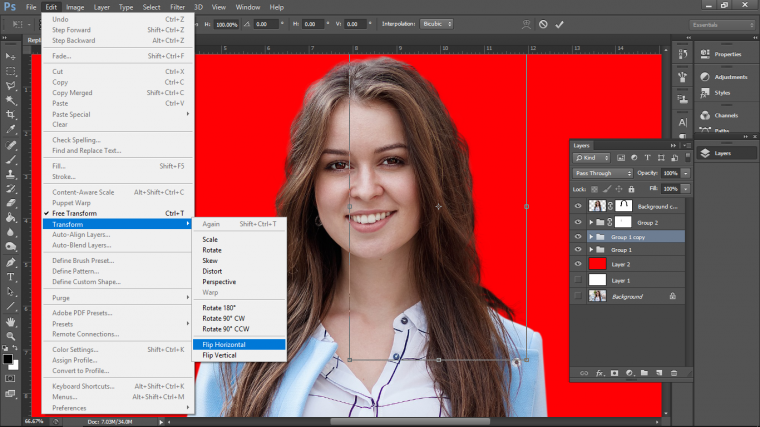
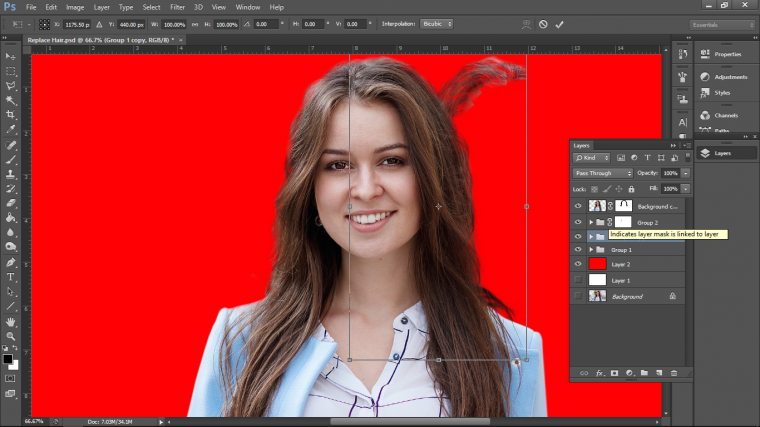
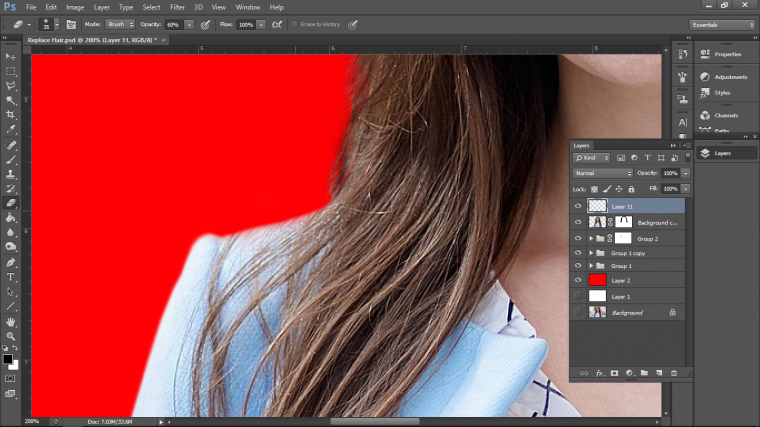
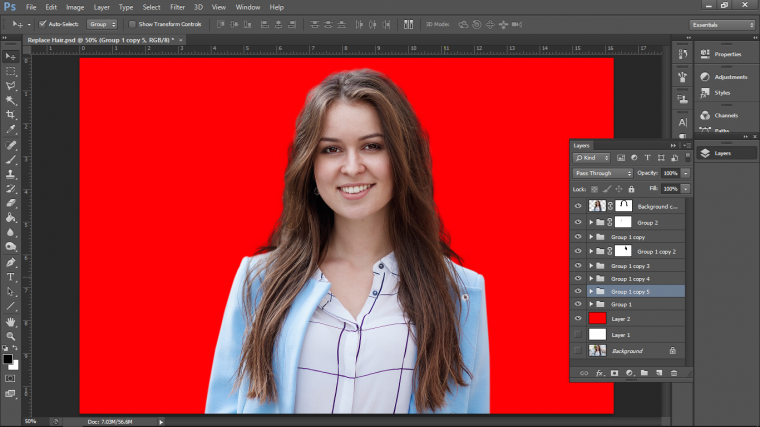
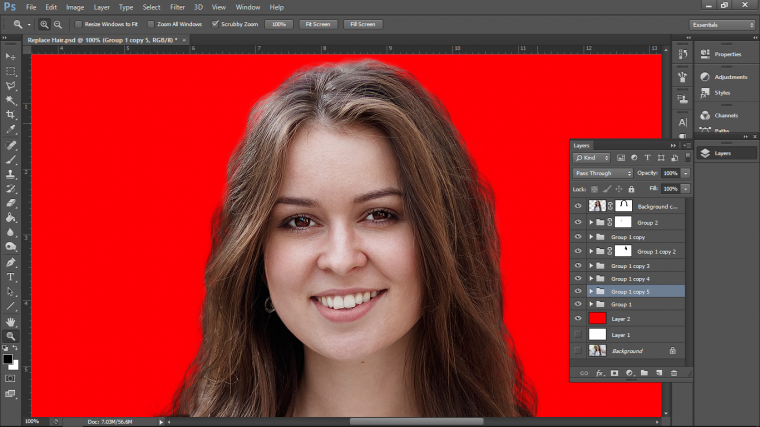
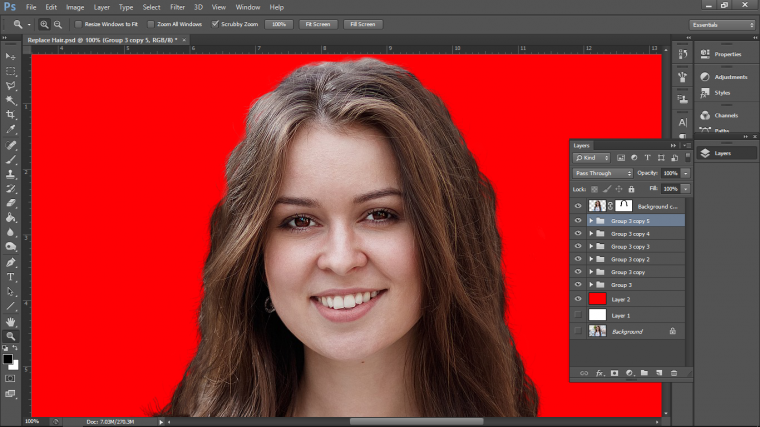
And when you are finished you can group all the layers together, move them in behind the cropped out image, then with a soft black brush soften the edge of your cropped models hair just to help blend everything in a little better, after a lot of trial and error and effort you should end up once you pop a new background in with something like my image below.

Comments (0)
There are no comments yet.