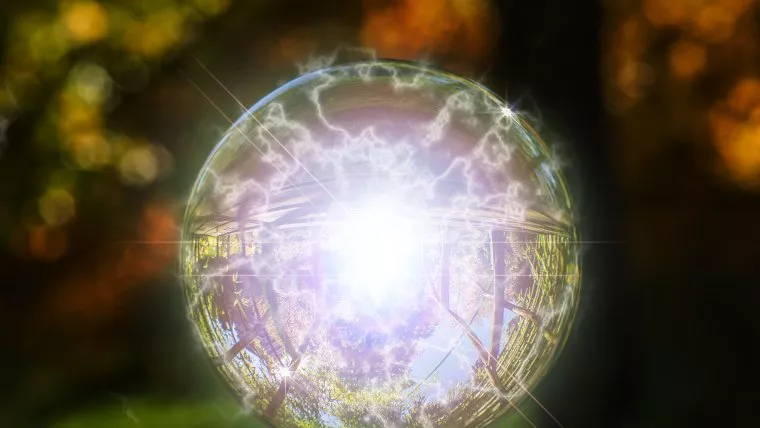
display one object in specific color or colorsects in many ways Crystal Balls like myself or somebody could be holding the plasma Image as I’ve seen on a few YouTube Videos and peoples Photoshop Art work out there.
The one I was tempted to do but decided on the current image was a frozen Ice Bubble, I thought that would have been pretty cool until I decided to stick with the image I have below.
I decided to stick with this image because I liked the color and I wanted to experiment with color combinations, so there’s also going to be a slight color theory lesson in this tutorial also without meaning to.
The Ice one would have been very cool and all but I would have been dealing with very little to go by in terms of the color palette available in that image as most of the image is basically just white.
So that’s just a few ideas for you to think about as you follow along.
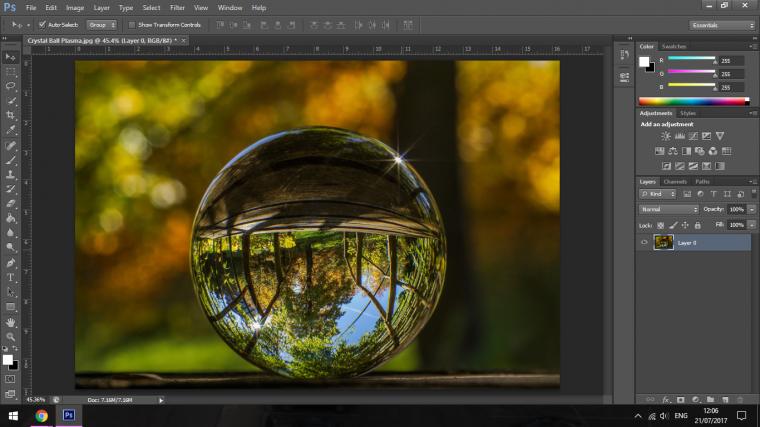
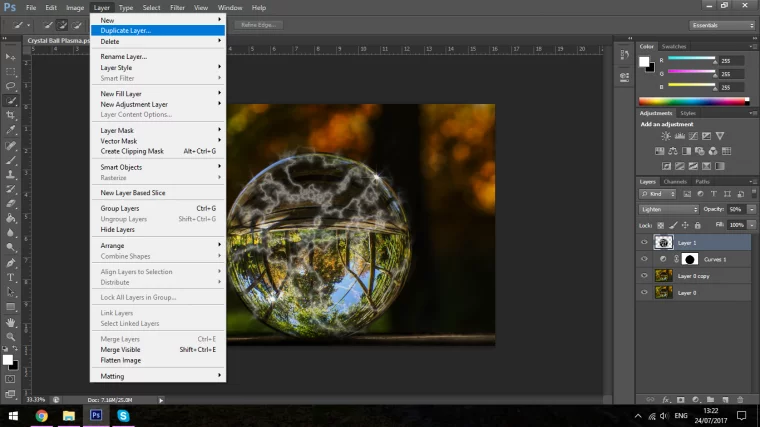
The first thing I’m going to do is to create a duplicate of my image so I’ll always have the original as a back up in case things get a little bit out of hand.
You do this by going to Layer – Duplicate Layer…
Press Ok when prompted.
Now you will see on the right hand side in the layers panel there will be a new layer.
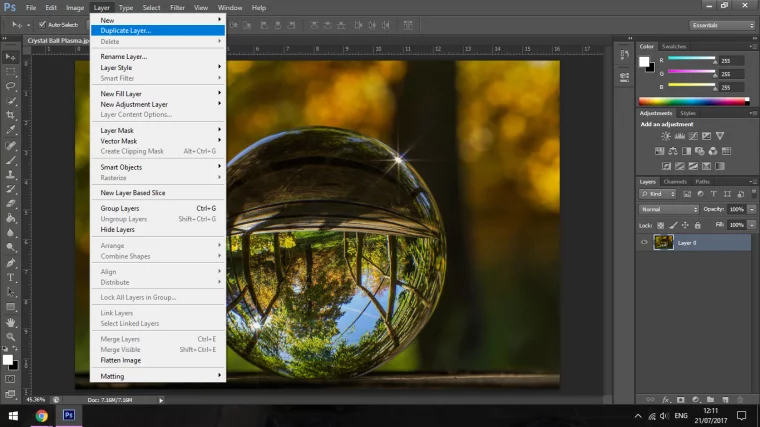
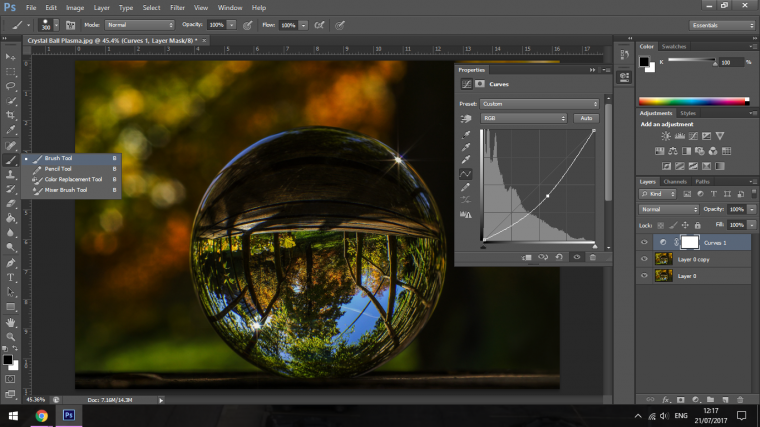
Now I’m going to open up a Curves Adjustment Layer, I do this by going to Layer – New Adjustment Layer – Curves
You will now see the Curves Panel appear on the left-hand side with a Graph in it and a line running directly through, click on the middle of that line and drag it down, this will darken your image which we want because it will help push our effect forward.
When you do that then choose the Brush Tool making sure it’s on Black, you do this by clicking on the double boxes at the bottom left-hand side, there’s a small quarter circle arrow beside that, when you click on it it will flip you back and forth from Black to White, to be on Black the White square must be behind the Black square.
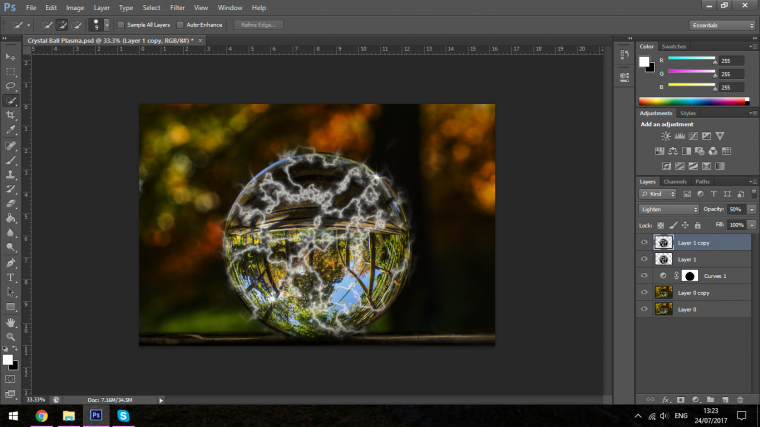
Remember when I mentioned the Layers panel when we first duplicated the original layer and you saw two?
Now you will be seeing 3 layers.
One of the Thumb Nails s your layer mask.
When you click on that you will be able to use the Brush to hide images on your photo.
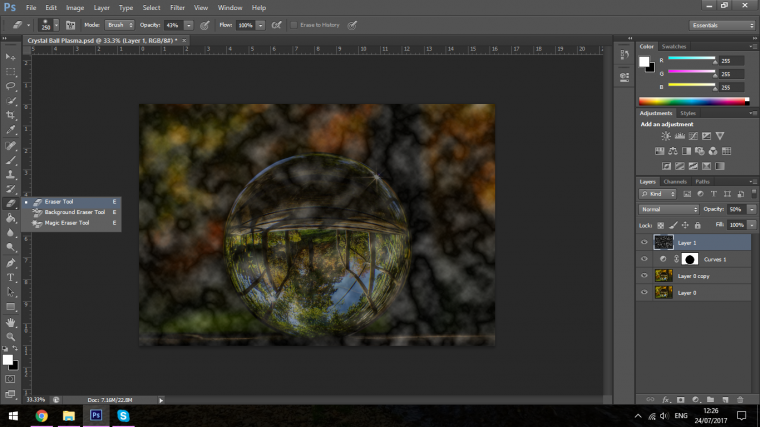
So using the Bracket Keys on my Keyboard beside the Return Key size my Brush to the same size as the Crystal Ball as best I can then click to hide the dark version of it.
I’ll also play around with the wood part you just see at the bottom giving it a little highlight where I think the light would fall, nothing major just a 5 second go over is all you’ll need if at all.
But I like my little attention to details 🙂
Note: If you make a mistake removing any parts don’t worry, if you choose white you can paint them back in as easy as you removed them, you can also play with the brushes opacity to lessen the strength.
You’ll find that option at the top of your screen just under Filter and View in you the menu bar.
Just click on it and move the slider about to reduce or increase as you see fit, when you do multi clicking with your mouse will remove little bits at a time bit by bit as you click and drag your mouse over the image.
Now if you want to also, you can go through the curves Adjustment process that we just talked about and instead of darkening you can click and drag the graph line the opposite way brightening.
Then using the Brush Masking Technique paint out all the too bright areas leaving just the main highlights.
It’s an option depending on your image but not necessary for my image.
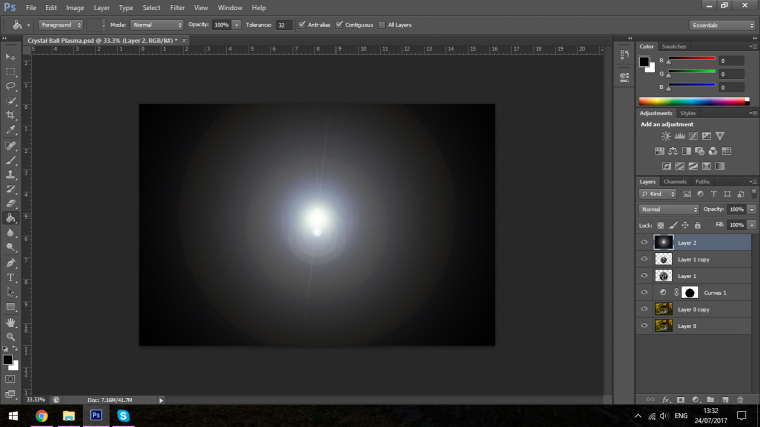
Now, we prepped our image and we’re ready to start to create the actual lighting effects.
The first thing we need to do is to create a new layer.
You can do this by going to Layer – New – Layer…
Then Press Ok when prompted.
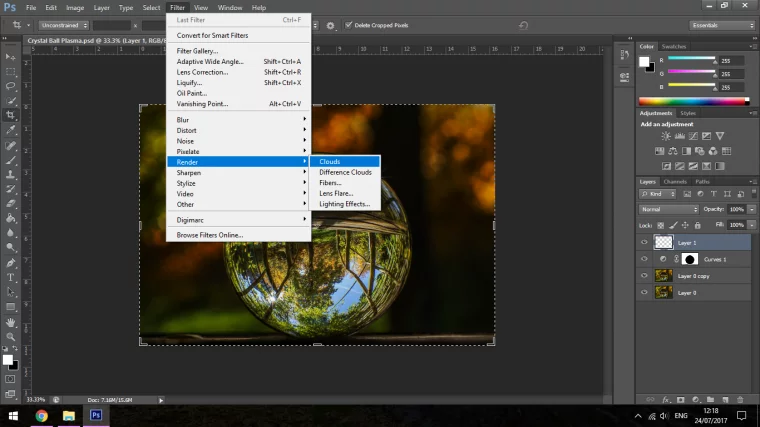
Next go into your Filter Menu, 3 to the left from Layer.
In there you’ll find Render – Clouds.
Click on that and your layer will then fill up with Clouds.
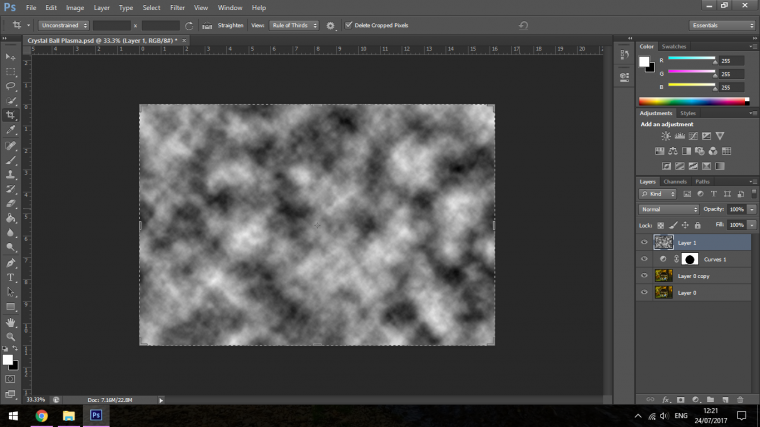
Now go to Render again only this time in stead of choosing Clouds you chose the one below that called Different Clouds.
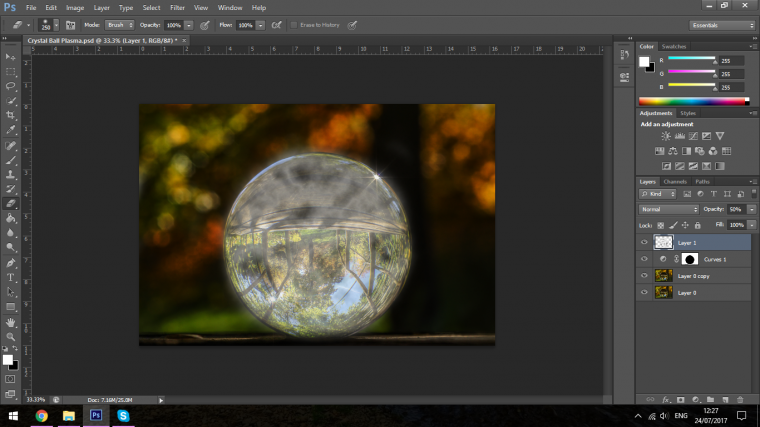
You will now have a strange looking marbled looking effect.
Drop the Opacity of this layer to about 50% to start with just so we can get a bearing on what it looks like, it may look different on your image.
Now choose your Eraser Tool and erase everything on the outside of your Ball, if you’re not using a ball then you may have to get creative.
would stick to some sort of orb shape.
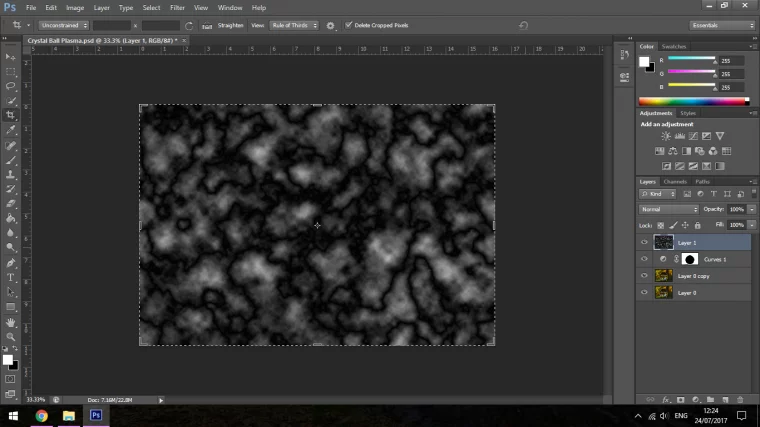
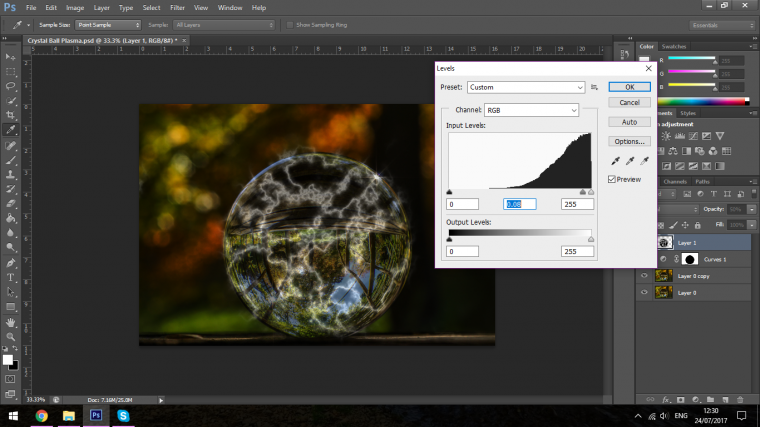
Next key in on your keyboard Ctrl I to invert the layer.
The layer will now be a lot brighter.
Next, go to Image – Adjustment – Levels
Push the middle slider all the way over to the right-hand side to you see an effect similar to the one I have below.
In case you’re wondering what we are creating here, we are creating a lightening effect.
So save this one in your back pocket for future if you ever need a cool lightening effect to add to some picture or two.
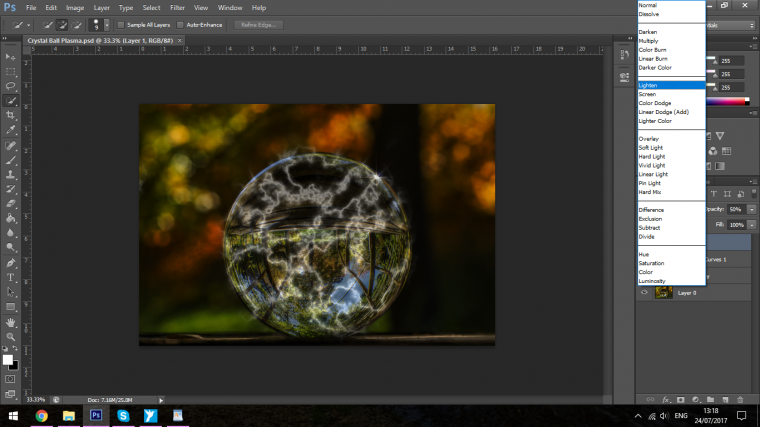
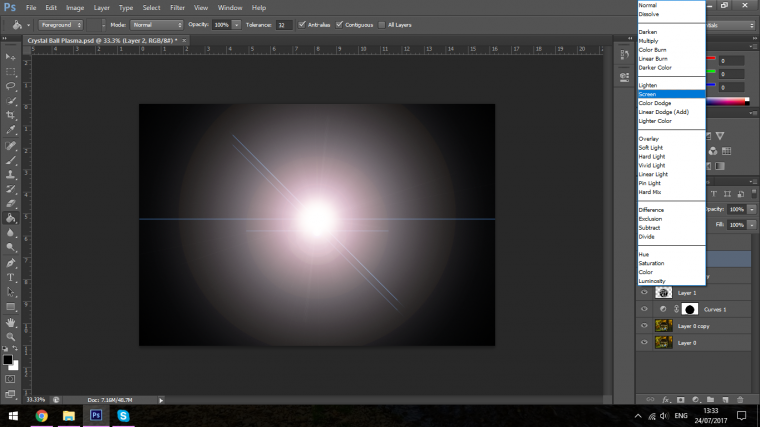
Next, change the Blending Mode to Lighten.
You find the Blending mode drop down box in the Layers Panel over to the left that contains the little thumb nails, it is to the left of Opacity.
You’ll notice that it says Normal, click on that and then scan down till you see Lighten.
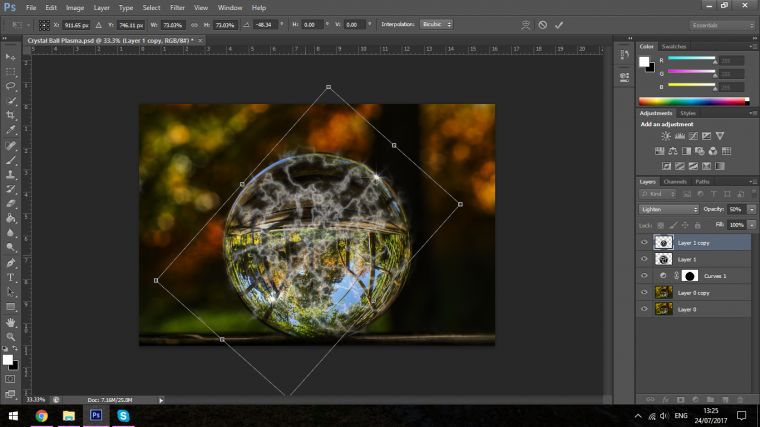
Next up we will make a duplicate of his layer.
You will find this in Layer – Duplicate Layer.
Now press Ctrl T on your keyboard to activate the Free Transform Tool.
Resize your Lightning to a little smaller and rotate it a good bit.
To add some depth to the lightening I’m going to drop the opacity of the new layer to around 30-40% and the original Lightening Layer I’m going to increase that to about 60% to bring it forwards a little bit more.
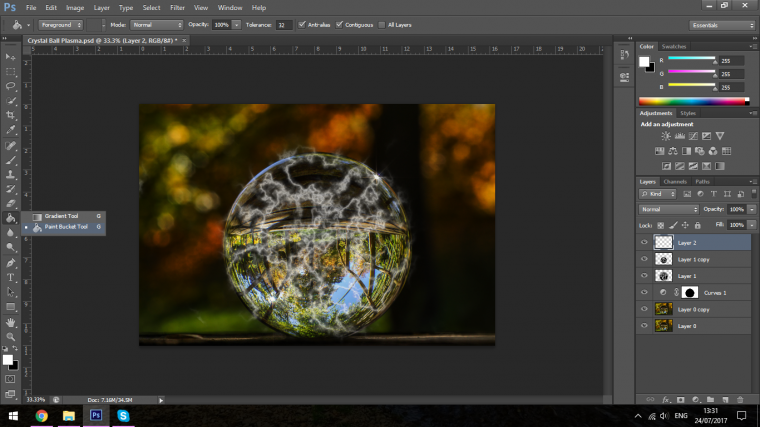
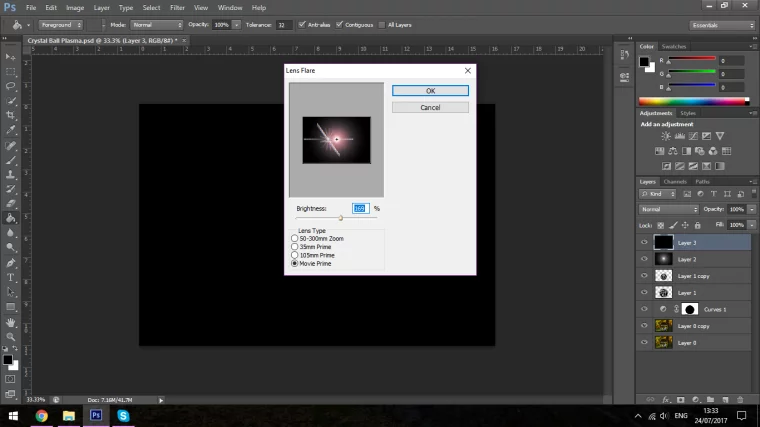
We’re now ready to add the Glow to these orbs of Lightning.
Create a new Layer and grab your Paint Bucket Tool, make sure it’s on Black.
Then click on the screen to fill in the layer.
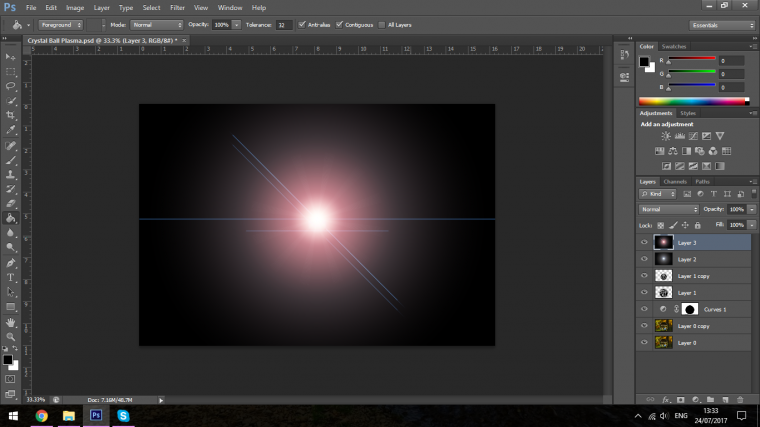
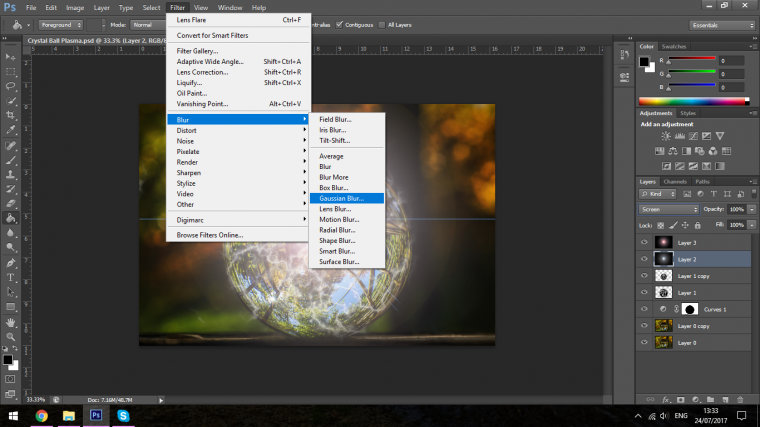
Now go to Filter – Render – Lens Flare
You’re going to do this twice so you’ll have two layers with a different Lens Flare on it. I Choose the two bottom Lens Flare Options.
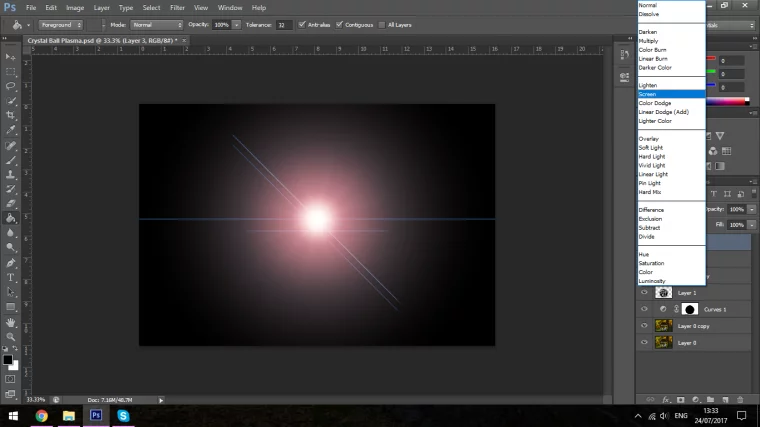
Then I changed their Blend Mode to Screen.
Once Screen has been added to the Lens Flares and they are see through I’m going to add a Gaussian Blur to the First one, around 10-20 should be enough to do the job nicely.
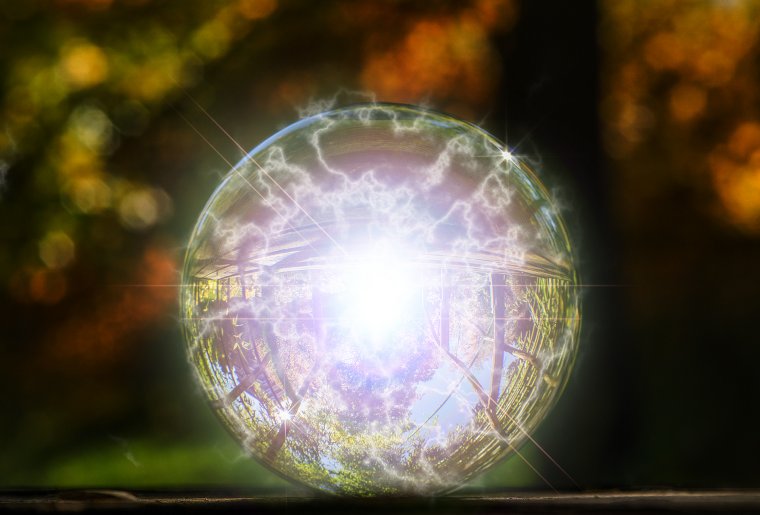
What you’ll have now is what can only be described as a pretty awesome effect before you, I’m sure you’ll agree.
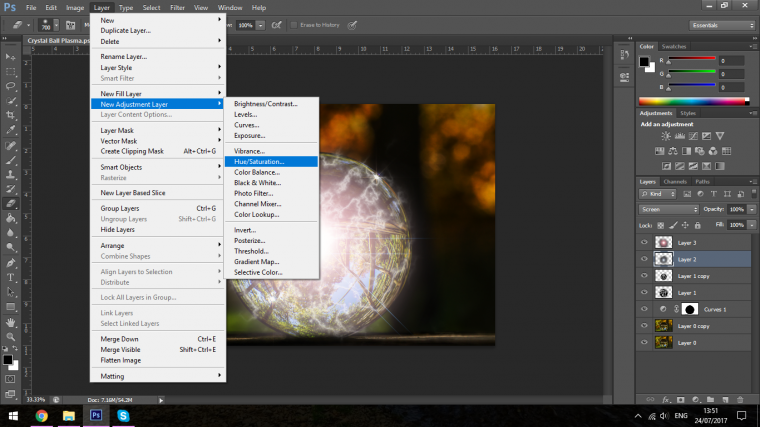
But we’re not done quite yet, but we are close, if you wanted you could finish up here but I want to add a little bit more color to this, so what I’ll do is click on the first Lens Flare layer.
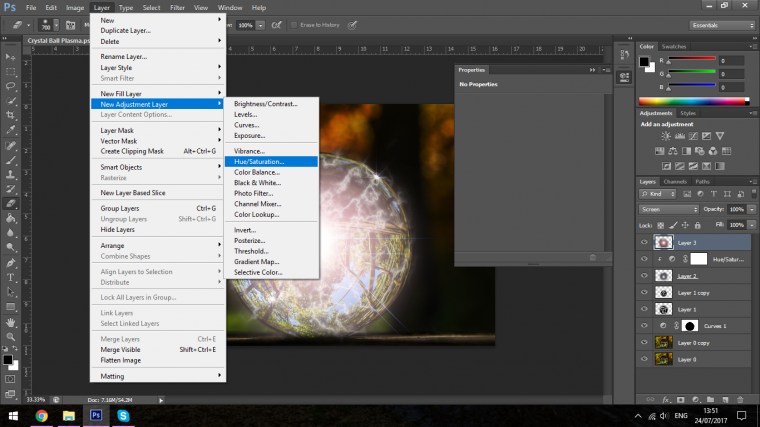
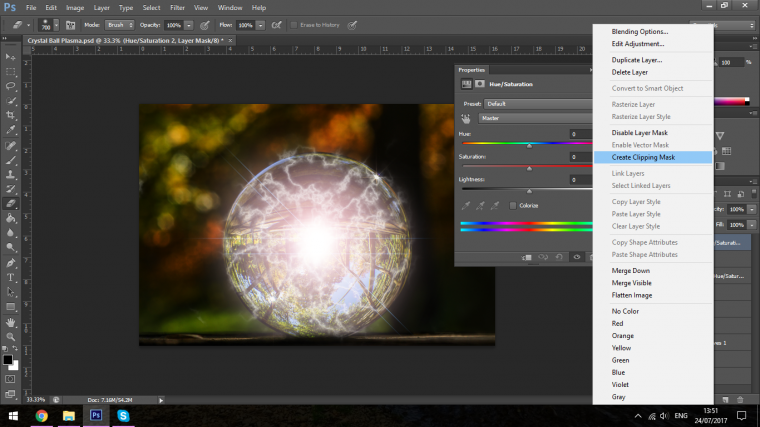
So I click on my layer and then go to Layer – New Adjustment Layer – Hue and Saturation
When I have this chosen I the right click on that layer and choose Create Clipping Mask, what this does is it joins that Adjustment Layer to the layer below so it will only make changes to that layer.
Then do the exact same as we just did to the other Lens Flare Layer.
Now click on each Adjustment Layer in turn and change the Hue and the Saturation as you see fit to what ever color you’d like.
And there you have it we are now complete, I hope you enjoyed and I hope you create some awesome images with your new knowledge.
How to do the selective color effect in Adobe Photoshop?
Graduated from college in 2002 with a degree in Art & Design, I started exploring my way in Graphic Design and Professional Post Production. Full-time freelancer since 2011.


 Facebook
 Google +
Comments (0)
There are no comments yet.