How to Edit Photos for a Cinematic Photography Effectwww.sleeklens.com
Hi all, welcome to this PhotoshopTutorial, and today we’re going to be looking at how to create a cool cinematic photography look in our images.
So get settled and pic an nice image that you would like to try this photo editing tutorial on, you can use one of your own or something you find through a stock photography website or Google images. Don’t be afraid to try this tutorial on multiple photos so you can really master the cinematography effect.
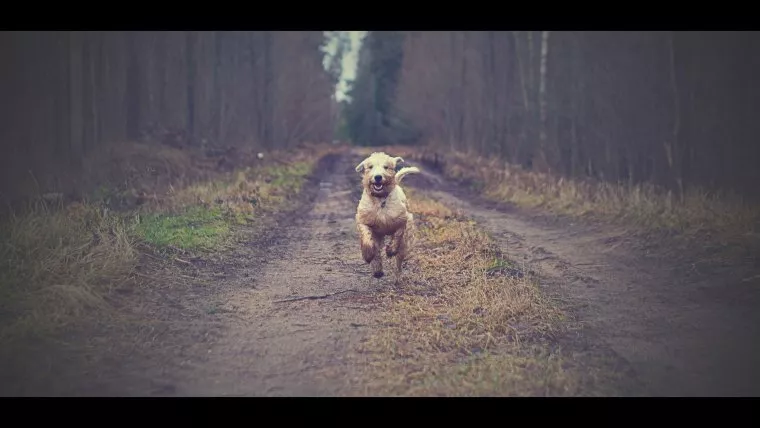
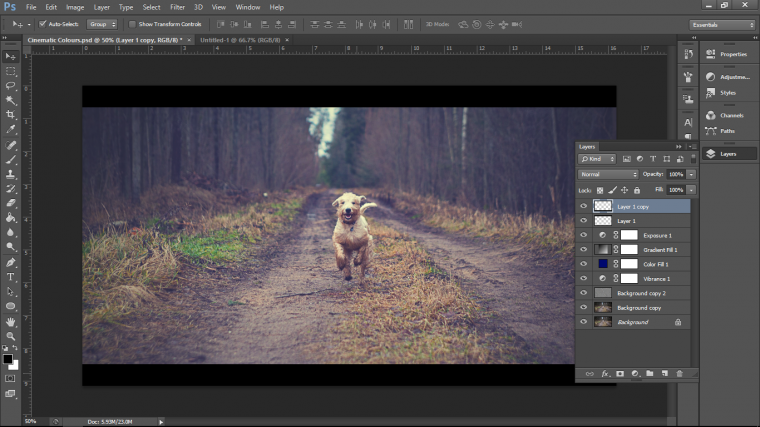
This is the image that I will be using to create a cinematic photo.
Table of Contents
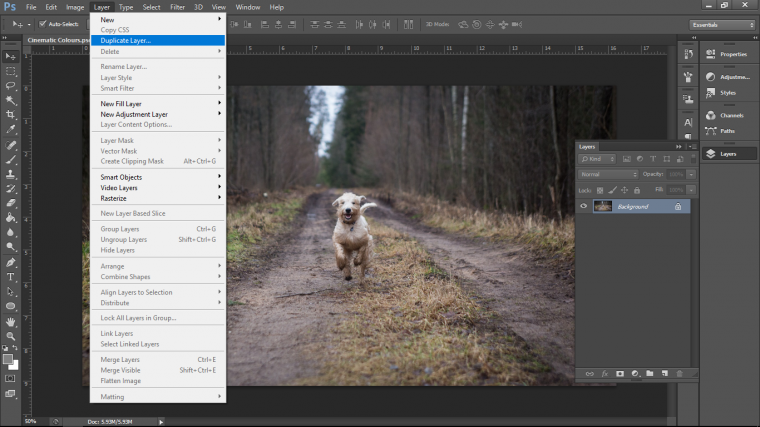
Duplicate Layer
The first thing that I like to do is to create a Duplicate Layer, so go to Layer, Duplicate Layer.
I do this as standard every single time, I like to do it even if the end result doesn’t require it, reason being is because of 1. it’s a good habit to get into as a photographer while photo editing and 2. you never know what you will do with the image in the future especially if you are like me and keep a record of all your PSD’s in case of future need.
Center Image
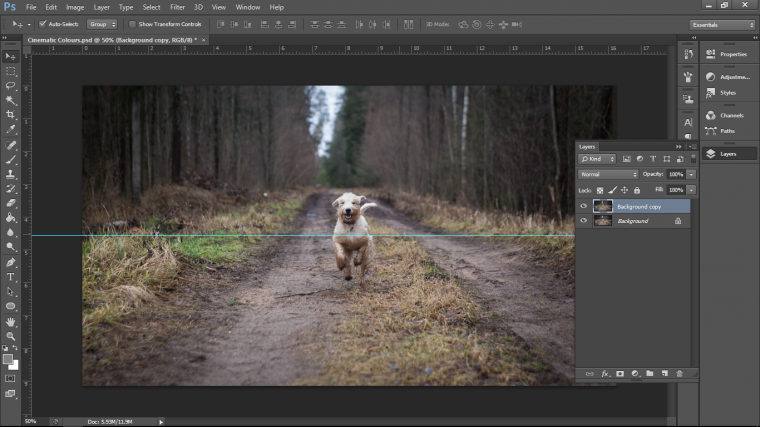
Now I want to make sure that the dog is in the center of my image to ensure it has nice composition. You generally want the subject to be eye level. So, where you see the measurements at the top and at the side of your image, so what you do is click on that and drag it down to roughly the center of your image, you should feel a little snap happens when you reach the center and it should automatically place the line in the center of the image.
Do the same with the side as well.
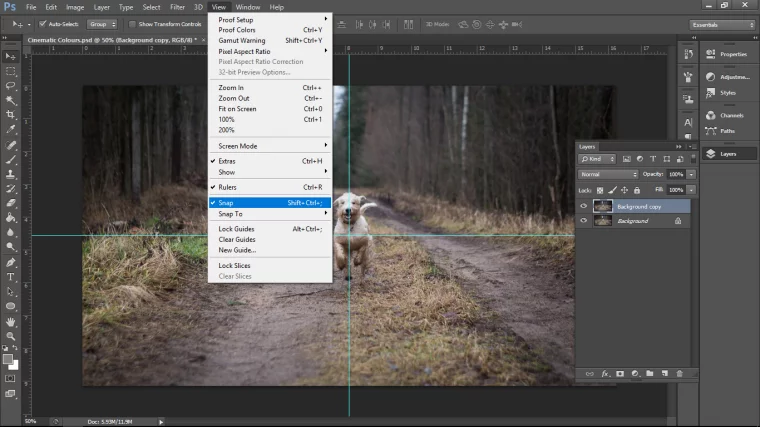
If your image is not centered grab the Crop Tool by pressing (C) on your keyboard and adjust and if you do not feel the Snap automatically placing your measurement in the middle go to View and then down to Snap, clicking on it to activate it.
OK so once that’s all good if it’s an option that you wanted to choose you can simply remove the measurement lines by clicking on them and doing the reverse of what you just did, so drag them to the rulers on the top and side and release, that will get rid of them.
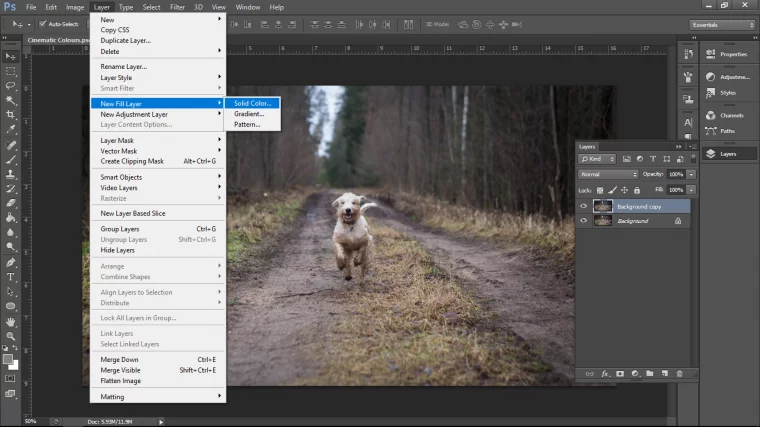
Add Solid Color Layer
Now we are ready to begin the process of creating cinematic image.
Go to Layer-New Fill Layer – Solid Color
Press OK
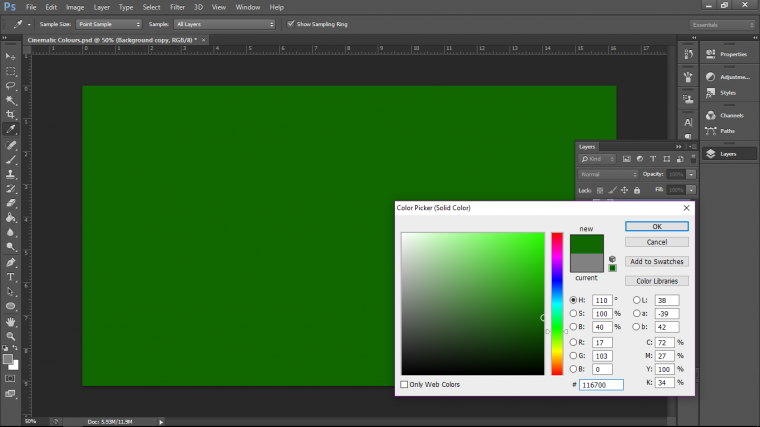
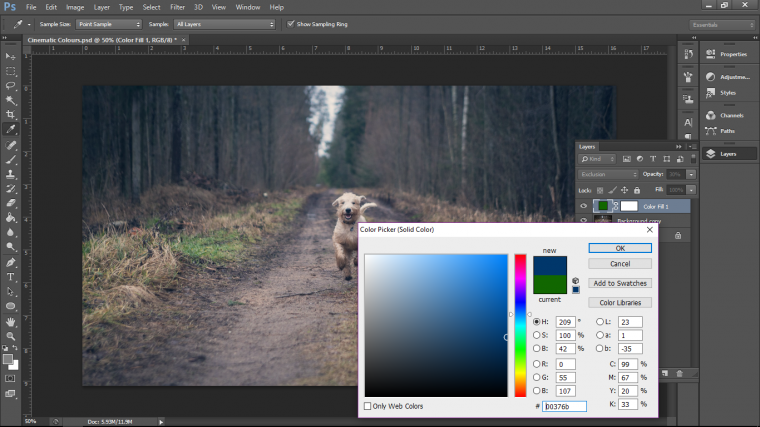
Now you should have a full-color Adjustment Layer, you can choose any color here you want, so I’m going to start off with green in memory of Breaking Bad. It’s a great TV series that’s well-known for its green-hued cinema film effects.
Once you have chosen your color, press OK and then we’re going to change the Blending Mode.
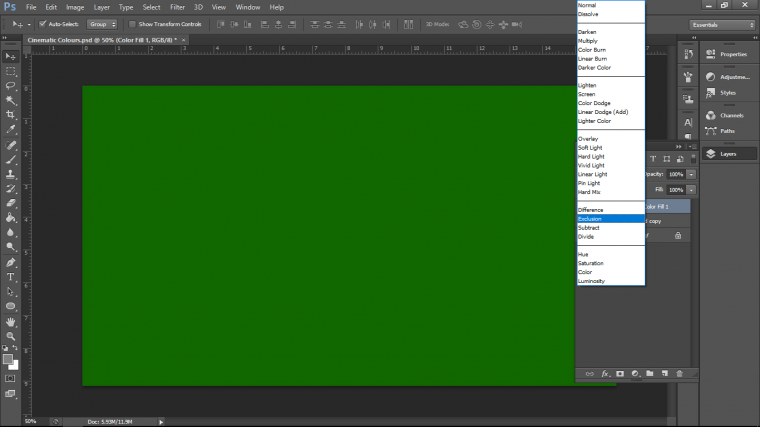
Go into Blending Mode: Exclusion
So if you don’t know what the Blending Mode is you will find it in your Layers Panel, to look to the right hand side where you will see little layers stacked up with thumbnails included, if you don’t have this up go to ‘Window’ at the top bar on the program beside ‘Help’, and look for ‘Layers’ in there.
Ok so, if you are in your layers panel, look for the word ‘Normal’ in a tab, click on that tab and a load of Blending Mode options will appear, scan down the list until you see ‘Exclusion’ and click on that.
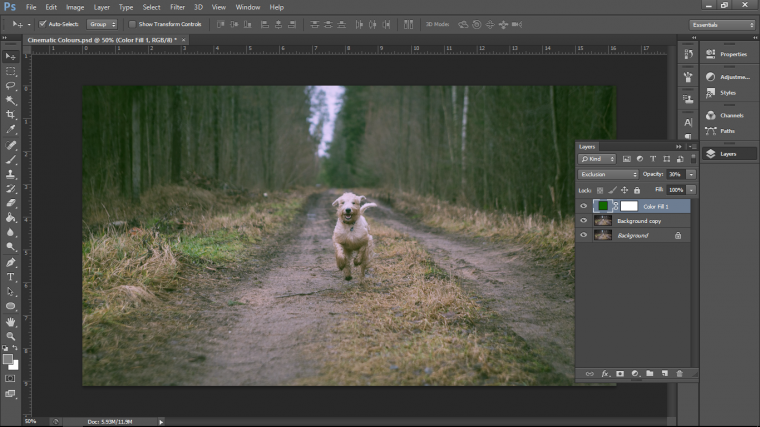
Adjust Opacity
Then in the same panel look for ‘Opacity’ and reduce it to about 20-30%
So if you would like to change the color of the cinematic shot, it is easy, all you have to do is to double-click on the little color thumbnail and the color panel from before will appear, then you can play around with the colors until you are happy, you do this by clicking in the big center part and you change the actual color on the side slider.
Once you’re done then all you have to do is click OK and you’re set, remember that you can do this as many times as you wish because this is an ‘Adjustment Layer’, so keep those words in your mind, because this is one of the most important functions of Photoshop, it allows you to do what is called Non-Destructive post production editing.
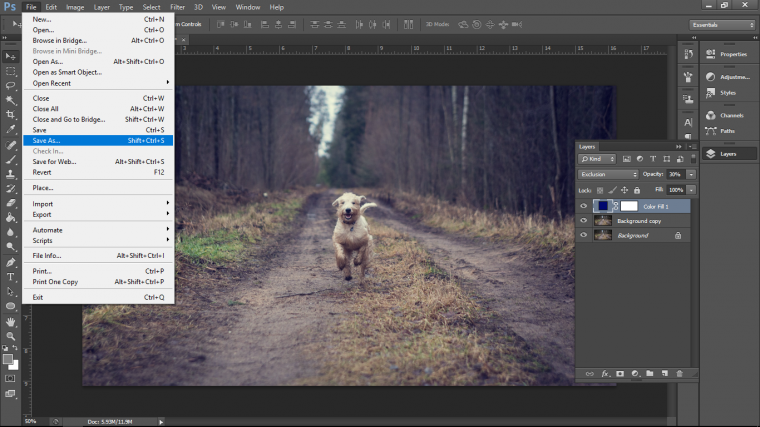
Save Progress
Ok, we’re going to leave it here for the minute, so save up by going to File – Save As.
Name it and change the setting to PSD as shown below.
So, so far we have got our cinematic photo and duplicated it, then we added a solid color and changed the Blending Mode to Exclusion before we played around with the color after we dropped the opacity on that solid color layer.
Color Theory
Now, I just want to talk about the colors that we chose, so just a little bit of color theory here that I follow myself, so you can essentially use any color that you want to use yourself, but a little rule that I use when it comes to color grading is that Blue and Greens equals cool and Red and Yellow equals warm, so depending on your cinematic image, you’ll want to choose a color palette according to the dominant color in the cinematic photo or the dominant theme/theme you are going for…
So think about it this way, if your image was a beach scene you would probably choose a nice yellow-based color to increase the warmth and so forth unless you were going for a specific look which I am going for in this tutorial which is the cinematic look, which uses a lot of blues to cool the subjects down.
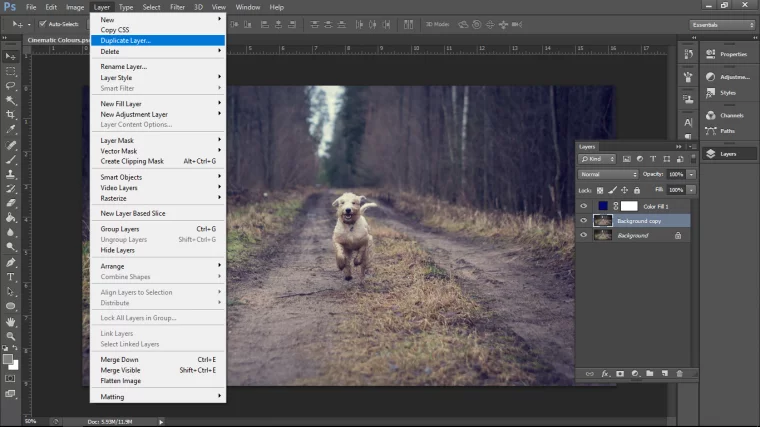
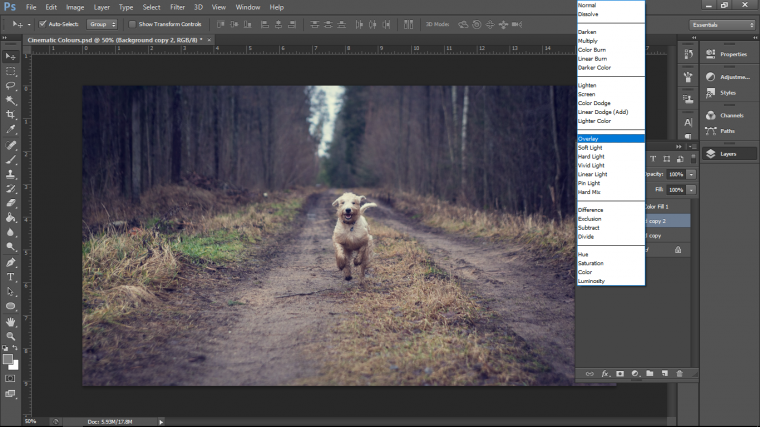
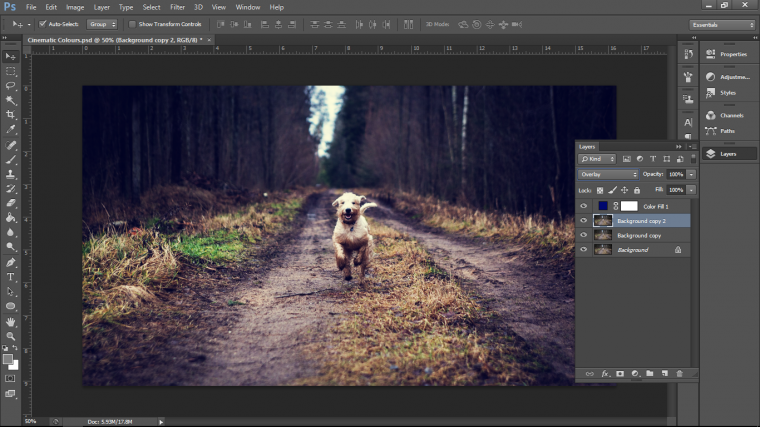
Create Overlay
Ok, so next I want you to create another duplicate of your cinematic image and change the Blend Mode to Overlay this time.
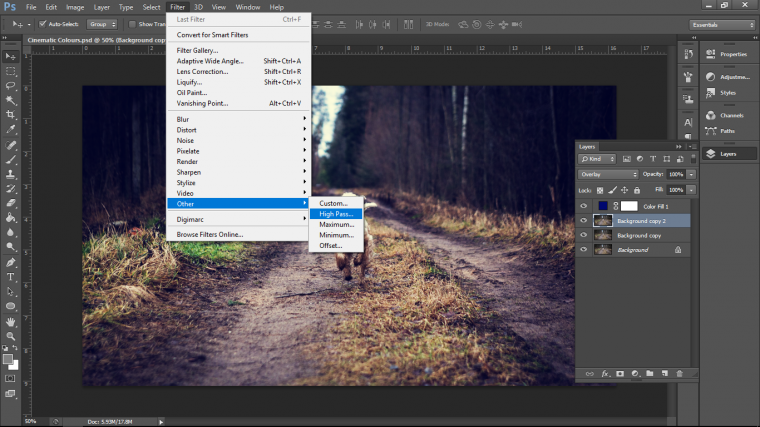
Add a High Pass Filter
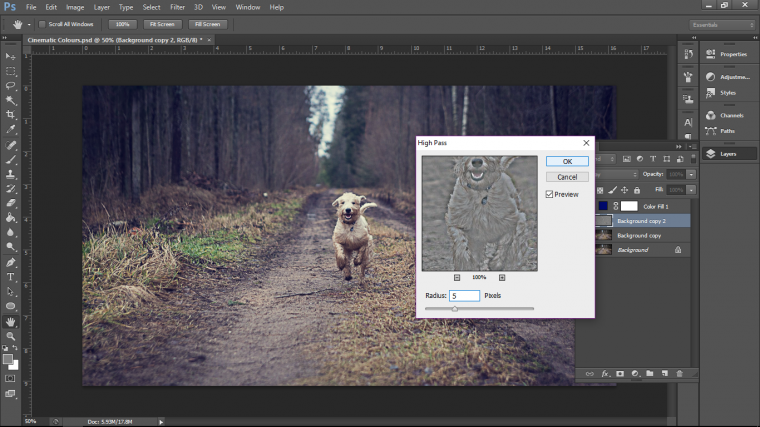
Next we will go to Filter – Other – High Pass
What this will do is to add a little bit of sharpening to cinematic photos.
Choose a Radius of 5, I think that should do the image nicely, then press Ok.
You can also drop the opacity on that layer to about 50% if it’s too much or until it looks good. I’ll stick to 50% as I’m pretty happy with that.
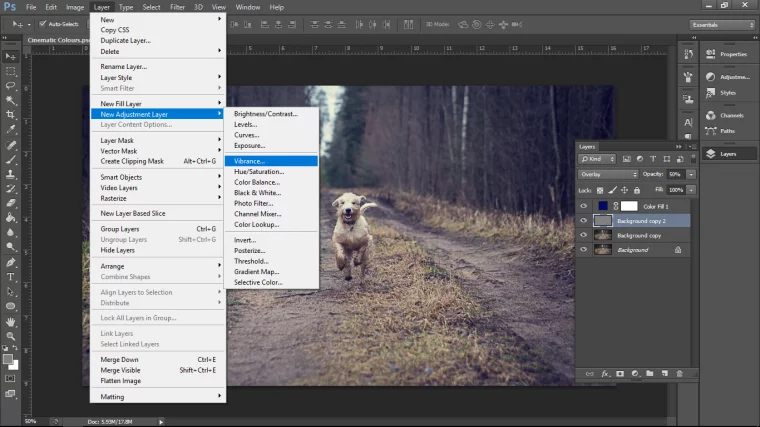
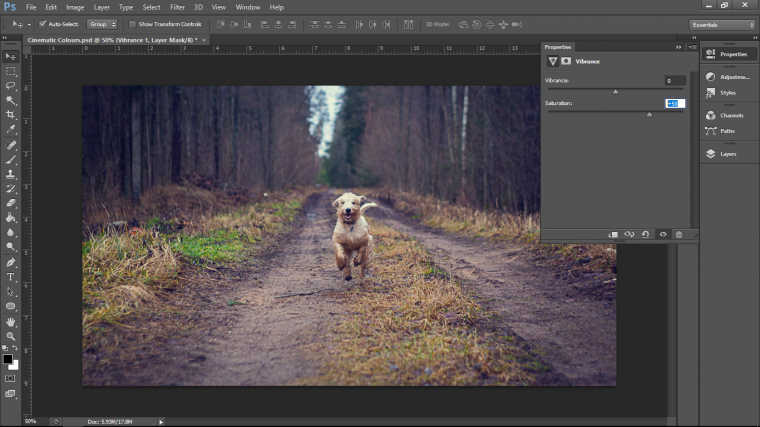
Adjust Vibrance
Next I’m just going to add a little bit of Vibrance to the image t0 create a bit of cinematic style contrast, so I go to Layer – New Adjustment Layer – Vibrance
When the panel appears I go straight to the saturation slider and move it to the right, for me I was happy with +50 you may find better results elsewhere.
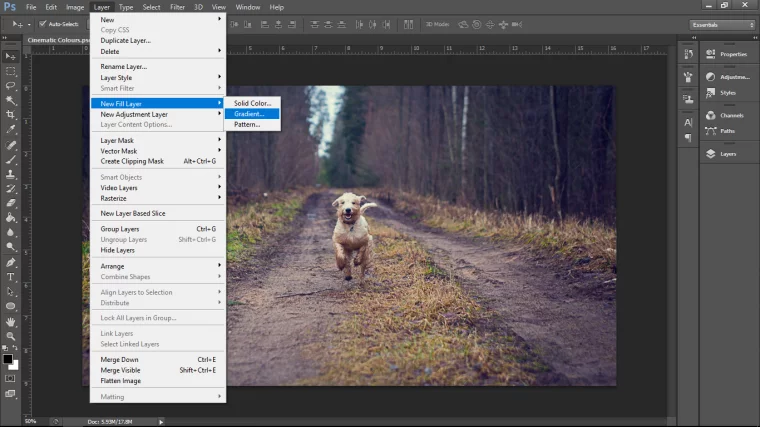
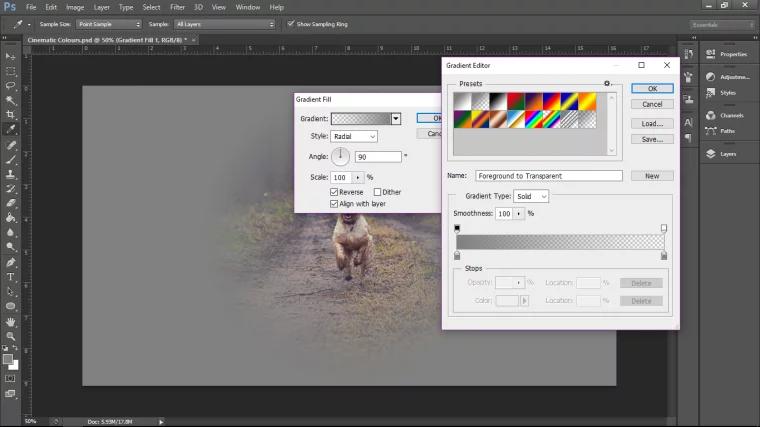
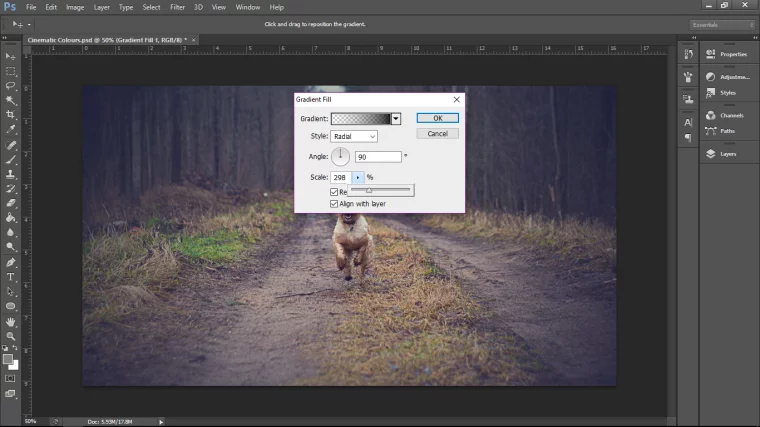
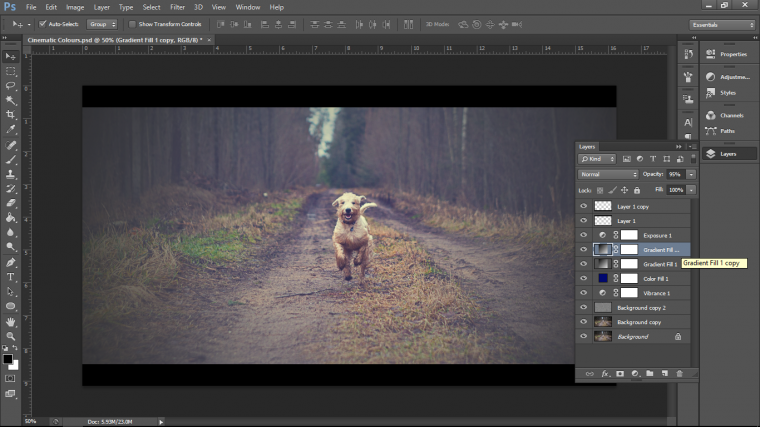
Create a Gradient Layer
Then I want to create a Gradient Layer, you’ll find that in Layer – New Fill Layer – Gradient
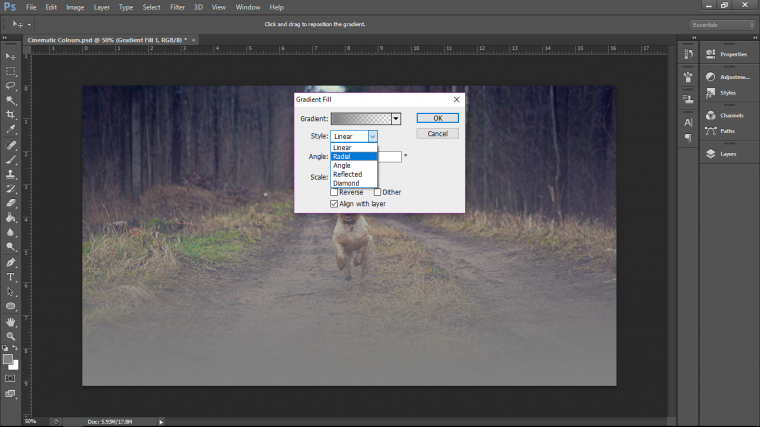
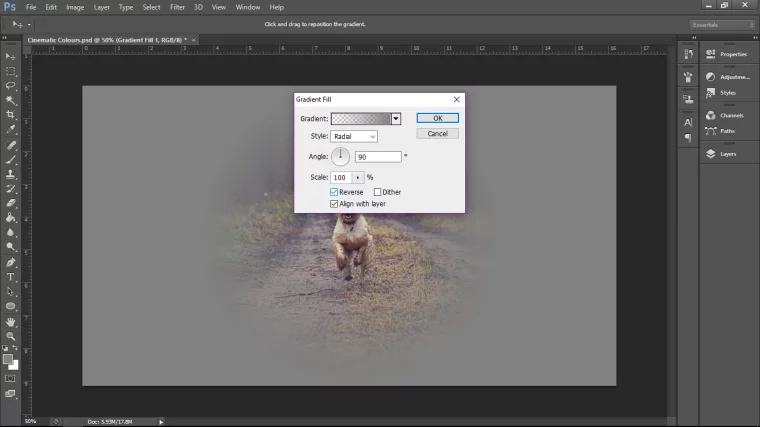
Click Ok and you will see a panel appear, first thing that you want to do is to change the setting to Radial.
Then click reverse.
Next thing you want to do is to choose the gradient with half it’s opacity to zero, it should be the second one across, you may also need to change the color side to black.
You do that by double-clicking on the Gradient Bar, then when the panel appears you’ll see another Gradient bar with 4 little tabs at the edges both top and bottom.
Make sure the tabs on the left are Black.
So again you double click on these and change them to Black and press Ok.
Then at the bottom of the panel, you will see Scale, click on it and use the slider to get to the point where your gradient is just creeping in at the edges and press Ok.
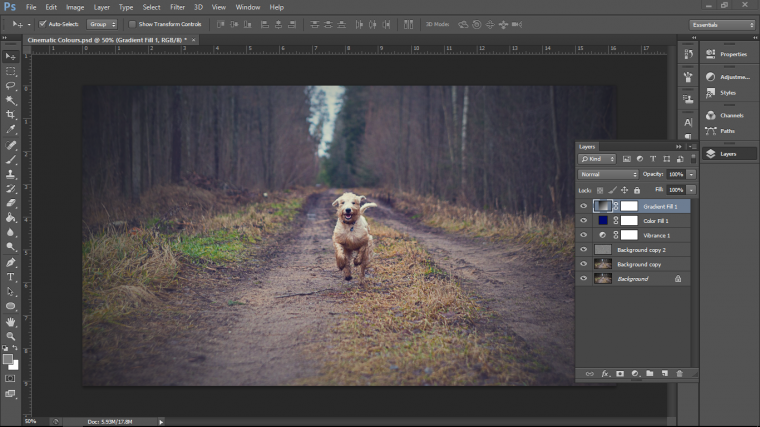
Make sure this adjustment layer is at the top of your layer stack, if it’s not, just click and drag it to the top, easy as!
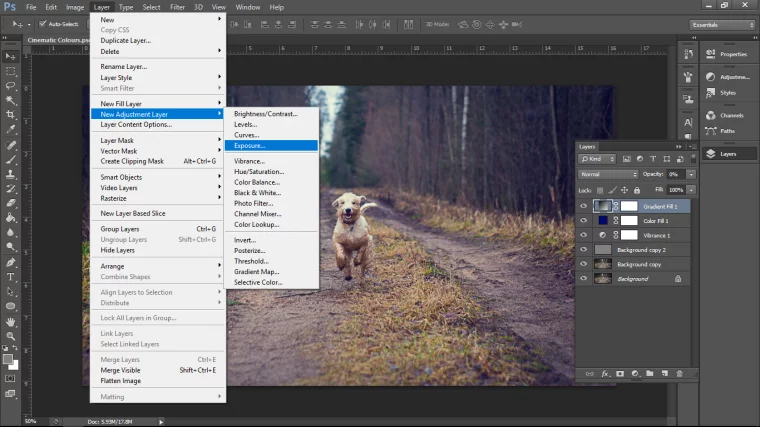
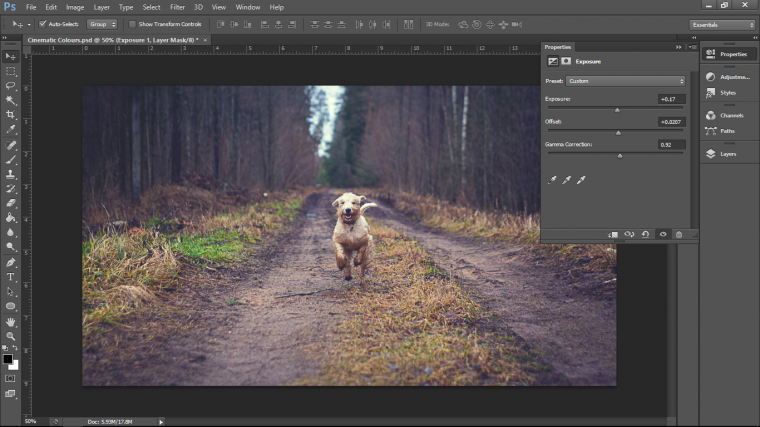
Fix Exposure
Next we’re just going to play around a little bit with the Exposure to adjust to give the photo a bit of cinematic lighting. This will help you achieve that soft lighting look cinematic photography is famous for. You will find it where you have been getting the ‘New Adjustment Layers’
The only two here I am concerned with is the Offset and Gamma, I’m just going to nudge them to the right just a little bit and leave it at that.
I want a kind of faded light effect with the exposure.
At this point, if you wish you can go back into your Adjustment Layers and play around if you are not 100% happy with your results so far
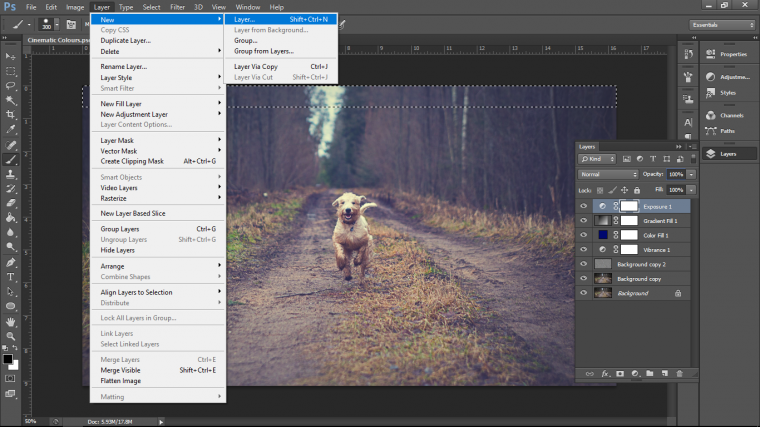
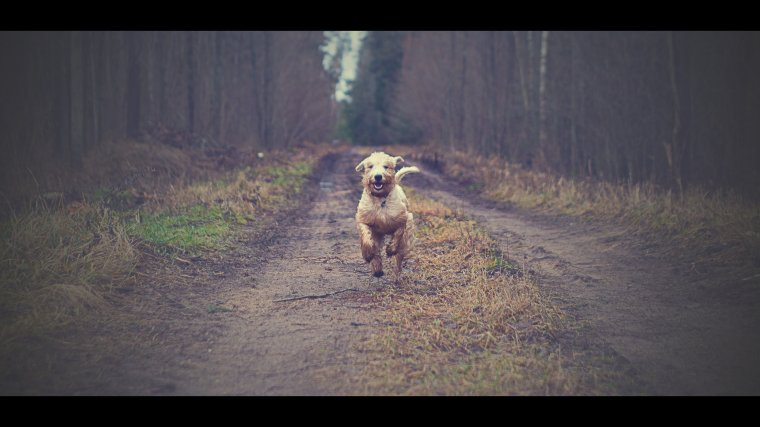
Create Cinematic Frame
Finally, we’re going to create a frame to achieve the full cinematic effect. Create a new layer on top of everything.
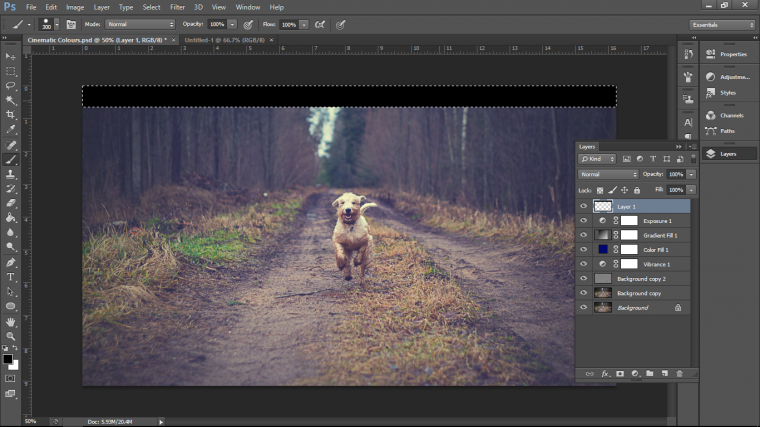
And using your selection Tool just create a little rectangle right at the top.
Next grab a Brush with Black and paint in that.
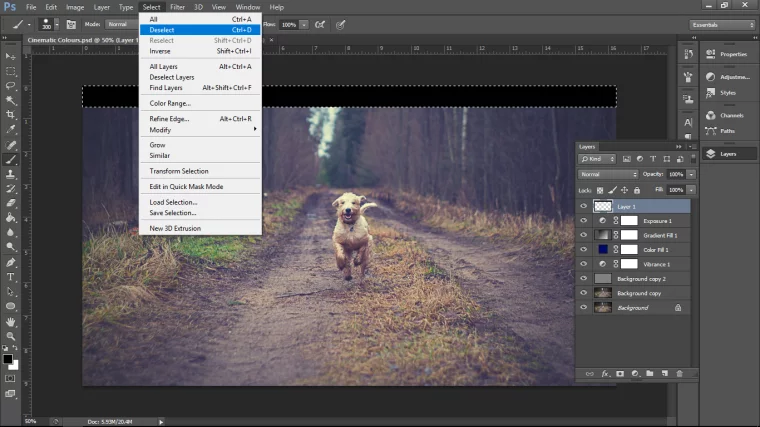
You can Deselect in the Select drop down box.
Then just duplicate that layer and move it to the bottom using your mouse to click and drag on it.
Again if you want to make adjustments to some of the settings you can do so.


 Facebook
 Google +