
Hi all, today I’ll be starting the first Lightroom Tutorial I’ve done in a long long time.
So keep an eye out because I’m going to be revisiting Lightroom quite a bit on and off between my Photoshop Tutorials.
What we’ll be looking at today as the title intends is how to resize our images in Lightroom.
There are numerous programs out there that you can use for this including Photoshop of course but not a lot of people know that you can actually do it in Lightroom as well.
How I decided to write this tutorial was that I was refreshing my computer and starting it from scratch again when I job came up with a client looking to increase the size of their Images for print, I didn’t have Photoshop installed yet only Lightroom so I had to dig this one up as I hadn’t done it in a long time and I thought it would be the perfect time to write this tutorial both as a refresher for myself but also to drop some knowledge on you guys out there too.
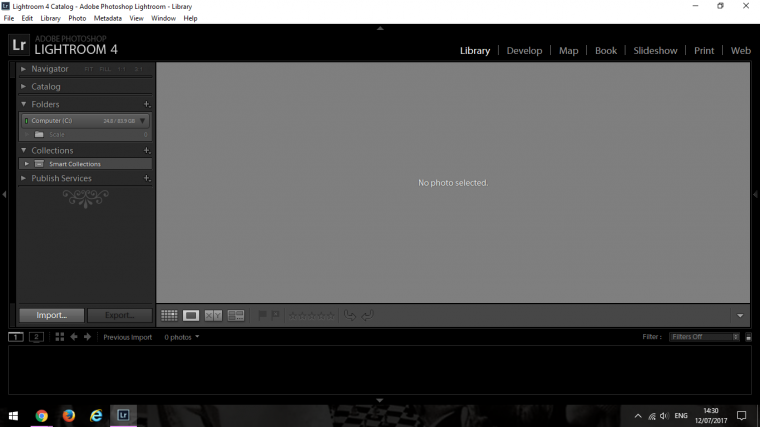
Import your Image so we can get started, to Import you have to have your Images in a folder.
I have mine on my desktop just to start off, you would have specific folders etc if you are working professionally but you would know that anyway.
But just for this mines on my desktop.
I go to Library – Import
Click on Import, when you do you will see a new pop up appear.
On the top left-hand corner click on the Removable tab.
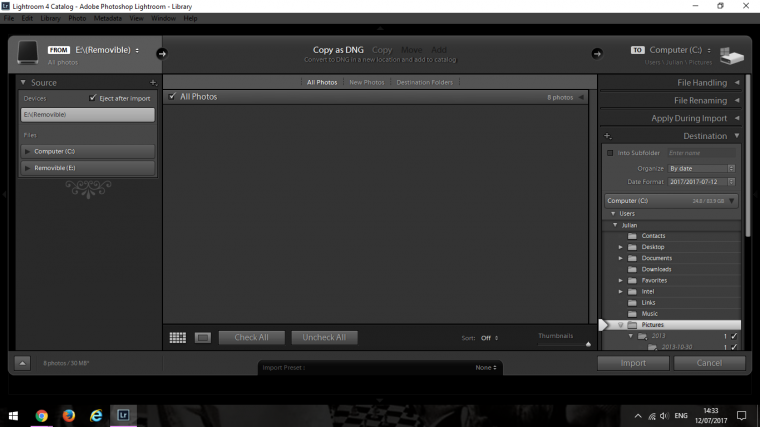
Choose Other Source…
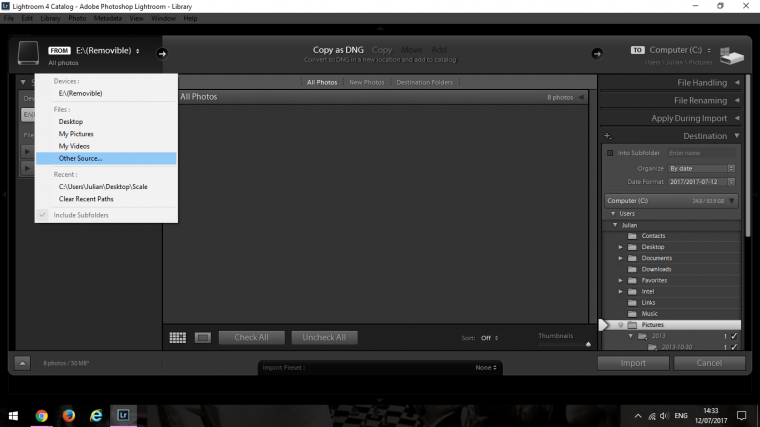
When you do this you will be able to search for your Image folders by navigating the various menus just as you would look for any other file.
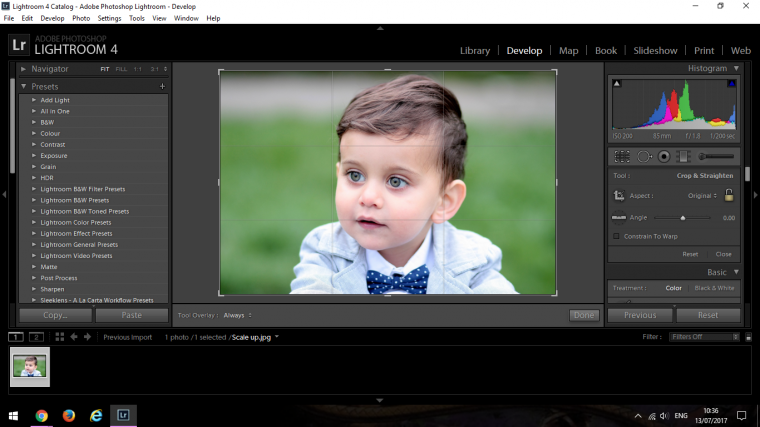
Click and Open your file then click on Develop which is the Tab besides Library.
It is in Develop that you do all your editing.
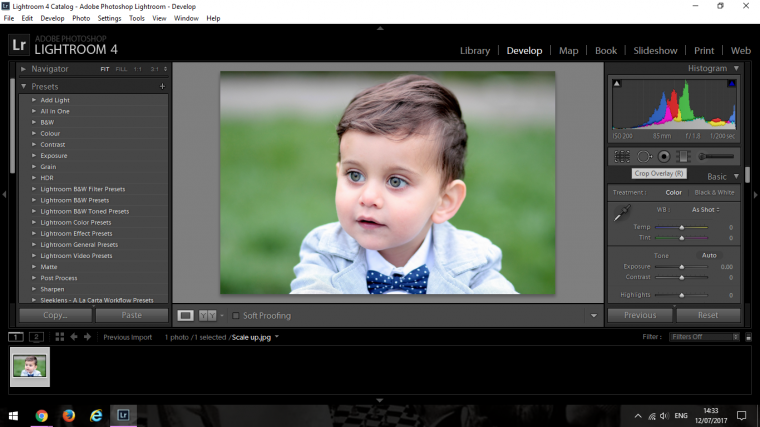
When you have this all opened up and you’re good to go it’s time to resize.
You resize via the Crop Tool.
The Crop Tool is on the right top hand side of the Lightroom worktop, you will see where it says Histogram and there are graphs in all different colors.
Under that you will see some Icons, 5 to be precise.
It is the first one on the line, it looks like a small grid of squares, when you hover over it, you will see that its name comes up, so keep this in mind, if you don’t know what any of these tools are all you have to do is hover your mouse cursor over it and its name will appear.
Very handy for learning!
Ok so click on that.
As you can see, a panel has just opened up, in here is where you will find all the options.
Next to the padlock icon, you will see the word Original.
Click on that a pop up will appear.
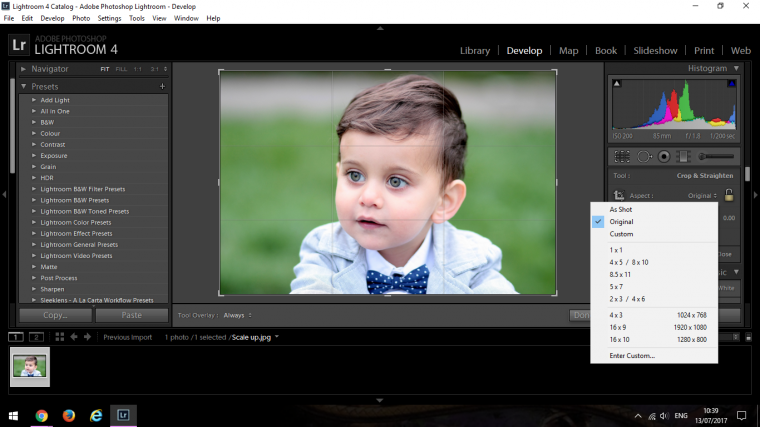
say I want the image to be 40×30 Inches I’m first going to change my ratio to 4×3, you will then see constraints appear where it’s going to be cropped.
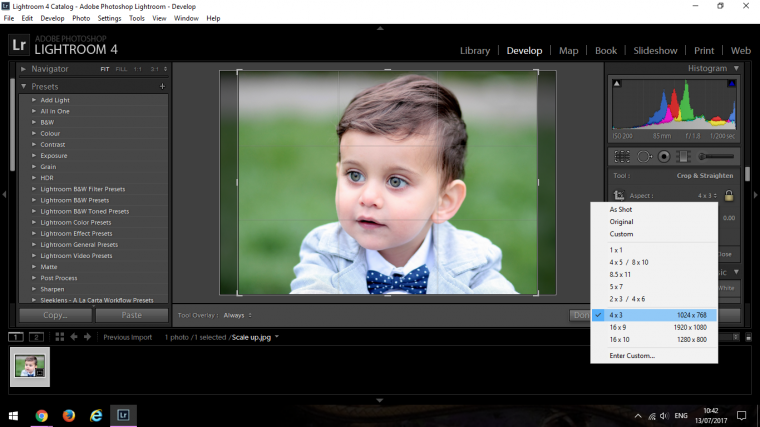
Then hit return.
Now right click with your mouse on to the image.
Choose Export.
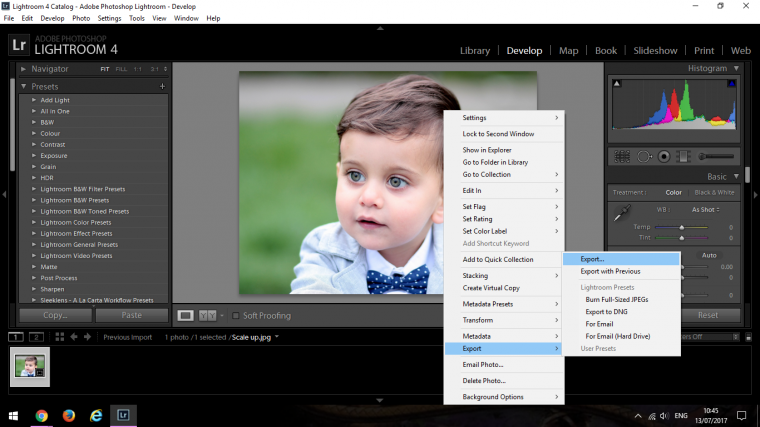
A panel with all the options will now appear, this is where we will be doing all our changes.
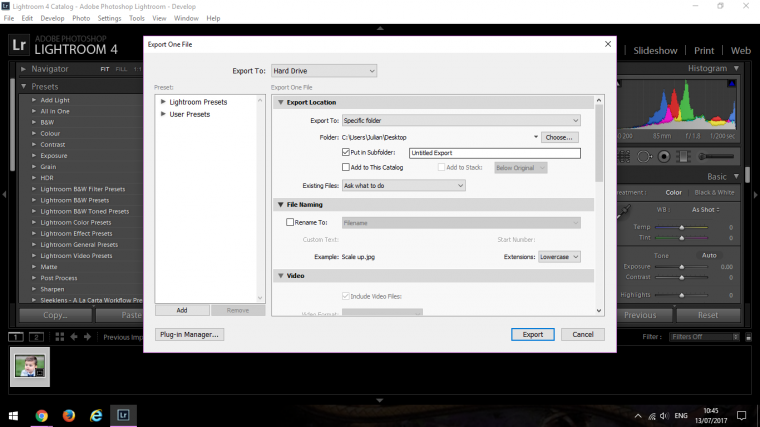
Save your file inside a folder of your choosing where you see Export to:
Or create a new one, just standard stuff here atm.

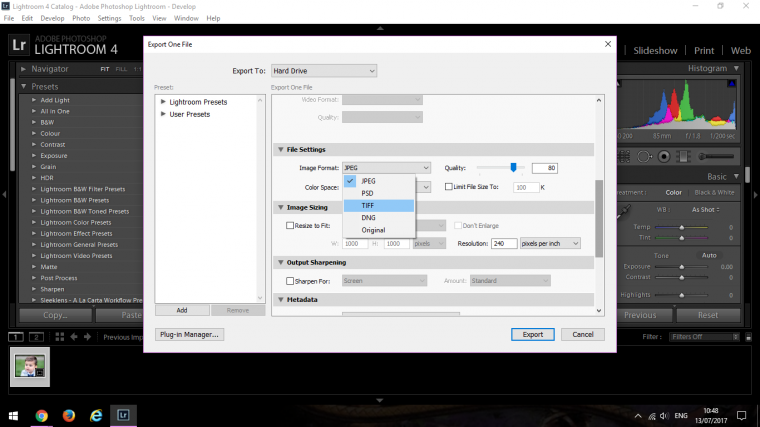
Next, scroll down to File Settings, and choose Tiff.
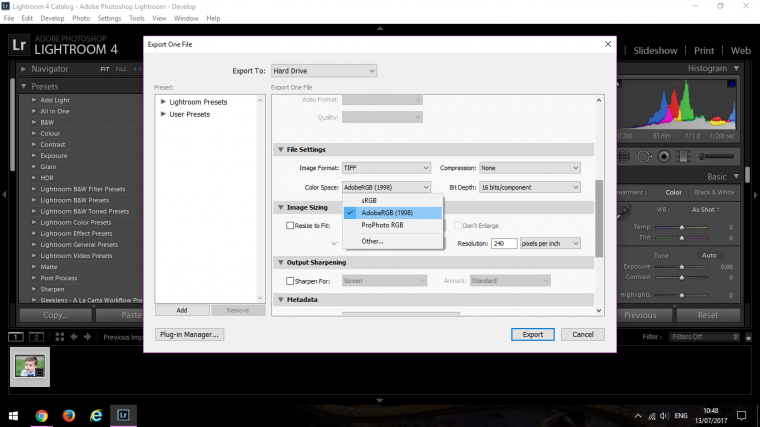
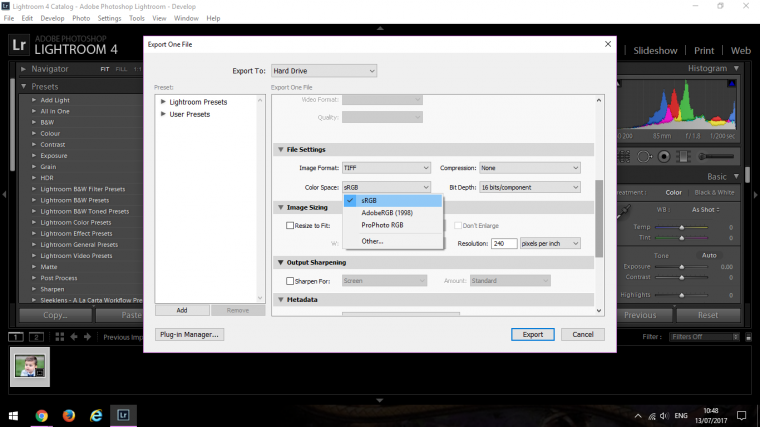
Below that you will see color Space, click on that, click on sRGB.
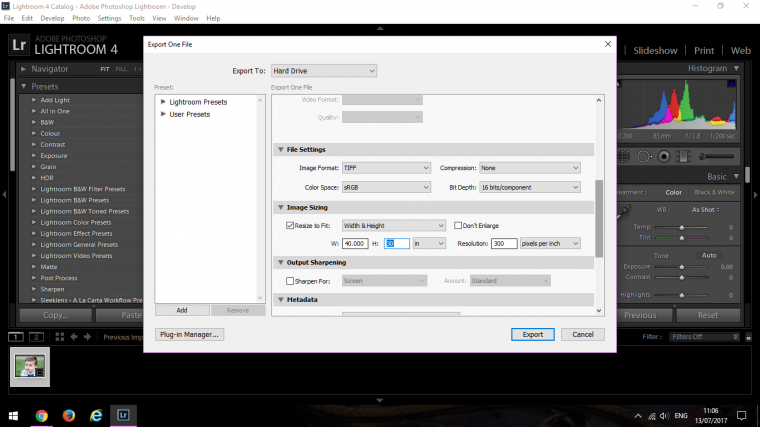
Now below that section, you will see image sizing, click the box saying Resize to Fit.
Change the Resolution to 300 and the measurement to Inches.
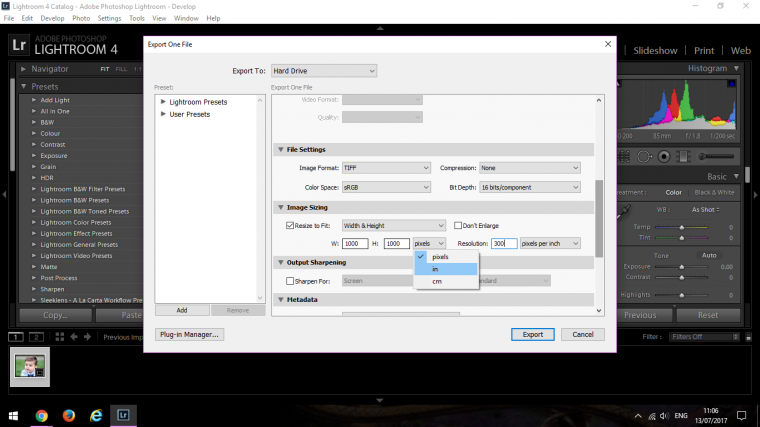
Then change the Width to 40 inches and Height to 30 inches which is the ratio we want and have already set up
Click on export now, and when you locate your file where ever you have it saved you will see the massive version there waiting for you.
When you click on it and zoom in you will see that it still hold most if not all of the detail, if you are losing a little bit of detail then don’t worry you can always use the sharpen tools in Photoshop but it will generally not be necessary.


Please verify your software version before proceeding.
 I’ve verified my software version


 Facebook
 Google +
Comments (1)
I always learn something from Julian’s tutorials. Thanks