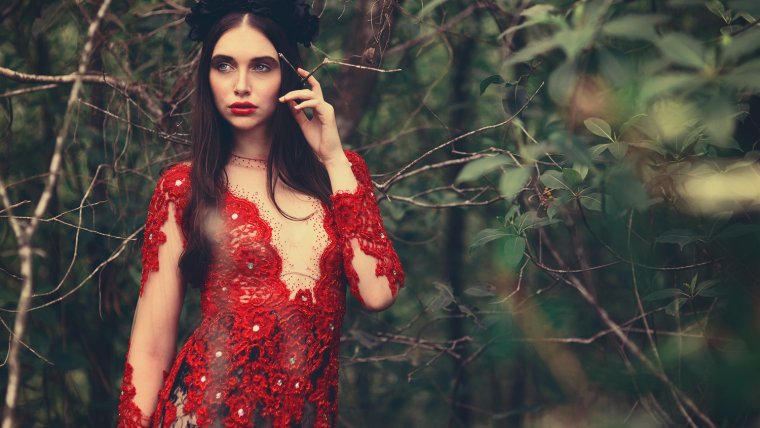
Matte effect is an effect applied to the image using Tone curve tool in Lightroom in Develop Module for various aesthetic reasons chosen by the photographer. As it gives a real different effect, which is difficult to see it in the real world makes many people fall in love with it.Though we are not going to see how to create a matte effect in this post, but where and what kind of photographs whether it look good if chosen to apply.Many times Matte effect will help in making a good portrait looks great, sometimes it can be applied over on a travel photography also but rarely some would have seen. At times it is also used for wedding photography. Matte effect which is preferred by most professional for a realistic look to the photograph with a classic touch. Black and White photograph with a matte effect will give professional look to the photograph using lightroom even if you are not a professional photographer.A picture with matte finish is always smooth and non-glare on the surface. So that, this effect can be used for various photographs such as black and white, fashion, a portrait which are to be framed also, wedding photographs which have numerous of candid memories. There is always a pinch of finish in matte effect that will boost the photograph’s outcome to film look.
![]() The above image will show you the difference between before and after effect of the matte preset. These types of photographs, when applied with matte finish, will enhance the ultimate realistic feel of the photograph and also while printing the photograph will look professional.Tip 1:
The above image will show you the difference between before and after effect of the matte preset. These types of photographs, when applied with matte finish, will enhance the ultimate realistic feel of the photograph and also while printing the photograph will look professional.Tip 1:
To compare two versions of photographs it’s better to create virtual copies as many as you want and apply different effects/corrections and see it yourself to choose a better one.
Tip 2: To compare two versions of the photographs, select the two photographs in Library module and press “C” this gives a side by side view of the two images. If you have more than two versions of the photographs you can still compare them, first select the photographs (in this case 3 or 5 or even 8 pictures) and press “N” which takes you to Survey mode where all the images are displayed in view area one after another.
When an SOOC (Straight out of Camera) image is little overexposed and after fixing the basics like White balance, Exposure, Lens profile corrections, we can apply the matte finish via tone curve panel. The difference may be subtle but that makes a massive difference which many likes, which you can understand on seeing the above photographs.
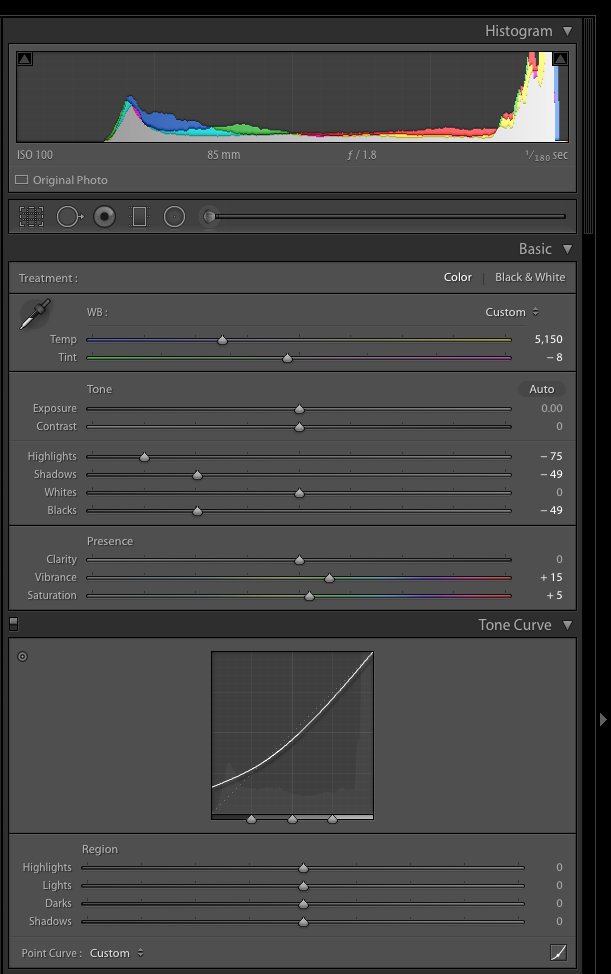
The below screen shot shows you the tone curve where you can adjust it until where you get the matte look, but if you need more effects to your photograph. You could do with it in lightroom’s develop module which will also increase the quality of the photograph.
Let’s look at this photograph from a wedding. I have made it as a Black & White image so that we could see the difference easily.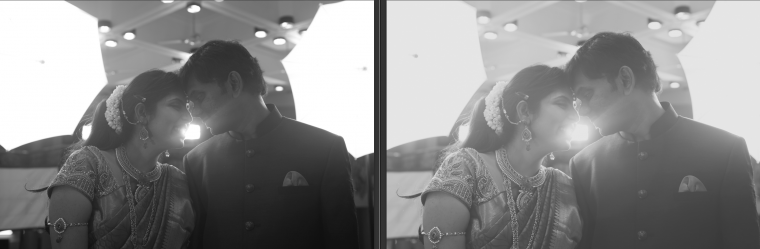
As said before, Black and white photographs are mostly the preferred type of photograph for a matte effect. In most cases, it is often used by experts and is capable of producing a high-quality professional look.
If you look at the before and after picture of the wedding which is in black and white, the contrast was high in the base image after we add the Matte preset the contrast been reduced and the image looks pleasant and smooth which gives a classic look to the photograph. The photograph is now Low in contrast but the texture got enhanced.
Let me show you some more examples to know where and why to use matte preset effect. Look at the below picture of the couple captured as a still image to make it as a frame. For this photograph, we can apply the matte preset effect which will give a better look than before.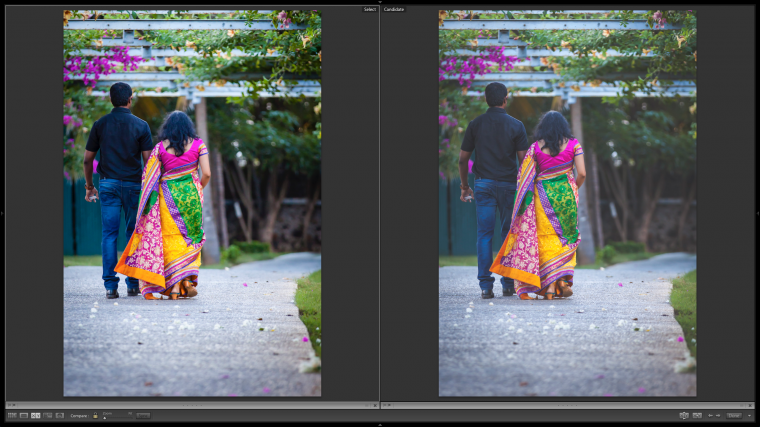 Now see the processed photograph after matte preset effect and which is perfectly framed. The improvisation after matte finish gives a different look as you can see it below photograph.
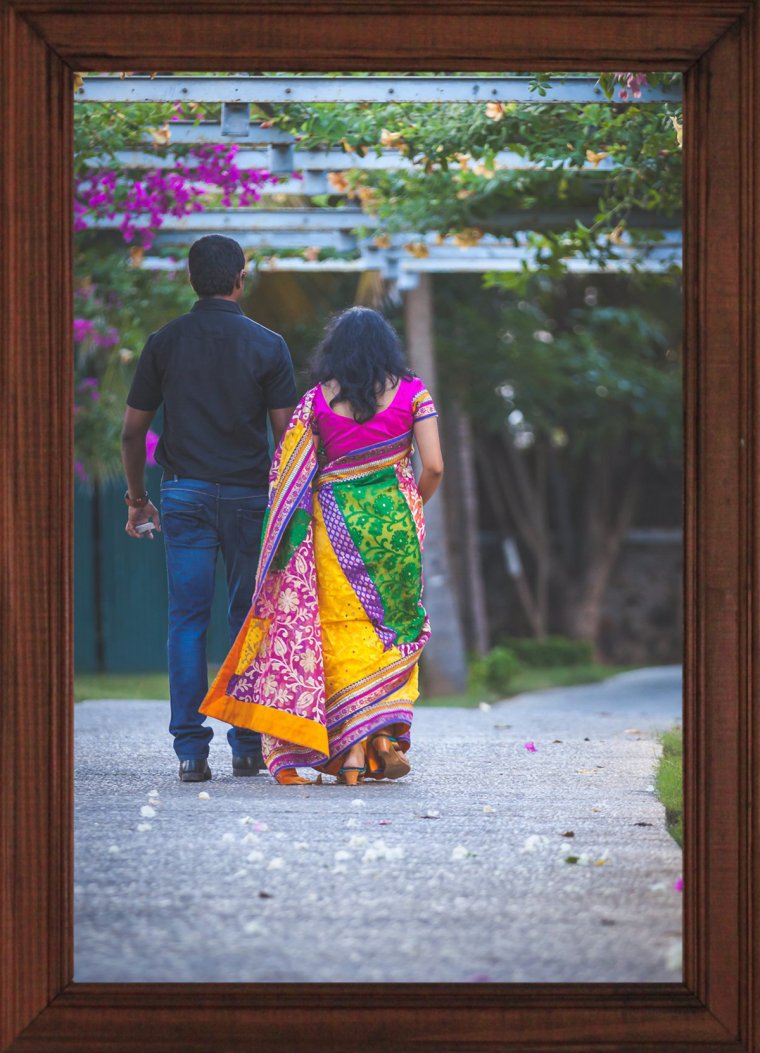 Hope this article gave you a better idea where and why to use the matte preset with various example photographs over a Black and White, portrait, and fashion which can be done using lightroom.


Please verify your software version before proceeding.
 I’ve verified my software version


 Facebook
 Google +
Comments (0)
There are no comments yet.