Basic Workflow of Landscape Photo Retouch in Lightroom Iwww.sleeklens.com
Before getting started, I would like to compare the differences between Adobe Lightroom and Photoshop as some of you might be new to photo retouch. They are both powerful software for photo editing. However, they are designed for slightly different purposes. Lightroom is powerful in batch-processing. Thanks to the Sync function and presets in Lightroom, you will be able to process loads of photos within a couple of minutes. Unlike Lightroom, Photoshop is a software designed for photographers, illustrators and graphic designers, etc. Photographers also have more control over their photos in Photoshop. You can edit the photos in detail with layers, whereas it is impossible in Lightroom. There are also various techniques that are only applicable to Photoshop such as frequency separation and sharpening with high pass filter.
Should I shoot RAW or JPEG?
We are going to use a RAW file as an example. It is essential to understand the advantages of using RAW files for editing. If you are familiar with the basics of RAW files, you may proceed to the paragraphs below. RAW is an almost unedited file that stores all the data that the CMOS sensor captured. It has a much greater dynamic range which means you have a better chance to restore an underexposed photo. You can also do all the editing without affecting the quality of the photo. Of course, RAW file does come with some shortcomings. As RAW file stores all the information captured by the sensor, it often has a double size of a JPEG file. Also, you will need some dedicated software such as Lightroom and Capture One to open RAW files. If you want to share your photos to your favorite social media sites right away, I recommend you to shoot RAW+JPEG.
The Workflow
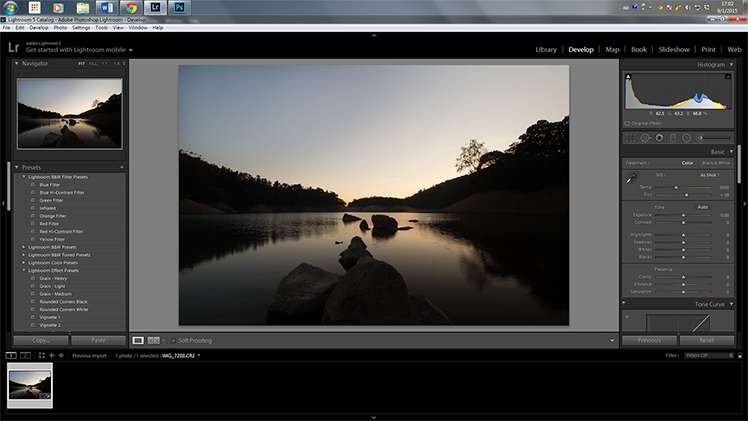
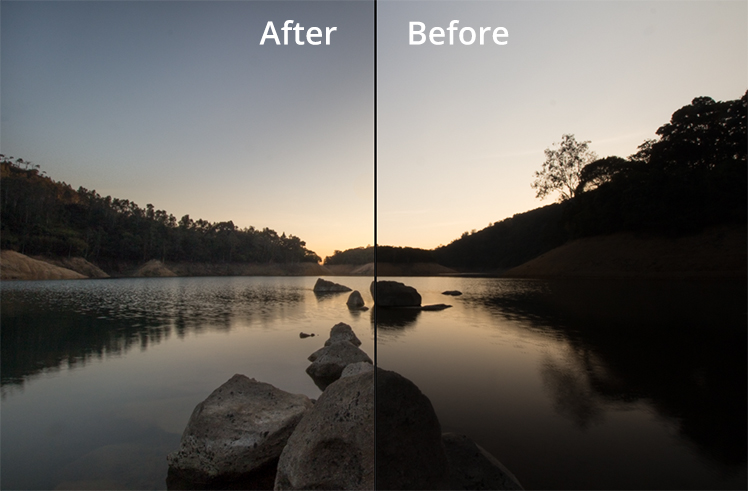
This is the a purposely underexposed RAW file. I usually shoot with the approach of ETTL, which is the abbreviation of Exposed To The Left, because digital cameras are more tolerant to underexposed images than overexposed images. Once your photo is overexposed, it is unlikely to be restored successfully. Therefore, I would play safe by underexpose my image by around 2/3 to 1-stop while shooting landscapes in order to preserve the details of the bright sky.
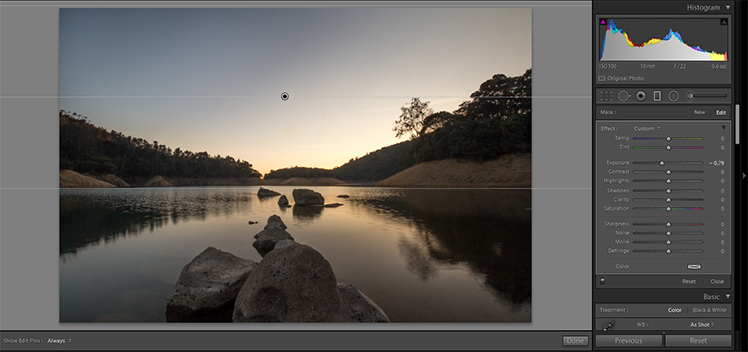
Firstly, navigate to the Develop panel and check the histogram on the top right-hand corner. The left and the right of the histogram represent the amount of data of whites and blacks respectively while the middle part shows the amount of data of shadows and highlights respectively. We will need to boost the Shadows a little bit and suppress the Highlights until there are no data in the two extremes of the histogram.
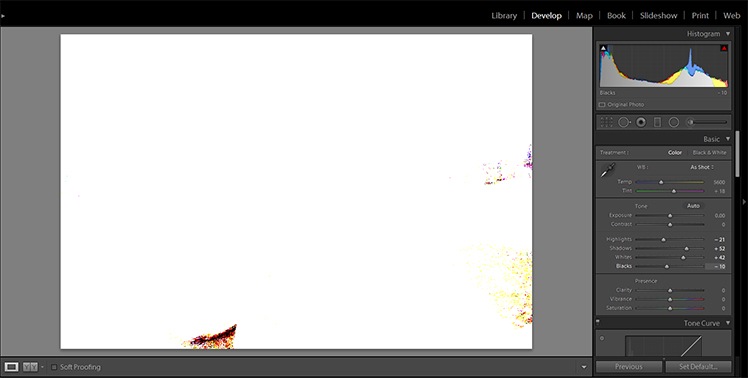
Hold your Alt key (Windows) or Options key (Mac) and drag the slider of Whites to the right until colors appear on the photo. They are the parts that will appear as pure white or near pure white.
Then, hold your Alt key or Opt key again and drag the slider of Blacks to the left until there are shadows on the photo. The shadows represent the parts of pure black.
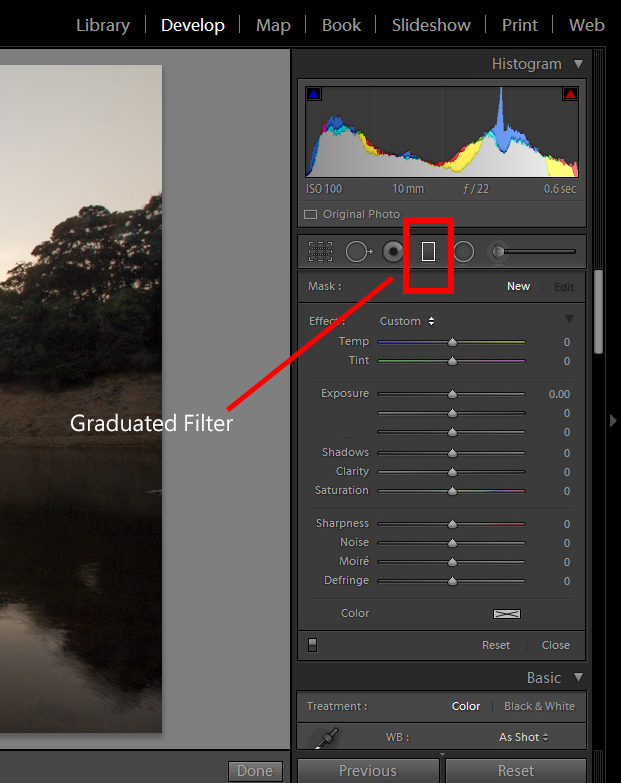
Let us take a look at the outcome. You will see the details of the underexposed foreground is restored without considerable compromises in quality. We will go through the procedures of fine tuning the sky with the use of graduated filter in Lightroom.
You will see an icon with a rectangle. It is the graduated filter that we are going to use. After clicking on it, you may start dragging it on the photo from top to somewhere near the horizon. You may hold the Shift key on keyboard to ensure that the graduated filter is parallel with the horizon.
After that, you need to go to the right and reduce the Exposure of the graduated filter to see the effect of the filter. Needless to say, you may also play around with other parameters such as boosting the sharpness for outlining the clouds, if any, to get the desired result.
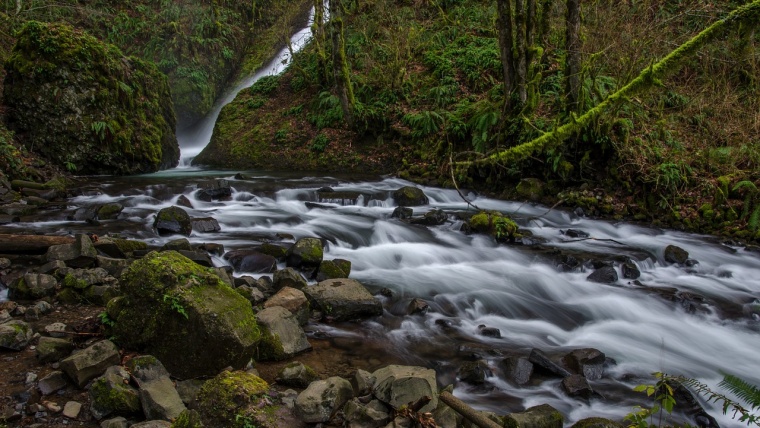
And here is the final result. In the second part of this guide we are going to go through some tips on color retouch of landscape photos – See you next time and happy editing!
I am a freelance photographer who specializes in architectural, landscapes,streets and fine art photography. I have been learning photography for nearly 5 years. I am currently collaborating with some HK-based photography sites such as DCFever.com and FotoBeginner.


 Facebook
 Google +
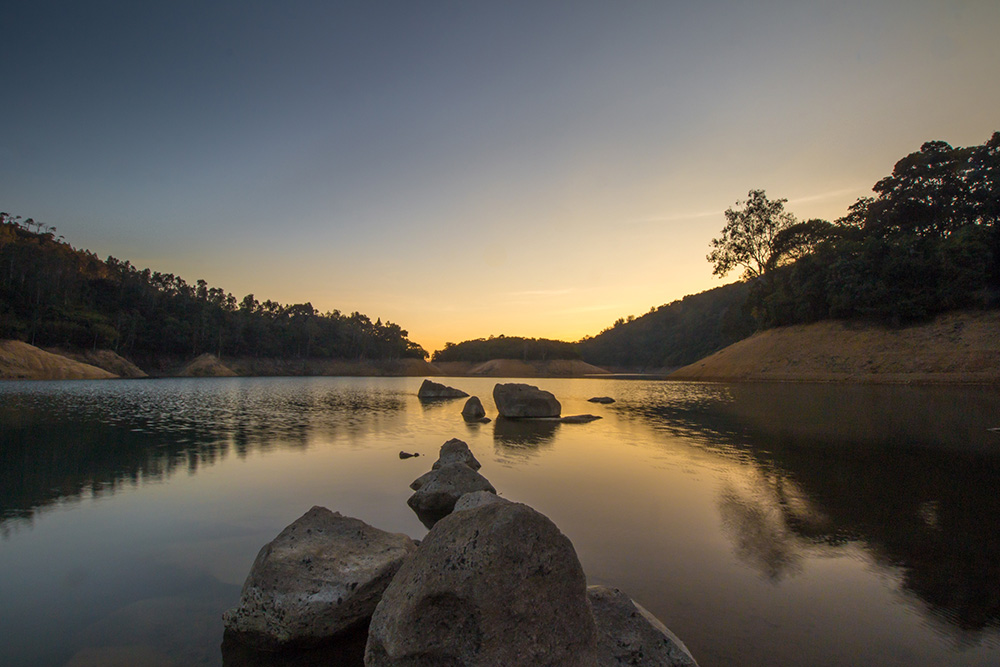
Comments (0)
There are no comments yet.