How to post process a party scene with Lightroomwww.sleeklens.com
Party Scenes are the type of freestyle photography where various moments happening together in the same time. These shoots are generally difficult or tricky to capture because of different colourful lightings in it. They’re supercharged with action, intrigue, and uncertainty. There is either darkness or vibrant lights among people moving on the floor.In the same time, processing party scenes are really simple and quick. You just have to decide which colour you want to make prominent or you can decide to keep. Trying not to edit the photograph for real colours is advisable as there would be the least control for you over the lightings.
Table of Contents
Editing a party scene using lightroom
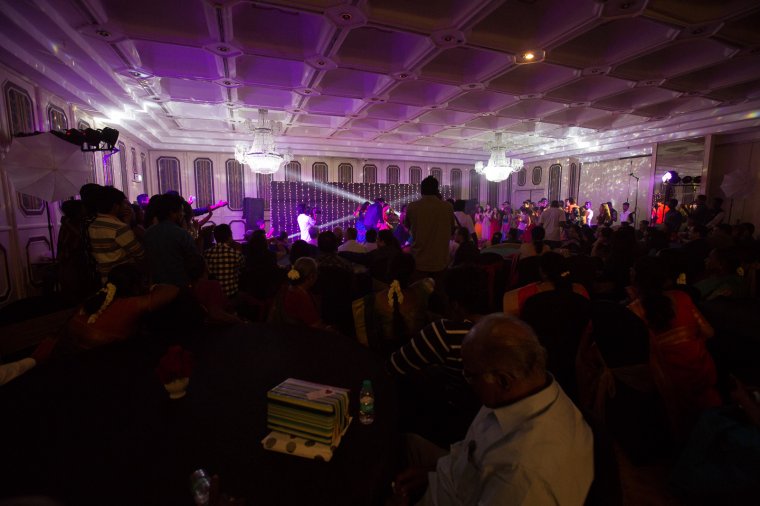
The below photograph is a shot from recent Sangeet party in a wedding and the photo below is SOOC (Straight out of Camera).SOOC picture of sangeet partyYou can see from the above photograph how vibrant the environment and enthusiastic people enjoying the party. Few people dancing on the floor was having fun between amazing multi-coloured lights and others cheerfully watching it. These types of shots may look good naturally but sometimes, due to low lighting, the photograph lose its details in the surroundings.
How to fix it?
At the first glance, the image looks flat and underexposed, Remember in a party scene you can play a lot with different colour adjustments. For this image, my only intention is to bring out the yellow colour and make it pop up a bit. It is not that yellow colour should be used in all the photographs. The colour choice is one’s wish so that you could choose what you want in your photograph.To edit this photograph cropping and adjusting the exposure are the key factors to make it better. We can use various tools in Lightroom that I will explain you in the further steps.
Improving Exposure level
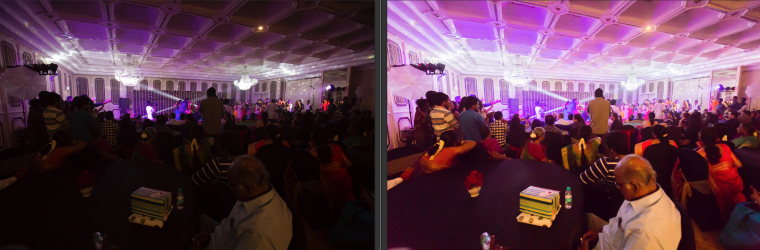
The Exposure and White balance are the most important and initial part of editing. You can see the difference between before and after editing on exposure and white balance in the example picture shown above.To adjust the above photograph, I have used exposure tool which toned up the photograph brighter than before, Temp and Tint tool have attuned the overall white balance ( see screenshot 2). Using this I’ve made this in an easy way but make sure that you have adjusted the level of exposure and white balance adequate for the photograph which is crucial to achieving the result.Editing these types of the photograph may raze the details in it so always remember not to reach that level and try to make it level-headed as I have attained in the above photograph. The next thing is to make a complete photograph to that we can eliminate the nondetailed part from the entire picture by cropping.
Cropping a party scene
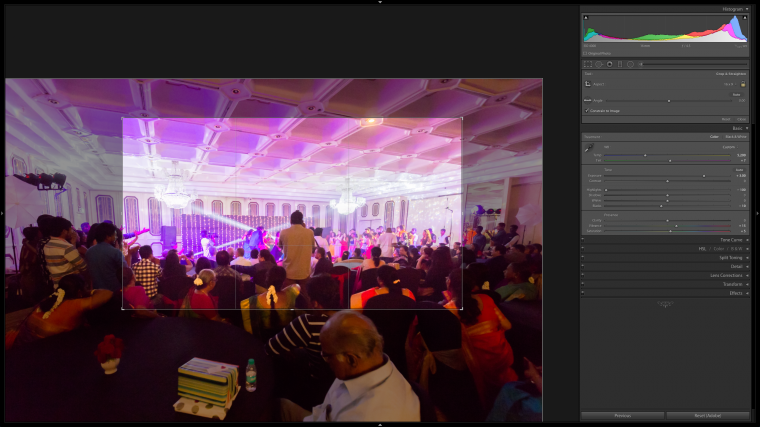
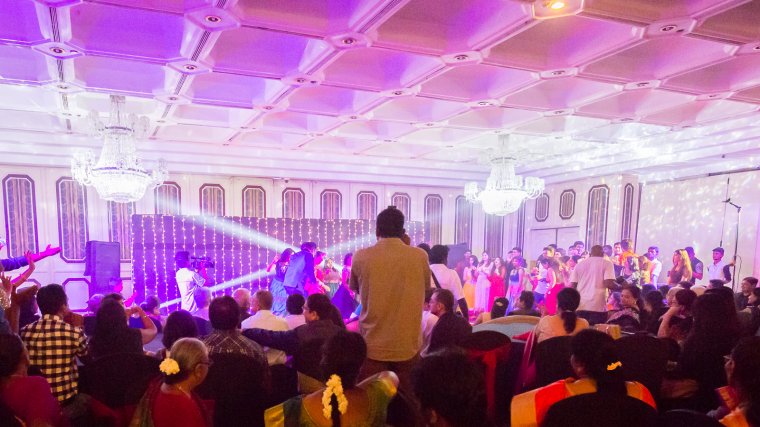
When cropping a party scene decide on the portion which you are going to make it as a better picture from the processed photograph. Use crop tool (refer screenshot) in develop module. consider using a good aspect ratio to crop the photograph and go on. See the below photograph I have cropped with the ratio of 16:9 and the portion I have chosen was with more information of the party.Tip: Press “R” to activate the crop tool even if you are in the library module.After cropping, you can see the photograph below which is with detailed information of energetic crowd and you can feel the party with lights and colours all around the photograph.Note: The Special details such as glittering reflections, colour splashes have not lost its originality in the photograph.Party scenes can be interpreted and can be processed in many ways, in this case, we have not done much processing as such as the image in hand doesn’t allow much room to process. If there was only one subject (example one musician playing an instrument or a singer singing) there may be more room to process, like to isolate the subject or some other thing which may pop in your mind while begin processing.Hope I have helped you to know how to edit a party scene photograph in simple steps using lightroom’s tool with a general idea of editing with this photograph such as improving exposure and adjusting the white balance. Try this out with your photographs and make it more than better as before.
Navaneethan Viswanathan (best known as Navanee Viswa) is a professional photographer based in Chennai. After completion of his Engineering and Management degrees he worked as a Civil Engineer for almost 10 years and slowly realized that his true passion was in building good photographs rather than building a structured construction. This made him quit his job and become a full time photographer to pursue his passion. Now he specializes in Candid Wedding photography primarily, he also does Product photography, and Industrial photography.
Navaneeth is a trekker and a traveller, who enjoys photographing things he comes across during his travels. He contributes articles regularly to photography websites like Digital Photography School , and he also maintains a photography blog which is followed by many. This blog has lots to talk about photography and the techniques involved. His works have been exhibited at the photography exhibition organized as part of Art Chennai 2012. Many of his works have been chosen as best entries in on-line galleries like One Eyeland . Navaneeth is also well known in the industry for his photography related workshops.


 Facebook
 Google +
Comments (0)
There are no comments yet.