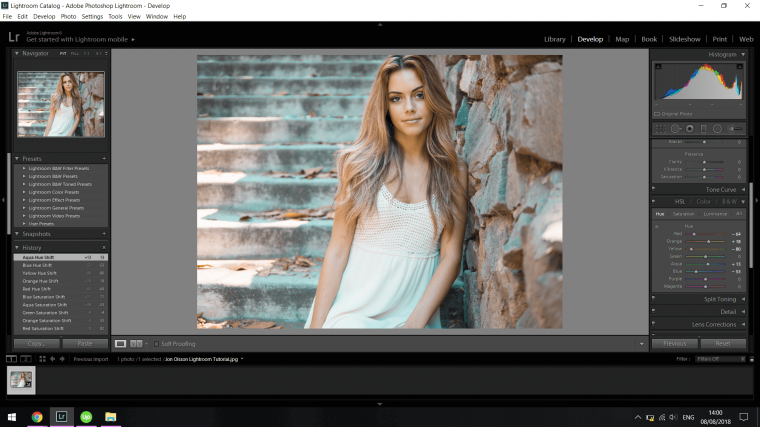
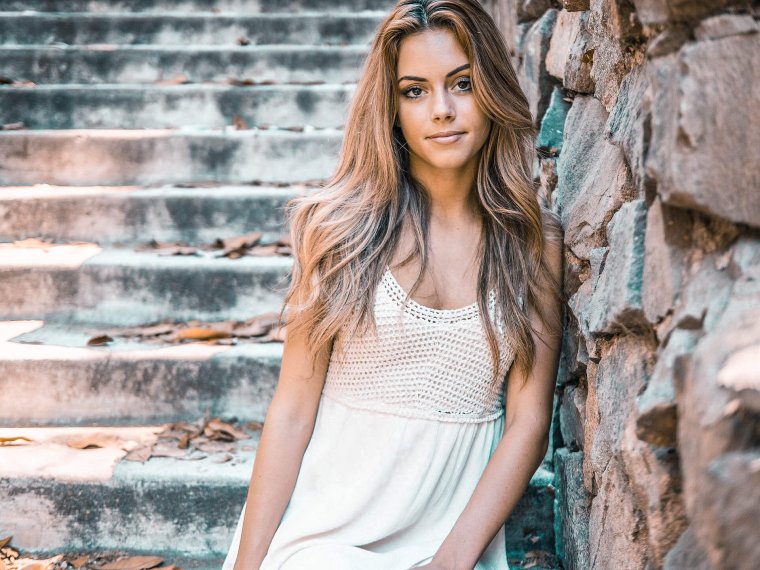
Hi! I’m back to continue with my Lightroom Tutorial. Since my last edit I had a little change of heart when it came to my saturation sliders, I felt that the orange was probably a little too strong, cause it’s more likely to be used to turn autumn into summer in Lightroom; so check out the image below and see what changes I made. But this could be done if Lightroom presets was installed.
So keep this in mind when you are editing, if you wish you can close everything down and head off to your favourite coffee shop or whatever and then come back later and have a look at your Image and how it looks now that you’ve been away and gave your eyes and brain a little rest, you may see the image totally different than what it was when you left it.
But that’s the cool thing about Lightroom is that you can come back at any point and change up your previous edits.
If you still feel that your colours are not quite where you want them to be you could go to the Hue sliders option which is just to the left of the saturation sliders option, then you can play around with the same colours again and see if that makes any kind of difference to your image.
When I did it I was able to pull a more Teal colour out of my Blues which is exactly what I was looking for and I didn’t even realize till I tested the Hue option out.
So with a bit of luck then maybe you will see something come out of the woodwork as I did when I got round to checking out the Hue.
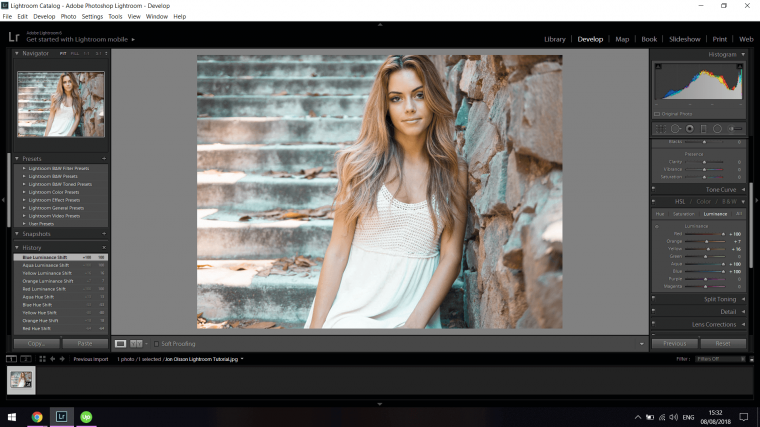
Next you can take a look at what the Luminance Sliders do.
These Sliders will increase your colours and give them a little bit more brightness.
You can go down the Sliders and see what results you come up with, if they do nothing for your image them just set them back to zero.
So at this stage if you want to see what you have done on your image so far you can hit the Backslash Key on your keyboard, you should find that on the left hand side of your keyboard beside the shift key.
Next we can do a little bit of Split Toning, so what this does is specifically add the colour you choose to the Highlights or to the Shadows, so look on the panel on the right we have been using until you see Split Toning and click into it.
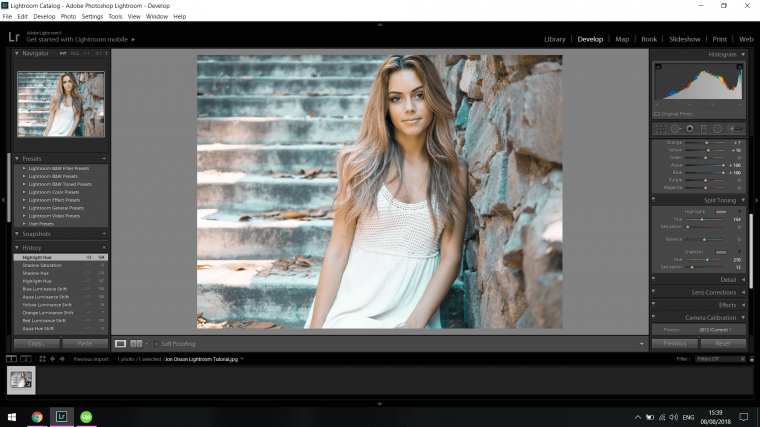
So a little trick you can use here when using split toning is, say you go to Highlights and you click on the Hue slider, hold Alt on your keyboard and your entire screen will now become the colour that the slider is currently over, note that this is not the colour your entire image will become, it is just to give you a better idea of the colour that will go into your Highlights, same works for Shadows.
With split toning I’ll add a nice orange to my Highlights and Teal to my Shadows which is a Green Blue colour.
You can also add a little saturation if you wish as well.
Cool so we went threw all our colour options to see what difference it makes, some probably didn’t do a whole lot but it’s good just to go threw them anyway especially when learning to see if your eye can pick up on subtle changes, it’s also a good idea to familiarise yourself of course too.
OK let’s hit the last little stretch.
Go to the Basics panel at the top.
So the basic editing process I do is I -100 my Highlights and +100 my Shadows.
Then I go to Whites, so what I do for Whites is I hold Alt, when you do this you will see your screen turn Black, what you do here is you move your slider over until your image disappears completely, if you slide your slider about you will notice your image appear in white pixels, so you want this to basically disappear or go down to the minimal amount of pixels visible.
You do the exact same for Black on of course the colours will now be reversed.
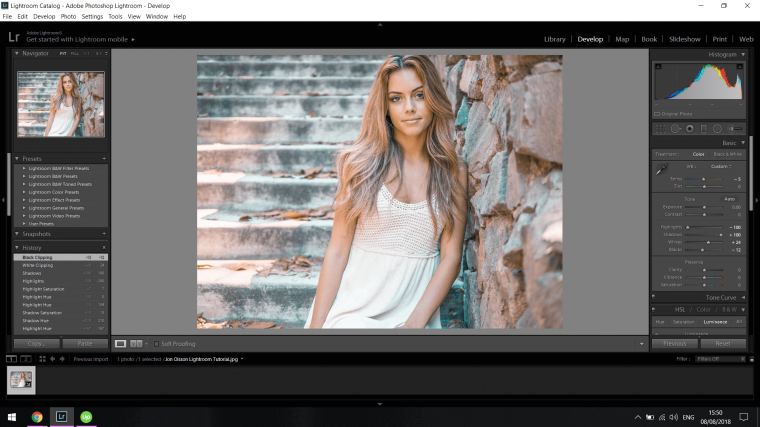
Last little touch is to go down to where it says ‘Clarity’ and slide that to the right until you get a good contrast similar to Jons work.
By now you should have an awesome image!


Please verify your software version before proceeding.
 I’ve verified my software version


 Facebook
 Google +
Comments (0)
There are no comments yet.