Nature provides us a never ending possibility for inspiration for pictures. Waterscape photography have their own charm, the same way, they have their own way to get edited in the Lightroom Presets software like adding sunflare effect. Let’s see how we can edit waterscape photography using Lightroom Presets. We have made a video on how to install Lightroom presets which you can see in our site.
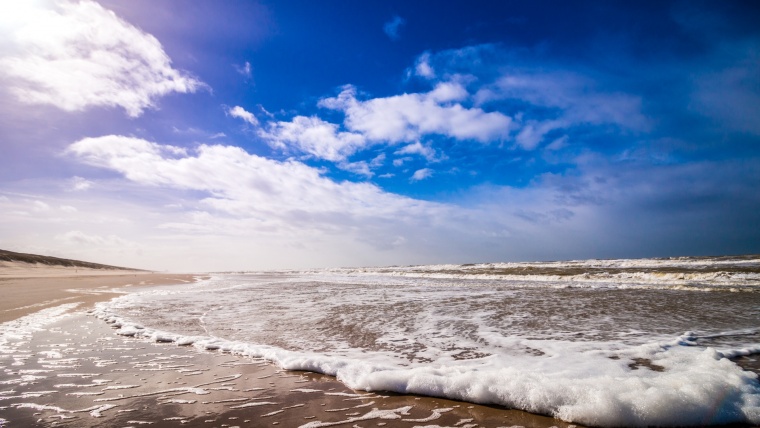
Here is an image which was shot a few years back by me. Basic gears were used to shoot this image at 6:00 AM in a place called Rameshwaram.
Rameshwaram is a town and second-grade municipality in Ramanathapuram district in the south of India in Tamil Nadu. It is located in Pamban island separated from the mainland and connected through the Pamban Bridge. Needless to say, nature and sceneries here are pleasant to the human senses.
One such location was this place and the camera was set to take the picture. The camera settings are as below:
The shutter speed was set at 20 seconds, with the lens aperture as f/22, ISO of 100. The picture was shot using an 18-200mm f/3.5-5.6 IS lens.
I didn’t have a tripod, instead, I used a parapet near the wall for support.
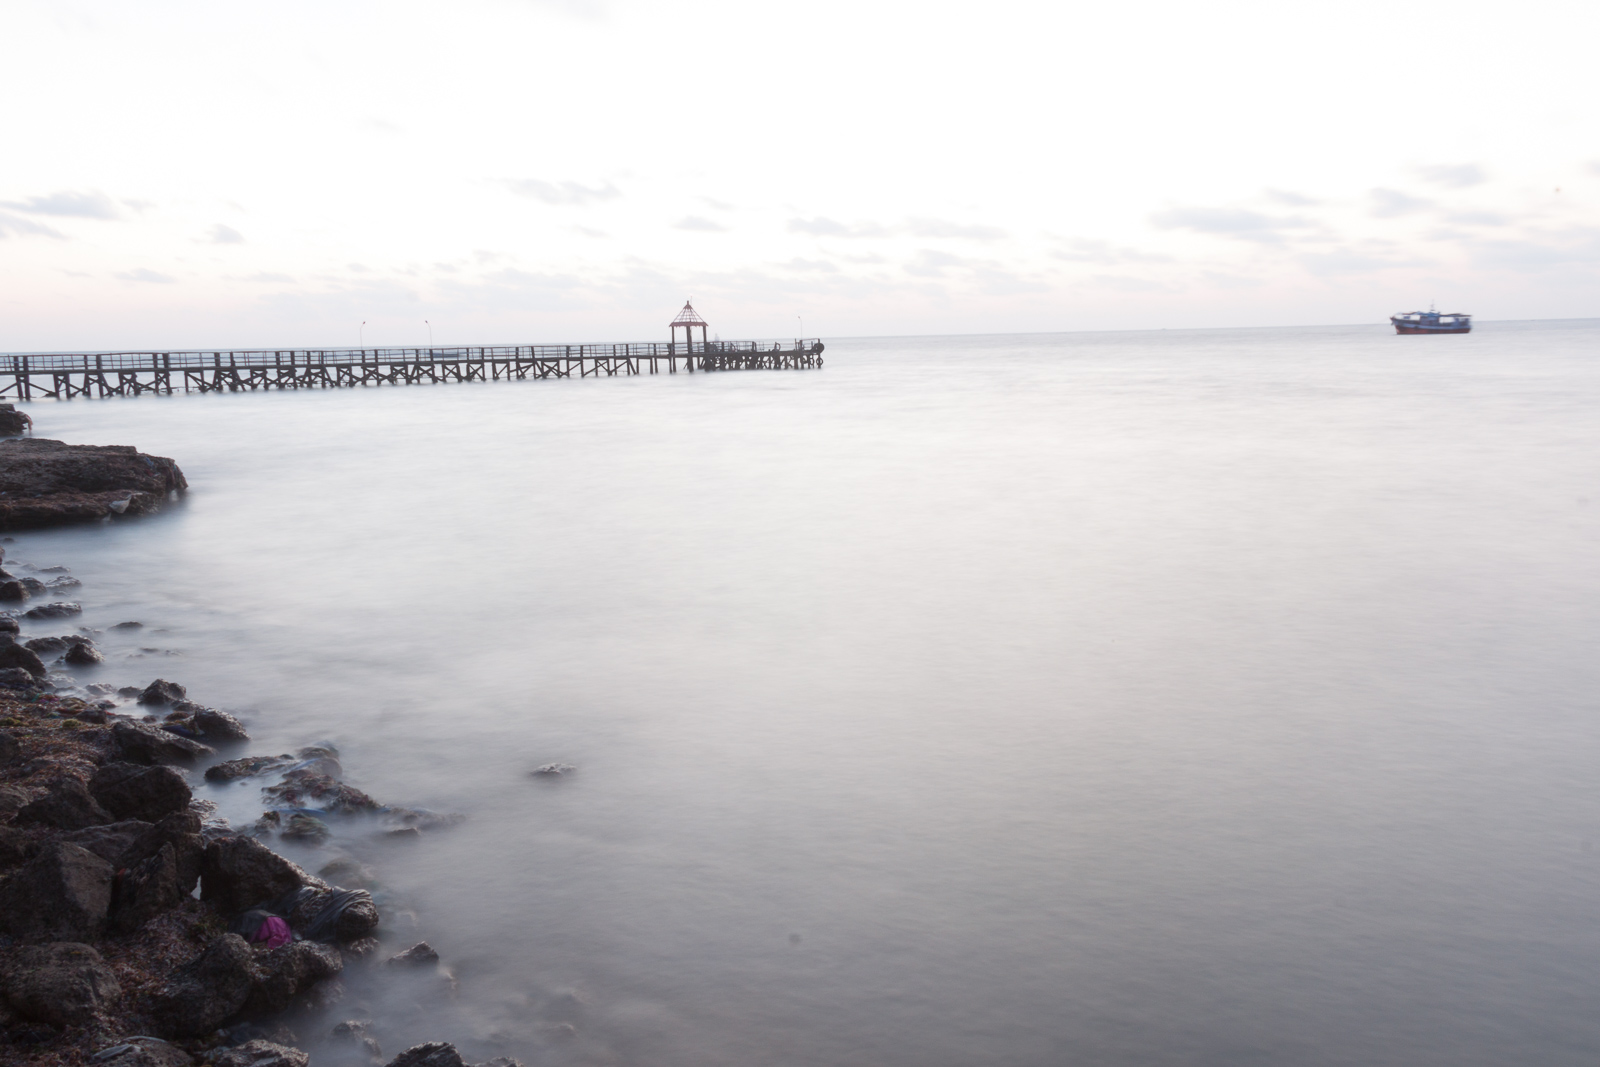
Screenshot – As shot image (Straight out of camera)
The SOOC may not seem pleasing to eye right now, but remember, only a few things can be given importance while taking a photograph, that is – a. Composition, b. Exposure, c. Shooting in RAW format. All these are to be met to take any photograph and only these could be manipulated to give a good image as a final output. However, good composition and framing alone does not make a picture stand out as the best appealing one at times. To help the photographer show the beautiful imagery he saw to his viewers, usage of software for post processing is necessary. All the three mentioned above was taken care and given importance in the shot given.Let’s proceed further to the software, Lightroom to see how to process this image and make it look pleasing.Once the image has been imported to Lightroom, open the image in develop module and apply the lens profile corrections to the picture. Correct the horizon to get a perfect horizontal line using the crop tool(R). Applying Lens profile is a one click job in Lightroom. After this, go to Lens correction panel on the right side in the develop module and just click the checkbox “Enable Profile Corrections”. Lightroom automatically figures out from the image’s metadata and applies the right lens profile corrections. The image will look flat and straight if the horizon is corrected well.Now we fix the White balance of the image. By doing so, the image gets a better feel of life to it. The As shot, White Balance shows that the temperature is 4700 in the picture and I have changed it to 2800, this brings a huge difference to the image and the tint remains unchanged from -2. 
Screenshot- After WB
Here on, we have to remove small blemishes, sensor dust, and to do all the fine adjustments to the picture. These basic fixes are of utmost importance to the picture and the final output looks better.Let’s look at it one by one. First, using the spot removal tool, I have removed the sensor dust across the frame and the purple patch on the rock. Next using the basic pane, I reduced the highlights to -100. To bring even more smoothness to the water surface, I have brought down the clarity to – 40.Now, the foreground portion is almost done. Now, to fix the sky area. The sky has a lot of details and even if not cloudy, it always has an appeal to give to the viewers.Editing of the sky is not really tricky, if done right, it gives you the best effect. In this picture, I applied a graduated filter from the top till the horizon. The changes in the settings of the graduated filter what I applied was that I have pulled down the highlights to -100 and have increased a little bit of sharpness to + 25 and the temperature to + 20 to give the sky a little bit of yellowish tone. Now, the colour is not enough. Colours bring out the life in any photograph. Hence I added a specific colour over the filter area by picking a light purple colour from the colour picker.This is the final processed output.


Please verify your software version before proceeding.
 I’ve verified my software version


 Facebook
 Google +
Comments (0)
There are no comments yet.