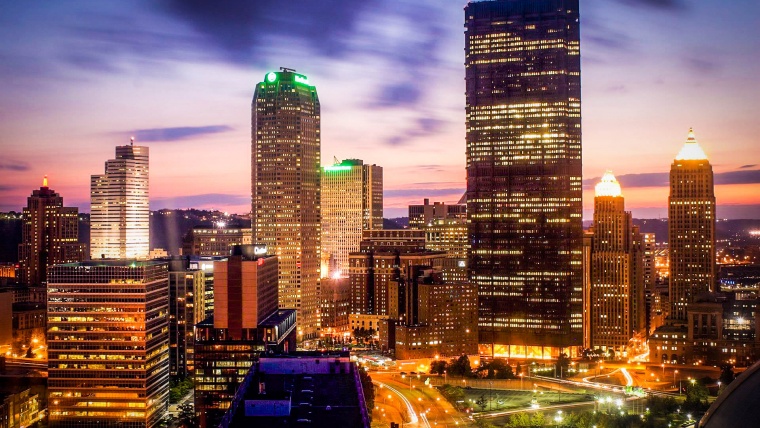
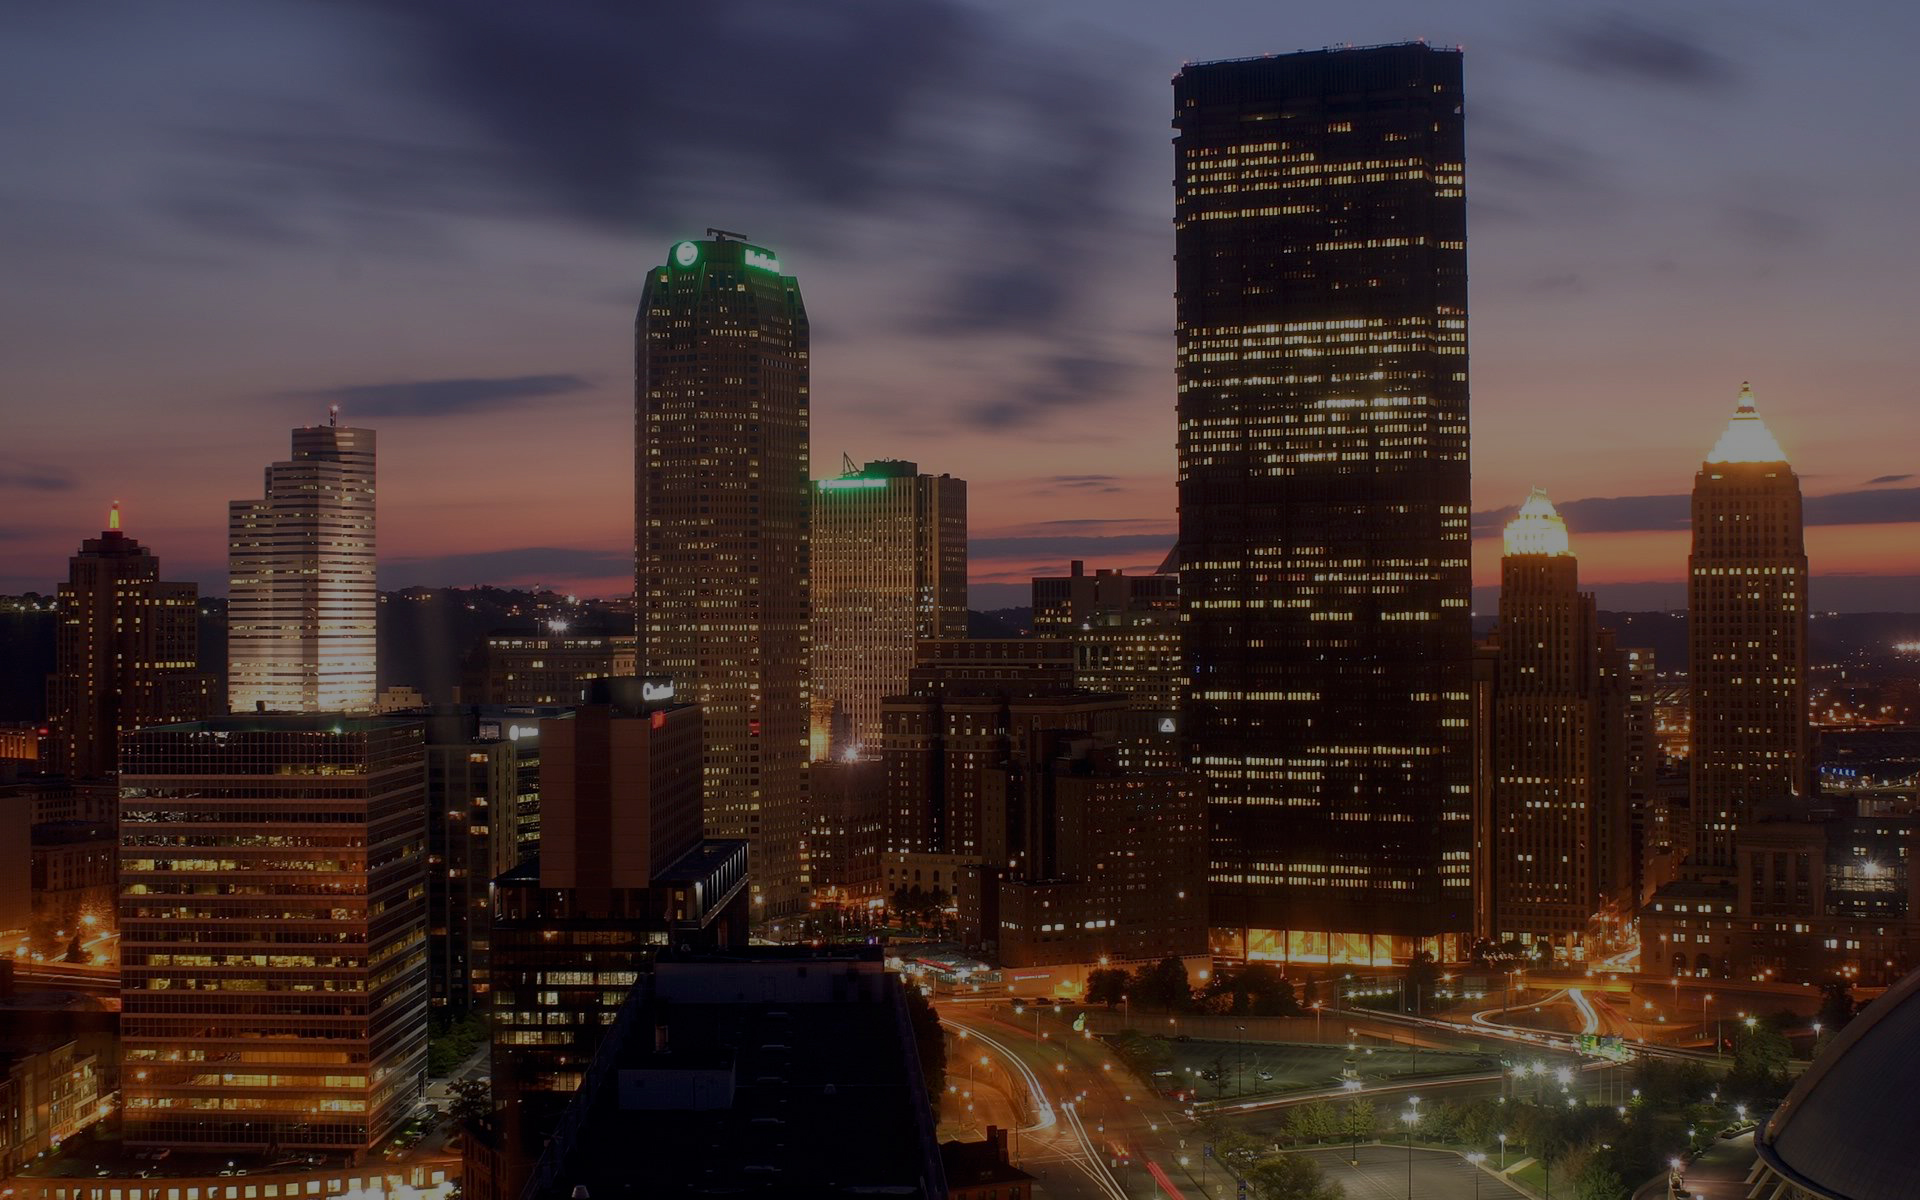
As you can see in my image that I have here, it is slightly under exposed which is super easy to do and really quiet common.
Now, in this tutorial you don’t have to have and underexposed image to follow along with the process as it will be basically the same, minus one part, which will be explained at the right time.
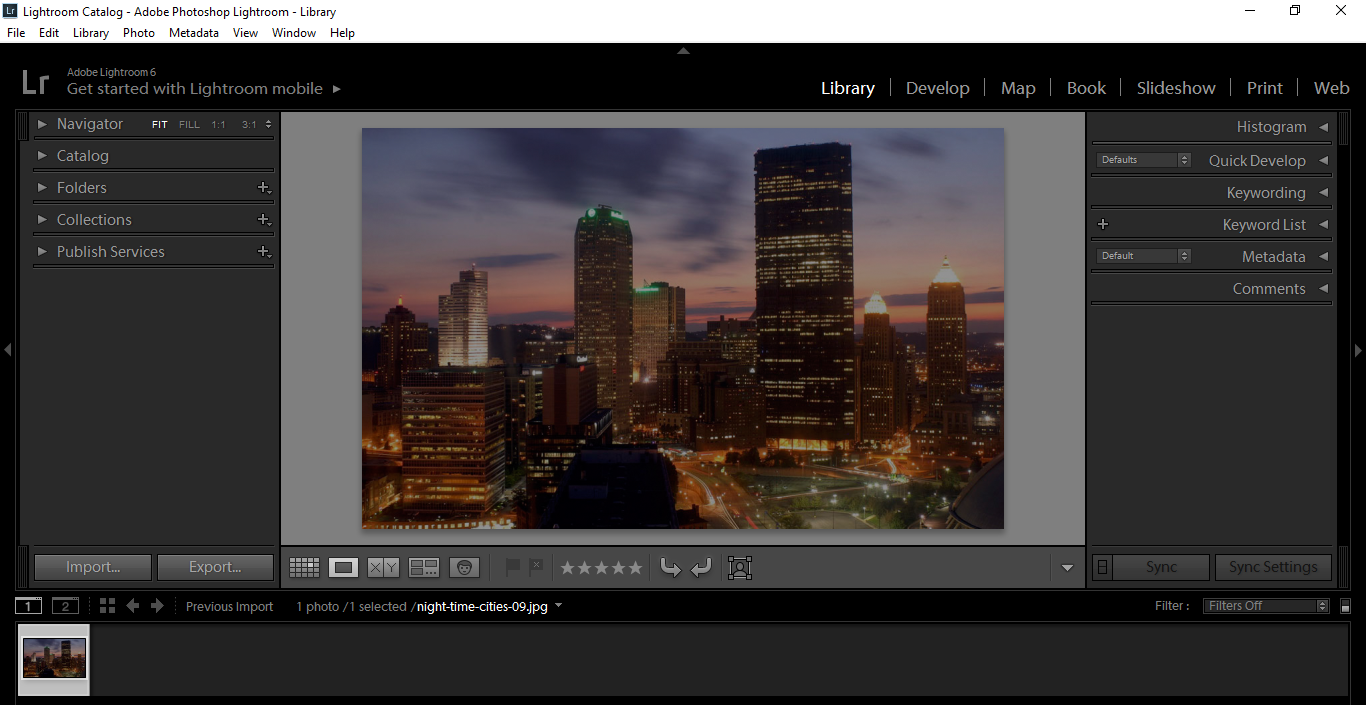
Let’s begin with going to your Develop Module, then Click on the Basic Panel to get started.
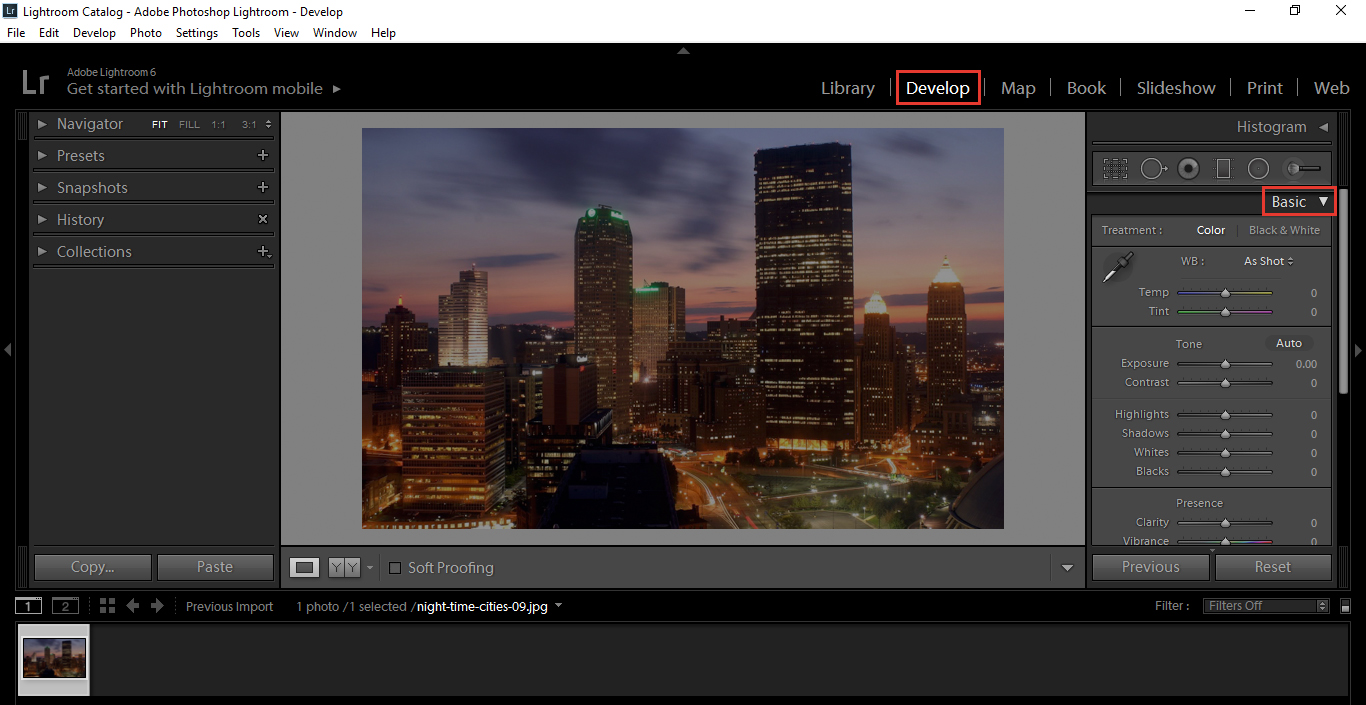
With being under exposed, you will lose some detail in the shadows so that’s the first area I want us to look at. I’ll go to my shadows and move the slider to the right to start to bring out some more of the detail missed in the under exposed shot.
Work with it until you’re happy, but be careful not to go too far. You’ll only want to adjust it enough, depending on how under exposed the image is.
This is where (what I was talking about the right time), if you have your image exposed correctly you can stop with shadows at this point. But, with under exposed images there is a little bit more work we have to do yet.
So, for the under exposed shot, you want to go to your exposure slider and move it to the right brightening your image up a little more.
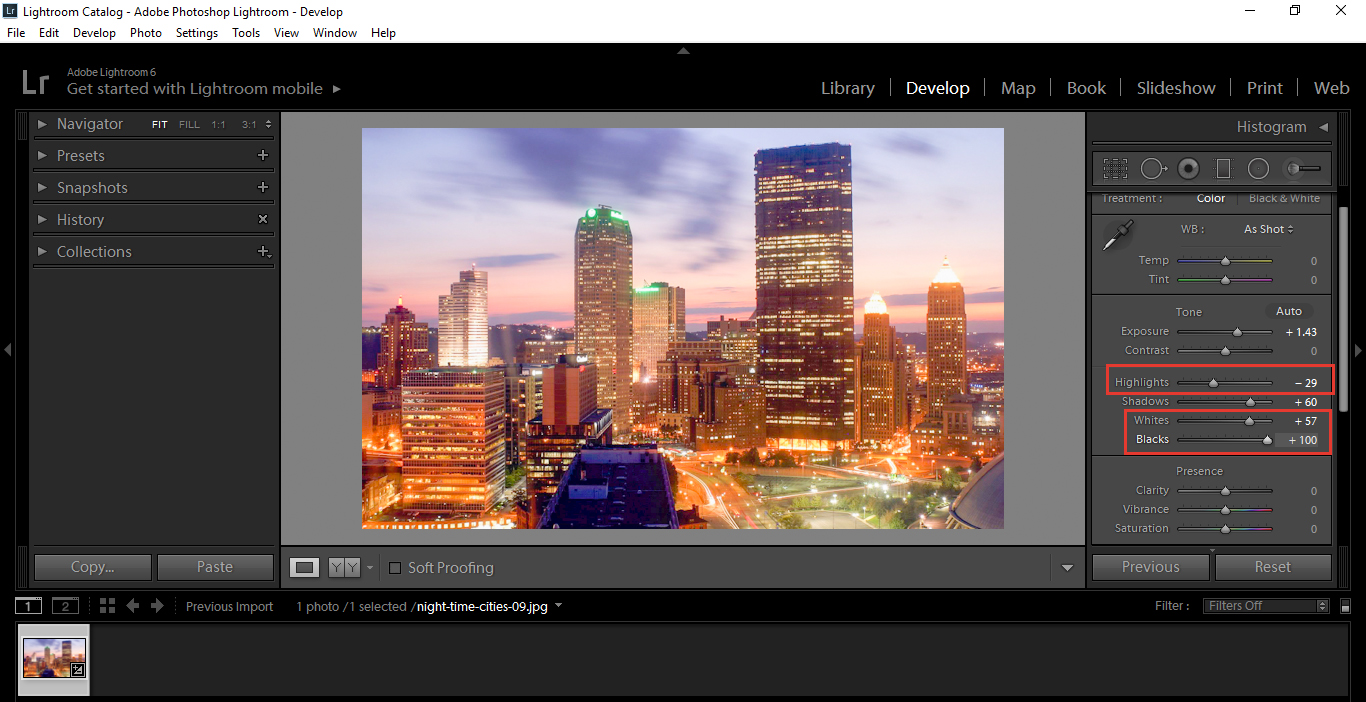
Next, take a look at your Highlights Slider, it may be or it may need to be brought down just a little, so take a look at that. I had to decrease mine to about -29, anywhere form 0 to -29 would have been fine though. I could have left it, so there is a lot of leeway in that.
Really, it’s what your own eyes find appealing.
Whites and Blacks are next, with those you can use the ‘Alt Key’ in combination with Sliding.
Click on your Slider, then hold Alt. You will then see that your screen turns full white for blacks and full black for whites, with a lot of little pixels spread throughout. What you will want to do here, is move the slider to a point where the pixels disappear or just about disappear, to clean up your Highlights and Shadows a little further.
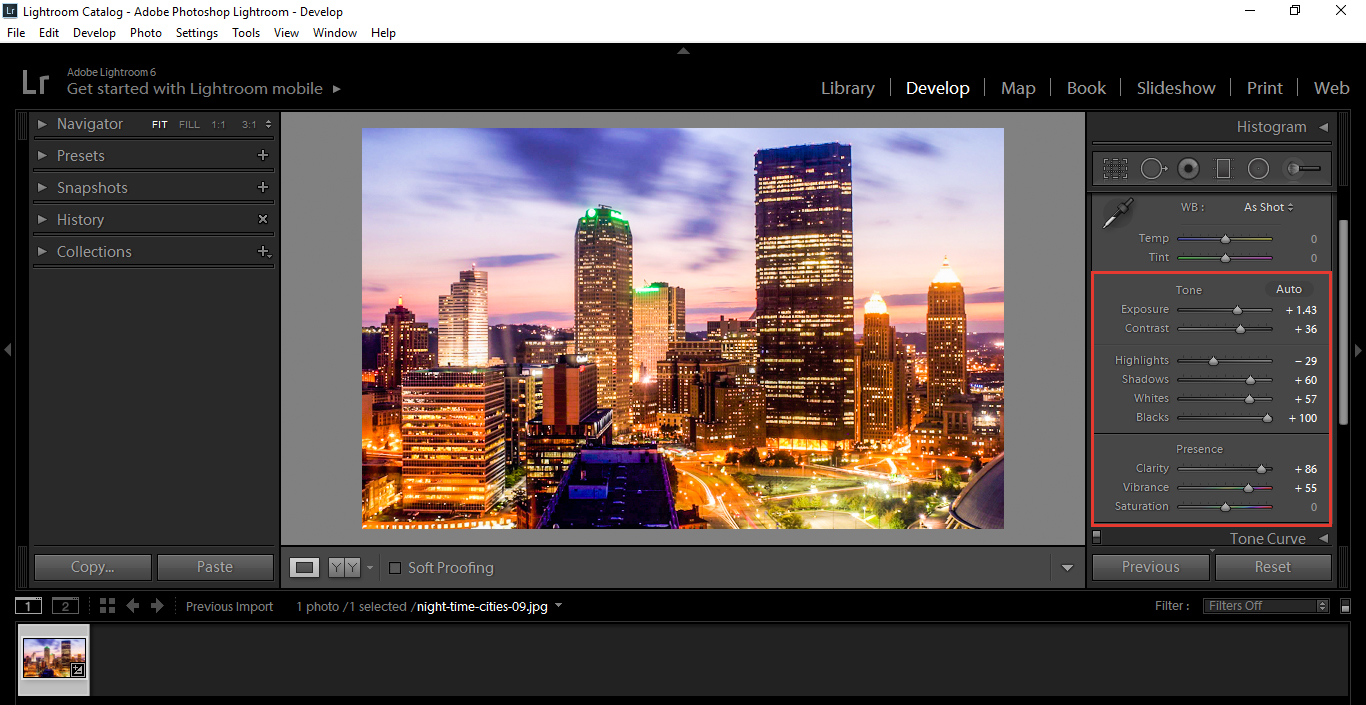
At this point you can add a little bit of Clarity here (Below Whites and Blacks in Presence Panel).
Personally, I feel that this image doesn’t need it. You may have one that does, so it’s at least worth a look to see if it improves the image any. I’m adding this, to show you that using your own eyes and being happy with your edits is key. Train your eye to help decide when you are satisfied. stress on the YOU part, because it really is your own artistic vision that matters.
Now, I’m going to add in a little bit of Vibrance here. I think it will bring the lights out more and give this image a cool dramatic effect like our Presets do.
On second thought, I went back to Clarity and boosted it up because I remembered about HDR Presets, and thought it would look kinda cool after I increased the vibrancy of the lights.
Then, I added just a little touch of Contrast in there as well.
So now, I’m finished with the Basic Panel. I could play around with Temp and Tint too, but I’m pretty happy with my results so far and don’t feel I need to ad those in.
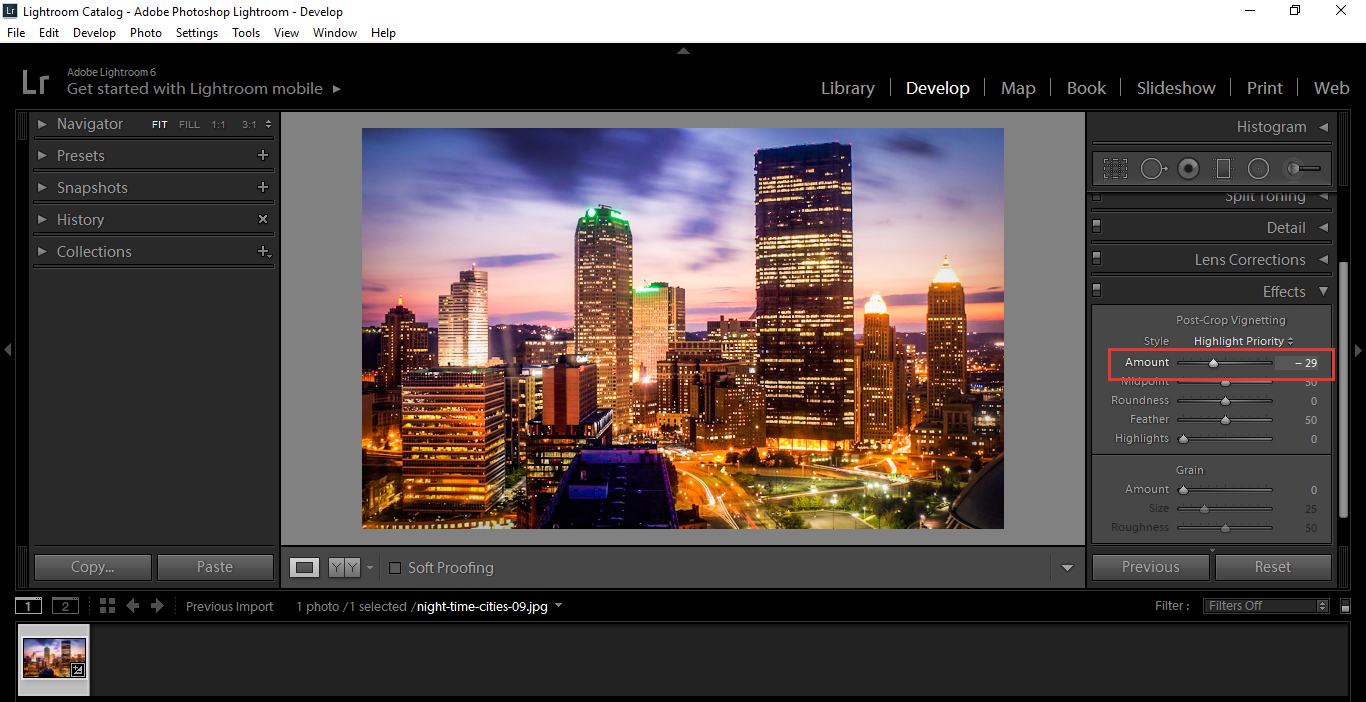
Now, I’m going to go to my Effects panel and add a slightly darkened vignette to my image.
Decrease for Dark.
I’m pretty happy with the results, so I’m going to leave this image alone now. if you like these kind of effects, take a look at our Presets and get hundreds of these at the click of a button.:)
Graduated from college in 2002 with a degree in Art & Design, I started exploring my way in Graphic Design and Professional Post Production. Full-time freelancer since 2011.


 Facebook
 Google +
Comments (0)
There are no comments yet.