How to Create a Blanket Fade Effect in Lightroomwww.sleeklens.com
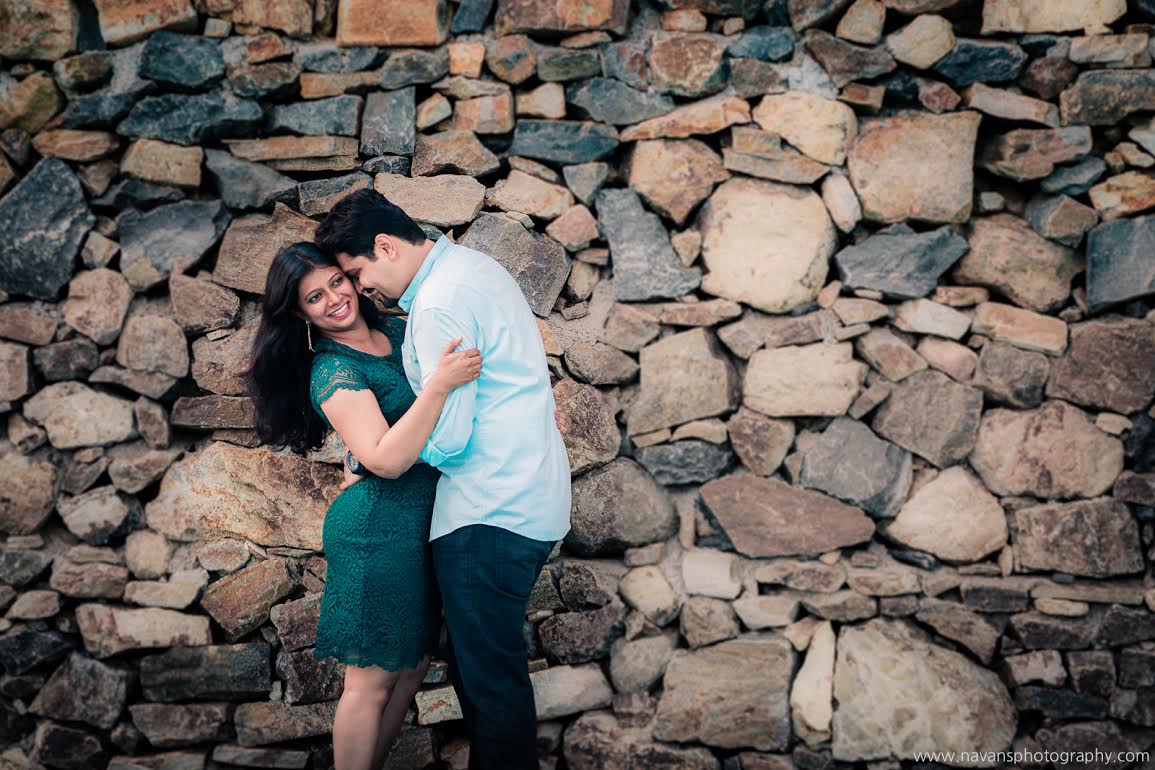
Blanket Fade effect is the effect whereby an image is made to disappear gradually or the sound volume is gradually decreased to a lesser volume or zero. It is a great technique to highlighting selected portions of the image. Do you ever wonder how so many amateur photographers seem to have perfect and beautiful blanket fade in their images or wondered how the photographer got that background fading like that? Let us share with you today how to get the perfect blanket fade effect for your photograph using the photograph below which was taken for a pre-wedding shoot. The blanket fade effect though cannot be applied for all kind of photographs but it can surely be used and applied for newborns, portraits in general for people. Below is the SOOC image which is a little blunt in terms of attention and emphasis due to the wall which makes the whole picture stiff and flat. We would want our subjects and the picture to bounce more in terms of colour and sharpness. Let us go about fixing the image step by step.As we have already seen in our previous article, we always start by fixing the exposure or the White Balance. Likewise, for this picture, we took the As shot Temp and Tint from 5200 and +17 to 5590 and +10 respectively. Although, you can keep shifting and toggling around with these until you feel like the picture has improved to the maximum. You will have to remember here to avoid getting a magenta or green shade across the image while adjusting the Tint slider. Reducing the Highlights fully to the last, that is to a -100 as well as bringing down the Whites brings down the brightest and overexposed portions of the photograph. Here we have brought down the White to a -26 in order to lessen the over exposed stone wall that grabs a bit of the attention that the subject should be getting. To make the subject stand out, we bring down the exposure of the wall a bit. We mean to achieve this through the Blanket fade effect, the most important part of the whole post. This is where the main effects are added to the picture. Until now, we have briefed you with the editing that takes place to any normal photograph that is imported to Lightroom for edits.Pressing and holding shift and M simultaneously will activate what is called the Radial Filter in the Develop Module. One can find the radial filter tool below the Histogram in the Develop Module. For more details on the Develop Module shortcuts, you can read up here.After you activate the Radial filter, you can place it over the subject for the effect. You can increase or decrease the size of the overlay by accordingly pulling in/out the circumference of the elliptical overlay to increase or reduce the area respectively.The basic idea is to mask over the area you want to apply the fade effect on. To get a little more insight you can check out the picture below and see how we’ve applied the methodology to the image. You can choose to reduce the exposure, saturation, and sharpness of the portions outside the selected mask that you created using the Radial filter. We have reduced the Exposure by -0.50, and the Clarity of the picture to a -100. We’ve brought down the Saturation to -51 and the Sharpness of the image to -100 but increased the Noise to +50 to create a complete fade effect on the walls.The feather slider lets you smoothen out the Effect so that it blends in with the picture and doesn’t stand out like a bubble. This is important to ensure that your image looks natural as you do not want your picture to be screaming out ‘edited!’. Previously, before the Radial filter was available in Lightroom, the one method that existed to achieve this effect was a roundabout and tedious task, which was using the Adjustment Brush to take it over the area you either want the effect on or don’t want the effect on. Thanks to the Radial filter which easily takes care of that for you instantly. The Radial Tool in Lightroom is easy to work with and also a very helpful and handy tool in many cases and we hope you found this article useful. A small change in the exposure and will direct the viewer’s eyes towards the subject, and thereby increase the impact your photograph creates on the beholder.
Navaneethan Viswanathan (best known as Navanee Viswa) is a professional photographer based in Chennai. After completion of his Engineering and Management degrees he worked as a Civil Engineer for almost 10 years and slowly realized that his true passion was in building good photographs rather than building a structured construction. This made him quit his job and become a full time photographer to pursue his passion. Now he specializes in Candid Wedding photography primarily, he also does Product photography, and Industrial photography.
Navaneeth is a trekker and a traveller, who enjoys photographing things he comes across during his travels. He contributes articles regularly to photography websites like Digital Photography School , and he also maintains a photography blog which is followed by many. This blog has lots to talk about photography and the techniques involved. His works have been exhibited at the photography exhibition organized as part of Art Chennai 2012. Many of his works have been chosen as best entries in on-line galleries like One Eyeland . Navaneeth is also well known in the industry for his photography related workshops.


 Facebook
 Google +
Comments (0)
There are no comments yet.