Sunrise and Sunset Photography – Shooting into the Sunwww.sleeklens.com
Warning: this article deals with capturing images of the Sun. Looking into the Sun with bare eyes or through a photography lens can produce irreversible damage to your eyes. Be extremely cautious when trying the techniques shown in this article!
Photography is based on light. In fact, the mental picture of photography being a way of painting with light is a common place. And while it is true that the process of painting is in principle more complicated than pressing a shutter button, getting to understand how light is transported and reflected to finally reach the sensor is a lifelong process.
When shooting an evenly lit scene, getting the right exposure is usually a straightforward process, with even point and shoot settings usually giving pretty good results. In these occasions, what distinguishes a good photographer from the rest is the composition of the image, another skill that can be improved throughout a lifetime.
However, when light conditions are far from ideal, the way we capture our images needs to be adjusted and point and shoot settings become pretty much useless. The more extreme the conditions, the harder it can get to get the right exposure for our photos, even getting to the point where exposure bracketing and blending in post-processing becomes necessary.
The most extreme condition is arguably the one where a strong light source is included in the composition of an image. Given the limited dynamic range of cameras, what we can expect from a photo taken with the Sun in the frame differs significantly to what we actually see.
In this post, I want to show you some tips on how to take photos of sunrises or sunsets and what you can do to get interesting shots in general when you shoot directly into the Sun.
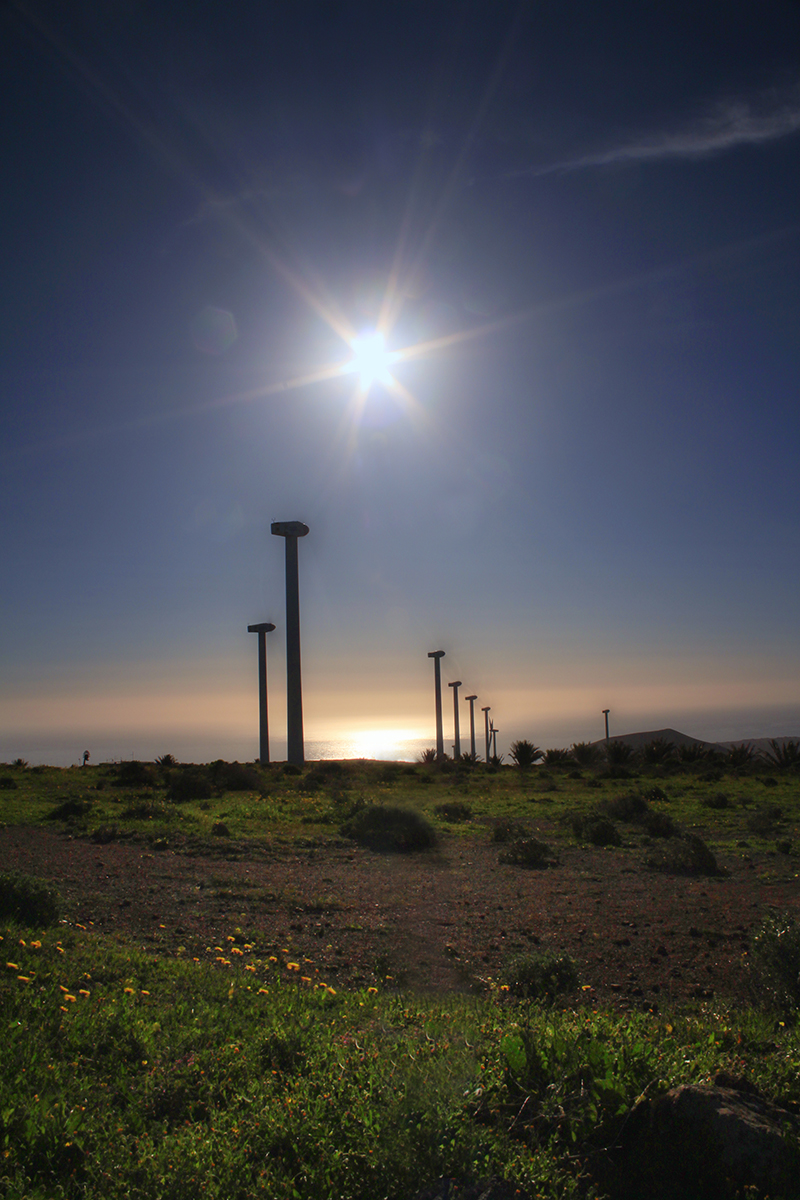
The first thing you have to get used to is how your camera captures light. If the conditions are so that the light will be more or less evenly distributed even with the Sun being part of the frame, you can get colors and details at many different parts of your final image. This happens, for instance, when the Sun is relatively high on the sky and the foreground is a highly reflecting surface like snow, or even sand.
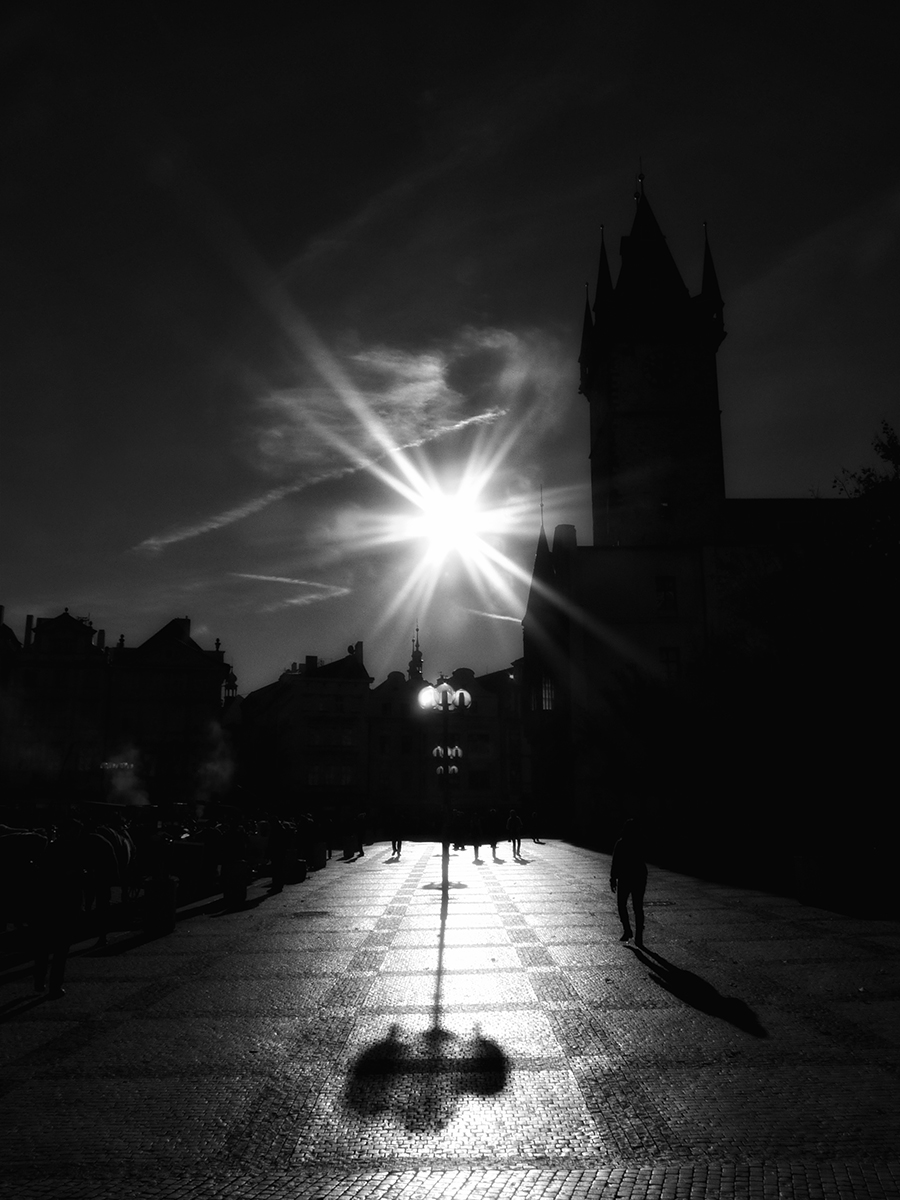
However, when the scene is rather dark, the objects are opaque or simply no direct light shines on them due to their position with respect to the Sun, you have to start thinking in terms of silhouettes.
This is probably the most difficult part of the learning process. Silhouettes can actually make very eye-catching photos, but the brain needs to get used to how they look, since when you are standing there you don’t see any silhouettes. So basically this is one of those points where the only thing you can do is practice as much as you can until your eyes and brain get properly trained.
During sunrises and sunsets, the Sun is low enough as to be located on the background of your image, literally behind any other subject. This means that if you want to capture the Sun in your frame during those times, you need to think about how your foreground will look as a silhouette.
In that sense, a great place to capture nice photos of this time of the day is anywhere close to the sea. On the one hand, piers and lighthouses usually provide low and extended silhouettes and, on the other hand, a complete lack of subject means that you will have a classical sunrise or sunset over the sea shot, which are always nice.
Given the incredible brightness of the Sun, it will simply outshine anything else in the picture, most of the times making it impossible to extract any brightness or color information from other areas. This is simply because, in order to have the Sun as a distinguishable object, the rest of the image will be underexposed.
If you want to retrieve the information in those areas, you will most of the time need to resort to image blending techniques. For this, in the simplest case, you just need to make a photo with the foreground correctly exposed and one in which the areas of the sky surrounding the Sun still have valid information. The Sun itself will usually be overexposed anyway, but that’s fine for the purpose of landscape photography.
After you have both exposures, you can used Photoshop or any other image processing software to combine them so that your final image has enough information all over.
Unfortunately, in many occasions, even with the relatively good dynamic range of modern DSLRs, this is the only way to go. So that’s basically a short list of situations where you can include the Sun in your images. Even though it might seem strange at the beginning, shooting into the Sun can provide great results that are quite different from what you are used, so give it a try.
To finalize, a few important tips that you should take into account:
First and most important: use the LiveView of your camera when shooting into the Sun. Never look through the viewfinder since this will cause irreversible damage to your eyes!
Evaluate the scene: make a quick inspection of the conditions in general to plan whether you want to capture silhouettes or a full scene.
If you want to go for a full scene and the foreground is not very reflective, you will have to do more than one exposure.
Use a tripod: whether you are doing bracketing or a single shot, a tripod will make it much easier to compose your image and get everything in focus before pressing the shutter button.
Clean your lens!: this is an important one. When shooting into strong light sources, any small dust particle in your lens (or sensor) will cause a flare that needs to be removed during post-processing and sometimes it can be difficult to do it, so simply plan ahead to avoid the hassle.
Leonardo Regoli is a self-taught amateur photographer currently based in Ann Harbor, Michigan (USA). His main interests are travel and landscape photography.
Hi Jill, we’re still testing the iPhone XS to give a proper tips & tricks guide for it. You can check the review we made comparing the three models and the changes that have been introduced in this article: https://sleeklens.com/iphone-xs-review/
Jill •
Guest
Any tips on taking sunrise photos with the new iphone xs? I just got mine, and the photos are not as good as from my iphone 7. The photos are too bright and not “real” color. For example, the clouds were super dark to the east in real life but on my phone the clouds were just boring gray. I would love to know how to get the true color.
Karen C •
Guest
Thank you Leonardo for sharing your talent. Come to Maine, we have beautiful landscape for you to photograph!!
Carolyn •
Guest
Thanks for sharing your talent with thoze of us who Njoy The Art,and Artist. Keep up the Great work. G0D B WITH U ALWAYZ ? Until the next Viewing B SAFE⛅ Take Kare. Bye for now


 Facebook
 Google +
Comments (4)
Hi Jill, we’re still testing the iPhone XS to give a proper tips & tricks guide for it. You can check the review we made comparing the three models and the changes that have been introduced in this article: https://sleeklens.com/iphone-xs-review/
Any tips on taking sunrise photos with the new iphone xs? I just got mine, and the photos are not as good as from my iphone 7. The photos are too bright and not “real” color. For example, the clouds were super dark to the east in real life but on my phone the clouds were just boring gray. I would love to know how to get the true color.
Thank you Leonardo for sharing your talent. Come to Maine, we have beautiful landscape for you to photograph!!
Thanks for sharing your talent with thoze of us who Njoy The Art,and Artist. Keep up the Great work. G0D B WITH U ALWAYZ ? Until the next Viewing B SAFE⛅ Take Kare. Bye for now