
Hi, today I’m going to show you how to cut out Fur effortlessly in Photoshop.
This is a big task, and I see it all the time on forums and the like, I too have had problems in the past with this area of Photoshop as it can be very hard to do if done wrong, you can get into all sorts of bother.
What I did then was I took a week and went into researching this and this only, and my goal was to figure out the easiest way and most efficient way to achieve this.
You can also use this Tutorial for other things like clouds and trees etc., basically anything with a rough, jagged edge.
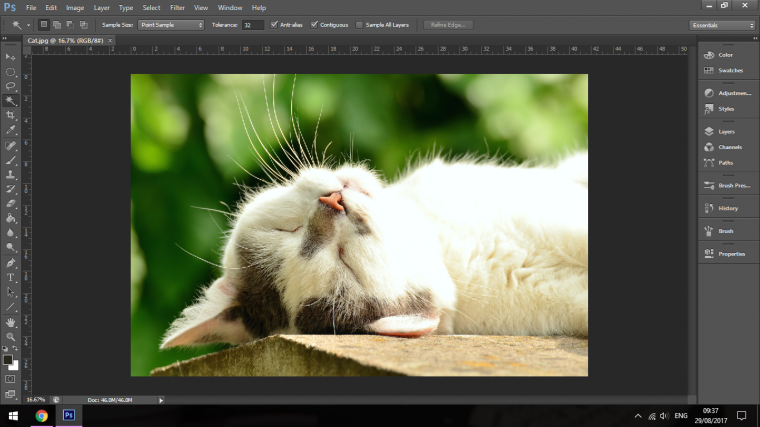
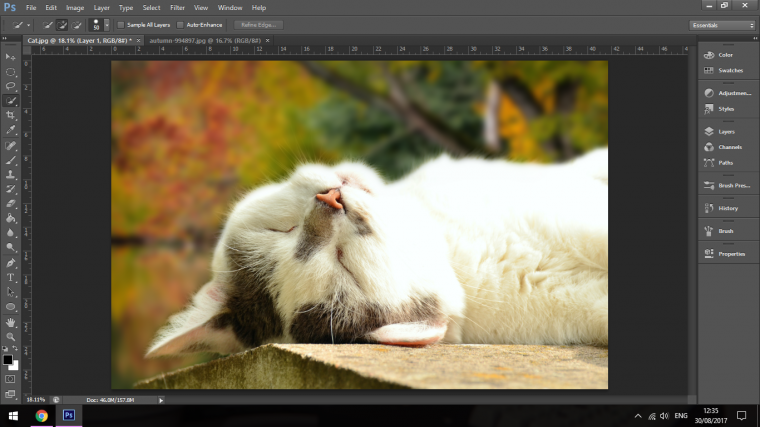
So for this Tutorial the Image I’ll be using is this rather intense looking cat on the prowl below… Joking off course 🙂
So for this, we’re going to be using the Refine Edge Tool as our primary weapon in this endeavour.
I will say though that this will work better on images that contrast each other, so if I was to try this with a Cat that was grey and had a complicated grey background than I could have to look into other ways to select my image, but that’s a whole different tutorial right there, so it’s just, for now, focus in on this way and have it in grained.
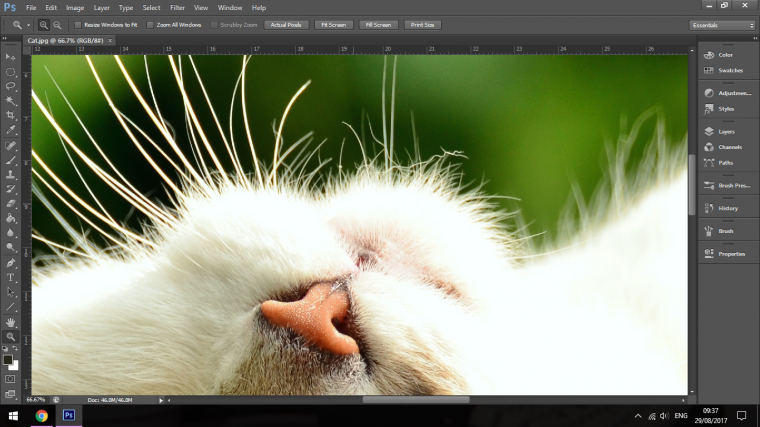
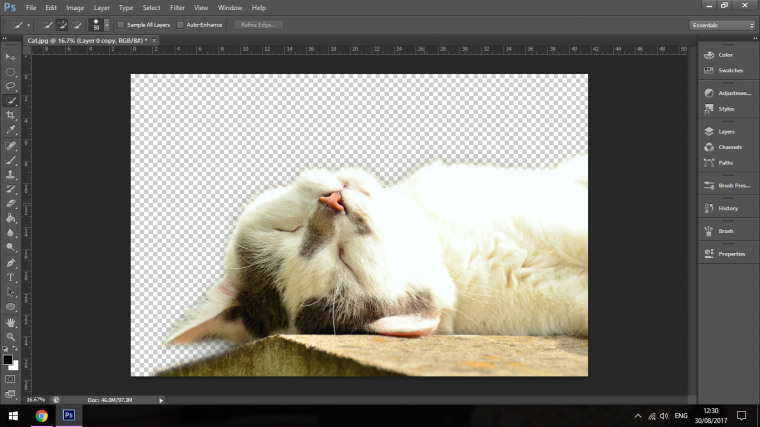
When we zoom into the Cat, you can see how complicated the Fur on the Cat can be.
Quick Note: I want to open my Background Layer, so hold Alt and double click on it to see the little padlock disappear first.
Now Imagine trying to do this with the Pen Tool… oh now that would be some serious work we would have to put in, hours!
Thank goodness we are NOT going to be doing it that way.
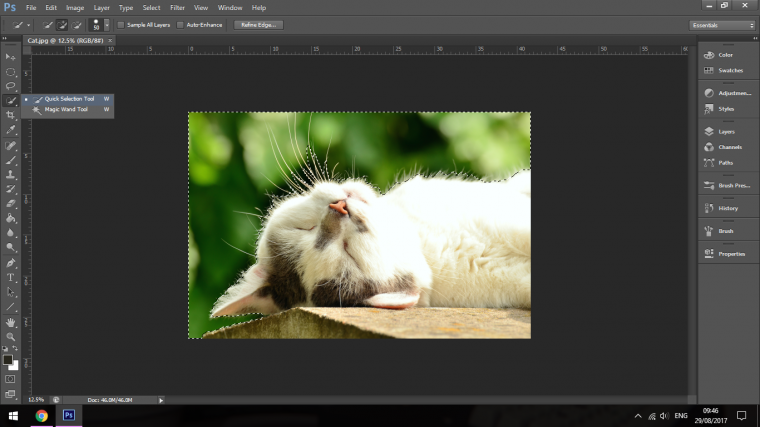
The first thing I’m going to be doing is to Select the background of the image.
For this, I’m going to use the Quick Selection Tool.
If I was just to create a mask with this standard selection by going to Layer – Layer Mask – Hide Selection…
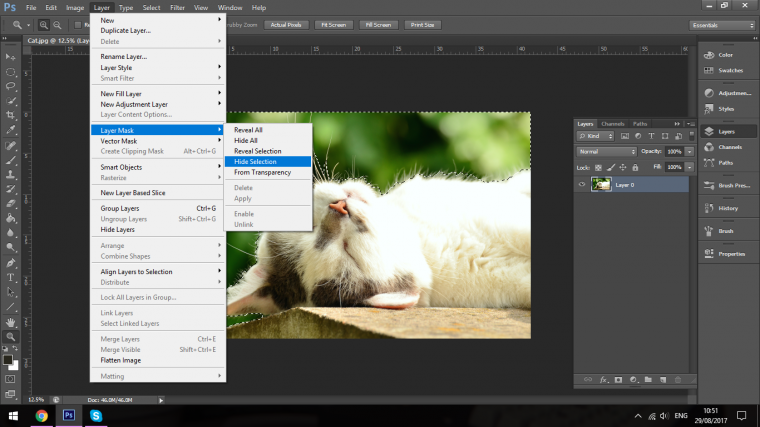
You will see that the standard selection isn’t very good at all.
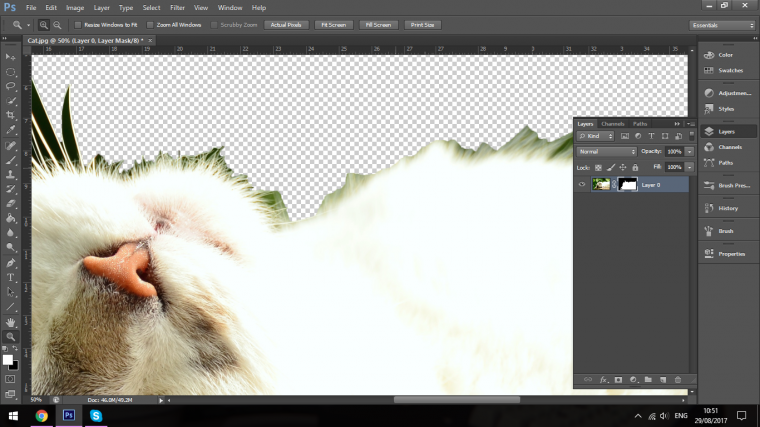
This is where the Refine Edge Tool comes in to help us out, and help us out a lot it does!!
If you followed the steps that I did and had your mask key in on your keyboard Ctrl + Alt + Z to undo till you get back to the original selection that you had.
So back to this…

Click back onto your Selection Tool that we were using, and at the top of the menu bar, you’ll see the Refine Edge Tab.
It’s roughly in the middle just under where it says “Help.”
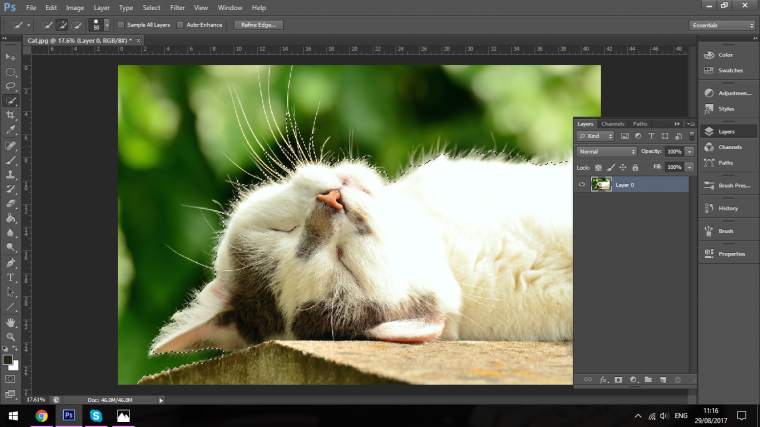
So just before you click on that go to Select – Inverse
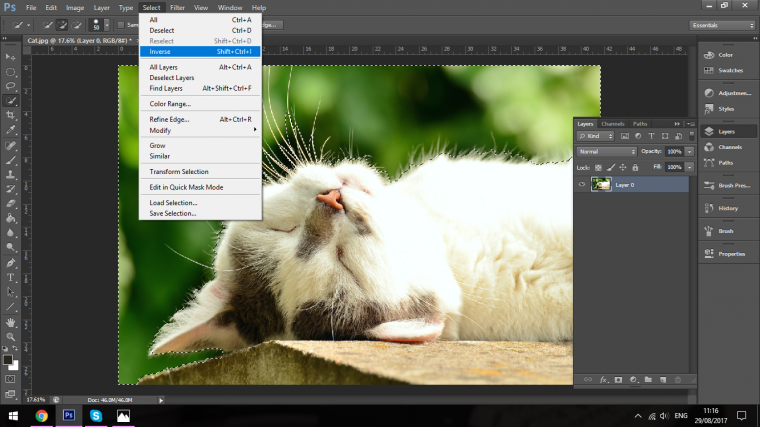
Your selection will now be reversed.
Then click on the Refine Edge Tab.
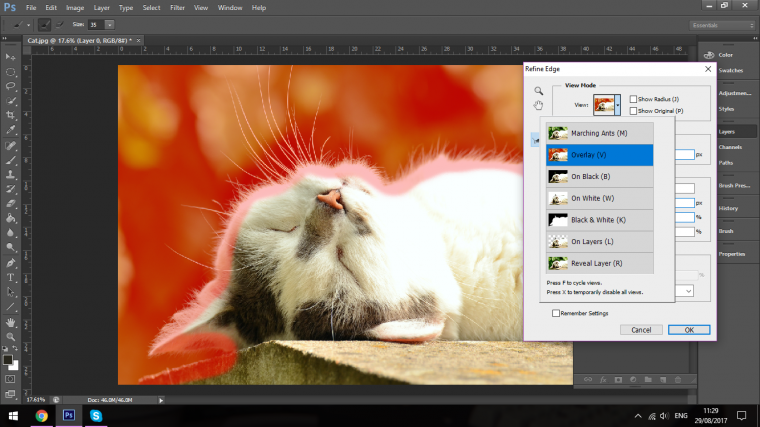
When you hit the Refine Edge Tab, you will now have this Panel available to you.

At the top of the Refine Edge panel, you will see View mode, it’s not really something you need completely, but it is something that can come in handy for when you need to see your edge a little bit better, you can scan through these for a few seconds and saw what they all do.
OK so moving on you will see the area below that called, edge detection, we’ll be looking into this a little later, so move past that to the next called Adjust Edge.
You will see four different options there, Smooth we are not going to worry about because we can do this with the next two which at Feather and Contrast more efficiently.
But for now, I’m just going to pull those all back to zero for now and -100 for the shift edge slider.
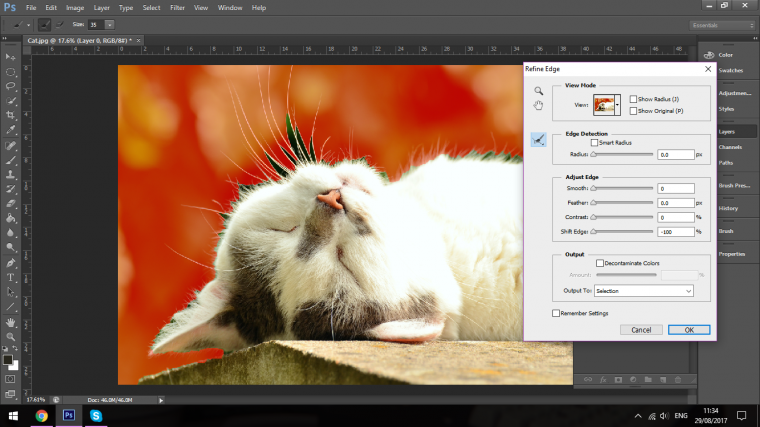
Below that you will see Output.
I will leave Decontaminate Colours off atm I don’t need it.
You will see a Drop down box below that, that’s called Output to:
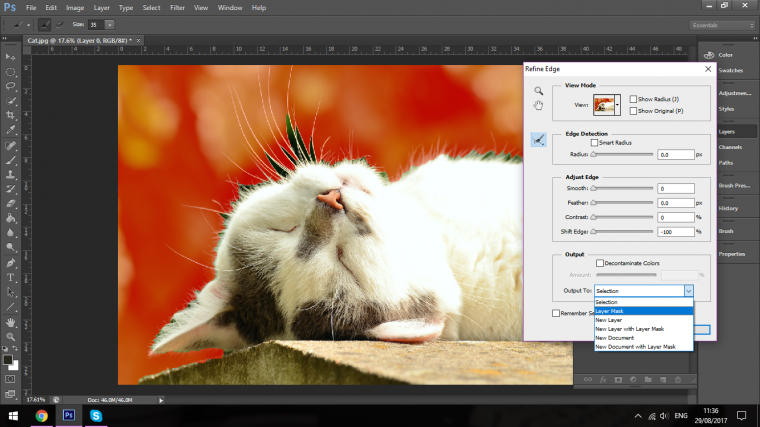
We’ll change this to Layer Mask.
Now is where we go into it in a big way so get your note pads out and get your pen ready.
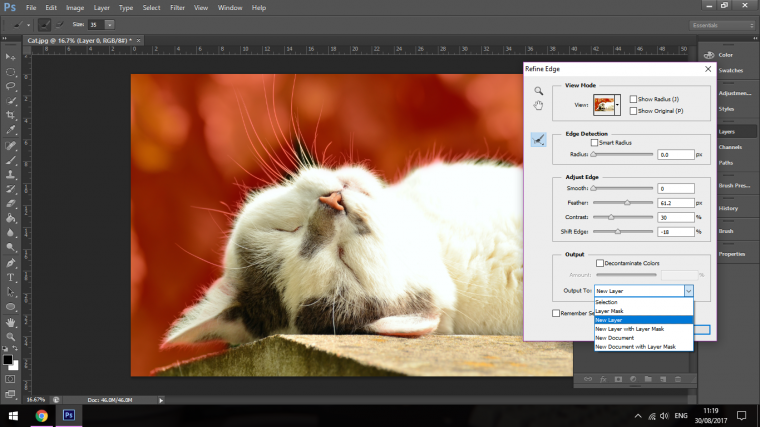
The first thing incases you have not done this already is to change your Output to New Layer.
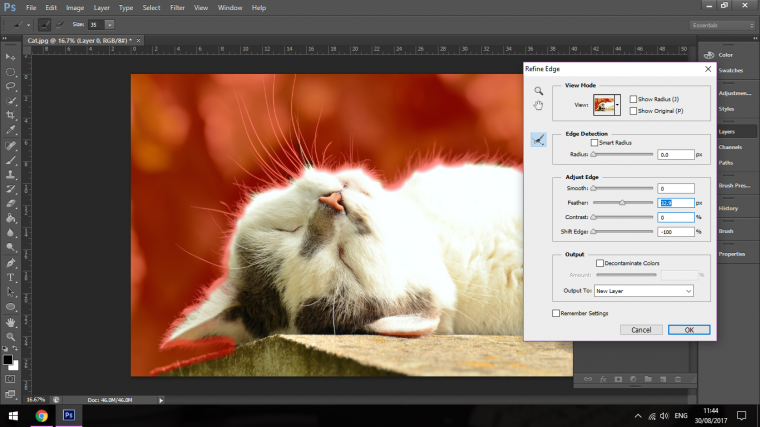
Now, the next thing that I’m going to be using is Feather, Contrast and Shift Edge.
I’m going to be trying to find a balance between the three of these.
First
Move everything to zero if it isn’t already so that we can start together and I’ll walk you through like we are doing the task in tandem.
Shift Edge goes to -100, but for this, we’ll just consider it zero for now, or in other words, the sliders go all the way over to the left-hand side of the panel.

Start with Feather.
I’m going to bring Feather up till I get a nice smooth edge along all of my Cats Fur.
So try to get your image to something similar to where mine is, ignore how far the slider is because this will be relevant to the actual image.
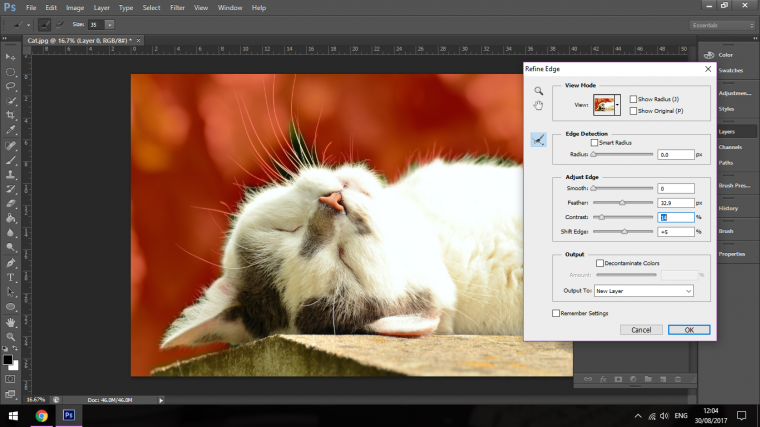
Next, I’m going to use the Shift Edge slider, the same points as I did above works for this as well, I want to just have it on edge, don’t worry or you can see a little bit of the original background, in fact, you want that.
Again try to get something similar to what I have in my image below.
If you get anywhere near that I would say you will be okay, but we can correct it a little down the road if we have too.

With the Contrast slider, I just want to slide this to the right a little; I want to get to the point where I do not see any hard edge, there will come a time when you’re sliding this to the right that you will see the hard edge appear again.
If you just take a sec just to slide it all the way to the right you will see what I’m talking about.

Now start to slide it back as I just said, till you get something like what I have below.
So by now, our edge isn’t looking too bad, certainly, a lot better than what we had at the start.
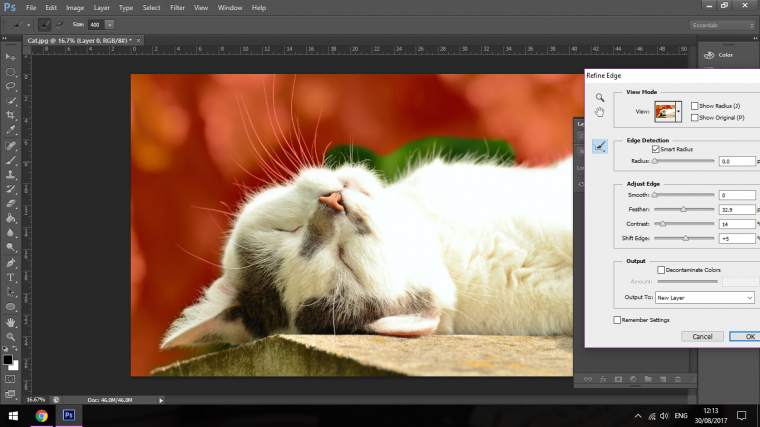
Now we’re going to get into the real meat of this tutorial; we’re going to be using the Edge Detection Tool.
What this tool does is to refine your edge down to the point where you may not have any background left on the cat at all.
What I want to do first is to click on the box that says Smart Radius.
Make sure that you’re clicked on to the icon that looks like a paint brush; it’s under the Magnifying Glass and the Icon of a hand.
You will be able to change the size of your Edge Detection Brush.
Then you simply click and paint along the edges, and the Photoshop will do the work for you.
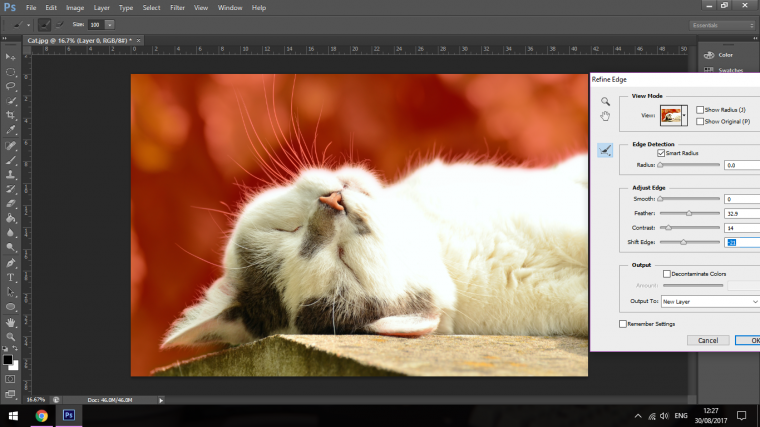
Once you have gone over your entire image, you can then go back to the Shift Edge slider and just bring it back in a little bit more.
When you feel that you’re done, you can click OK, and we’re looking pretty good!
Now we lost a few things like the whiskers but you can always create those on your own, I would just zoom in on one, select it with the pen tool and then use the same one to copy and paste a few times changing the position to each one to make it look like there are a few different ones.
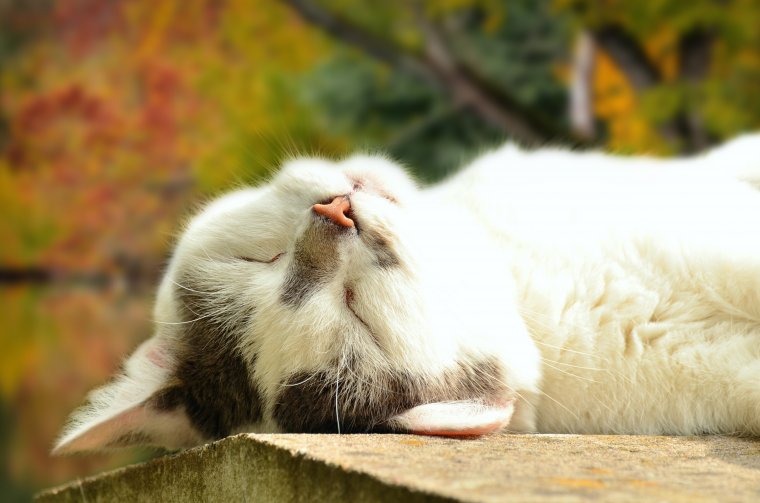
Now I can add in another background, add a little blur and my image is looking pretty awesome!
Wonder how to remove reflection in photoshop here is the best guide for it!. see you there 🙂


Please verify your software version before proceeding.
 I’ve verified my software version


 Facebook
 Google +
Comments (1)
OMG, thank you so much! This really worked. Much appreciated!