How to Replace the Reflections in Sunglasses Using Adobe Photoshopwww.sleeklens.com
When it comes to a sunny day, wearing sunglasses is important as it protects the eyes from harmful, direct rays of the sun. However, equally important is taking those beautiful shoots that will remind you of your own or client’s experience outdoors. Sunglasses normally reflect the surrounding objects and in some cases, you might want to replace these and have them reflect something else that wasn’t part of the surrounding environment but will make the photo look better. As such, this tutorial has been put together to help you learn how you can put a different reflection in sunglasses easily using Adobe Photoshop.
To start the process, we need to have the image that we want to use as the replacement on top of the sunglasses. We will drag it to our original photo and put it on top and then hit Command/Ctrl +T to transform it. We will shrink the object to fit in the sunglasses and turn it a little bit to make the replacement look original. While at it, if you want to put different scenes on top of sunglasses or do a replacement but realize that the image is not the best to use, you can use a smart object in Photoshop is very powerful to change this up without having to follow all these steps again.
What you do is to right-click on the object and then choose “Convert to Smart Object.” This might not appear as though you’ve done anything but when you have a smart object, you’ll have a small icon on the layer and this allows you to change the photo willingly and be able to put different types of photos on top of what you are doing.
From here, we need to get a selection. We will, therefore, hide the current layer and get a selection of the sunglass frames that we need to be replaced on. We can use a number of tools including the pencil, the right selection tool, the magic wand or any other method you want. For our tutorial, I already have one selected and therefore we will go to “Load Select tool > Sunglasses” and then show the image layer again. We will then create a layer mask and once we click on the layer mask button, everything outside the sunglass frames disappears except what is in the selection.
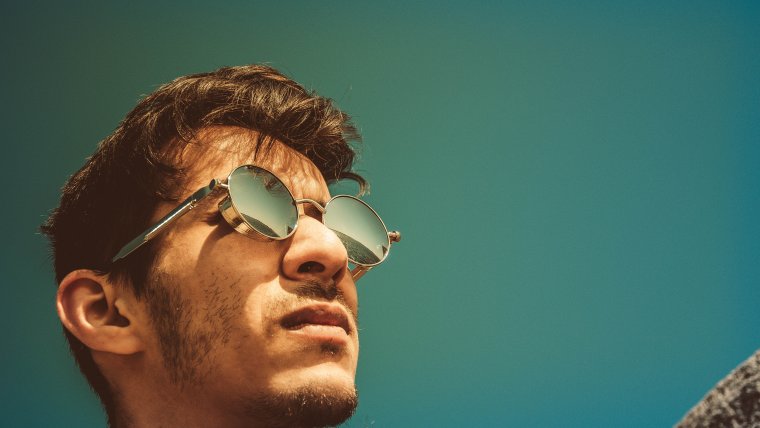
Of course, you will realize that what is left looks okay but fake. To blend in perfectly and add realism, you can reduce the opacity or go on and play with blending mode. We will choose the ‘screen blending mode’ which allows you to see the reflection of the clouds and also see through the lens like it was originally was and you can see the contours of the guys’ face.
You can toggle to see the ‘before and after’ photo and you can see the difference. We can look at how another photo would look like and this is where the smart object comes in. Remember the smart object layer that we had and you can go to this and double click on it. This shall open a separate document and this is the original sky layer that we had and that we turned and this is what we can replace with. We can hide this layer and drag another image of the sky into the smart object layer and it’ll automatically open. We then transform it a little bit so it looks a little better in the frame.
When this is done, we close the layer and once you click on the close button, it’ll ask don’t save, cancel or save and you can choose to save and it’ll be saved internally. We can then go to our original layer and you’ll realize that the sky has changed in the sunglasses. If we go back again and hide the original one and click ‘save’ again, we will get the clouds again.
This tool is powerful and you can use it to place many different objects and scenes in there and it’ll automatically update without you going through the process again. That’s how it is to quickly replace the reflection on sunglasses using the Adobe Photoshop. There are different types of blending modes you can use and they’ll all give you different reactions but you can look for the one that works best for you.
If you enjoyed this tutorial, you can visit Sleeklens.com for more as well as multiple Lightroom Presets and Photoshop Actions.
Just in case you want to print the photo you just created here is a guide on the best print settings for photoshop
I am a Real Estate and Landscape photography as well as a Graphic Designer based in North Carolina, USA. My passion for photography started with taking photos with a point-and-shoot and now I own a successful photography business. My goal is to help others learn the art of photography, develop their creative side and just have fun.


 Facebook
 Google +
Comments (0)
There are no comments yet.