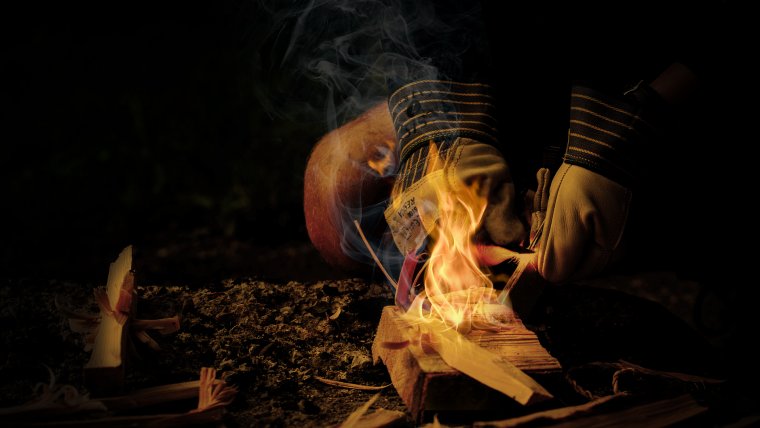
Today I’m going to be showing you in this new Photoshop Tutorial how to turn a day seen with a camp fire into a night scene with a fire.
If you are taking shots of a campfire it probably bests that you do not actually use real fire for a few obvious reasons.
It can be dangerous.
The Photoshop could last a long time so the fire would have to be constantly looked after which is the last thing you want to do when you’re busy trying to take photographs.
There will be a tonne of smoke which is just not good for you nor is it good for the photo’s it will be obscuring.
And last but not least the brightness of the flame could mess with your Exposure.
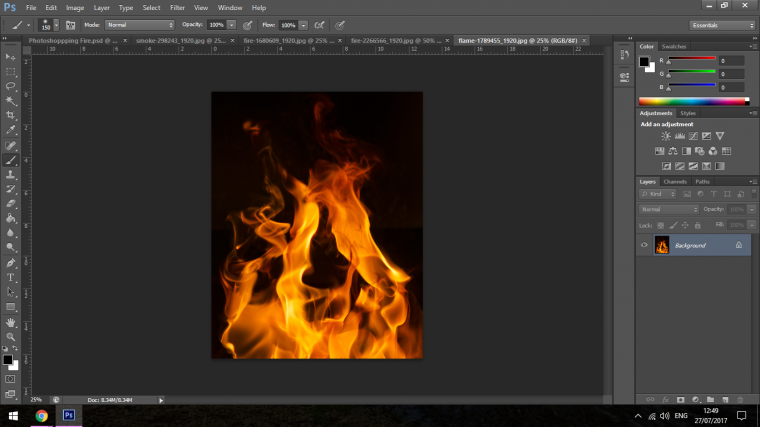
The First thing we have to do is find our image, so either you have an image that similar to what I have below already taken that you have or you can just look up on Pixabay or any other royalty free image website for an image.
Get something that resembles mine if you can.
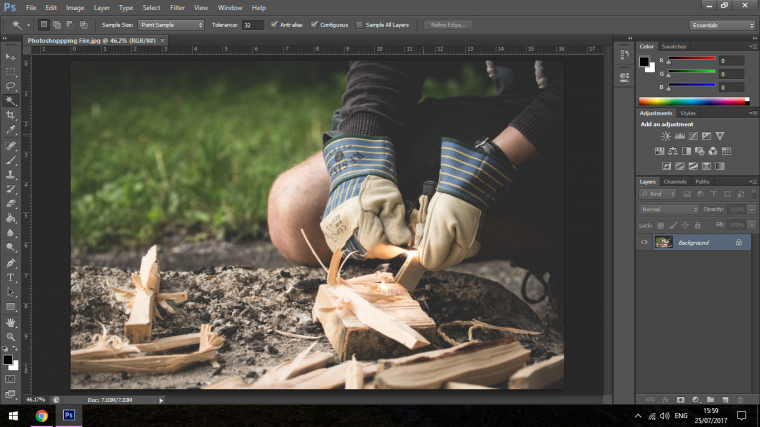
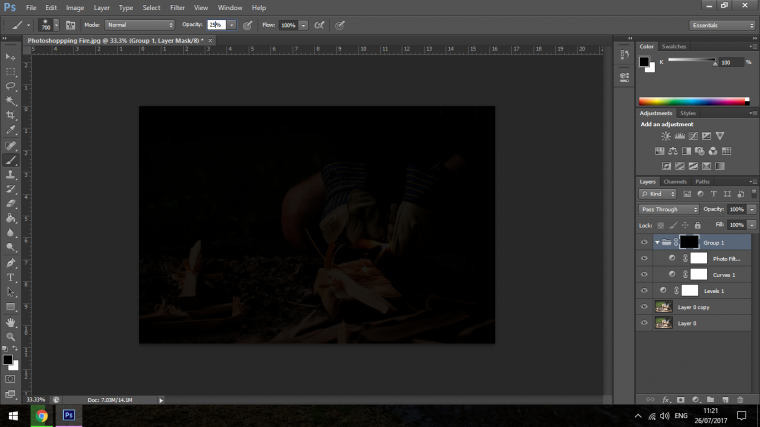
Now we’re going to darken this image down a good bit to create the night scene.
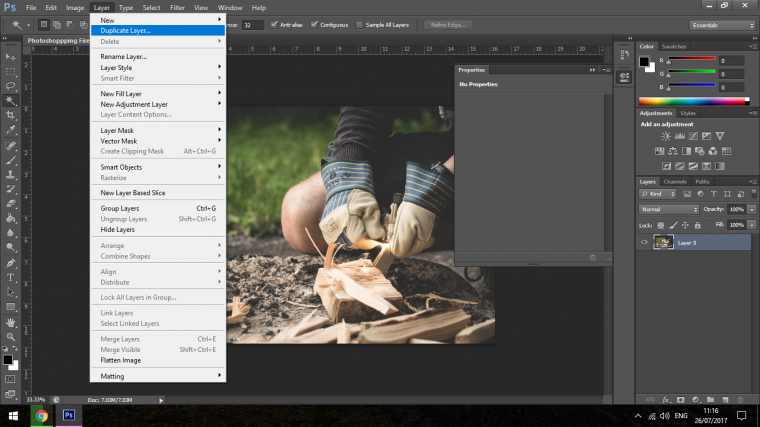
The first thing here that I’m going to do is to create a duplicate layer.
To do that go to Layer in the top of your screen as indicated below, under Layer you will find the action, click it and you will have a brand new layer with the original one intact in case of anything going wrong, you’ll always have the backup.
Next, go to the same place ‘Layer’ and click on New Adjustment Layer then Levels.
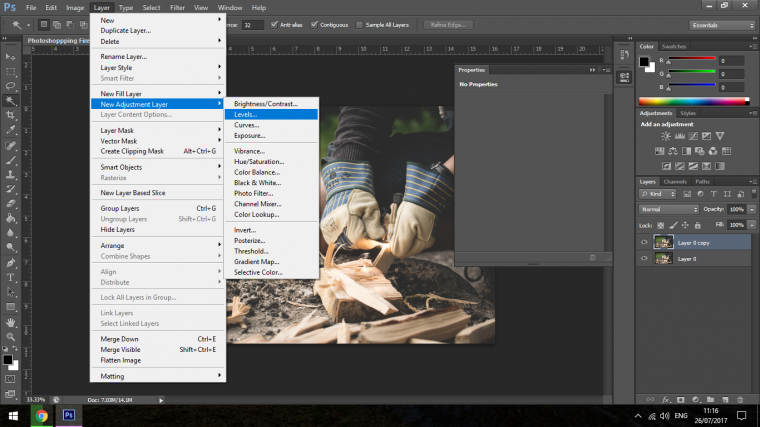
Click the Ok when prompted and you will now see a little histogram.
You will see three small tabs, Black, Grey, and White.
Click on the middle one and slide it over to the right until your image is as dark as mine.
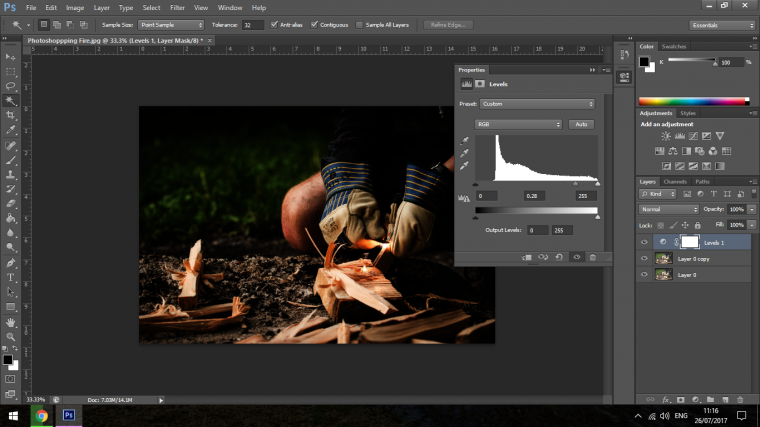
Then you will see a bar below that, that is Black and White.
Click on the White Slider and slide it over to the left until the image is nearly completely dark.
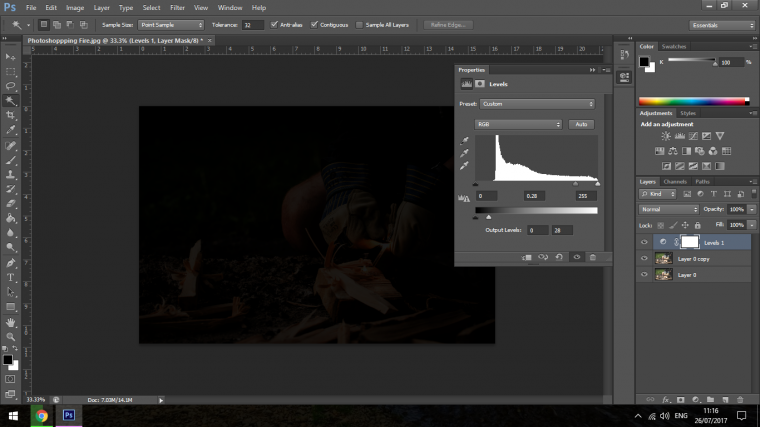
Next go back to Layers and Choose Group Layers or Ctrl G as keyed in for the Shortcut.
This is an important notice here when you create this group layer, when you do click on the levels layer and just drag it down a little below the group layer just to make sure it is not in the group layer folder.
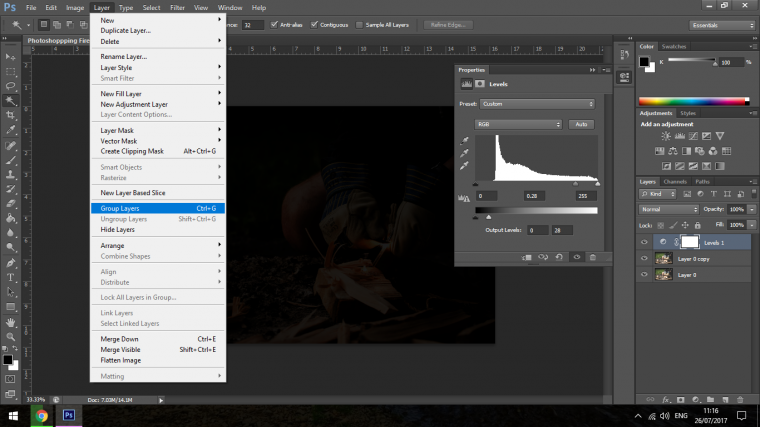
When you have that done you can now proceed to click on the group layer folder to activate it for use.
Then back to the Layer tab we go.
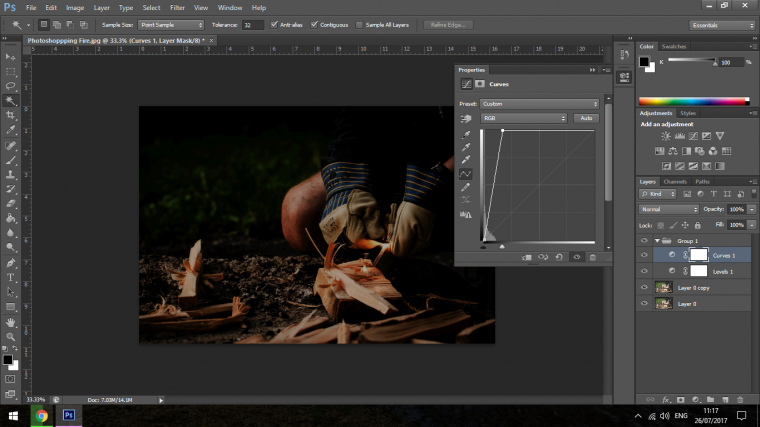
This time choose Curves as shown below.
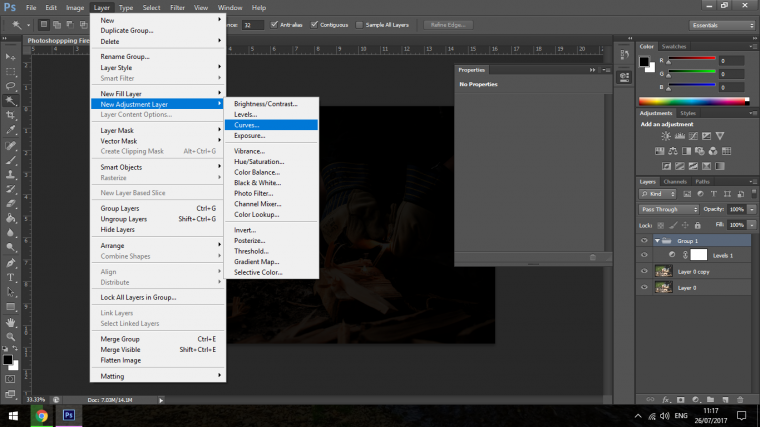
In Curves, you will see a diagonal line.
The marker at the top of that line to the right, click it and drag it directly across.
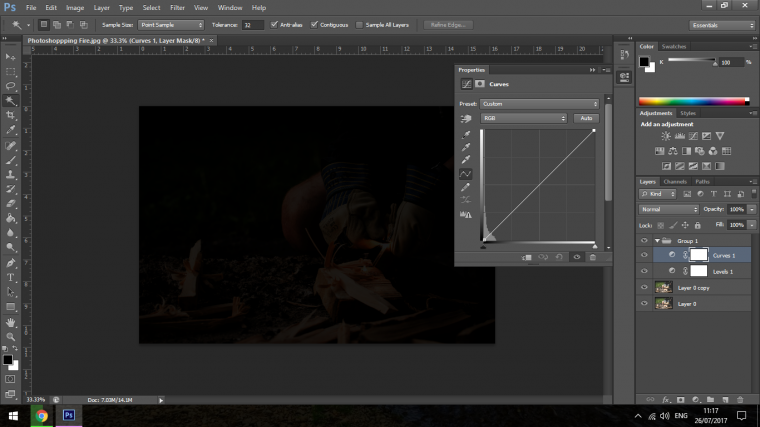
Go far enough that the image looks good, if you go too far it may start to pixelate a little and look a bit funky.
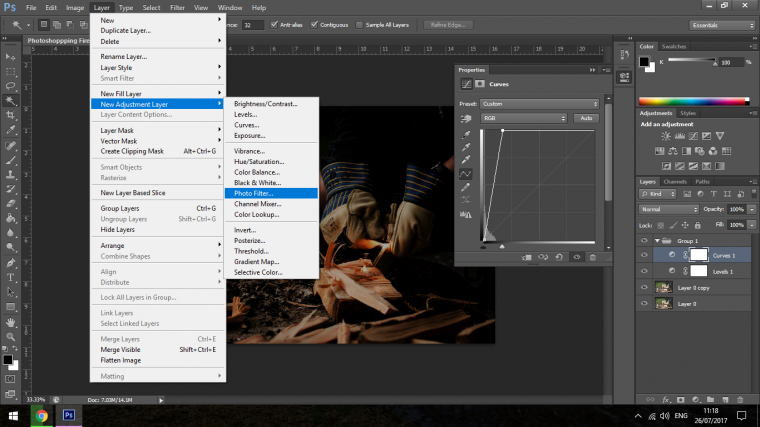
Now add another adjustment layer
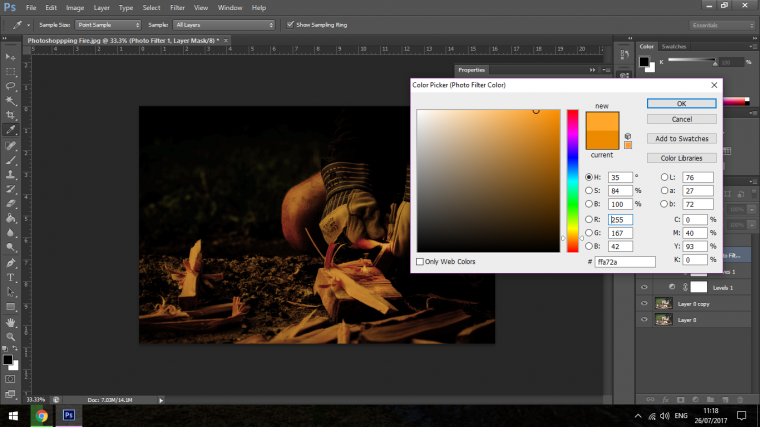
This time we’ll add a Photo Filter to it.
Make sure that Density is at 100% and that you have Preserve Luminosity checked!
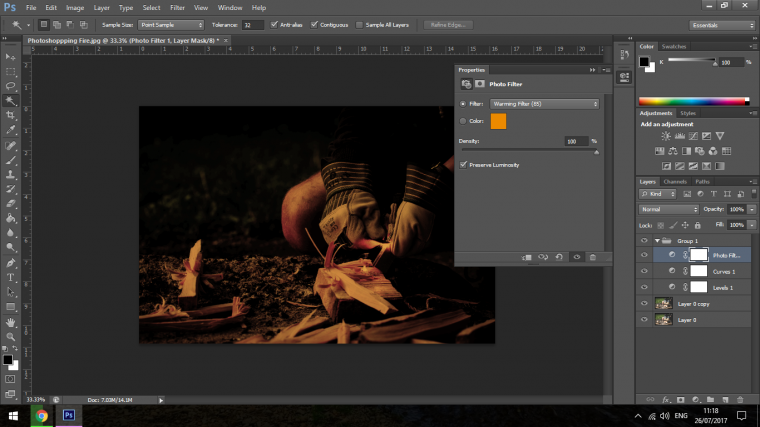
Double click on the little color box and play around until you get a color that you think would work well for a fiery glow.
You do this by just clicking on the colors till you get to where you what in terms of the correct color. I use correct very loosely, close enough is good enough.
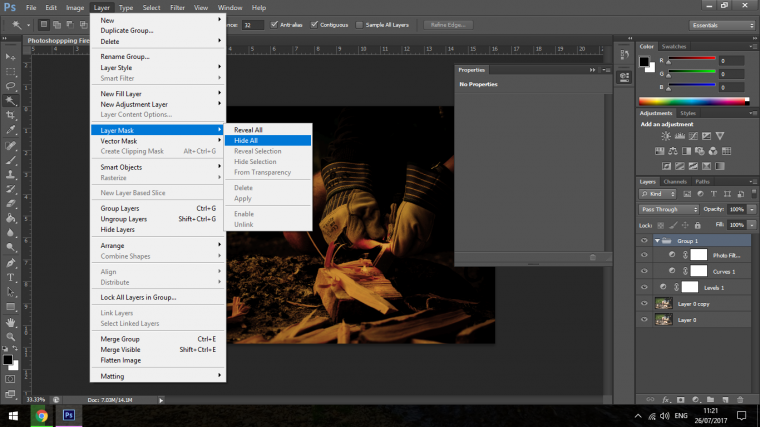
Now we’re going to add a mask, so click on your Group.
In Layer, you will find the option Layer Mask.
Click on that and choose Hide All.
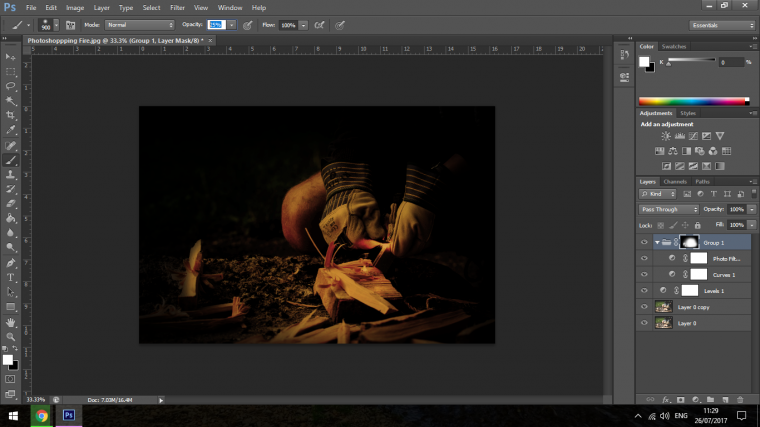
With an opacity of about 25% you now star to click over your image to start to paint back in the areas you want.
Think of where the fire light would fall.
You can use your bracket keys on your keyboard to resize your brush as you go along.
You can also press B to activate your Brush Tool.
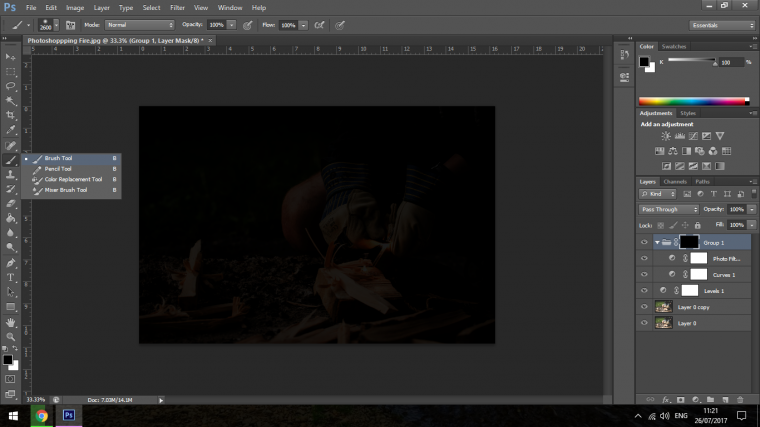
You will find the Soft Brush in the drop down box under Edit.

Your Opacity is in the same row, under where it says View and Window.
Then just start to rapidly click over the area building it up as you go along.
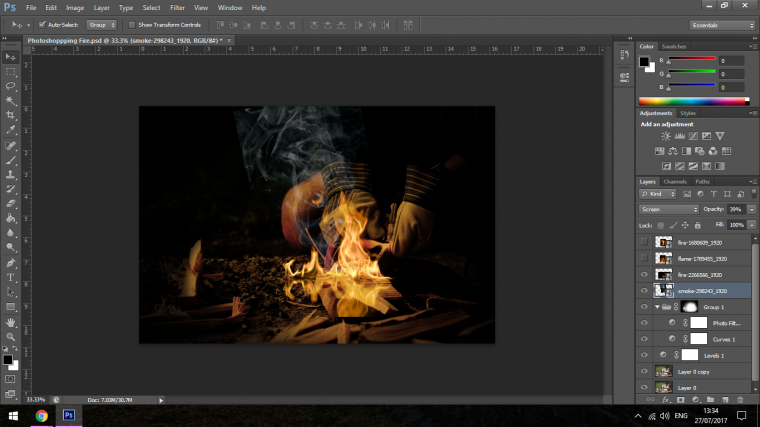
Ok so let’s get on to the Fire adding stage now that we have all the boring prep stuff out of the way.
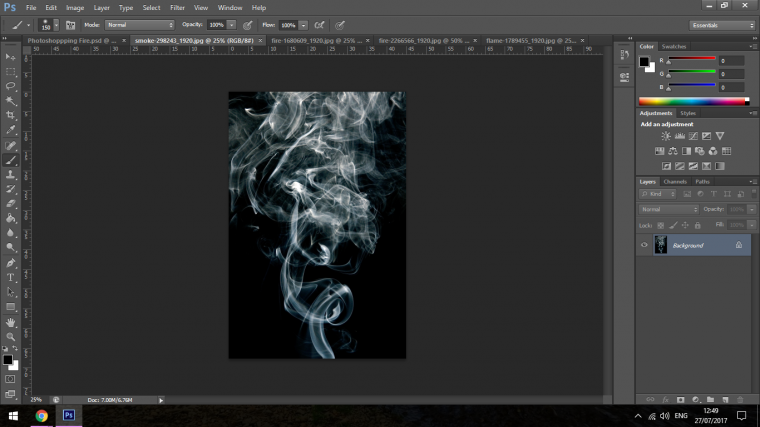
You have to first find images that are similar to the ones that I have.
I’m only going to use one image of smoke but you can use two or three, as many as you like that you think works, I may in the end not even use this many, I’ll probably just end up using one of the fire images no doubt.
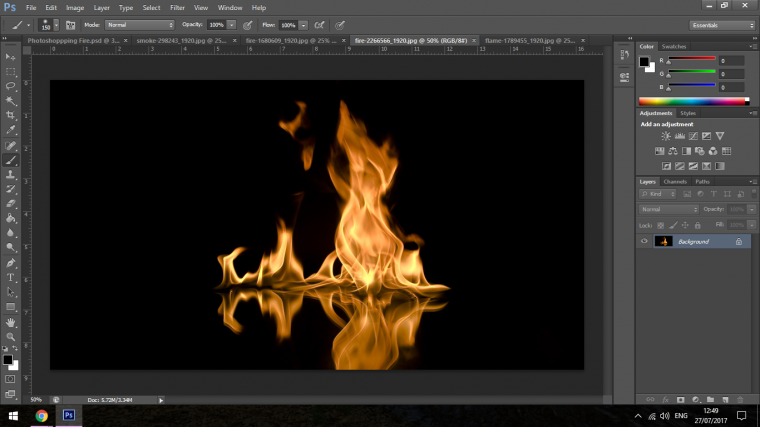
I’m going to use three fire images, I may not use them all but I like the variety it will give me.

The way you get these is, if you are just doing this tutorial to learn then you can just look up google under either Fire Stock and Smoke Stock.
What you’re looking for is to find images that have a completely black background, when you add the key word stock in front you should find plenty.
OK so I added those images the normal by opening them up in Photoshop just so I could show you my images, but the best way to do this is, have those images on your desktop or a folder so they are all together.
Click and drag over all of them so they are all highlighted.
Then click and drag them to the Photoshop icon at the bottom of your screen and all the images will now start to be placed into your Photoshop workspace.
Resize them to what you think will be a good size and hit ok, you can change the size as you go along.
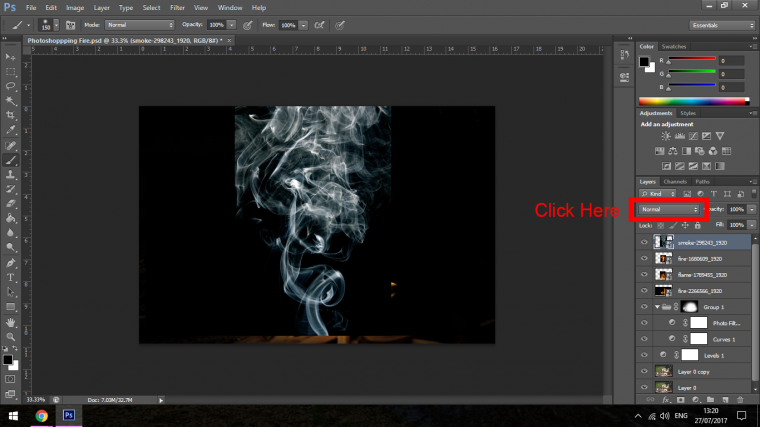
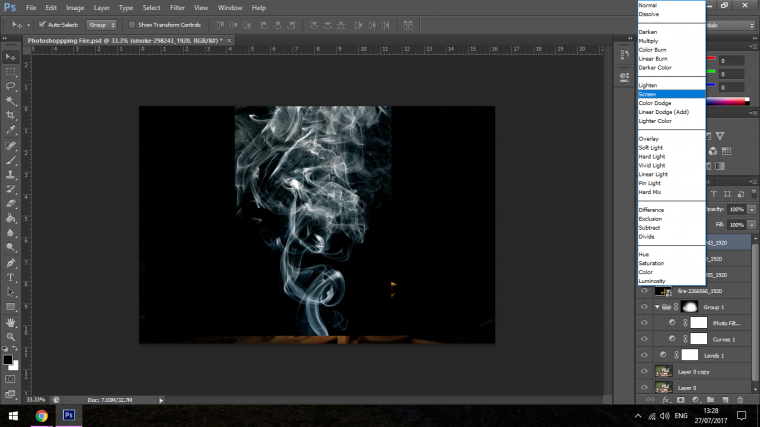
Now we are going to change the Blend Mode, click where I have indicated below and Choose Screen.
Then take each one and position as you see fit, for ease you can click on the eye icon beside the layer to turn it off and when you want to use it again just re-click the eye icon.
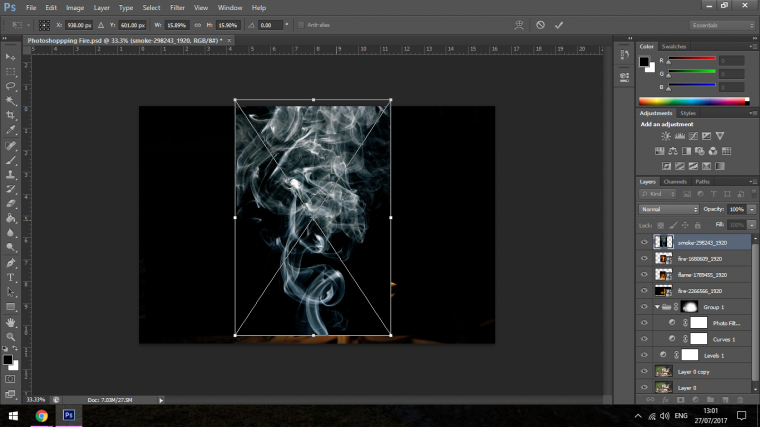
I’m just going to click and drag the smoke layer below my fire layer now I have them positioned.
Then I lowered the opacity of the smoke layer.
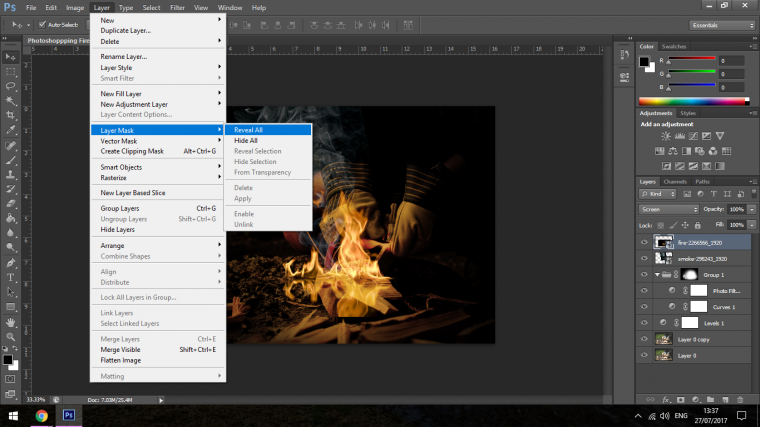
Now I’m going to create a layer mask just like we did in part 1 and I’m going to tidy up the fire and smoke.
This time though make sure to click on Reveal All.
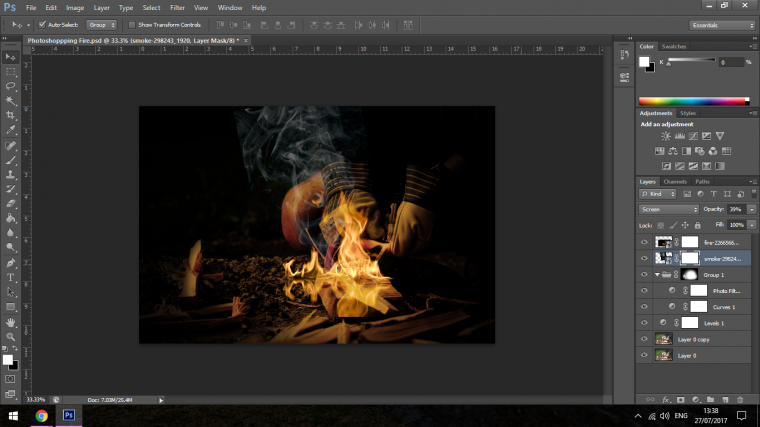
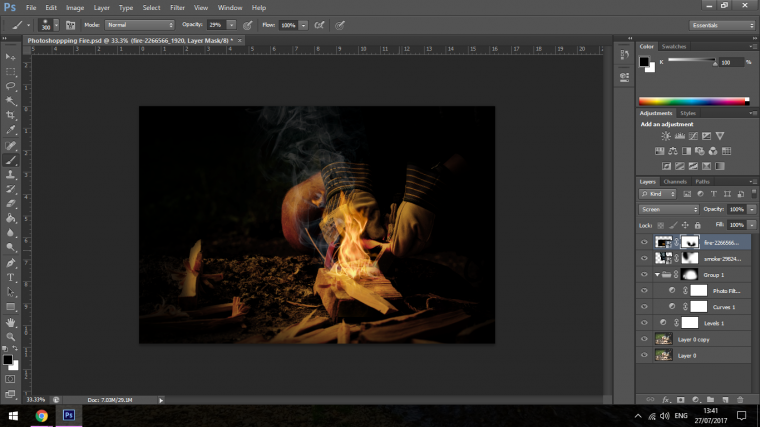
This time we are going to use the same Brush Tool technique but we are going to use Black on it.
Then just start to paint around any areas you’d like to hide to make it look natural, drop the opacity as you go along as well, with the smoke I dropped the opacity of the brush to blend in the top of the smoke.
At this stage, if you want you can let your creativity fly and start to add in some sparks and floating embers, just follow the steps from image searching for stock till what we just created.
So that’s it for this tutorial, I hope you’re are now confident you can add fire to just about anything you’d like in Photoshop.


Please verify your software version before proceeding.
 I’ve verified my software version


 Facebook
 Google +
Comments (0)
There are no comments yet.