We are living in a fast world, working longer hours and under greater pressure to produce than ever before. E-mails, social media follows rent, mortgage payments or school fees. It is no wonder many seek to escape to a slower, more natural life. That connection with the great outdoors. Photography is an excellent way of getting people out, whatever their physical ability, whatever their skills, whatever their equipment.
After a while, however, photography quickly becomes a personal art and form of expression. It is not about capturing an accurate image of a favorite place, but about capturing a feeling, an experience. Modern digital photography allows everyone to embellish their artistic personality. No finer example of this is long exposure photography, where the ordinary can become extraordinary. Long exposures create mood, drama or tell a story of movement and flow that standard exposures fail to deliver. Here, I hope to inspire you to have a go at long exposure photography, whether you’re a beginner or experienced. You will find that it opens up opportunities for novel images wherever you are. I show you some examples of what can be achieved and give you some tips on how to get the best results. Thoughts about equipment can be found at the end of the article.
Table of Contents
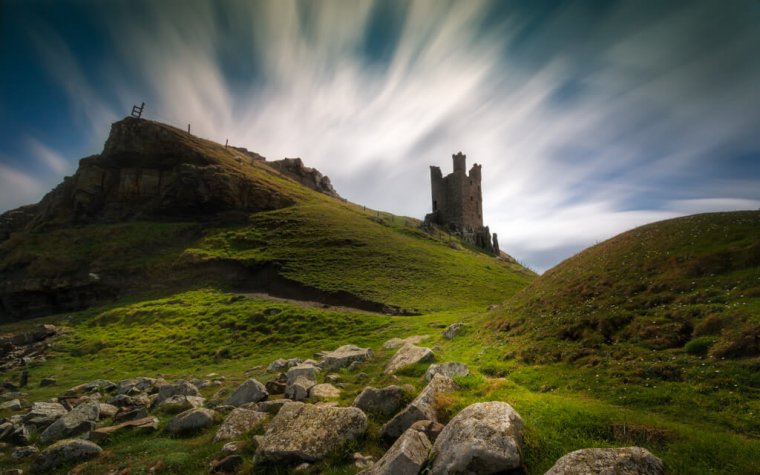
I personally like to escape city life whenever I can, to experience the splendid landscapes, coasts and nature we have here in Scotland. Long exposures can help solve a situation where you have a strong single subject but no interesting composition. Slowing down the movement of the clouds to create streaks can add drama and mood. The subject could be modern city blocks, monuments or historic buildings. In this example, I use the technique to add even more drama to the ruins of Dunstanburgh Castle, Northumberland in England.
Tip: Study cloud movement
The best results are achieved in changeable skies, so patchy cloud on a partly sunny day is perfect. This is an excellent subject for those who can only get out in the middle of the day. The dynamism more than makes up for the light at golden hour. There are a couple of things you need to think about. Look at the direction the clouds are traveling in. Ideally, you want to position yourself so that the clouds are moving directly to or from your subject. Think about exposure time in terms of how long it takes a cloud to pass through the frame. Two or three minutes is a good place to start.
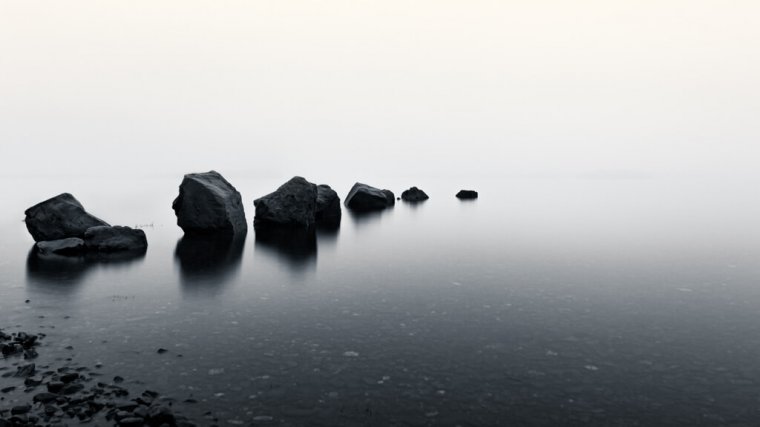
When we look at the surface of a lake, we see the bright peaks and dark shadow troughs. A long exposure of several minutes averages these away to create a smooth silky surface. In cloudy or foggy conditions, you can achieve minimalistic results. Only rocks or structures in the foreground stay in focus. This image from Loch Lomond in Scotland is a good invisible horizon result from a very foggy day.
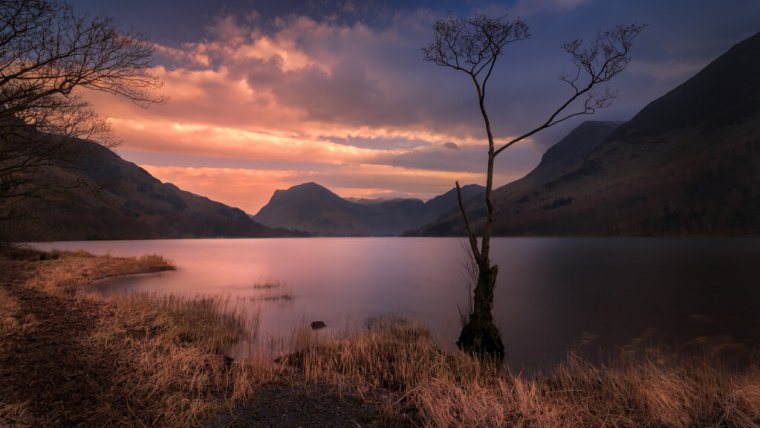
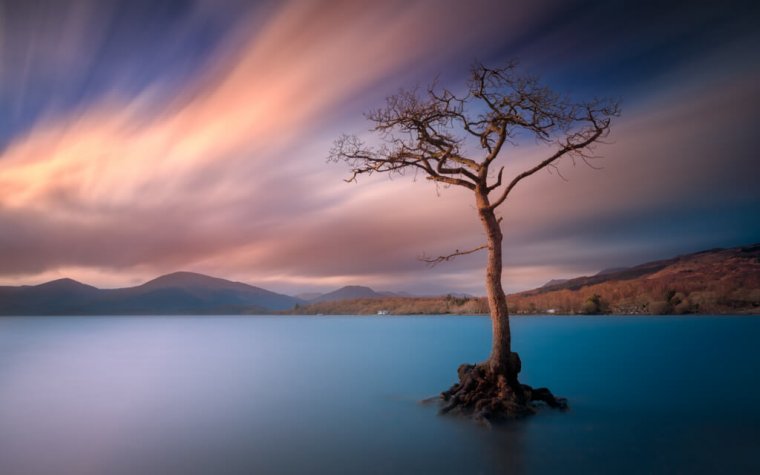
However, the magic doesn’t end there. Shorter exposures (tens of seconds) in breezy and bright conditions can result in the water having a metallic appearance. My favorite outcomes are the unexpected. Sometimes, an exposure of several minutes can reveal colors on the water’s surface you don’t notice by eye. It’s a great moment when the image appears on the camera screen and you’re surprised by the colors. Try going beyond the time necessary to smooth out ripples and waves and see what happens in different lighting conditions. I use a 15 stop neutral density (ND) filter to achieve 5 or 10-minute exposures in the middle of the day. Use structures in your composition like piers or submerged fences. A lone tree in winter can be outstanding if you can find one. This scene from Loch Lomond in Scotland is a fine example.
Tip: Take multiple exposures
Like all landscape photography, achieving the correct exposure of the sky, water and the landscape components of an image is challenging. While you can use software like Lightroom to darken skies and brighten the landscape, the dynamic range of most camera sensors is simply not large enough to balance an image without losing information. For the subjects I describe here, typically the sky and water require a similar exposure. Parts of the landscape can be too dark, however. Also, you may have a problem with vegetation or boats moving throughout the exposure. The simple answer is to take standard “bracketed” exposures at the same time as your long exposure. Many cameras have an automatic exposure bracketing (AEB) function. For example, with one shutter press, you can take five images (-2, -1, 0, +1 and +2 stops) of the same scene. I do this a standard practice without any decision-making on location. When you get home, you have the option of blending exposures in Photoshop to your taste. Taking multiple exposures of an identical scene gives you the freedom to be creative or fussy later on. There are no rules, so follow your own style.
The sea is constantly changing with the tide and light. Combined with the changing skies, you will never capture the same image twice. Think piers, harbors, breakwaters or stratified geology reaching out into the sea. This subject is ideal for those flat cloudy days when you would normally leave the camera at home. Think 5, 10 minutes or more and see what happens. The ordinary can become extraordinary. A good example is this breakwater at a small fishing harbor in Scotland. The very unusual geometry stands out against the smooth water.
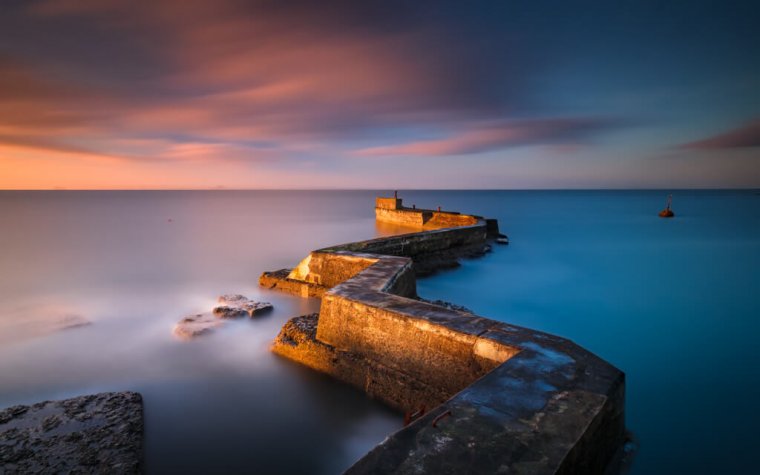
Tip: Get to know your location
You need to get acquainted with coastal locations. You must pay attention to the tide and how structures and rocks are revealed and covered. Where do waves form? Can you get back safely on a rising tide? Where is the sun rising and setting? It does pay to do some homework before you set out. Always check the tide times when you set out and prepare to get your feet wet. I find The Photographer’s Ephemeris (TPE) app to be a highly useful tool in planning my shoots. The image above benefited from knowing on which morning the sunrise would coincide with high tide and that the angle of the sunlight at that time of year would hit the structure in the way I hoped.
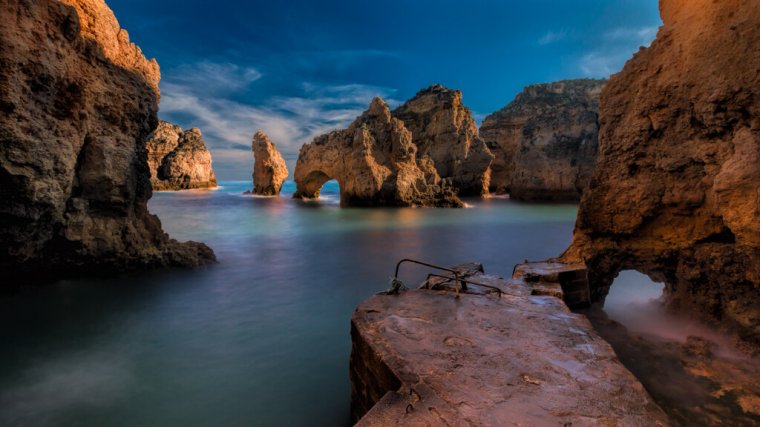
Some locations are so stunning, you will want to return again and again. The Ponta da Piedade, near Lagos in Portugal, is one of those jaw-dropping places. Heavily weathered limestone cliffs have been carved into rock pillars, a series of natural passageways, and secluded grottoes. The sandstone cliffs of gruff angles stand in blunt contrast to the deep turquoises and greens of the calm seas. There are so many angles to shoot from. The changing tides, light, and weather dramatically change the scene. In this example, I wanted the sun to be high enough to light up the color of the sea but still have a low enough angle for nice shadows and a sense of depth. A high tide coincided with late afternoon light to give a very pleasing result. The turbulent waters produce something like the metallic surface I referred to above.
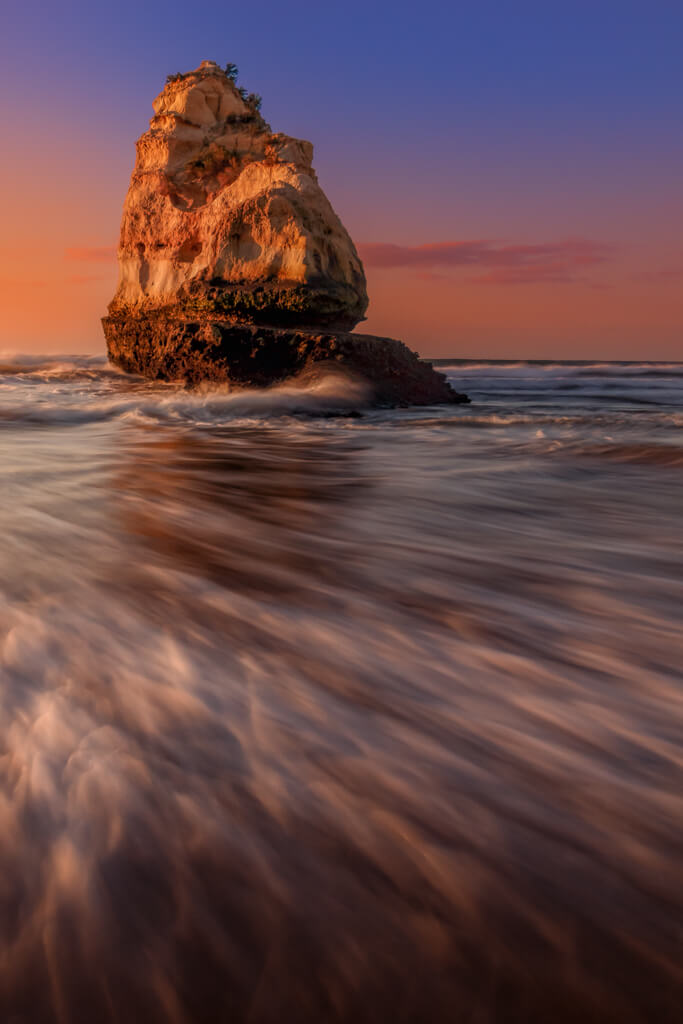
Beaches are many people’s favorite places, even if they are not sun worshipers. The opportunities for photographers are limitless. Some the best images capture the motion of the sea and record the dynamics of waves as they flow around pebbles or rocks. The best results are achieved when there is a bit of surf. The bright white foam will leave wonderful trails as a wave retreats. You could capture a full wave in its retreat or focus on a few pebbles or a nice rock. Spend some time studying your subject first. See what the water does.
Think about your timing. It does depend on how fast the water is moving. I suggest starting with 0.8 sec and see if your subject needs more or less time to create nice lines that illustrate the flow of the water. Ideally, work in a falling tide. You will avoid getting hit by a big wave. Experienced coastal photographers are prepared to get very wet and never walk away from their tripod. Unexpected large waves do happen and can soak you and knock your camera over. Always be alert, be ready to lift your tripod and start again.
Tip: Securing your tripod in sand
You will be using a tripod for best results, but they do sink into wet sand very easily. You can ram the tripod hard into the sand, but you may lose a rubber foot (I have!) and you are forcing sand into the fittings. The simple answer is to use something to spread the weight of the feet in the sand. Collect up some nice big shells and put them under your tripod feet and push down gently. If you do get sand and salt water into your tripod, shower it down when you get home and dry out before folding it up.
The magic of twilight
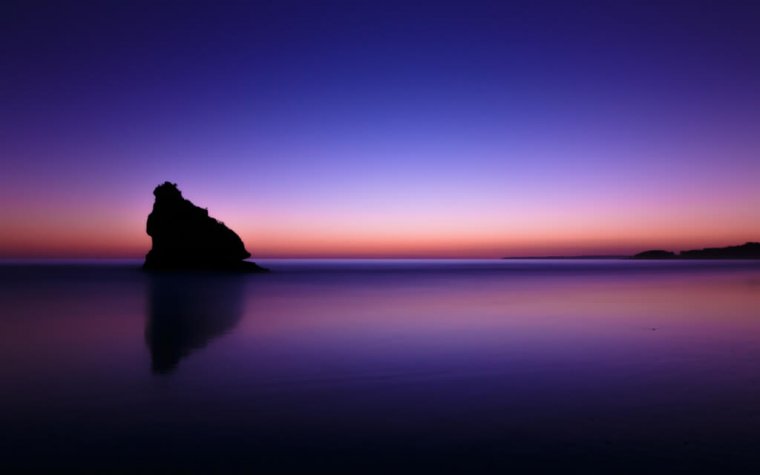
Most photographers know that the golden hour around sunrise and sunset offers the most wonderful light. However, don’t restrict yourself to the yellow and orange light. If you are lucky enough to be in a coastal location with a large ocean and no clouds over the horizon, you can capture intense violets long before sunrise or after sunset that our eyes struggle to see. These violets are reflected off the stratosphere over the horizon and can be dazzling. Sometimes the sea is brighter mauve than the sky, which can trick your mind. Set your white balance to fluorescent light at the location and see what happens. The conditions are nearly dark, so you will need a torch and be very familiar with your location to be safe. The results can be jaw-dropping without any manipulation. This winter scene from near Portimao in the Algarve, Portugal is a fine example.
This is a very popular long exposure subject and most photographers will have nearby waterfalls to practice their technique and achieve a beautiful image. The main attention should be on your composition. Frame up so you can see the water cascade across your image. I often prefer the small complex falls over the mammoth falls that get all the attention. Shoot on a cloudy day if there are trees over the waterfall so you can achieve a more balanced and moody exposure. Then you have a choice. Some prefer a middle length exposure of around 0.8 secs to illustrate the flow without creating milky water. I personally prefer the dreamy effects of 1 or 2-minute exposures. The timing will depend on the size of the falls and the volume of the water. This is probably the easiest long exposure subject to get a pleasing result from.

Tip: Cover the eyepiece
A key aspect of long exposure photography, especially the very long exposures with ND filters is the avoidance of light leak. If you own a DSLR, where light from the lens is sent to the viewfinder eyepiece via a prism, light can also take the reverse path. This is particularly a problem if the sun is behind you and shining onto the eyepiece. A portion of that light can make it all the way to the sensor. It’s a small amount, but enough to create glare and streaks on your beautiful image. There are two solutions. First, always shoot in Live View if you have it. It helps with your composition and focusing but also locks the reflex mirror up. Many DSLRs also have a mirror lockup mode. When the mirror is up most of the light from the eyepiece cannot make its way towards the sensor. However, this is not perfect when in bright sunny conditions. So the second easy tip is to cover the eyepiece during the exposure. Most cameras come with a cover attached to the manufacturer’s strap, but you can use anything. Some use a piece of foil or their hand. I just place my cap on the camera. Simple!
The camera:
Long exposure photography can be performed on mobile phones and compact cameras as well as higher end mirrorless and DSLRs. Photography should be about ideas and technique, not the latest equipment, so don’t be afraid to try. The key thing is being able to shoot in manual mode. Normally, you will want to reduce your ISO setting (the sensitivity of the sensor) to its lowest value, typically 50 or 100. You then vary the aperture and neutral density filters (optional) to lengthen an exposure to achieve your desired exposure time. Long exposures with higher ISO settings can result in accumulated digital noise with all but the higher end sensors.
Desirables: A camera with a “bulb mode” to allow exposures over 30 seconds is required for the longer exposures referred to in this article. A camera with live view is a big asset and will make life easier. You can ensure that your focus is pin sharp and can often get an exposure preview to help you estimate the best settings.
A sturdy tripod: Invest in quality. The value tripods you see online are great at first, but the components do come apart quite quickly with use. They struggle with sand and dirt and the heads are often not stable enough. You don’t have to go for a massive carbon fiber pro tripod, although they make life easier. I frequently use a travel tripod (Manfrotto Befree) as it is light, very compact and does a fine job in most circumstances. Choose something you are prepared to carry around. I also prefer levers over screws for the legs as they are less vulnerable to sand and dirt.
A remote shutter release: The super cheap digital ones you see online are perfect. Pros buy two in case one ends up the sea (mine did!). Those with wifi on their cameras can also use an app on their phone as a remote release. I have used this when I want to be in the shot as it can work over 50-100 meters quite easily.
Circular polarizing filters: These are probably the only filter that is essential for landscape photography as they achieve something that software could never emulate. They act to block out light waves reaching the camera from specific angles. By rotating the filter, you can reduce haze and reflections. You will get more intense sky colors, better cloud contrast and deep colors on water surfaces.
Neutral density filters: You don’t need them, but you will really want them if this is your kind of photography. You can take multiple short exposures and average them in Photoshop (Smart objects>Stack mode>Mean), but you will struggle to create multi-minute exposures this way. Neutral density filters are darkened glass that passes through a defined percentage of light. There are different densities for different applications. Typically, you would want to carry a 6 stop (aka ND64) and a 10 stop (aka ND1000, Big Stopper) or 15 stop (aka ND1500, Super Stopper) ND filter. Use the former for a golden hour and the latter for the middle of the day. You can download exposure guide charts online or use apps provided by manufacturers to figure out where to start, but you get a feel for this very quickly.
ND filters that do not create a color cast are not cheap. The cheaper ones online are not completely neutral and can add a red or brown cast to your images. If you are serious about your photography and are steadily building up your kit, you will need to come to a decision as to whether to stay with screw-in filters or to invest in a filter system that can clip onto all of your lenses. Screw-in ND filters are good from the perspective that there is zero risk of light leaking in between the ND filter and the lens, but you will require one for all your different lens sizes. If you do invest in a filter system, I do recommend a leading brand like Lee or Nisi. The mounts are very well made and the ND filters have tight fitting gaskets that prevent light leak. You often can use other brand filters in a system. For example, I use the excellent Haida ND filters in combination with my Lee system and their filters.


Please verify your software version before proceeding.
 I’ve verified my software version


 Facebook
 Google +
Comments (8)
Brilliant and very informative Adam. Thank you for sharing. I’d go so far as to say it’s as good as your photography ?
An excellent informative article which covers all the main problems associated with long exposure photography… well done Adam….
Thanks for getting in touch Ann.
I am pleased that you will find this of some help. I look forward to seeing your seascapes!
Best wishes, Adam.
Hi Adam, I thoroughly enjoyed reading your blog. I found it very informative and has provided me with some invaluable tips! Thanks for writing and sharing. As yet I have only tried long exposure photography a couple of times but would like to do it more, especially in coastal situations. With your help and advice in your blog I shall hopefully master it. Kind regards, Ann
Hi Martien.
Thanks for reading and getting in touch.
Sensor noise is an issue with long exposures. It is worse when the sensor is used at higher voltages (higher ISO), the exposure is very long (minutes) or has been on for a long time (mirrorless, live view etc). Lower end cameras will inevitably have more noise. I find that if I use the lowest ISO (50 or 100) on a mid range DSLR, the noise is not that noticeable even when using live view and taking several exposures. If you tend to have to push your shadows up in post production the noise will be exaggerated, so you need need to get your shots right to avoid this.
It is always the case that to achieve pro results, you should expect to do a tiny bit of tidying up in Photoshop or equivalent. I sometimes “despeckle” in Photoshop to smooth away any traces of noise in the flat areas of an image, like a sky or water surfaces. I usually only need to do this when I’ve accidentally used ISO 400 or 800.
If you have issues, even when taking this advice on board, then you either need to restrict yourself to shorter exposures or try a nifty Photoshop trick. You can take several exposures, one after the other and average them in Photoshop. Open them all as layers (no need to align them), convert to a smart object (Layer>Smart Object>Convert to Smart Object), wait for that, then average the layers (Layer>Smart Object>Stack Mode>Mean). I have used this for other night time scenarios where I had no choice but to turn the ISO up. This technique cancels out noise beautifully.
Finally, some cameras have a long exposure noise reduction mode. After a 1 min exposure, the camera will take another 1 min exposure with the mirror down and shutter closed. It will then subtract away any noise it sees. This is useful if you have certain pixels that are continually noisy. However, it is painful waiting for the camera to do this every time and you may miss your moment when shooting sunrises and sunsets.
Good luck!
A very helpful blog with impressive images
Excellent article and beautiful images Adam!
I’ve tried long exposures, but get a lot of sensor noise, even on my brand new D750. Don’t you have that problem? How do you deal with it? I understand it’s common because the sensor heats up, so I imagine everyone has it??