
Hi everyone, it’s really great to see you all back again ready for some more education on the program that we all love and of course that is Adobe Photoshop.
I have a basic tutorial for you today but one that is definitely needed for you to progress into the realms of Freelancer Professionalism or just to know for a hobbyist.
There is a tonne of different formats that you can use to save your work so it can be quite confusing when you’ve just started out, you’ll look at them all and think oh my, which is the best and which is what, I’ll clear that up for you today and talk about whats what and why you would use one format as apposed to another, so with all that being said lets get the ball rolling and get to it.
So the image I have loaded up was an image I did some editing on using various adjustment layers and so on.
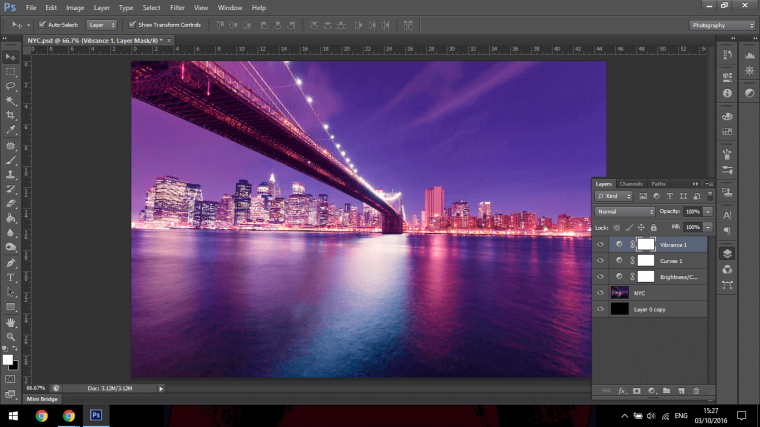
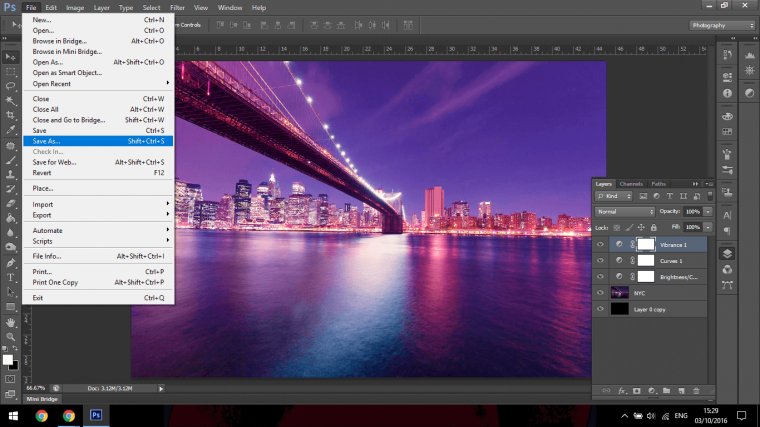
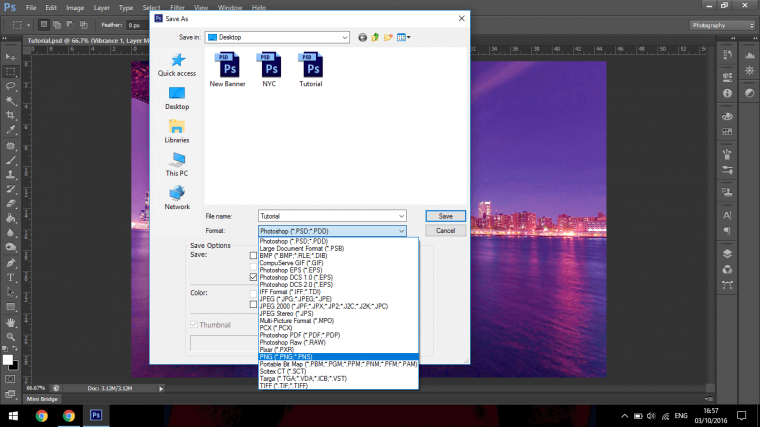
To save you must first go to File – Save As
You can find that right at the top left hand corner just beside the PS Logo, you click on File and scroll down to Save As.
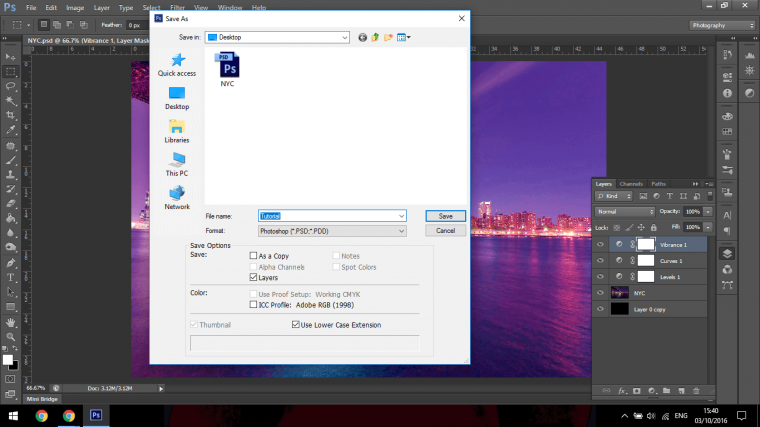
Then when you click on, you will get a pop up menu, in that you will see the files name which you can change to whatever you want, I’m going to go ahead and name mine Tutorial as you can see below highlighted.
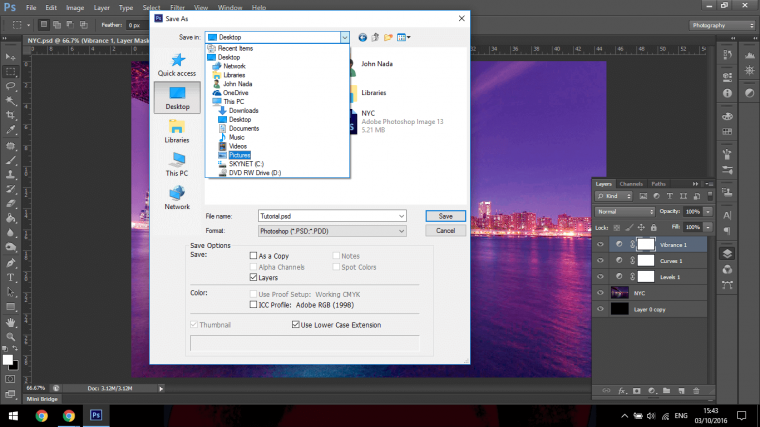
Ok so when you have that done you can then choose where you want your file to be located, I have clicked on Desktop on the side, but you can choose where ever you want and wherever you store your saved files, I would say you are most likely using an external hard drive of some sort so choose that.
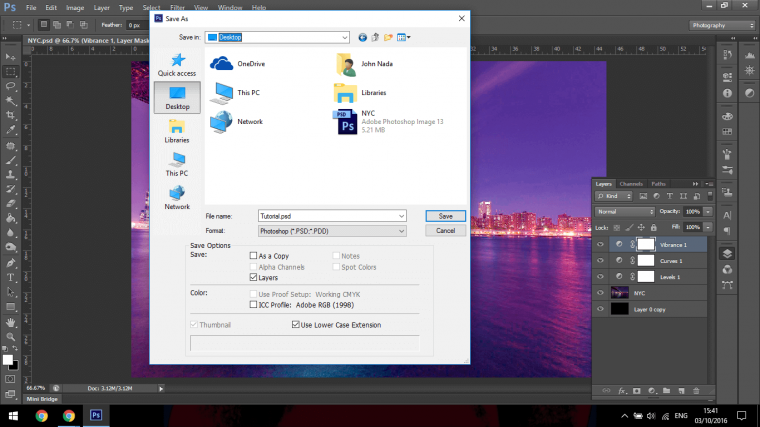
Right so now that you know what you are doing up to this point, which has been fairly complication free to a point if you are used to saving file and if you are then great this will be second nature to you and you will be ahead on points already.
The hard part…well I say hard it’s not really at all there is just a little bit of information that you will have to internalize but even this is very simple stuff once you get familiar with it all.
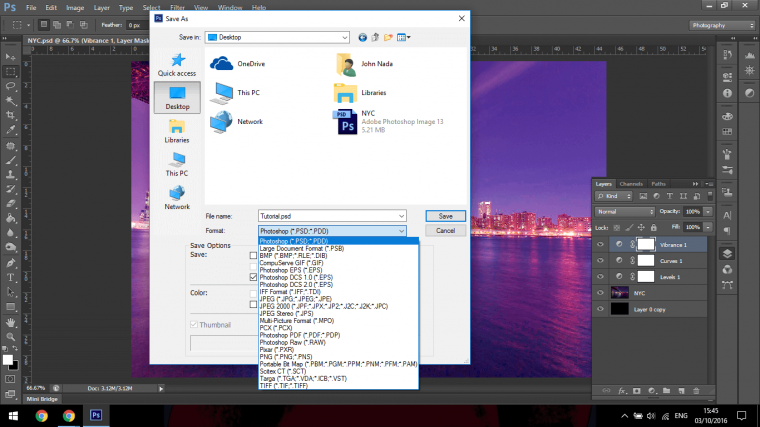
What I’ll do now is to go over the various formats I personally use, what I would use them for and scenarios as to when I have used them in the past so you get a feel for them in a more practical way rather than me just stating a load of text book facts at you.
First on the list there is the PSD file.
So this is the actual Photoshop file, (Photo Shop Document – PSD) this file is fully editable and contains all your layers, so as you see your Photoshop File now, once you click on the PSD file it will be the same.
The next file we’ll look at is the JPEG.
The JPEG is just the normal standard picture file, as before you click on it name it but this time once you click on save, a saving options box will appear.
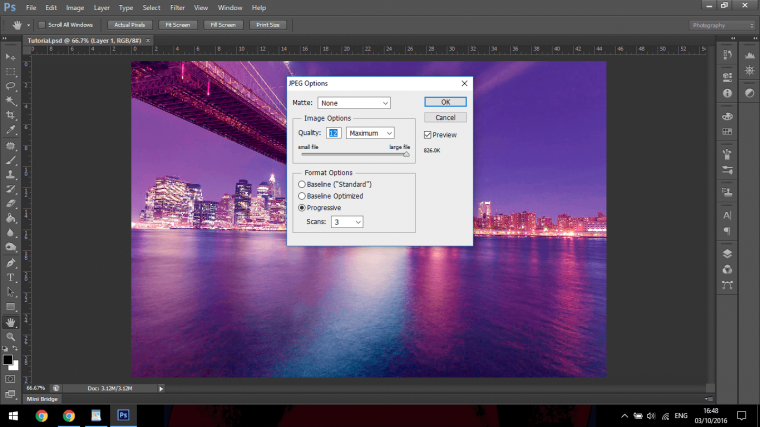
Within this options box you will see the quality slider, usually I will keep things at 100% and then optimize depending on my needs, but if you set the slider to around 80% it should hold it’s quality without too much lose of detail.
Next on the list is the Photoshop PDF file, I tend not to use this a lot unless I planned on making some sort of book containing a few pages, so this would be very good for a portfolio situation.
So if you were applying for a job you could send the PDF file, what I do is save images to PDF and then use and online joiner to create the booklet, it’s super easy and most employer will as to see a PDF.
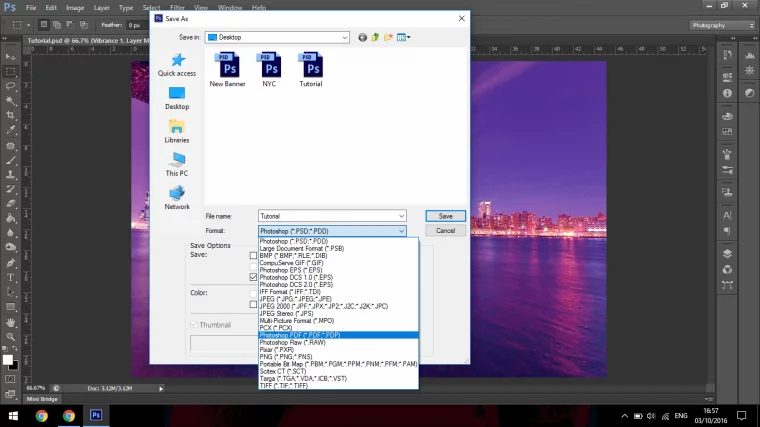
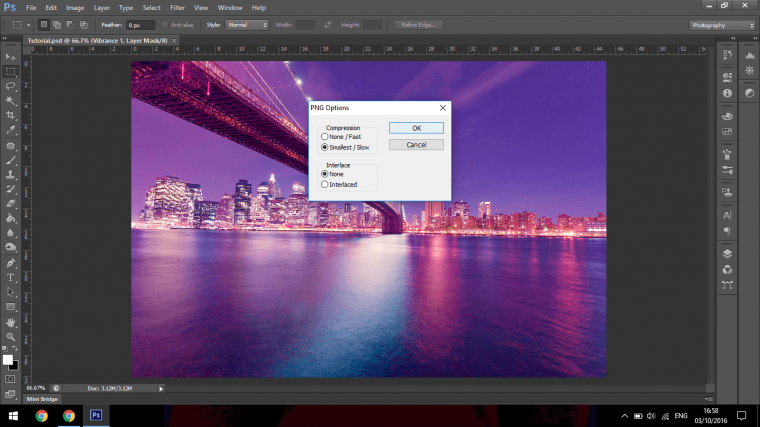
The next and last file is the PNG file.
What I use this for is two things, the first is a lot of times with web designers etc they will ask you for a PNG file format and the second is if you have a layer and something has been cut out/had it’s background removed
You don’t want to have a background on that, instead you want it to be transparent so you would use a PNG, so PNG’s are good for having a free floating object with in an image.
So with this knowledge you should be looking like a professional in not time.
Comments (0)
There are no comments yet.