Customising cells in Lightroom’s Library modulewww.sleeklens.com
Did you know that the cells in Library module (thumbnails of your folder/collection) could be customized to suit your different needs?
Well, yes. You can. You can customize not only how much info is visible, but in some cases, exactly which type of info is displayed.
This is mostly for all those users who like to maintain an organized work-space.
First off, let me tell you about the basic features and what they’re called.
The Content window is where Lightroom displays thumbnails. Each thumbnail, plus the grey border around it, is called a cell. There are two types of displays: Compact cells and Expanded cells. The difference between the two is that you can view more information in the Expanded cells view. But that’s up to your likes and dislikes. Some people like it when all the information is displayed around the image while some others don’t like the distraction of too many icons and symbols surrounding their work-space.
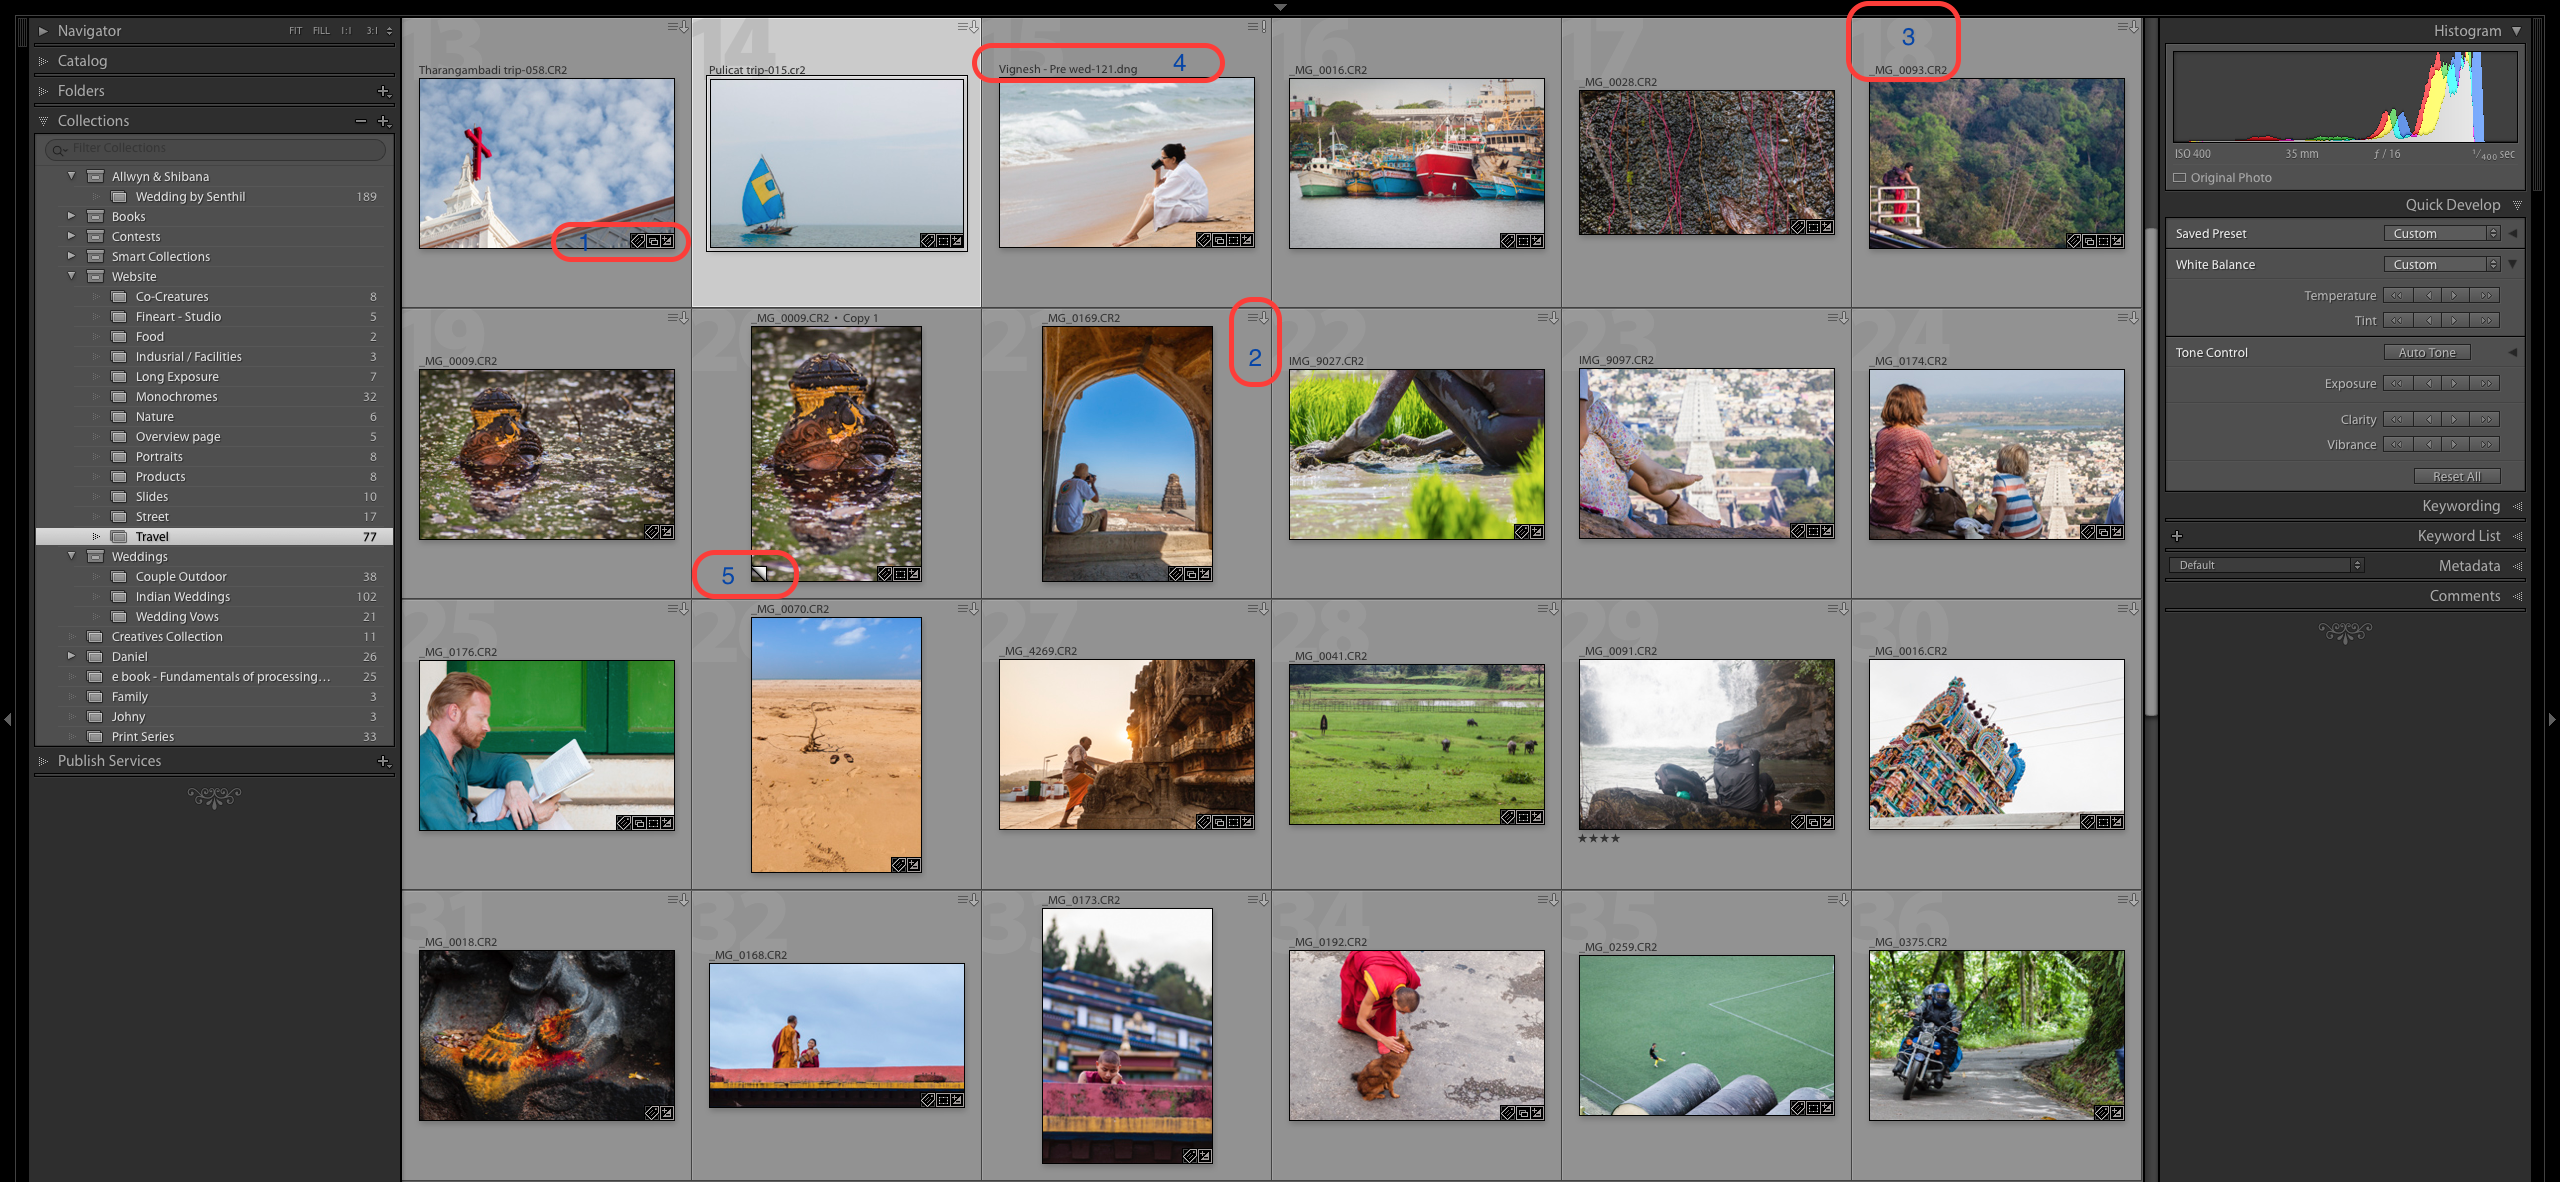
If you’re not in Grid view, just press the ‘G’ key. It’s a keyboard shortcut that will take you to the Grid view from any part of Lightroom. The Grid View displays thumbnails of photos contained in the currently selected Folders, Collections or search results.
A screenshot of Library module in grid mode
Visually shows the changes that the user has made to the photograph. for instance the first symbol shows that the photograph contain keywords. The second symbol shows that the particular photograph is part of atleast one collection. The third symbol [ +/- ] indicates that the photograph’s exposure has been adjusted since it’s import.
Shows us that the metadata changes which were applied during import has not been written on to the file. Kindly note that if the picture is in RAW format, the metadata will be written on to the respective .xmp files. If the picture is in TIFF/DNG/Jpeg format, the metadata will be written to the file itself.
Shows us the Image name (which is the filename) and the collection to which the image belongs. Notice the “18” in the background? That indicates that image is the eighteenth in the sequence in the currently selected folders or Collections .
Shows us the file name as stored in the system.
Shows us the flip over symbol which means that file is a virtual copy, not the original one.
Tip: If you hover the mouse over an icon and keep it still, Lightroom will display a label telling you what the icon means. It appears after about two seconds.
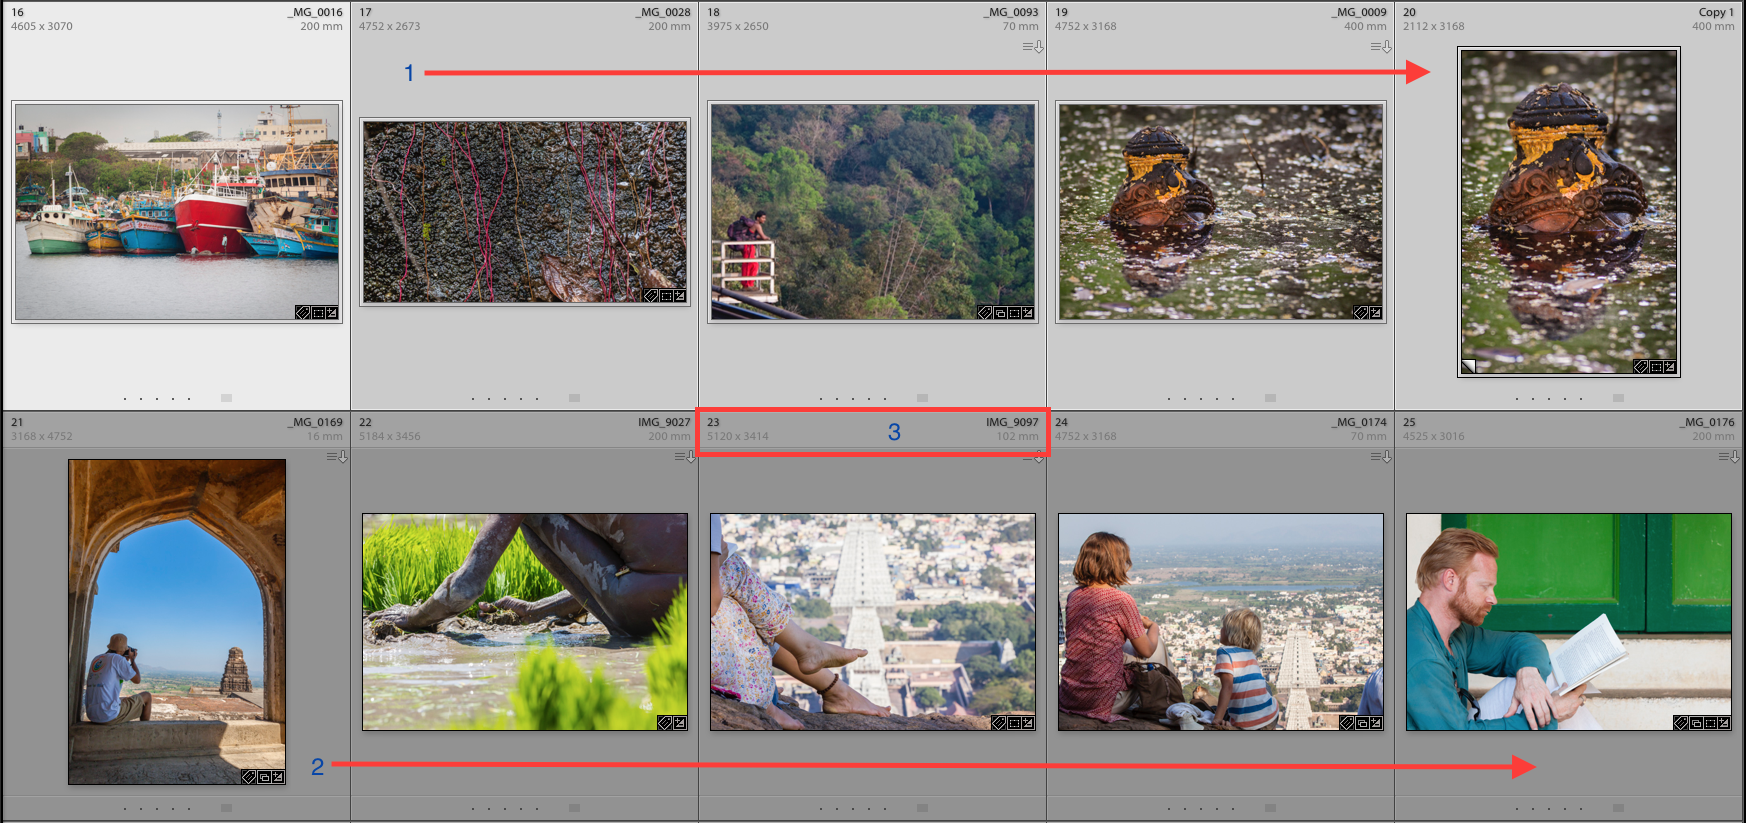
Closer screenshot of the Expanded cells.
The first cell is the most selected cell and the next 4 cells are selected cells (1), the bottom 5 cells are not selected (2). This feature especially helps while duplicating instructions from one image to another.
Closer view of the expanded cells.
Let’s look at no.3 –
The top left no: Denotes the file index no,
The bottom left no: States the dimensions of the file in pixels.
The top right detail: Name of the file/image
The bottom right no: Focal length of the lens used. This all can be customized based on what you want to see.
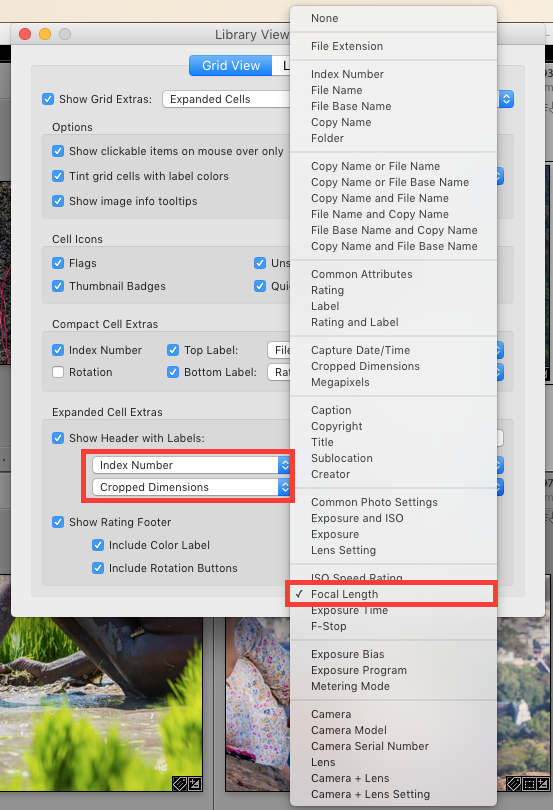
Screenshot of customizing cell details.
Lightroom lets you customise the layout of the cells so the display shows as much or as little as you wish. To customise the details around the cell press “Command + J” or “Ctrl + J” and the above window will open, where you can customise as per your requirements.
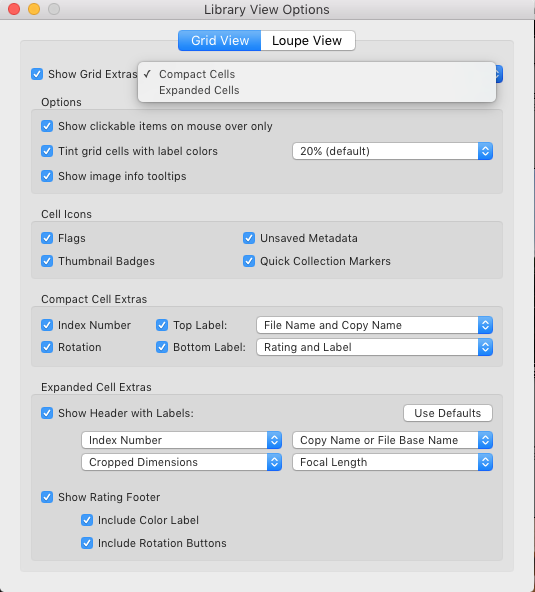
Show Grid Extras. This is where you make a choice between Compact Cells and Expanded Cells. Unticking the “Show Grid Extras” box simplifies your cell display. Doing so removes the information displayed around the thumbnails in Grid View.
Show clickable items on mouseover only. If you untick this box every thumbnail is displayed with arrows in the bottom corners that you click to rotate the image. And if the image is unflagged, a grey flag icon appears. With this box ticked, these icons are only displayed when you move the mouse over the particular image/cell.
Tint grid cells with label colors. If you don’t like the colour labels, or you just don’t use them, untick this box to turn them off. Or if you prefer them to be subtle and in lighter shades, the menu on the right lets you adjust the intensity of the colour tint.
The rest of the View Options let you customise what icons and information are displayed alongside the thumbnails. Lightroom lets you pick specific details that you want on the display and you can choose from an array of option by clicking on the drop-down arrow next to the buttons.
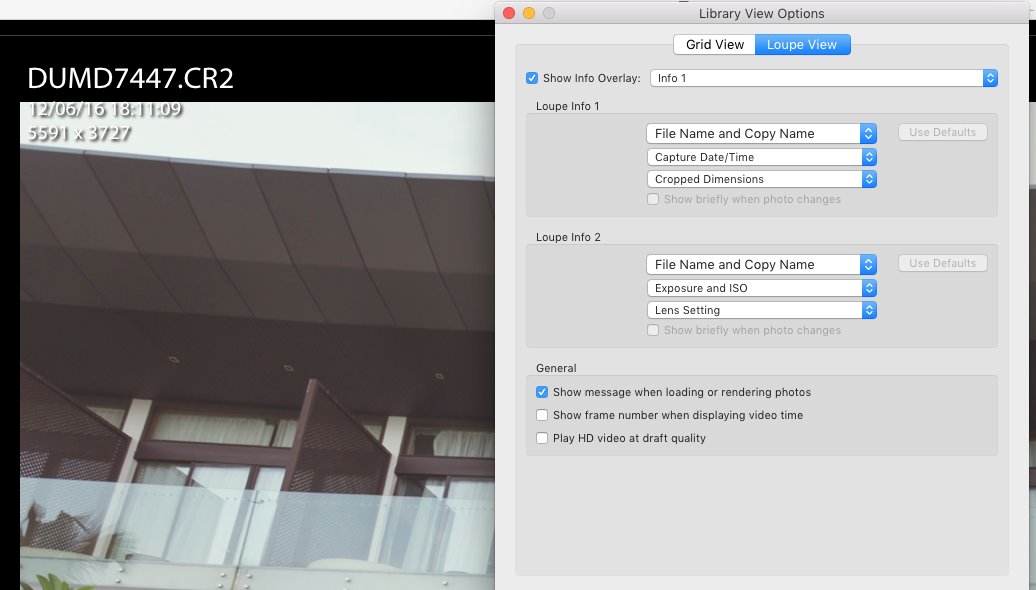
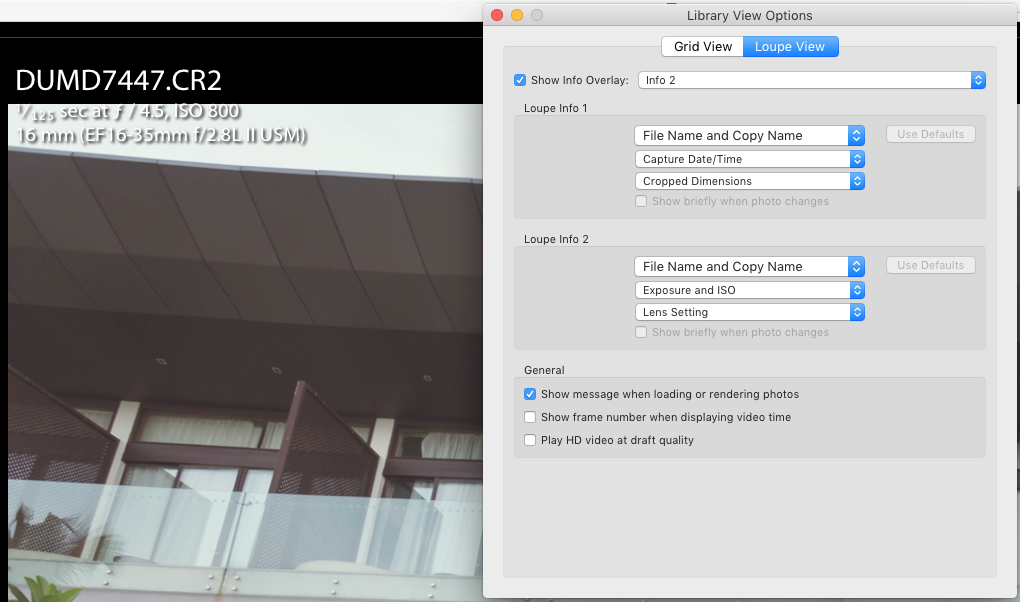
Screenshot of customizing cell details in Loupe View.
The first information overlay displays the filename, the time and date the photo was taken, and the image size (in pixels).
The second overlay shows the filename, the exposure settings (shutter speed, aperture, and ISO) and the focal length and lens used. This is handy for checking the camera settings when you are viewing your images.
I hope this article was helpful. Leave a note in the comments if you have anything to share.
Navaneethan Viswanathan (best known as Navanee Viswa) is a professional photographer based in Chennai. After completion of his Engineering and Management degrees he worked as a Civil Engineer for almost 10 years and slowly realized that his true passion was in building good photographs rather than building a structured construction. This made him quit his job and become a full time photographer to pursue his passion. Now he specializes in Candid Wedding photography primarily, he also does Product photography, and Industrial photography.
Navaneeth is a trekker and a traveller, who enjoys photographing things he comes across during his travels. He contributes articles regularly to photography websites like Digital Photography School , and he also maintains a photography blog which is followed by many. This blog has lots to talk about photography and the techniques involved. His works have been exhibited at the photography exhibition organized as part of Art Chennai 2012. Many of his works have been chosen as best entries in on-line galleries like One Eyeland . Navaneeth is also well known in the industry for his photography related workshops.


 I’ve verified my software version


 Facebook
 Google +
Comments (0)
There are no comments yet.