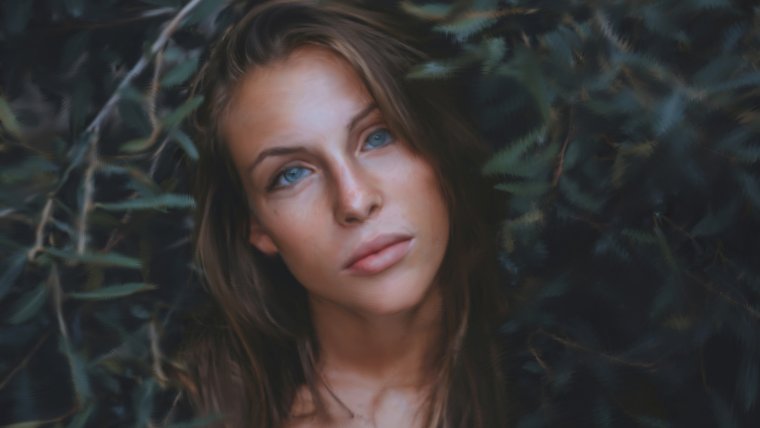
Hi all, today I’m going to do something a little more artistic over Photographic in Photoshop.
Recently I have been doing a few projects for a company that took a load of images that they weren’t particularly happy with so someone in the company decided that they would change their images out to a digital painting effect for their poster.
So they asked me would they have to do this from scratch as in use Photoshop to use the paint tools to make a copy as you would in real life with brushes and paint etc, and to that I said even better, I can take your images that you’re not happy with and convert them to the exact effect that they’re after and at the same time enhance the colors also without if looking over saturated as they would have looked previous with the standard mobile phone taken grainy images.
Now if you I use Photoshop CS6! so this will work for any Photoshop program but the new Photoshop CC that you have to subscribe to has a feature on it called ‘Oil Paint Effect’ also as far as I know there may be some plugins for the likes of CS6 too I’m not 100% to be honest so if you know about this plugin let us know in the comments section but for me I don’t have it unfortunately for me.
I think that doing it the way I’m about to show you anyway is better as you can make it unique to yourself instead on relying on Presets which is great for standard color edits and effects but when it comes to the likes of this I feel a combination of the two is probably the best when dealing with time constraints.
You can apply the Preset Effect and then go back in after increasing or decreasing the presets and apply what you know to improve areas and add your own twist and personal touch to it.
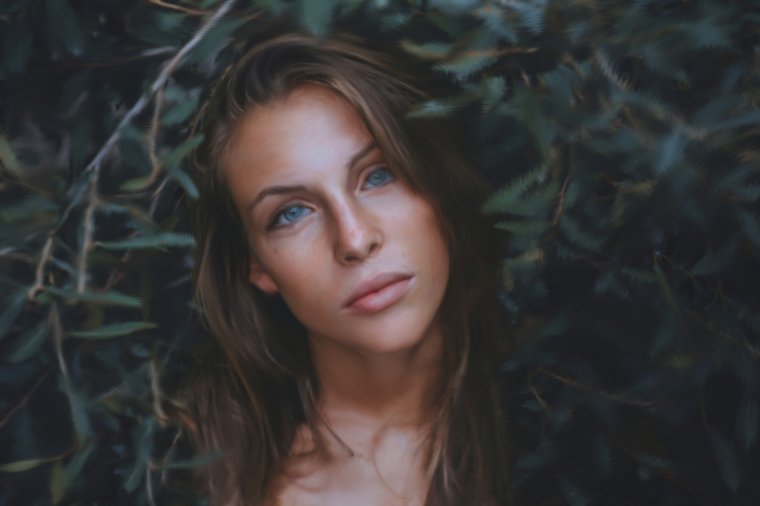
So with that being said let’s look at the image that I’m going to use today to convert to the digital painting effect.
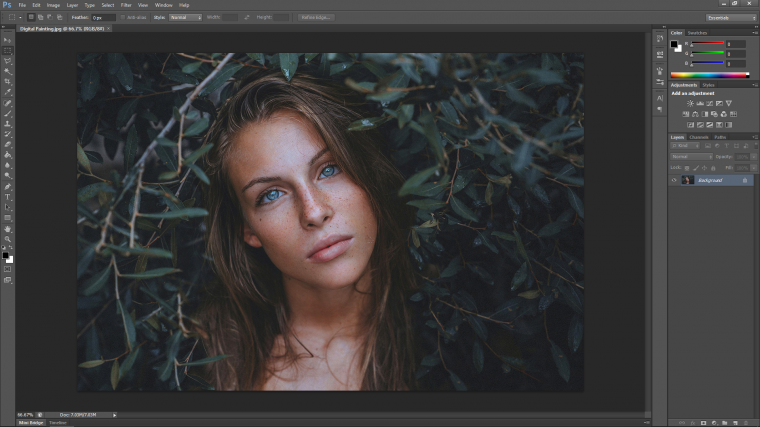
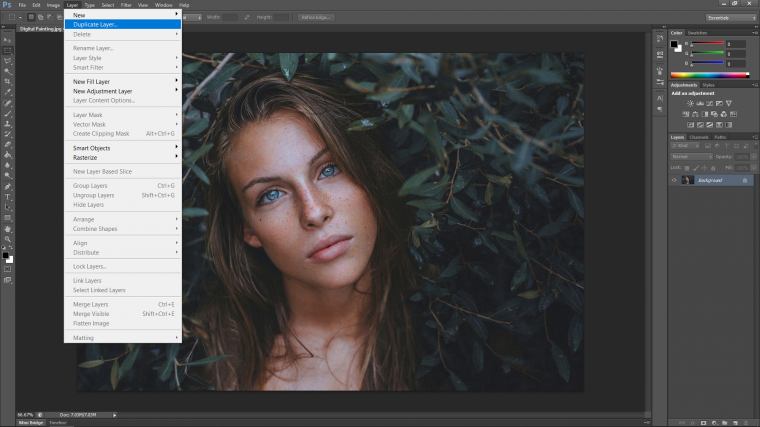
Ok, so the first thing that we must do is to create a Duplicate of the first background layer so that we have a backup and something behind our image in case we want to lower the opacity at the end.
To do this go to Layer – Duplicate Layer and hit Ok when prompted.
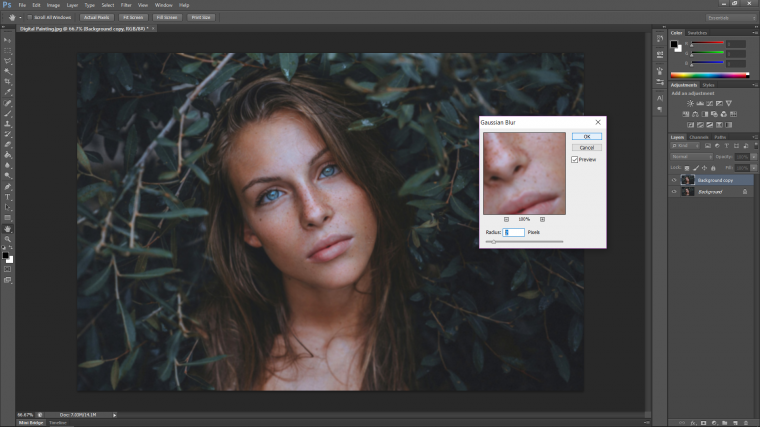
Next, I’m just going to give that layer a slight blur, nothing crazy just subtle.
I think for my image 2 should do the trick, your image may be different depending on the size of it so whatever you choose to depend on your image anywhere from 2-3 should be more than enough.
Now for the fun part!
Ok let’s grab the Smudge Tool!, you will see it in the example image below, it looks like a hand smudging something with it’s finger, just like you would do to a drawing or whatever.
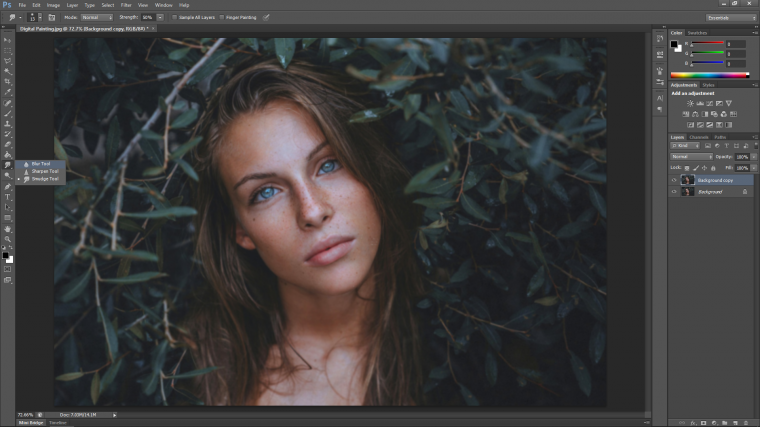
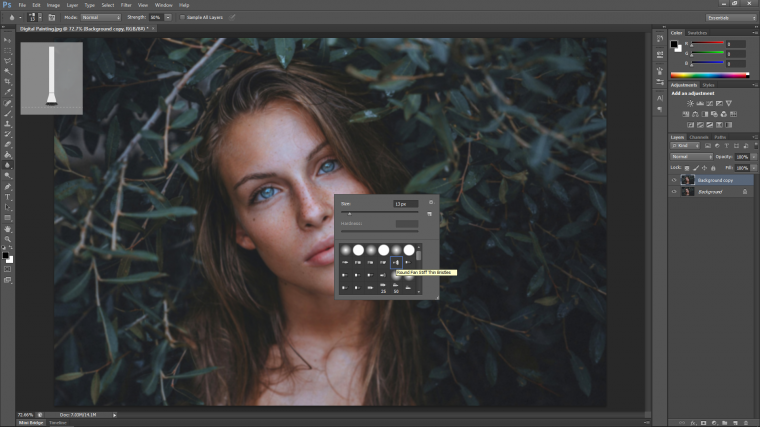
Next right click on your screen so the brush head options appear.
You’ll see a whole heap of these, you want to grab the 11th brush head, it’s called the ‘Round Fan Stiff Thin Bristles’
In the menu part at the top right you will see ‘Strength’ you want to change that to about 70% I’d say, I guess a range from 70-80% would work fine for an all-round pressure but you can move between to test your results and see what it looks like on your image.
Now you will be doing two things extra while working.
As you go along use your Bracket Keys on your keyboard to change the size of your Brush Head for more detailed areas such as the eyes.
Take note! paint in the direction of the object, so paint with the shape, for example with the hair you would make long broad strokes following the direction of the hair flow, you also what the streaks of the brush visible a little bit to make it look even more painted.
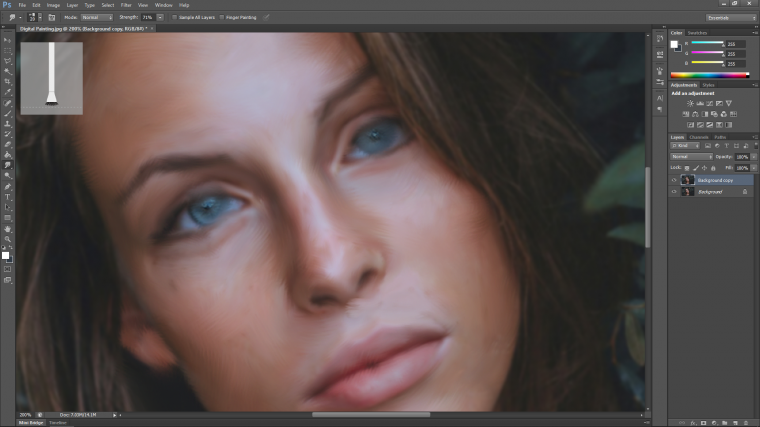
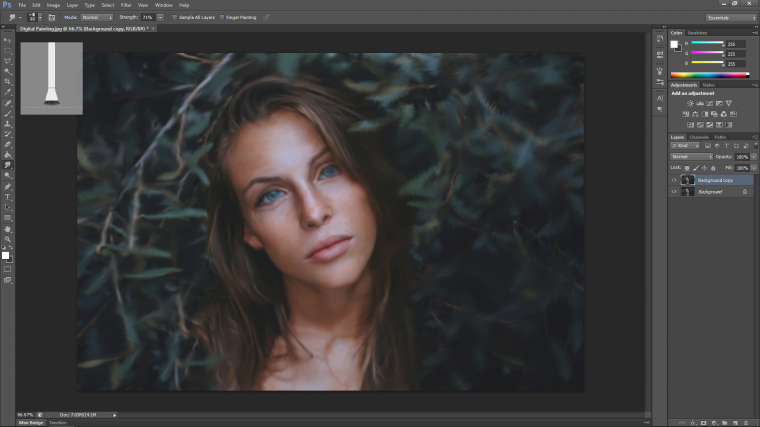
And that’s it, take your time and do a few to get used to it.
You can apply various other edits to your images like a bit of Vibrance or whatever, you can even lower the opacity of your layer a little bit if you feel it is too strong, in the end, you should end up with something like my image below.
Learn to add drama to your wildlife images in adobe photoshop here.
Comments (0)
There are no comments yet.