Hi all, going to be looking at a very helpful subject today that I have been doing recently in my professional life.
Recently I have been working with a few Photographers that have been doing large Photo Shoots, now in this Tutorial I just going to be using 2 images that are similar to save me a headache, but if you want to use a whole bunch of images and you have never done this before then definitely give it a go and see how it turns out.
What happens when I get these large amounts of images I will pick out the Images that are really similar and divide every thing into folders.
What I mean by similar is images that have the same lighting etc the actions with in the image doesn’t matter, so look for similar Exposures and things like that.
In this, we’ll be looking at Photoshop which is a different process than how this is done in Lightroom which I will also be covering at a later date.
I actually prefer to Batch edit in Lightroom but it definitely has it’s placed here in Photoshop too!
So with Batch editing, we want to use this process because it saves us a tonne of time, in my work, I get 400 images sent to me, where I have to pick out 200 (150 Colour and 50 B&W) then I have to edit those 200 images to shop ready for the client.
Now imagine if I had to get through each of that image individually and edit them, oh dear, I’d be there for quite some time.
So what I do is as said before gather all the images that are really similar, add them to folders and batch edit each group.
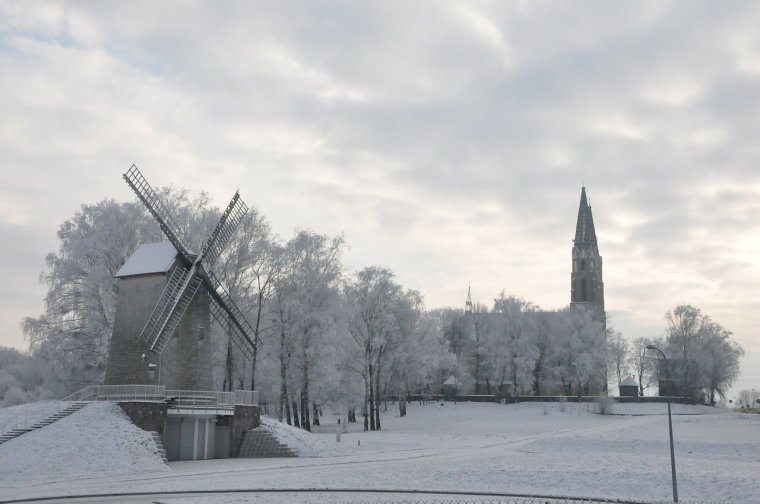
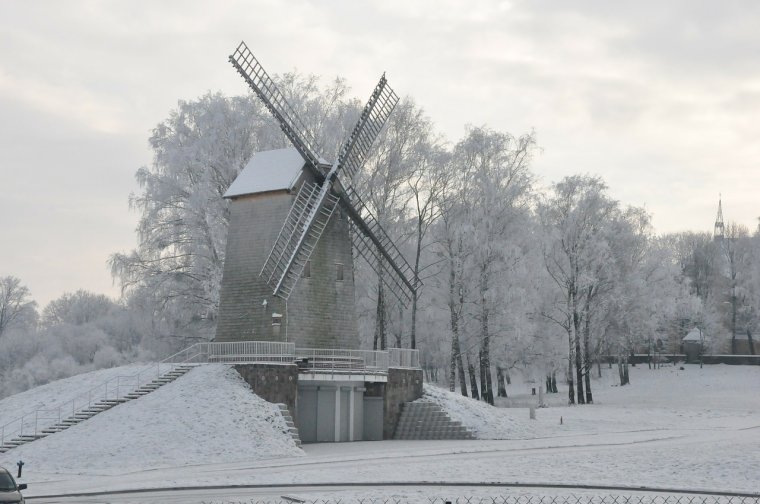
Below is the two image that I’ll be working with today.
Note how similar they are.
Virtually Identical!
Ok, now go a head and open up our images in Photoshop, however many you have chosen to use.
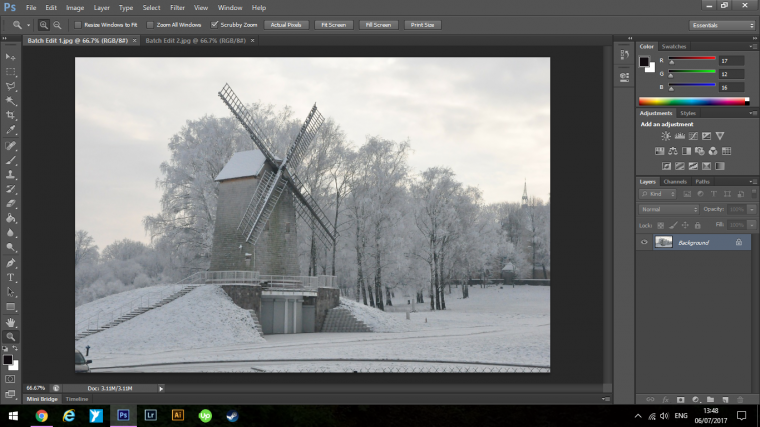
Next you have to go to File – Automate – Batch to get started.
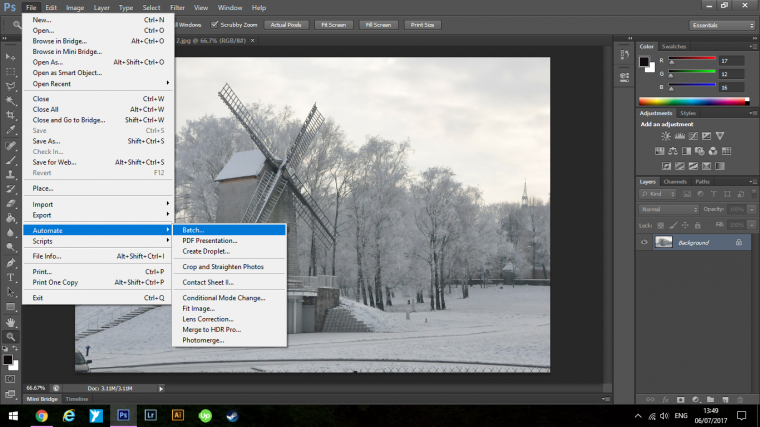
Once you do that you will see a pop up appear.
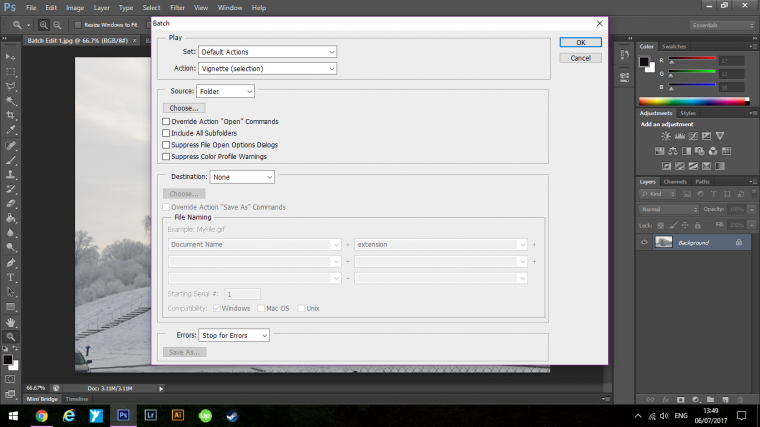
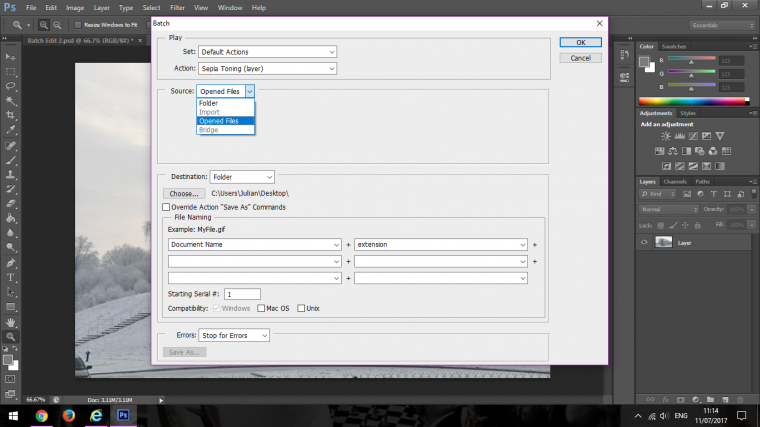
Once you get to this point you will see that there are a couple of Dropdown menus at the top under play.
At the top, you will see the ‘Play’ section.
This is where your actions will be contained.
For now, I’m just going to be using the Default actions as I have none if you are the same then follow suit if not you can use whichever action you would like to use.
If you want to check out a little more on actions then you will be able to find plenty right here
In that Play section, you will see the two drop down boxes available set and action.
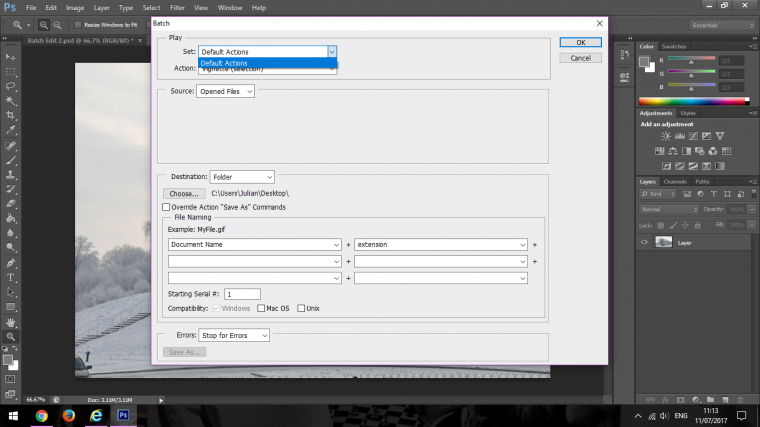
The first one is Set, usually, in here you will find all your action if you have any loaded up.
But as I said for this we’ll just use Default actions as an example.
Next, we’ll choose the action it’s self just below that, I’m going to choose Sepia Toning.
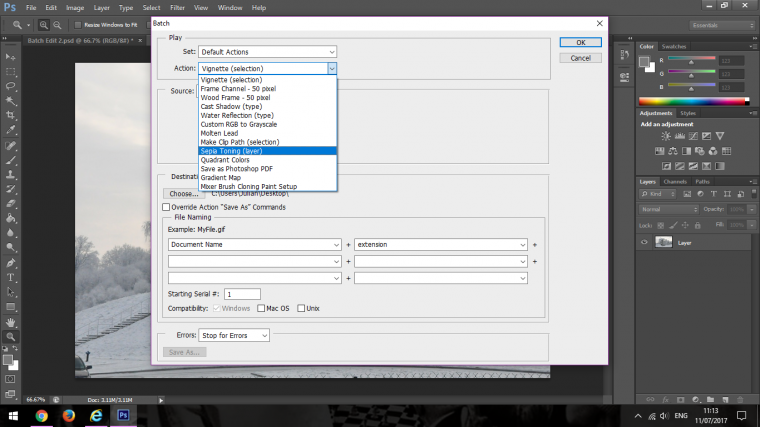
Below that you can see the Source, this is where you will find your images that you want to change up.
I have my files opened so I just choose Opened Files.
And then at the very bottom which mine already has chosen, you choose Stop for Errors.
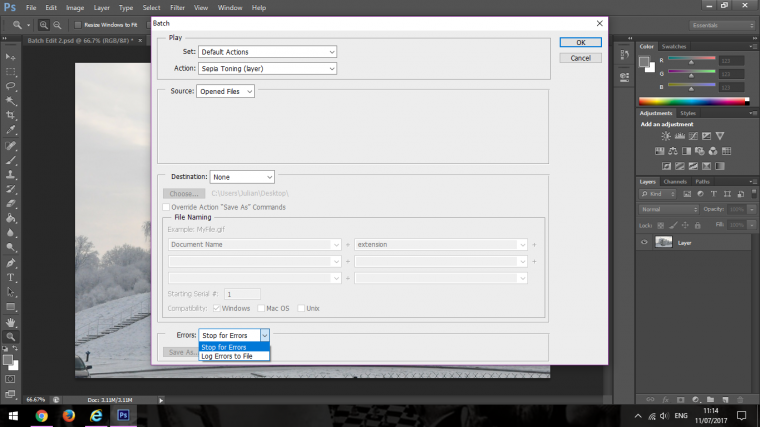
You would have a lot more of these if you were doing a large batch, but we just got our two so everything will be a lot quicker, with larger batches it will take time of course.
You will have to run through a few Ok Clicks but when you do all your files will start to change up automatically.
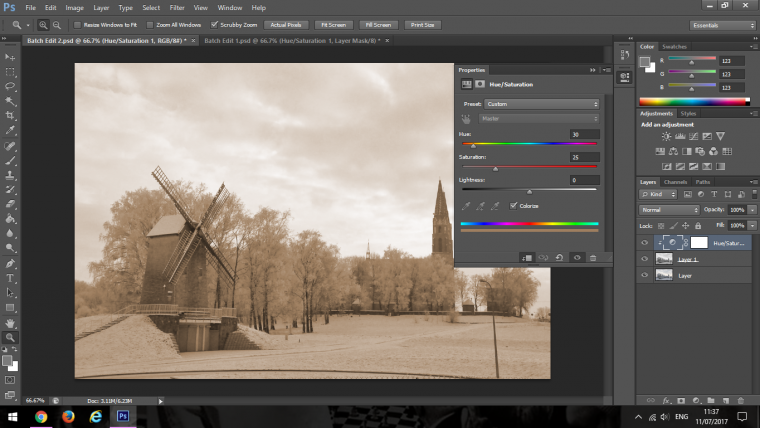
So now that your action is up you can see that there will now be a new adjustment layer and a copy of the original layer.
What’s good here is that you can now start to alter the adjustment layer if you want to, by double clicking on it.
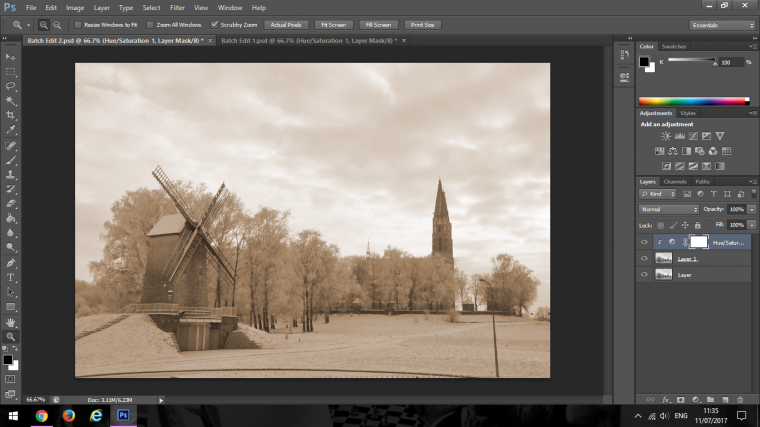
Then you will see all the setting appear.
Quick Tip – Master the clone stamp tool in photoshop
As you can see below you can Hue – Saturation and Lightness can be Adjusted.

Say you wanted to create another New Action well all you’d have to do is just go through the exact same process again as many times as you’d like or have the Actions available.
Comments (0)
There are no comments yet.