4 Tips on How to Take Sharp Photoswww.sleeklens.com
Have you ever feel that your photos are not sharp enough, especially compare to those that you have seen from others? The sharpness is one of the important element in the photo and even Post-processing can’t save you if you got a “soft” photo, which is why each time when I bringing any student of mine, I often emphasize how important it is to always check on their photo’s focusing.
The photo sharpness can be vary depending on your camera’s image quality and also the lens that you are using. A high-end lens especially prime lens is normally able to produce a sharper image. However, in this article, what I want to share with you all are not about these. Instead, what you will learn here is how to get the best sharpness from your gears.
Table of Contents
1. Using Manual Focus
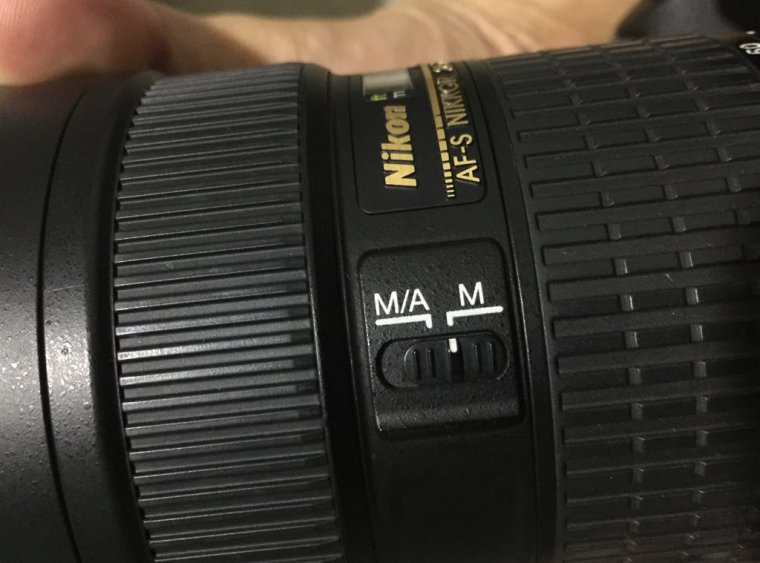
I know now a day most of the camera come together with very accurate and advance technology that aid the camera focusing, even in a low light environment, still, it is not perfect and it can go wrong sometimes in some very harsh conditions and you would not want that to happen. Switch your camera to Manual Focus mode, not only you take back the control of the camera focusing. It also stops the camera from keep trying to re-focus each time when the camera’s shutter is pressed, this help prevents any possible focusing mistake from the camera.
2. Using f/8 to f/11 Aperture
This is one of the common advice that you would be heard and there’s a reason behind it. Normally, f8~f11 is a “Sweet Spot” for most of the camera lenses. Not only that, it is also giving you enough Depth of field to cover all of the subjects in your frame for most situation, ensure all of them are in focus and stay sharp. If you going for a higher Aperture like f/22 or more, this will create Diffraction. What’s a diffraction? It is a phenomenon that occurs with light when it interacts with an obstacle, this deflects the light rays and cause irregular light pattern and causing your photo losing sharpness. In most situation, the max aperture I would go is f/16, if I need extra depth of field, I would using focus stacking technique, taking two different photos by separating focus on the foreground and mid-ground subject. After that, blend the two photos together in later Post-processing.
3. Using LIVE View to do focusing
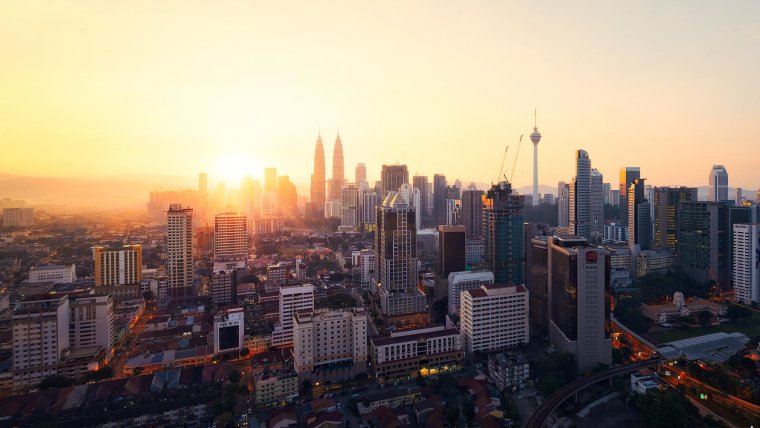
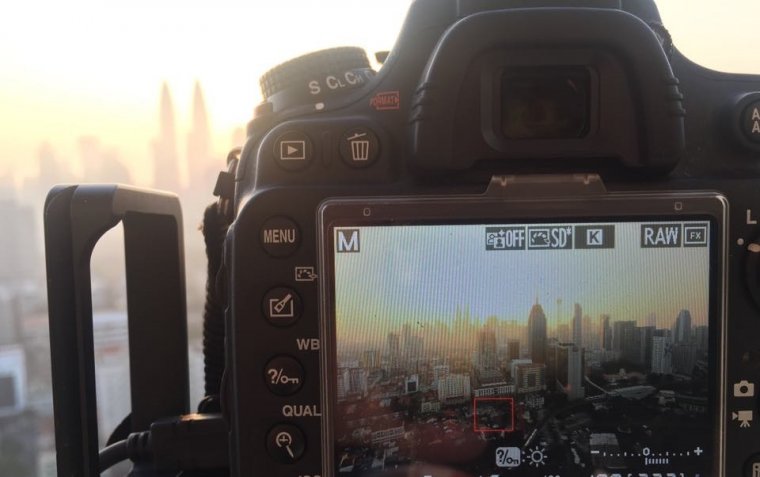
First, open your camera’s Live View. When you are in Live View mode, zoom in (by using the magnifier button) at anything that’s positioned at 1/3rd of the way into the scene from the bottom of the frame. Once the screen is magnified, you start doing the focusing by turning the focusing ring at your lens. By looking at the Live View screen, you will notice that there’s a certain point that everything in the screen appeared to be in focus and if you continue to further turn the focusing ring, the image will start to become blurry again. That “point” is where you should set your focusing on.
If your camera has Focus Peaking feature, it will help ease the focusing process, just turn the focusing ring till you see some red “dots/lines” around your main subject and it is now in focus.
Let’s talk back on why you should focus on something that’s positioned at 1/3rd from the bottom of the frame. This is actually a technique that’s known as Hyperfocal Focus, it allows you to maximize the depth of field and ensure everything in your frame are in focus. The actual Hyper Focus technique is slightly more complicated, it involved certain calculation that involved estimated distance between you and your foreground subject, the aperture and the focal length that you are using. To me, that’s something impractical and I never bother to do the calculation, focusing at 1/3rd from the bottom of the frame works fine for me. 😉
4. Do a test shot
Once you got your focusing in place, it is important to do a test shot and check the result. The checking is simple, just zoom in the test shot photo and using your camera cursor control to move around to the following area: foreground subject, corner of the photo and also subjects in the mid-ground and background. (You can ignore the sky, is okay for the sky to appear to be soft) As long as they are in-focus then you got the best sharpness for that photo, congratulation! 😀
P.s. even though you are an experienced photographer and very confident with using Manual Focus, it is still advisable to do a test shot and always check your photo sharpness using above-mentioned step. I have had experience of making mistake or sometimes accidentally moved the focusing ring without my own awareness. I was lucky that most of the time I was regularly checking the photo sharpness and quickly corrected the focusing.
That’s all for this article and I hope you all enjoy it. Happy Shooting!
Grey Chow is an award-winning landscape photographer, having his work published in several media including the BBC News. Currently, he is also sharing his experience and expertise through articles and hosting several photography workshops and tours around the world.
Usually, yes. However, there are certain situations that I would break that rule, one is that when I found it is not necessary, especially when I have my subject far from me and there’s no any foreground subject (Usually a scene with reflection). Another situation is that if I want to create a stronger “Star” or “Sunburst” effect, then I would go f16, but that would be the max. 🙂
Melissa •
Guest
Thank you for the article. I have one question regarding the “bottom 1/3rd” focus point. In landscape photography, should you always follow this procedure using the f8-f11 aperture?


 Facebook
 Google +
Comments (2)
Usually, yes. However, there are certain situations that I would break that rule, one is that when I found it is not necessary, especially when I have my subject far from me and there’s no any foreground subject (Usually a scene with reflection). Another situation is that if I want to create a stronger “Star” or “Sunburst” effect, then I would go f16, but that would be the max. 🙂
Thank you for the article. I have one question regarding the “bottom 1/3rd” focus point. In landscape photography, should you always follow this procedure using the f8-f11 aperture?