
A big mistake a lot of new photographers, as well as seasoned professionals from time to time make, is forgetting about the background of their photograph.
The background may seem to be of little importance, but when you start to compare great and mediocore photos, you will often find that the background is one of the major differences between them.
While a stunning background can rarely make up for a poor or blurry subject, it can help boost the look of the image tremendously. The background of a photograph is like the components inside a computer, you only pay attention to them when there’s something wrong, and when they work well, they support what you are doing.
Even though your background is not smooth and blurred doesn’t mean it is bad, it can actually be used for creating very interesting images.
Having a smooth and blurred background in your image is quite a safe method for it to look great though, so that is what we will be focusing on in this article. The blurriness of your background depends on several factors.
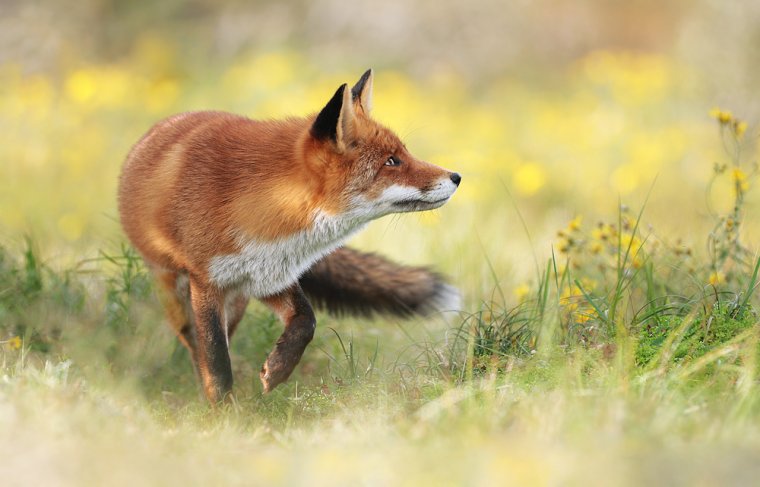
Table of Contents
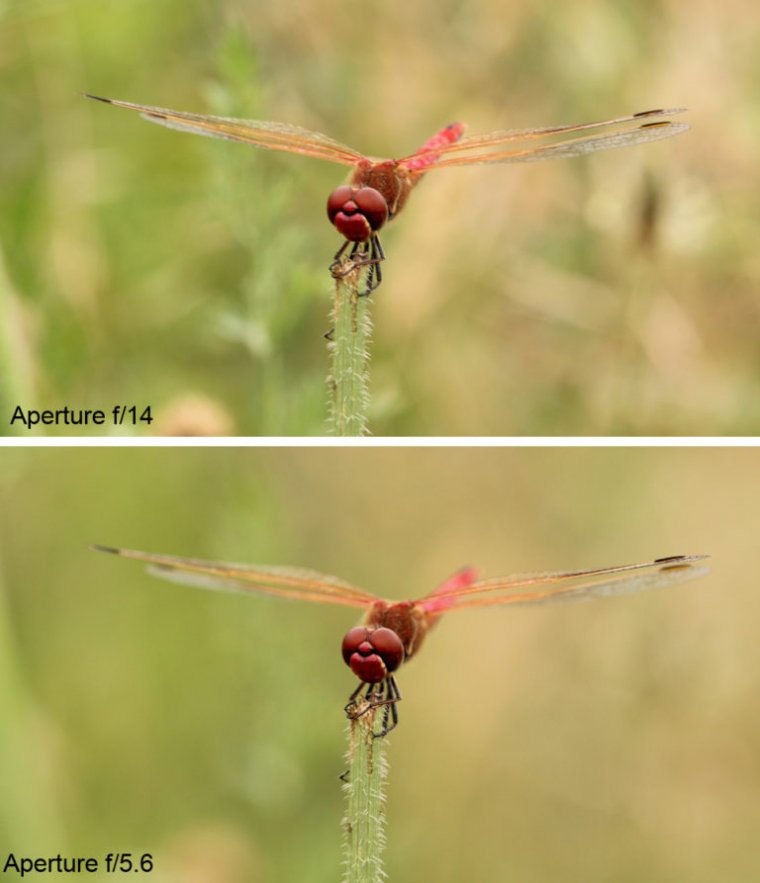
The aperture, also known as f-number or f-stop is probably the biggest factor influencing how blurred or sharp you background is. The lower the number is the less of the image is in focus. So f/2.8 means that a smaller part of your image is in focus, than if you had chosen f/16.
On a side not, it is worth mentioning that there is only ever one place in your image that is in focus. From there it gets gradually more blurred the further away from the focus point. It is just that when you chose a small f-number, like f/2.8, things will quickly get more blurry, than if you used a bigger number.It can just look like you whole image is in focus if you use a big number like f/22, but in reality, there is still only one place that is 100% sharp.
So when seeking to get a beautiful blurred background, you will want to use the lowest possible f-number, which opens up your aperture, hence why people also refer to it as the widest aperture.
How low of an f-number you can select is entirely dependent on the lens on your camera. Generally speaking, more expensive lenses lets you select a wider aperture like f/2.8 where as the kit lens often is limited to f/3.5 when zoomed all the way out, and f/5.6 when zoomed in.
With that being said most manufactures have a fairly cheap 50mm f/1.8 lens available. On the other hand, the autofocus, sharpness and overall quality of the lenses are not the best.
This is a very powerful tool to create blurry background, but often overlooked. The trick is to get as close as possible to the subject you want to separate from the background.
So if you are shooting a portrait, and want to make the background look more blurry, you need to get closer to the person you are photographing. This does not mean that you want to zoom out to be able to step closer. To minimise the depth of field and increase the background blur, you want to zoom in as much as possible and then get as close as possible.
Obviously this will not always be possible. You should always consider your composition before stepping closer or zooming in. As we discussed earlier, having a beautiful background will not make your photo great if the subject is poorly portrayed.
In summary, here is to formular to blurry backgrounds:
1) Shoot at the widest possible aperture, e.g. f/2.8
2) Zoom in as much as possible
3) Get as close as possible to your subject
But remember to keep your composition in mind. You can read more about composition here.
The focal length of your lens, usually measured, is how much zoom the lens has so to speak. For an example the usual kit lens is 18-55mm.
The more zoomed in the lens is, the more blurry the background will appear. We won’t get into the technical details of this, but longer/telephoto lenses has a shallower depth of field. So if you pick f/4 when zoomed in to 200mm, your depth of field (the amount of the image that appears to be in focus) will be much shallower, than if you photographed the same subject at 18mm.
For an example, if you are taking portraits, you want to consider using a 85mm, 100mm or maybe even 200mm lens to get a more blurred and smooth background. Even apertures like f/5.6 can show beautiful and blurry background at a 100mm, especially when combined with the next factor.
The best camera lenses for great bokeh and backgrounds are always wide aperture lenses. You have probably noticed that product photos or professional portraits always have a blurred background, those images are often shot with wide aperture lenses. The idea behind using a wide aperture lens is that you will isolate your main subject from everything else, to get a blurred, smooth and clear background. Wide aperture lenses are normally very expensive, but quality has its price as we all know. So choosing the right lens plays an important role if you want to achieve a blurred background.
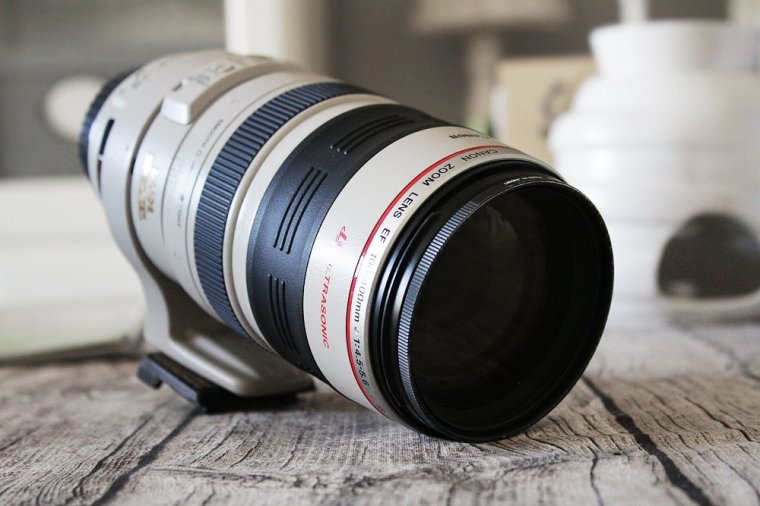
Here are some great wide aperture Canon lenses:
Canon EF 24-70mm 2.8 II L USM
Canon EF 50mm f/1.2 USM
Canon EF-S 60mm f/2.8 Makro USM
Canon EF 85mm f/1.2L II USM
Canon EF 70-200mm f/2.8L IS II USM
Canon EF 200mm 2.0 L IS USM
Sigma Art AF 85mm 1.4 DG HSM
Sigma 180 mm F2,8 EX APO
Sigma 120-300 mm F2,8 APO EX DG OS HSM
If you have a camera body with a large sensor you will be able to achieve longer focal lengths and therefore you will have better background blur. Compared with small sized sensors, you will just get a more smooth and clean background with a large sized sensor. Now if you combine a large sensor with a lens that has a large aperture you will get a super blurred background.

The more space there is between your subject and the background, the more blurry your background will get. It’s as simple as that. So if you want to achieve a smooth background try to position your subject as far away from the background as possible.
For portrait photography, try to play with the distance between your subject and the background, depending on the lens that you use, you should stand 10, 15, or 20 feet away from the background, you automatically will get a blurred background. Just try it, you won’t be disappointed!
As always, I really hope you have found the tips and ideas in this article useful!
Thanks for reading & see you next time!
All images by Julian Rad.


Please verify your software version before proceeding.
 I’ve verified my software version


 Facebook
 Google +
Comments (2)
Thanks for your feedback, I am glad you like it!
Best wishes,
Julian
Great concise tips. Thank you!