Hello!
Today in this Photoshop Tutorial I’m going to be showing you an AWESOME way to sharpen up your portraits.
So when you all out there are taking photos and you get all your edits complete, which is very important you do first btw as Sharpening should be the last thing you do, sometimes you’ll notice that you may have a little less detail on the final result that you may have wanted, this can happen with even the best equipment so don’t sweat it.
This is where we turn to Photoshop to finish up the job for us.
Oh isn’t Photoshop great!
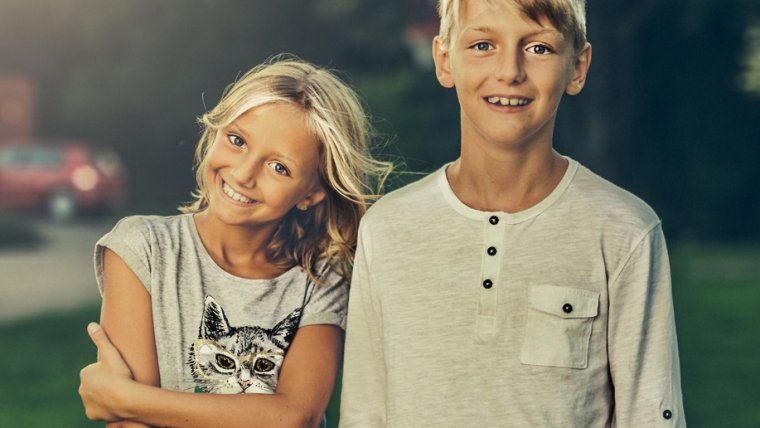
So let’s look at the Portrait that I’m going to go with today below.
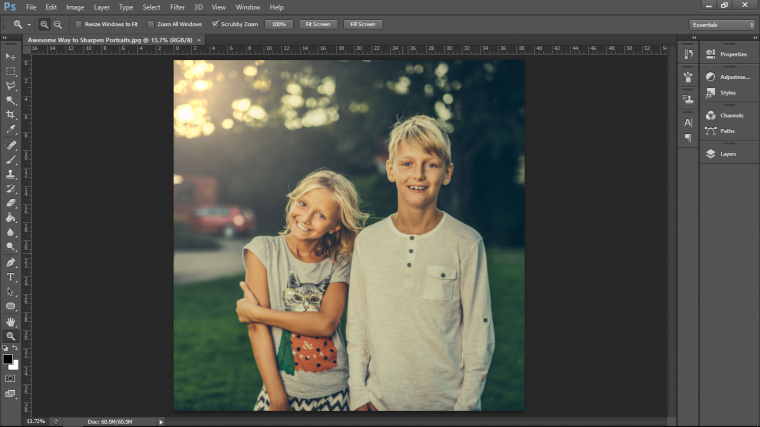
So cool picture of at Brother and a Sister, there’s loads in here that we can work with.
When it comes to sharpening we can do it so that it sharpens the entire image at once, but with the techniques that I’m going to show you, you can pick out individual areas to sharpen which makes it so much more effective, this technique will really add a whole new dimension of awesomeness to your images trust me!
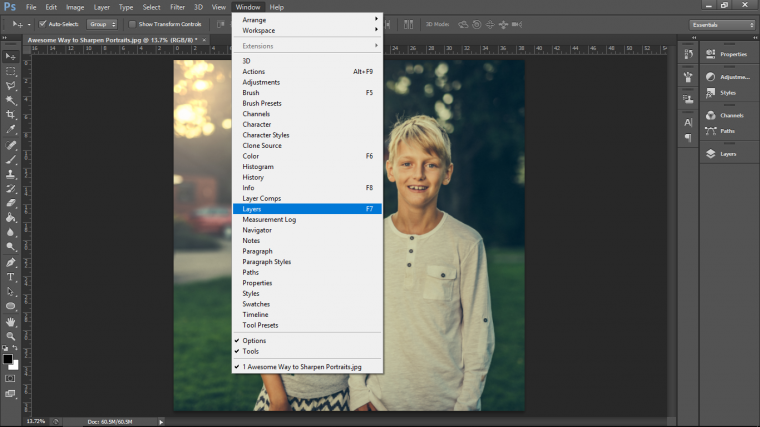
right let’s get to it, so what I need you to do first just in case you don’t have it on your screen like I have atm, is to go to Window – Layers.
Or press F7 on your keyboard to activate them.
Either way is good so whatever you prefer or remember best.
Eventually, hopefully, you’ll remember both with time.
Ok now we have to create a new layer so look along the top of your screen and go to Layer-New – Layer.
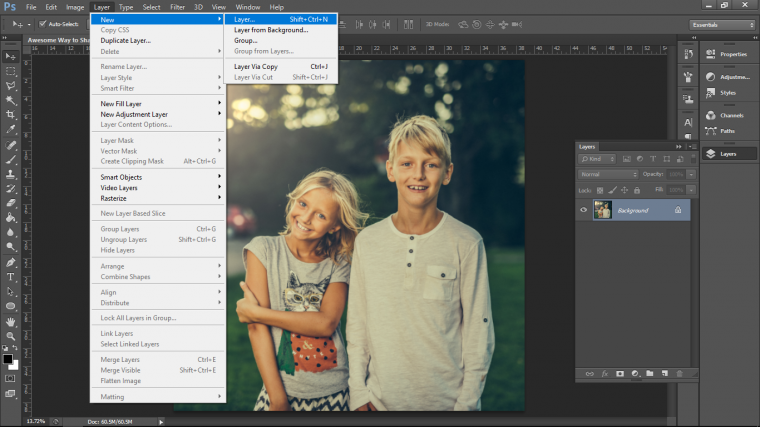
And you will see that now appear on the right-hand side in the layers panel.
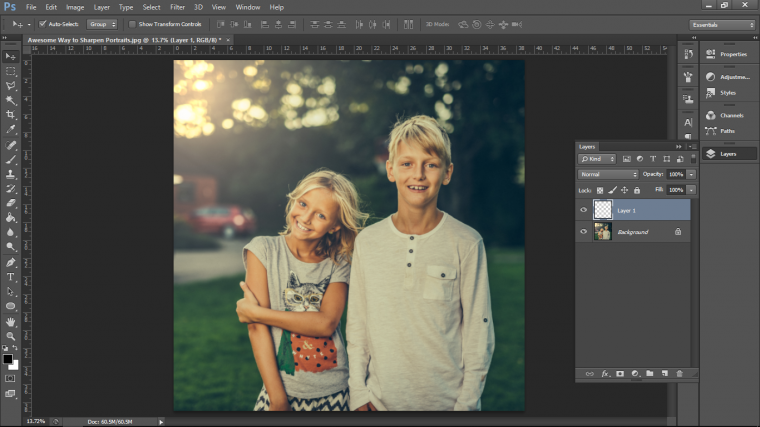
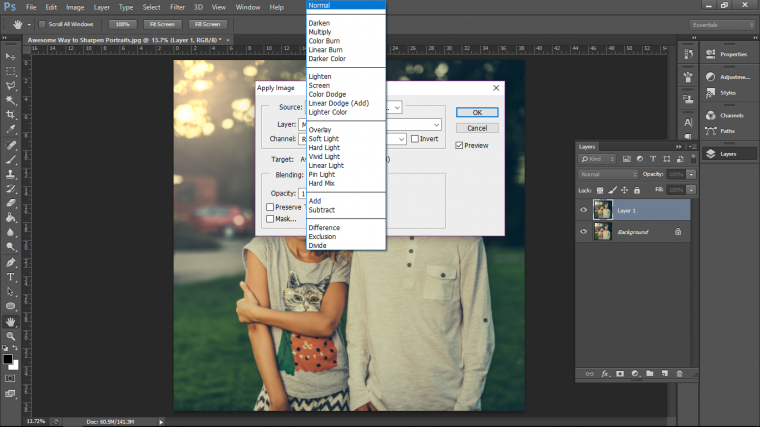
Once you see that then look along the top again look for ‘Image’, click on that and find ‘Apply Image…’
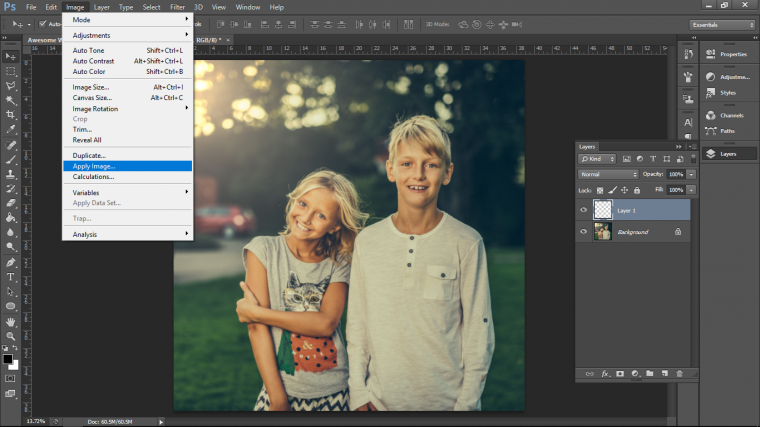
Once you see the panel appear change were it says Layer to Merged as it may not be already, but you may have that sorted automatically already so all good.
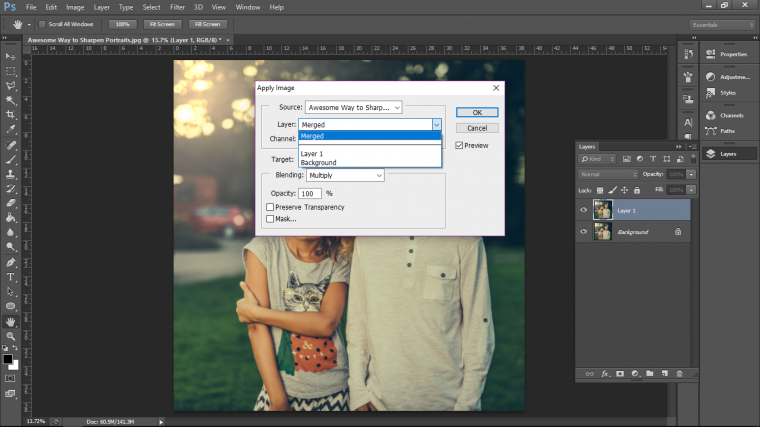
Then look below that to your see ‘Blending’, it will say Multiply, click on that and look at the top of the list where it says ‘Normal’ and click that, click all the OK’s you see as you go along and you’re ready to go.
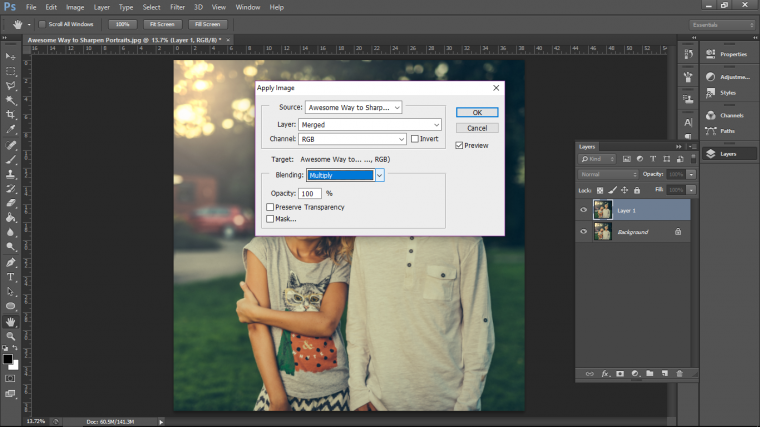
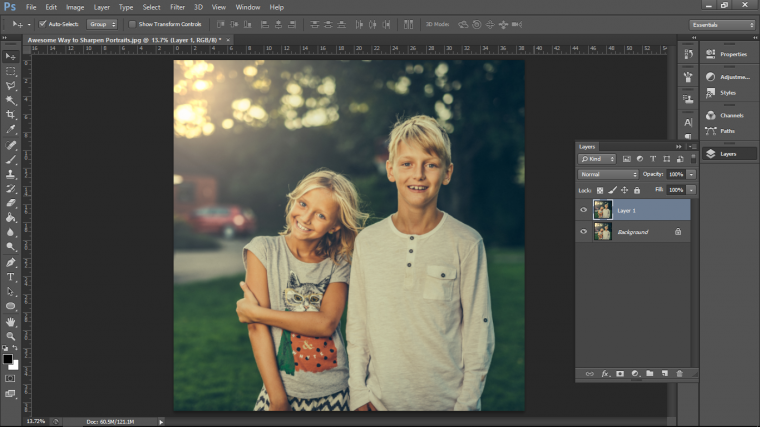
Cool, now we’re going to desaturate the image.
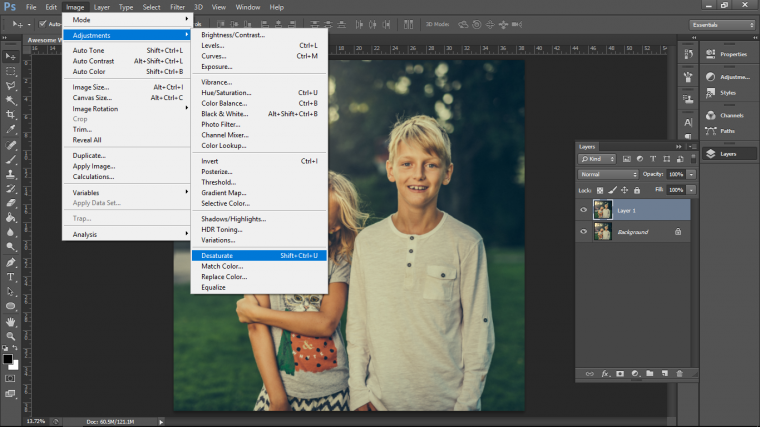
To do this you need to go to Image – Adjustments – Desaturate
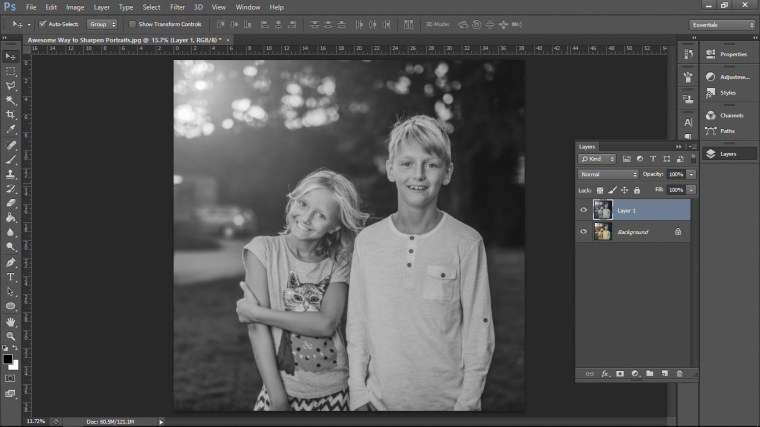
This will turn your image into a black and white copy, that’s the new you created which we are going to put the sharpening into, we still have the layer at the very start ‘the original’ safe at the bottom of the stacking.
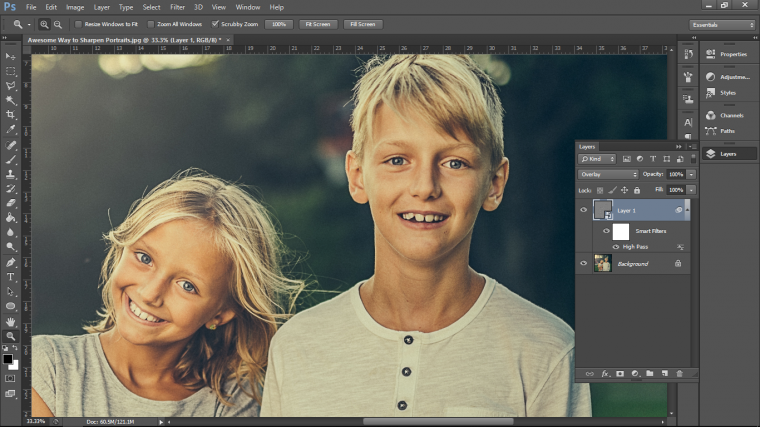
Ok cool now we need to change our layer to a Smart Object, this is really easy to do, all you have to do is go to the layer and click it, it will now be highlighted the right click on it using your mouse, a big panel appear, check for Convert to Smart Object and click on it.
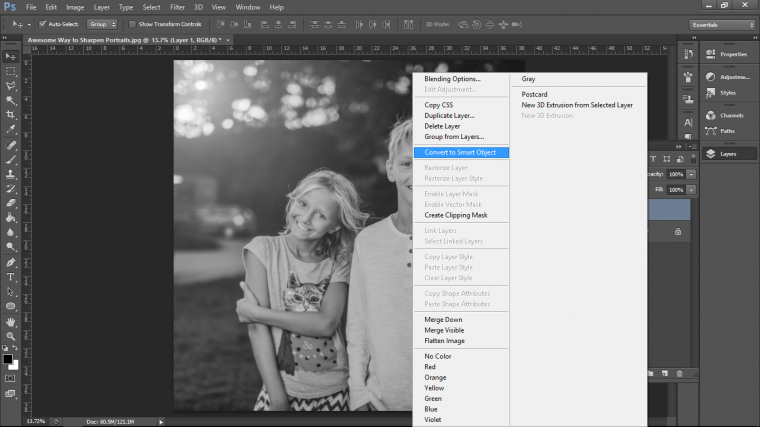
Now, remember we did that thing with the blend mode earlier?? well, the layers panel has something very similar, in fact, it’s the main blending mode option that you will be using in general, so look on the layers panel till you see the drop down box with ‘Normal’ written on it, click on that and look down till you see Overlay.
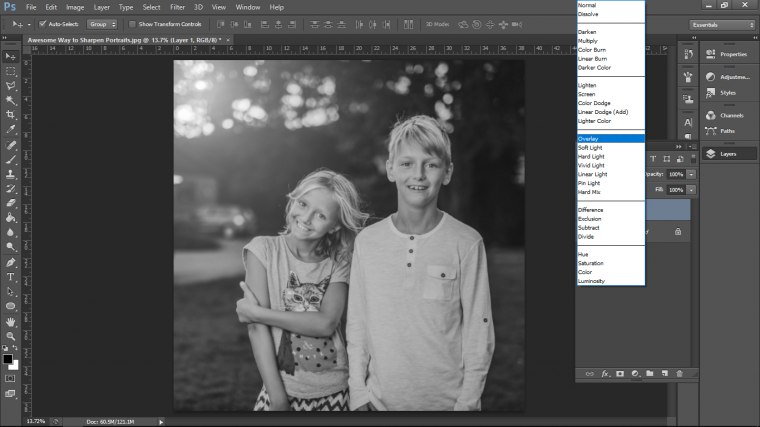
You will now see the image change from Black and White to a strange version of your colored image.
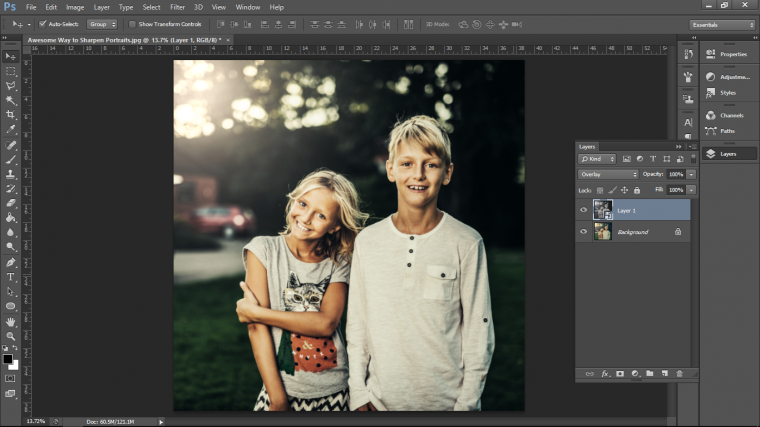
Next, we have to add the High Pass option to this layer.
We do that by going to Filter – Other – High Pass
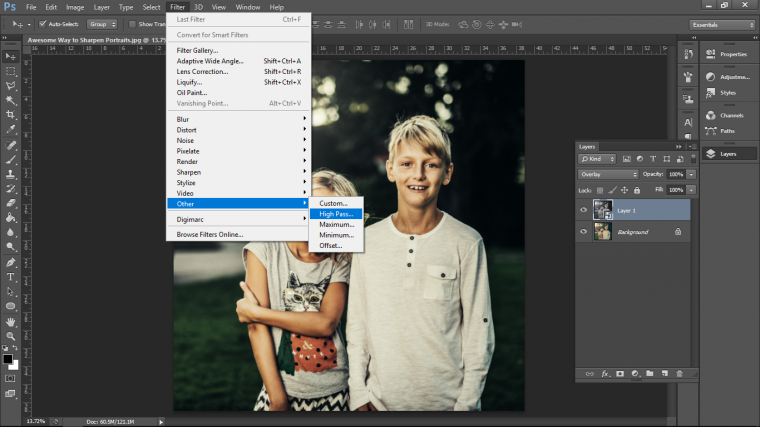
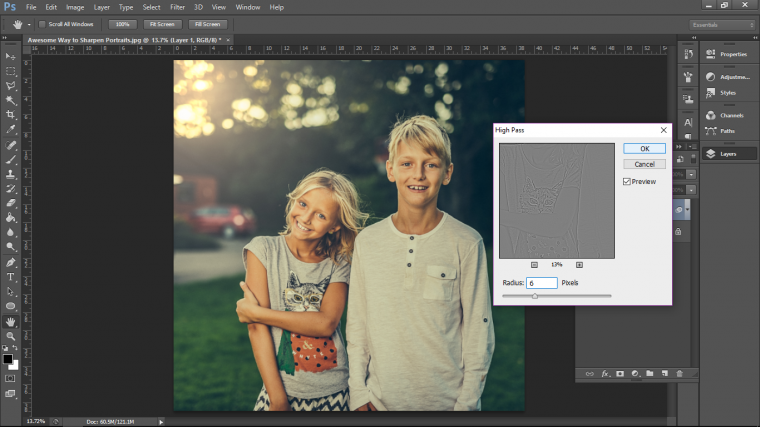
When you click that you will see an option box appear, you will see the zoom buttons to zoom out a little so you can see what High Pass is doing.
Then look at the slider at the bottom called Radius.
Slide it up and down and look at your image, you will see it change slightly, pay particular attention to different areas on your models etc, you will see some become sharper than others like the face to the T-Shirts.
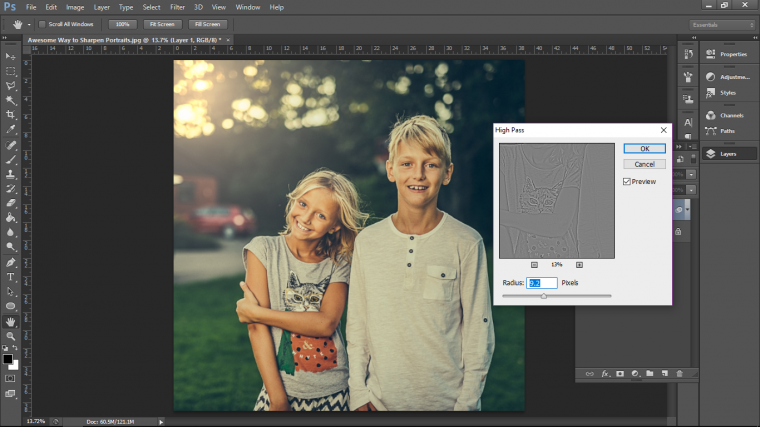
Ok, so when you have explored that a little change your radius to 6 to start off with and hit Ok.
Then you can save up and I’ll see you in Part 2. An Awesome Way to Sharpen Portraits in Photoshop: High Pass
Find out how to create facial hair using photoshop.
Comments (1)
Can’t wait for part 2.