Table of Contents
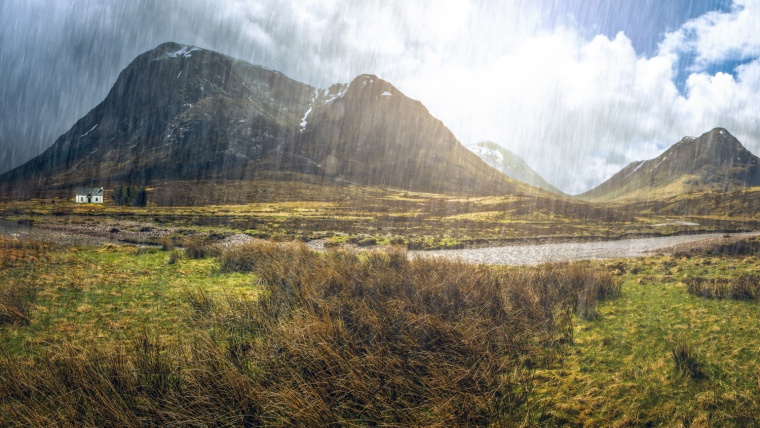
By using rain and snow overlays you can make your photos more interesting and to a greater extent control the look of your photos. Maybe you wish to achieve a moody look but were afraid to get your camera wet in the rain, or you may wish to create the perfect ambiance in a winter scene but the snow is missing, then our overlays will come to great use.
The principle for applying rain and snow overlays are the same and this article will focus on how to apply and adjust the overlays to your liking.
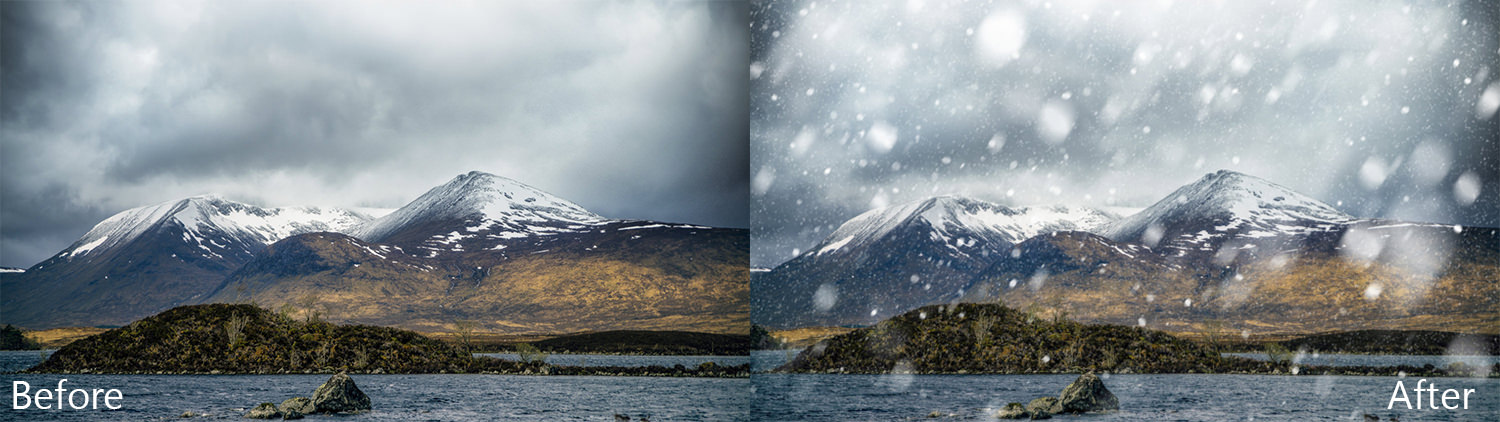
work best when there is snow already on the ground, but it will also work in situations when there might be fresh falling snow. The key here is that there shouldn’t be clear (too) clear skies and that there are no elements showing indications of another time of the year, for example, certain blossoms or the lushness of various vegetations. If there are no signs of snow on the ground it might be smart to use an overlay with less intensity, to really sell the effect.
can, of course, be used on photos from the entire year, but it is still important that there are no signs of very clear weather or similar. If the selected photo is pretty bright and vibrant an overlay with very heavy rainfall would not be a suitable choice. Generally speaking, you can use more heavy rainfall overlays as the photos get darker and moodier. There are of course exceptions to this guideline.

Here is the list of steps you need to take to apply the overlays:
1. Importing and resizing
2. Choose Blend Mode and Opacity
3. Colouring and Blurring (not always necessary)
4. Applying layer mask (if needed)
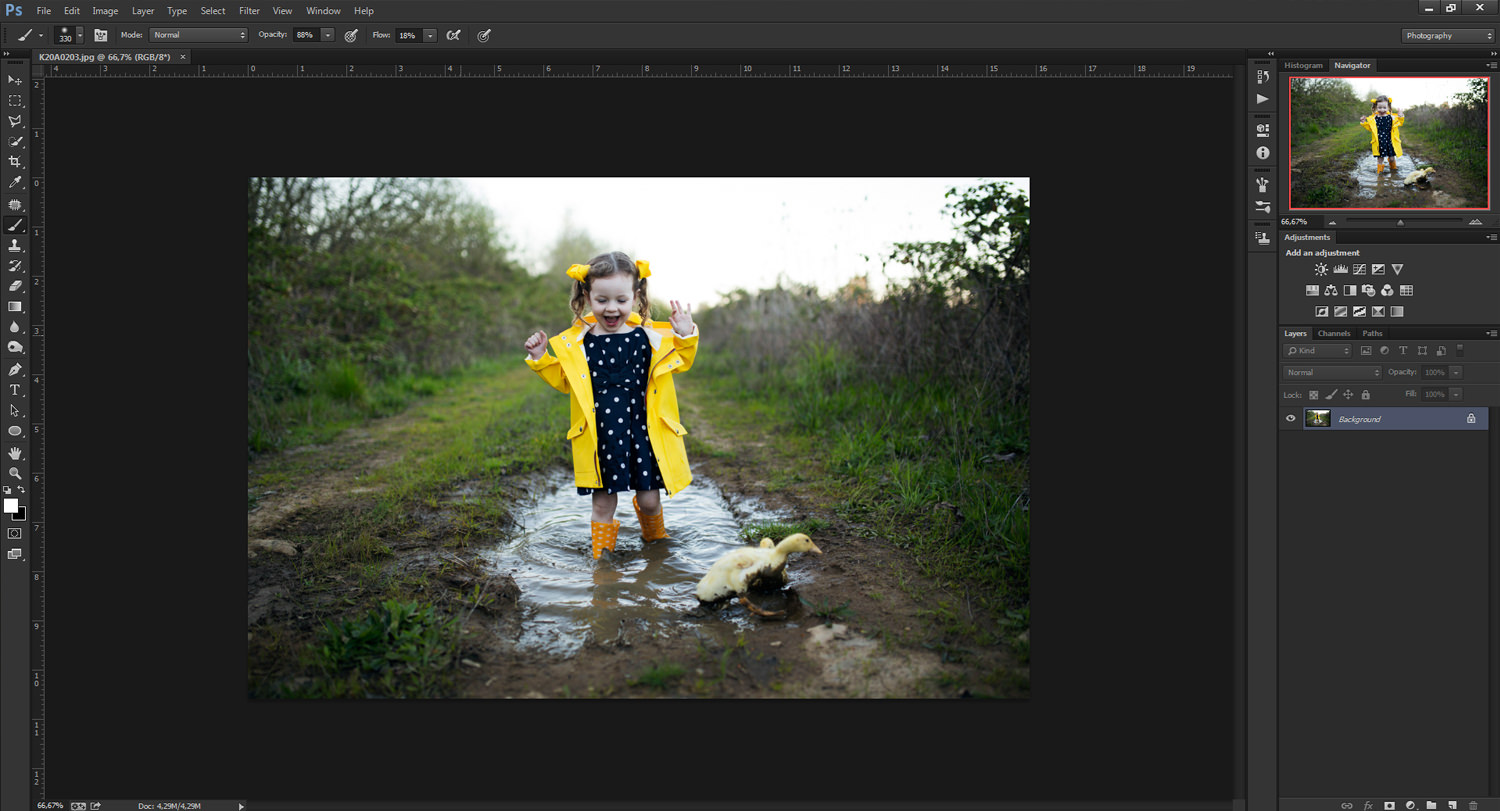
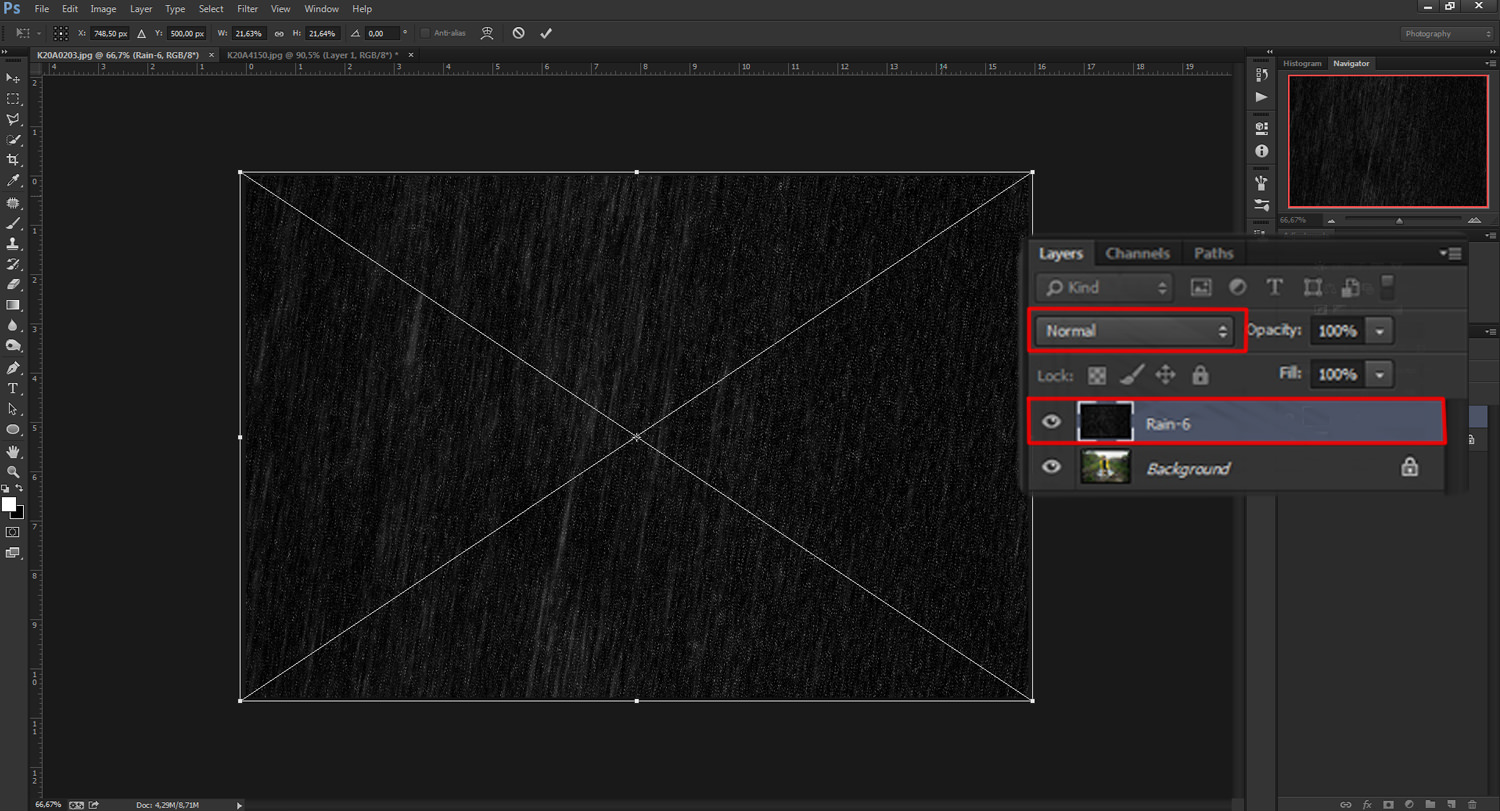
The first thing you have to do is to import the overlays you want to apply to an image, this is easily done by dragging the overlay from its folder onto your image in Photoshop. When you import the overlay you should be able to resize it directly and now you just have to make sure the overlay covers the entire image, or you can make it even bigger if you like. You can always change the size and position of overlays later using the Free Transform tool (Ctrl + T).
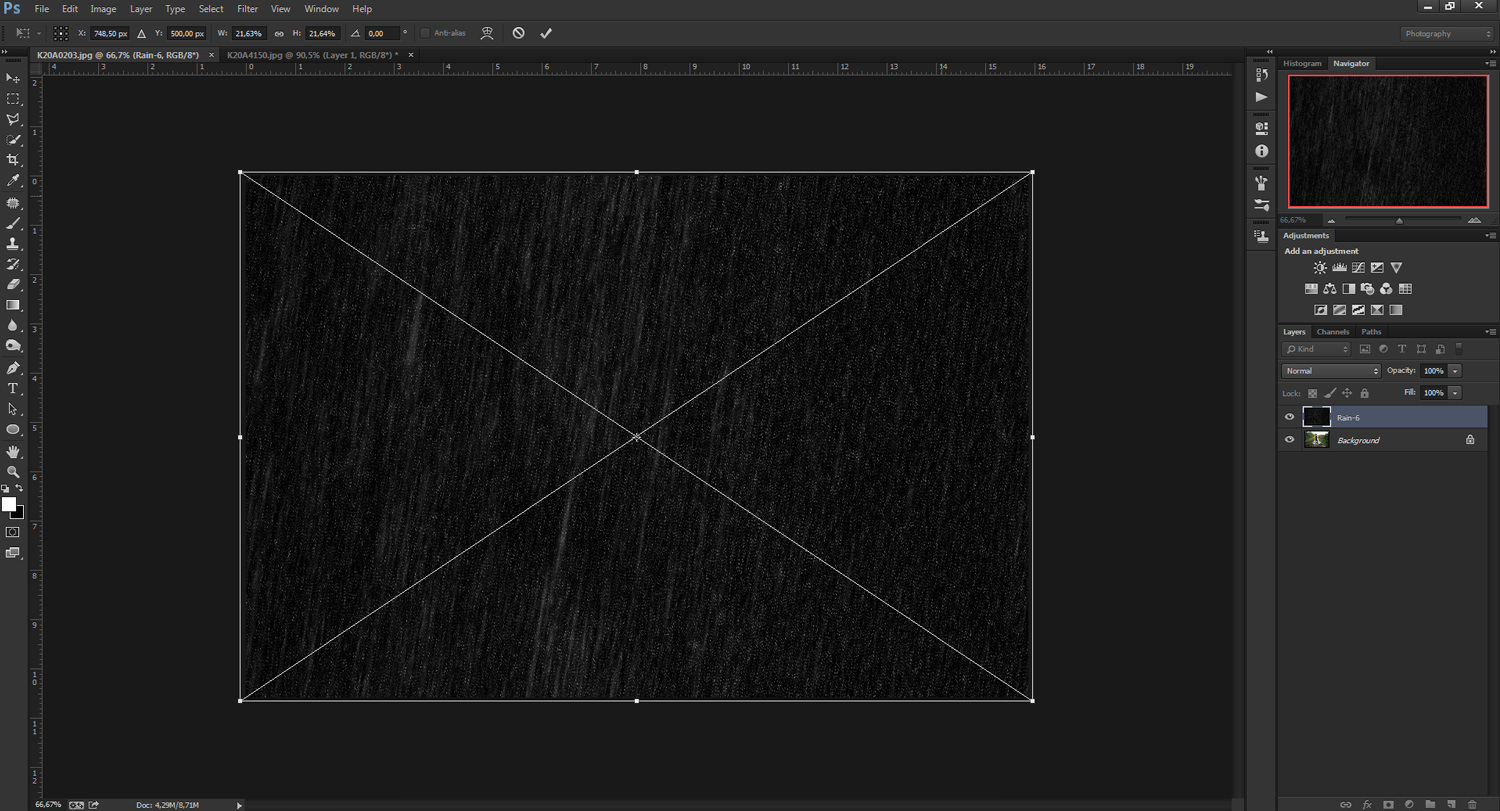
When you are satisfied with the size and position of the overlay just accept by clicking the checkbox icon at the top or press enter.
What blend mode you choose is important for the look of the overlay, and you can also change the opacity to get the desired intensity of rain/snow. To choose blend mode you need to have the layer containing the overlay selected and then selecting the blend mode quick menu above the layer panel. The recommended blend modes are “Screen”, “Color Dodge” and “Linear Dodge”. These will make all the black parts disappear leaving just the rain or snow left.
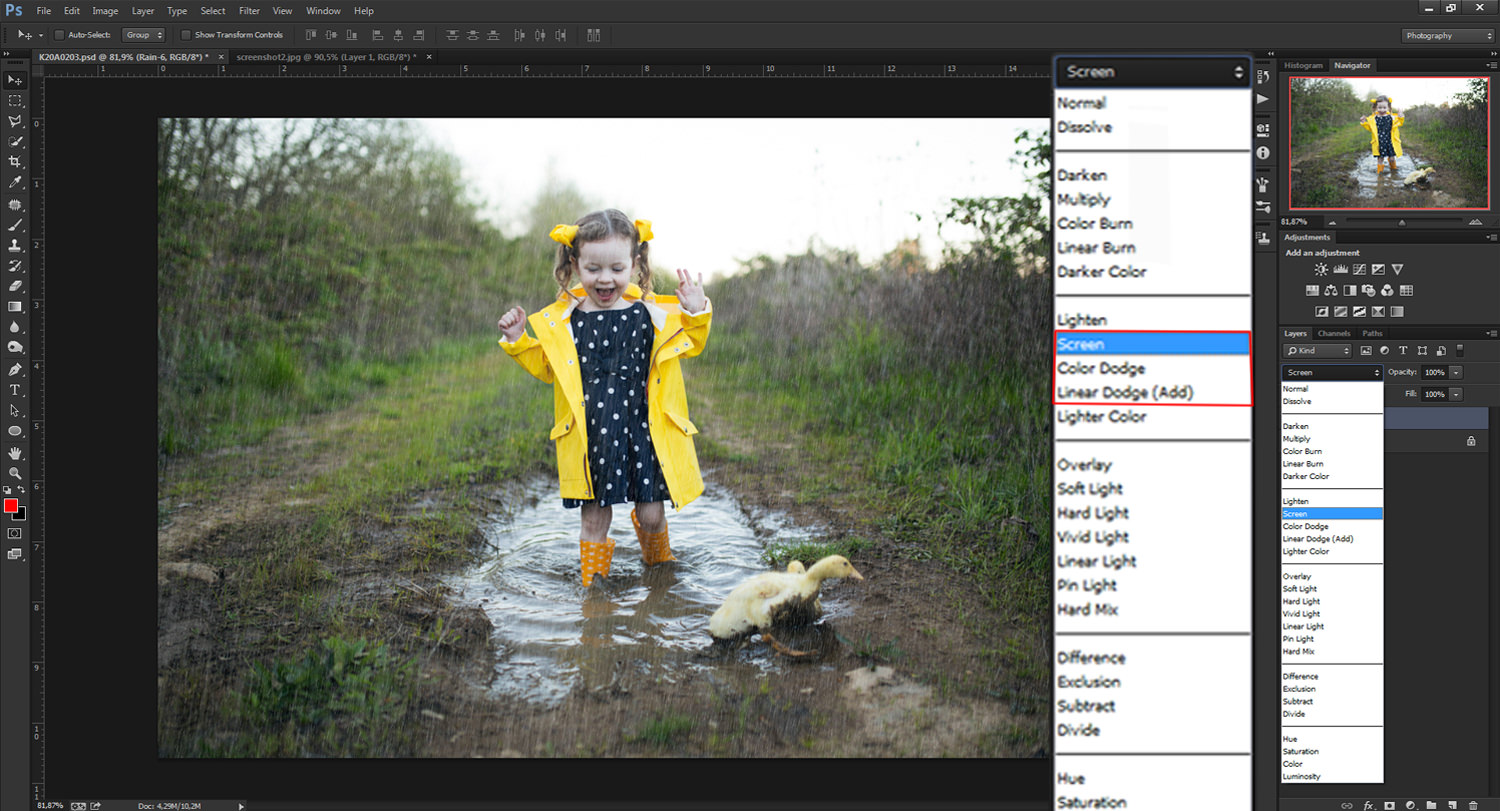
Here you can see how the blend mode “Screen” has removed all the black and adding rain to the image beneath. You can also try “Color Dodge” and “Linear Dodge”, these will give you a brighter, almost glowing, look to the rain or snow.
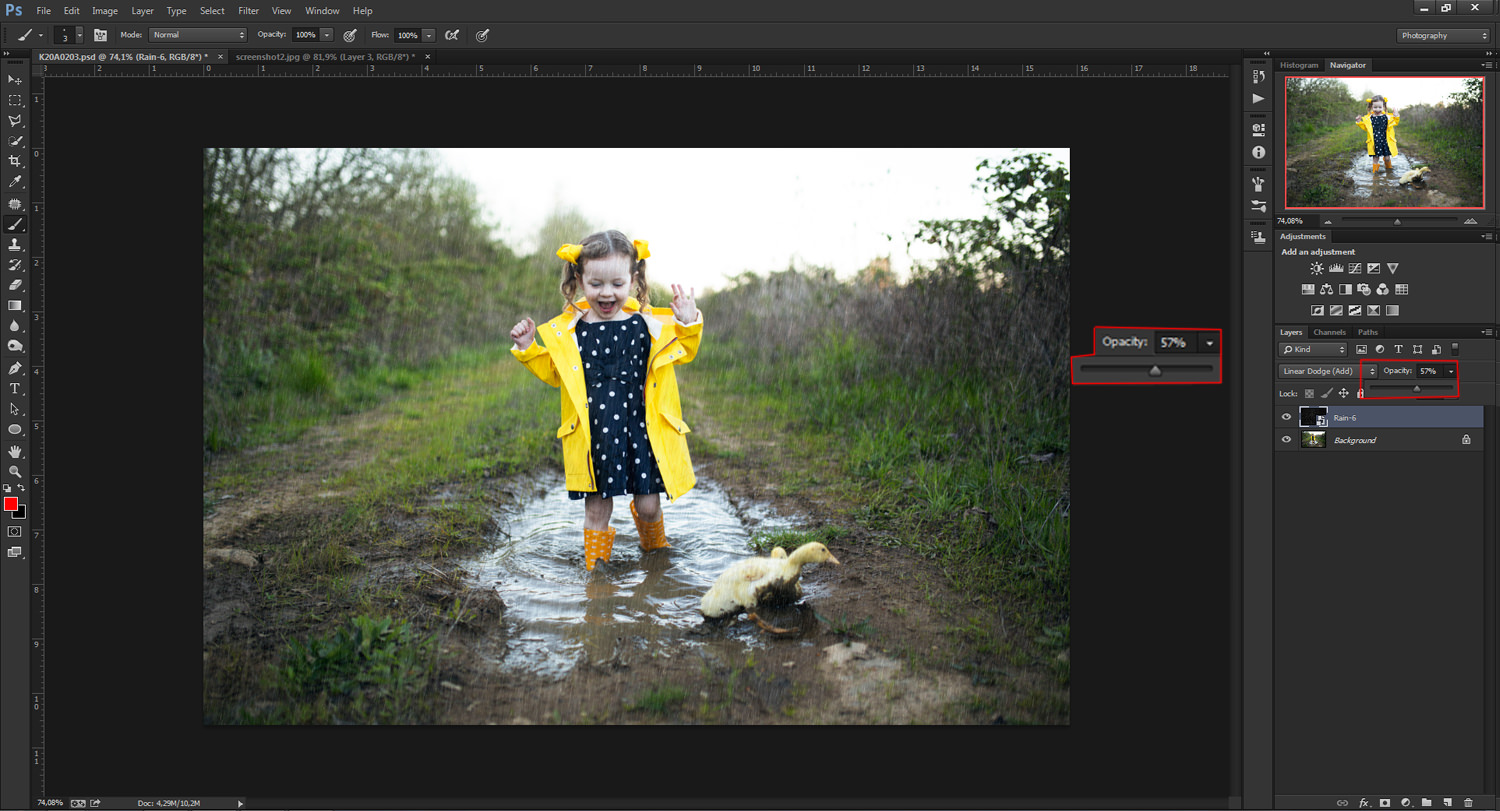
Next, you can reduce the opacity if want a more subtle effect, simply type in the percentage you want or drag the slider.
This step is not necessary for many occasions, but sometimes it can make a big difference for the overlays. If you find that the rain or snow looks too harsh you should fix it using “Gaussian Blur“. Since the rain doesn’t really have any color in itself but can be “coloured“ by the light in a certain situation, for example, the rain can have a slightly warm tone during sunset. To mimic these situations you need to add some colour to your overlay using a Hue/Saturation filter. If you use the blend mode “Color Dodge“ you do not need to do this since it will pick up some of the ambient colour.
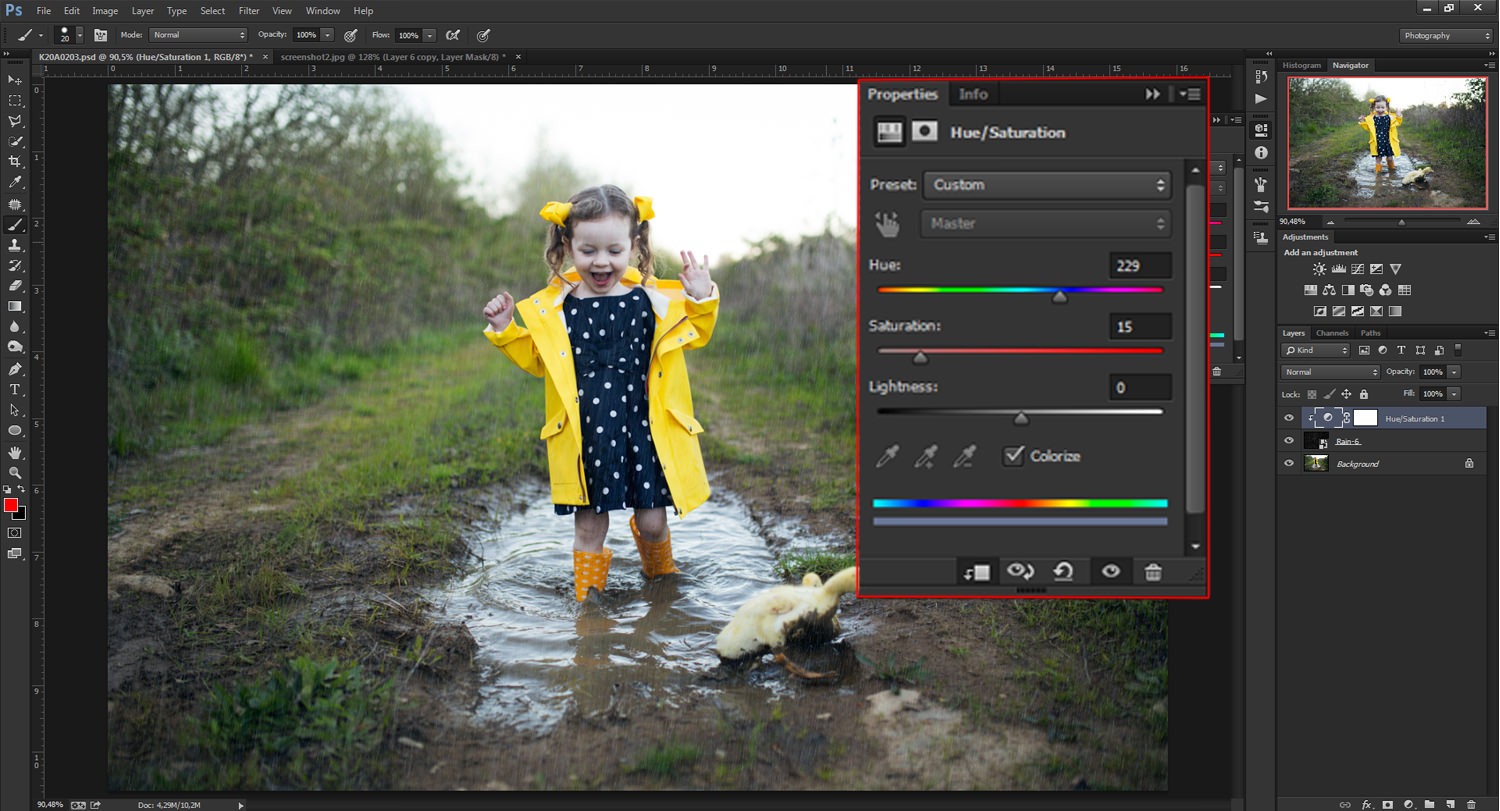
To add a colour tone to an overlay you need to open a Hue/Saturation adjustment layer while having the overlay layer selected. You then need to link it the layer below by clicking the “clip to layer“ icon, the icon furthest to the left in the icon row in the bottom of the Hue/Saturation panel. You also need to tick the box “Colorize“.
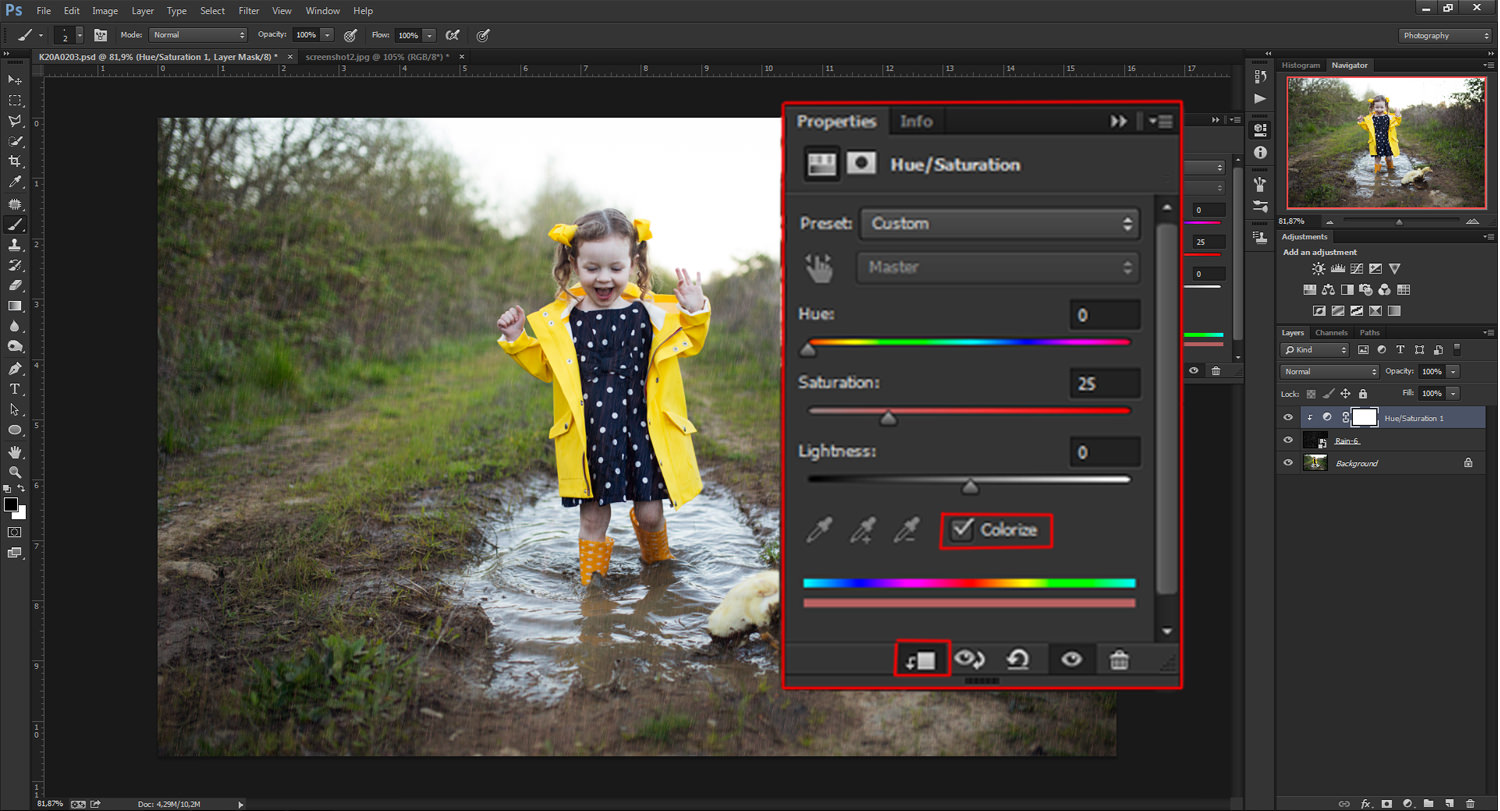
You can now change the hue, saturation and lightness sliders to set a fitting tone for your overlay. Keep in mind that it should make the overlay blend better with the rest of the image. In this case, we can see that the photo has a quite cool tone to it, so we need to set the hue to something blue, and we will also keep the saturation low because we do not want the rain to look too much coloured. The lightness should usually be around zero.
As you can see the difference is quite small, but it is important that the rain or snow fits in the picture.
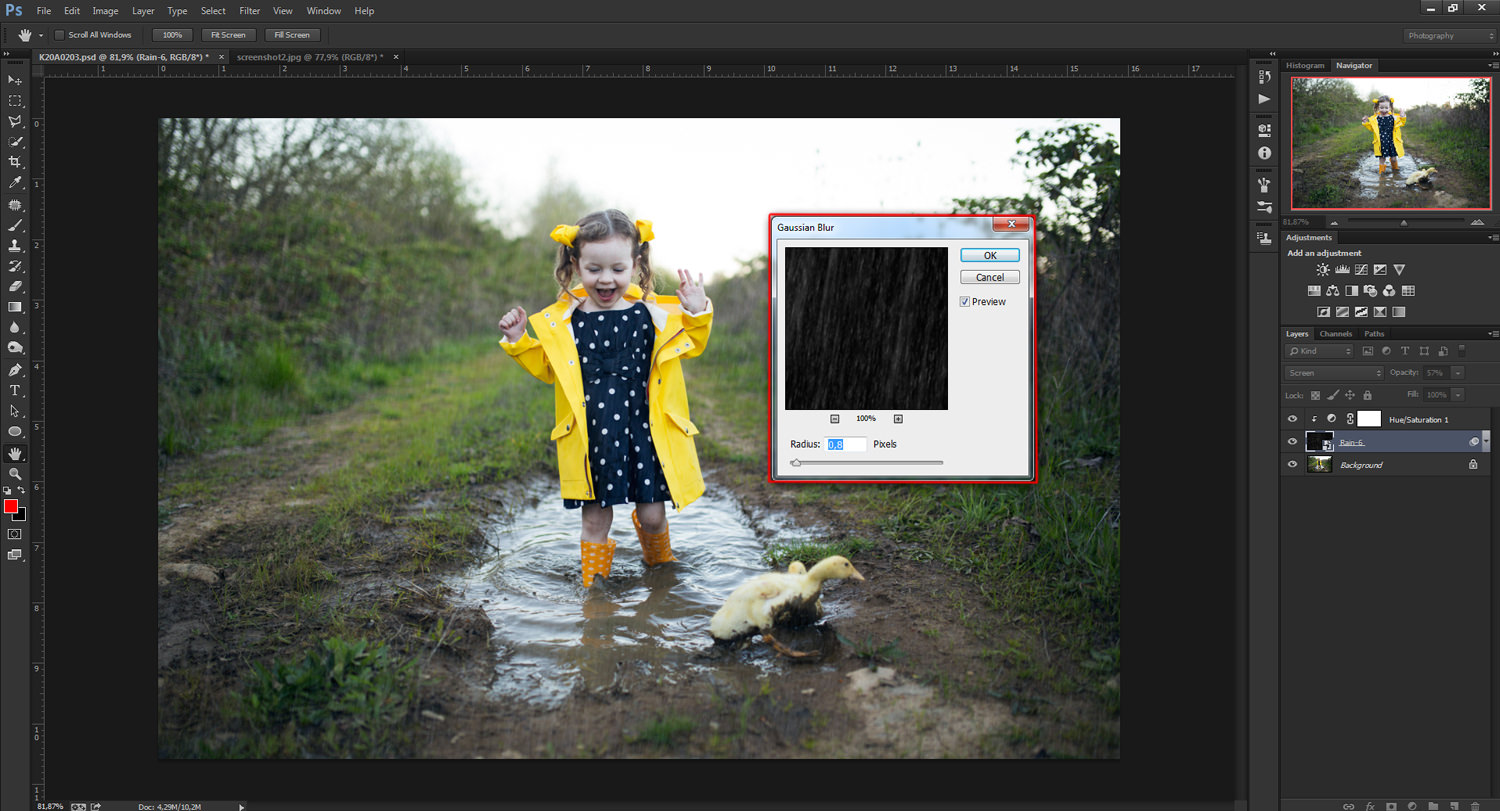
If you want to make the rain or snow a bit softer you can apply a gaussian blur. Go to Filter/Blur/Gaussian Blur while still having the overlay layer selected. Type in a value somewhere around 1 to 4, depending on the size of rain/snow. In this case, I will choose 0,8 since the raindrops are small in this overlay.
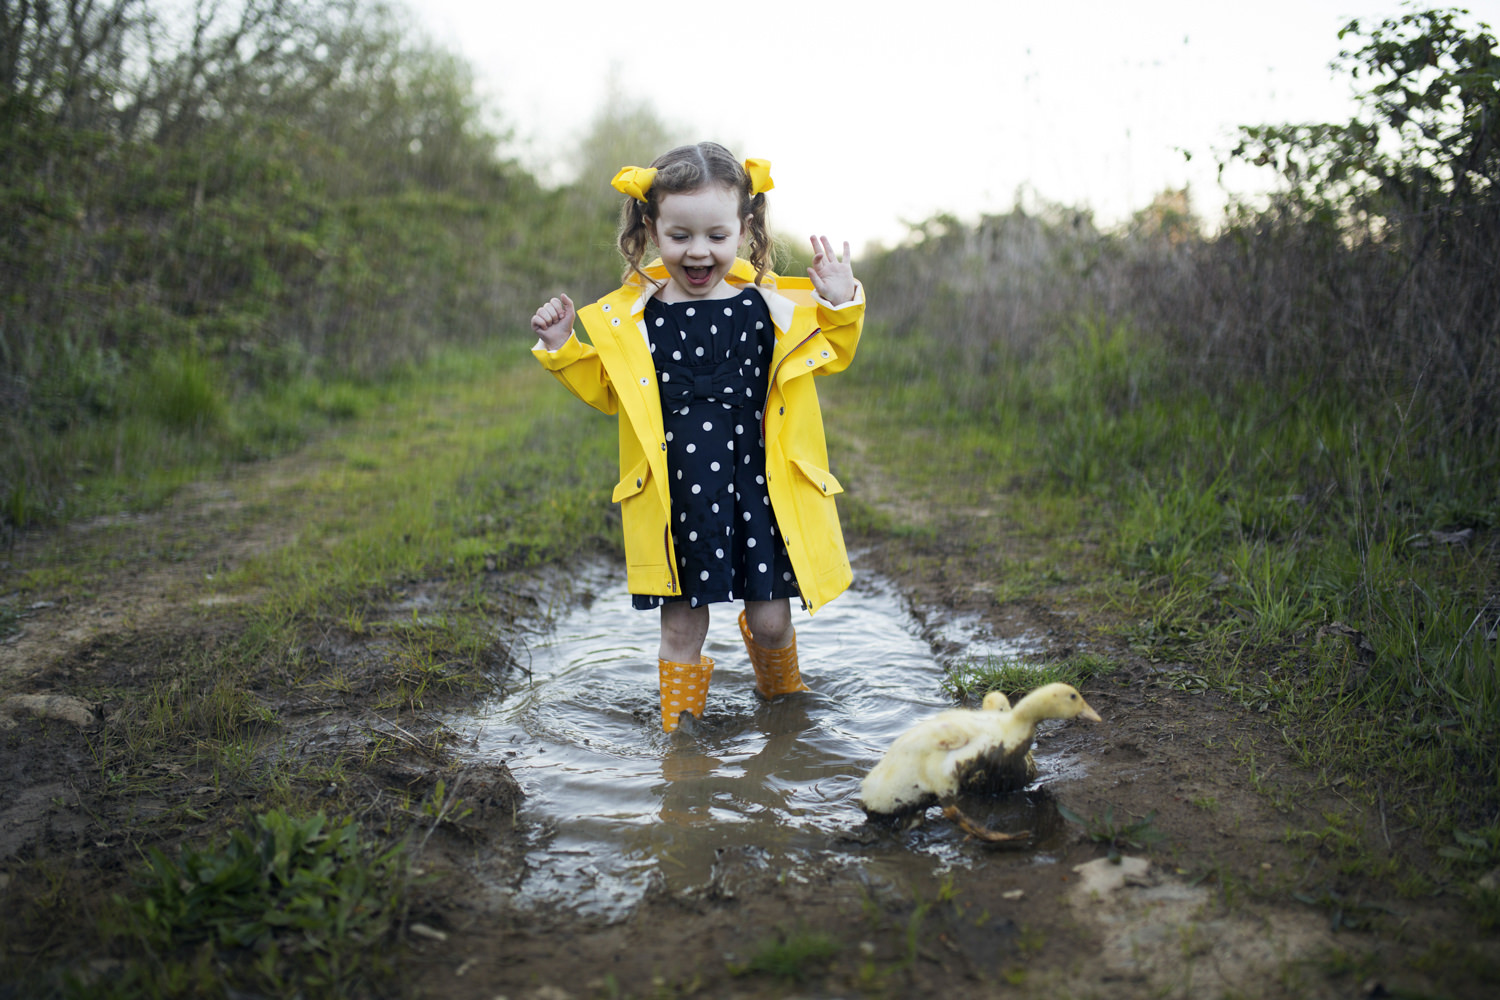
Now the basic look of the overlay is finished.
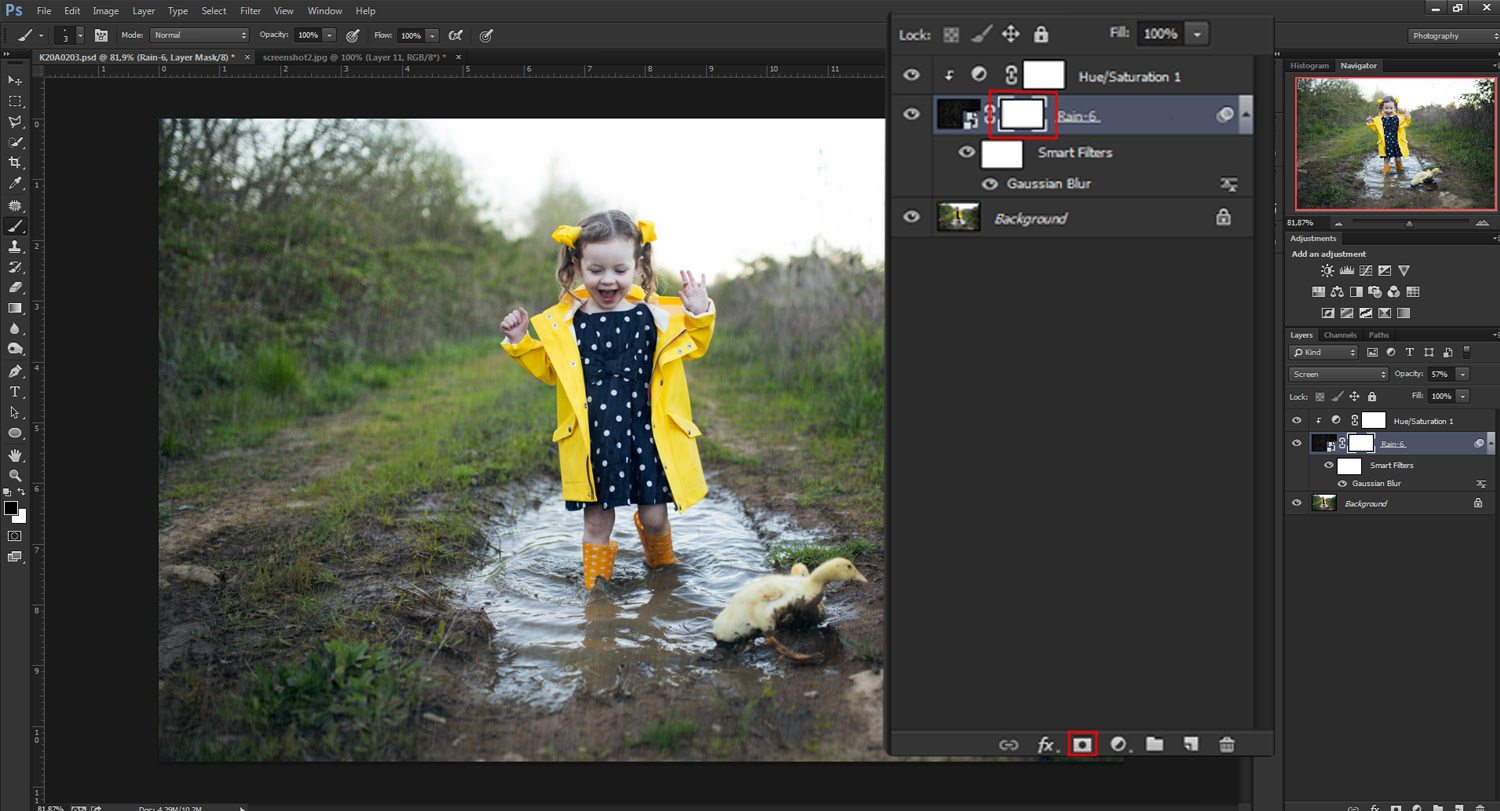
If the snow or rain is covering an important element of your picture you can remove with help of a layer mask. In this case, the raindrops are covering the girl’s face and clothing, and since the overlays are made in such a way that displays depth this can look a bit weird on some occasions. Since rain falls at different distances from the camera it would be strange if the small raindrops, that should be further away, falls in front of a subject closer in the frame. This might completely ruin some pictures with a lot of depth, primarily portraits. For the same reason, we also need to make sure that the bottom of the frame is free from rain since the bottom is closer to the camera and that means that the smaller raindrops should not be visible.
First, you need to create a layer mask, by clicking on the layer mask icon in the bottom of the layers panel. This will create a layer mask in white, and everything that is white in the layer mask is visible, while everything black will be hidden.
Now you simply have to select the brush tool (B) and make sure the brush is soft and color set to black. By painting on the area of the overlay you want to remove you can get rid of rain/snow that is unwanted.
We hope you have found this guide useful and that you will be able to use these techniques in your own photos. When you have mastered these basic skills for applying overlays you can go on with experimenting with other ways to get the most out of our rain and snow overlays, or our starburst overlay. You may also try our sky overlay for PhotoShop. The possibilities are endless and just waiting for you to explore them.


Please verify your software version before proceeding.
 I’ve verified my software version


 Facebook
 Google +
Comments (0)
There are no comments yet.