When you have mastered the basics for applying lighting overlays you can start exploring the most advanced possibilities of our products. This guide will show you some ways to take your overlays to the next level.
Table of Contents
Shaping the Overlays
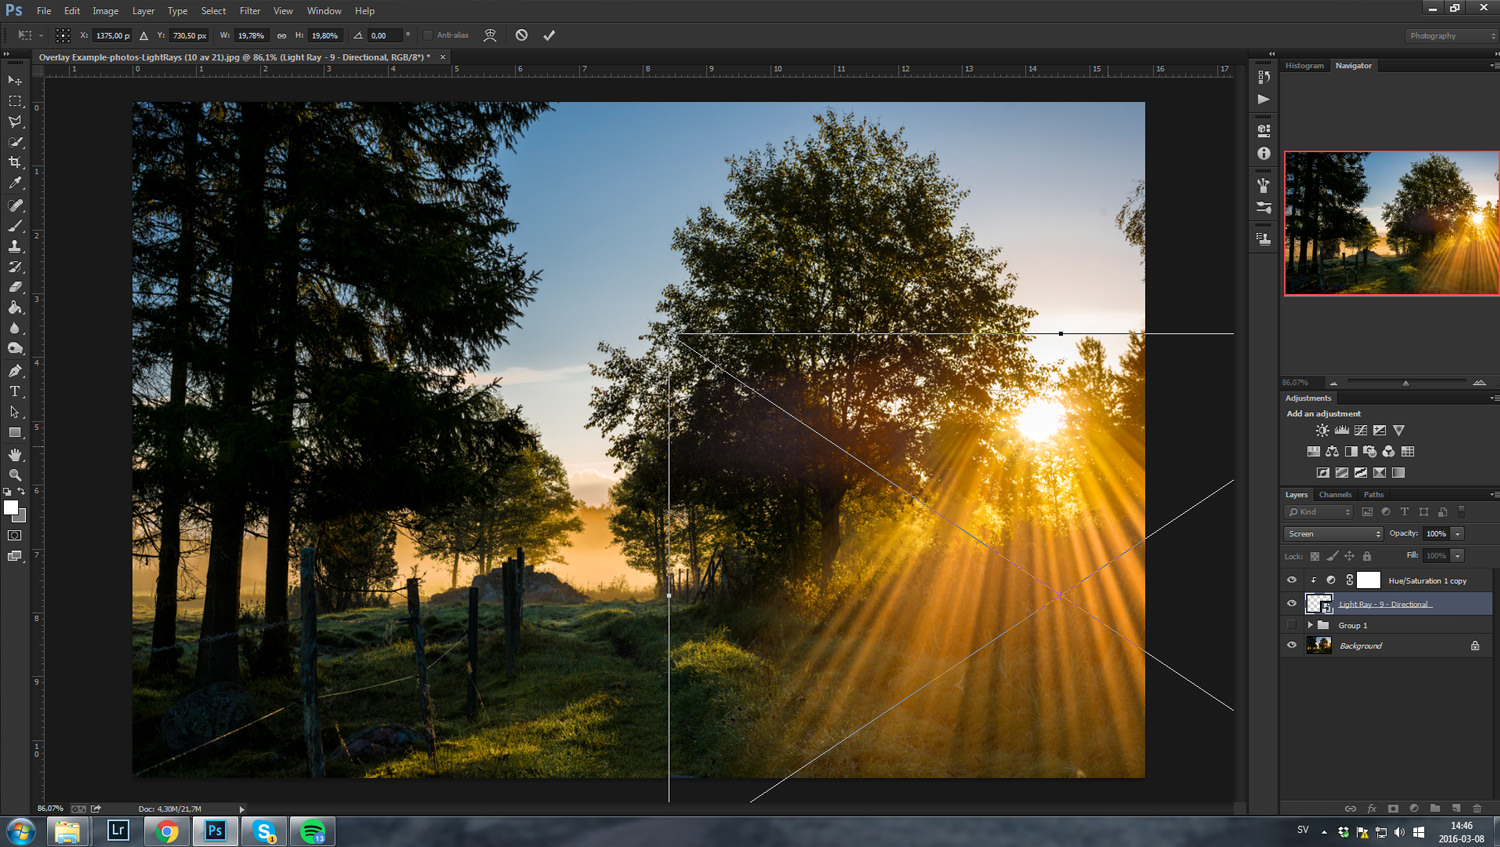
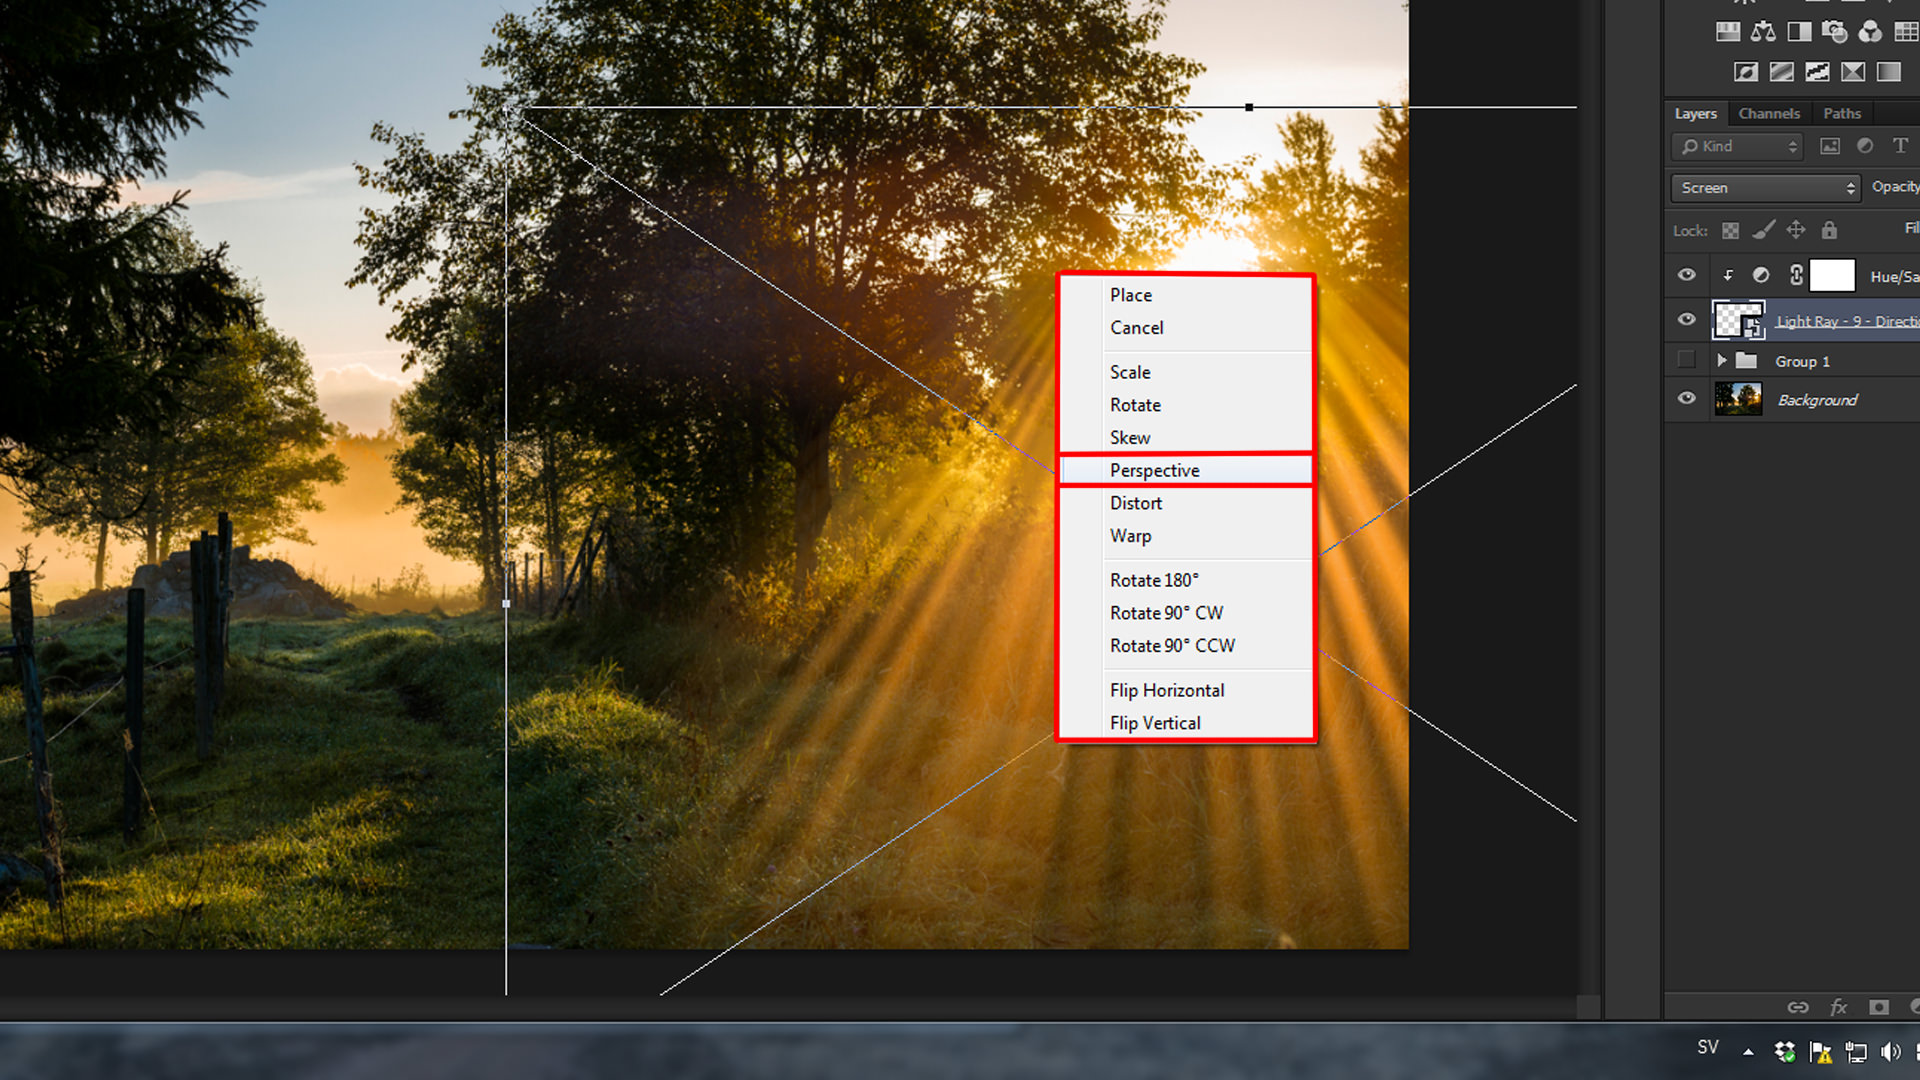
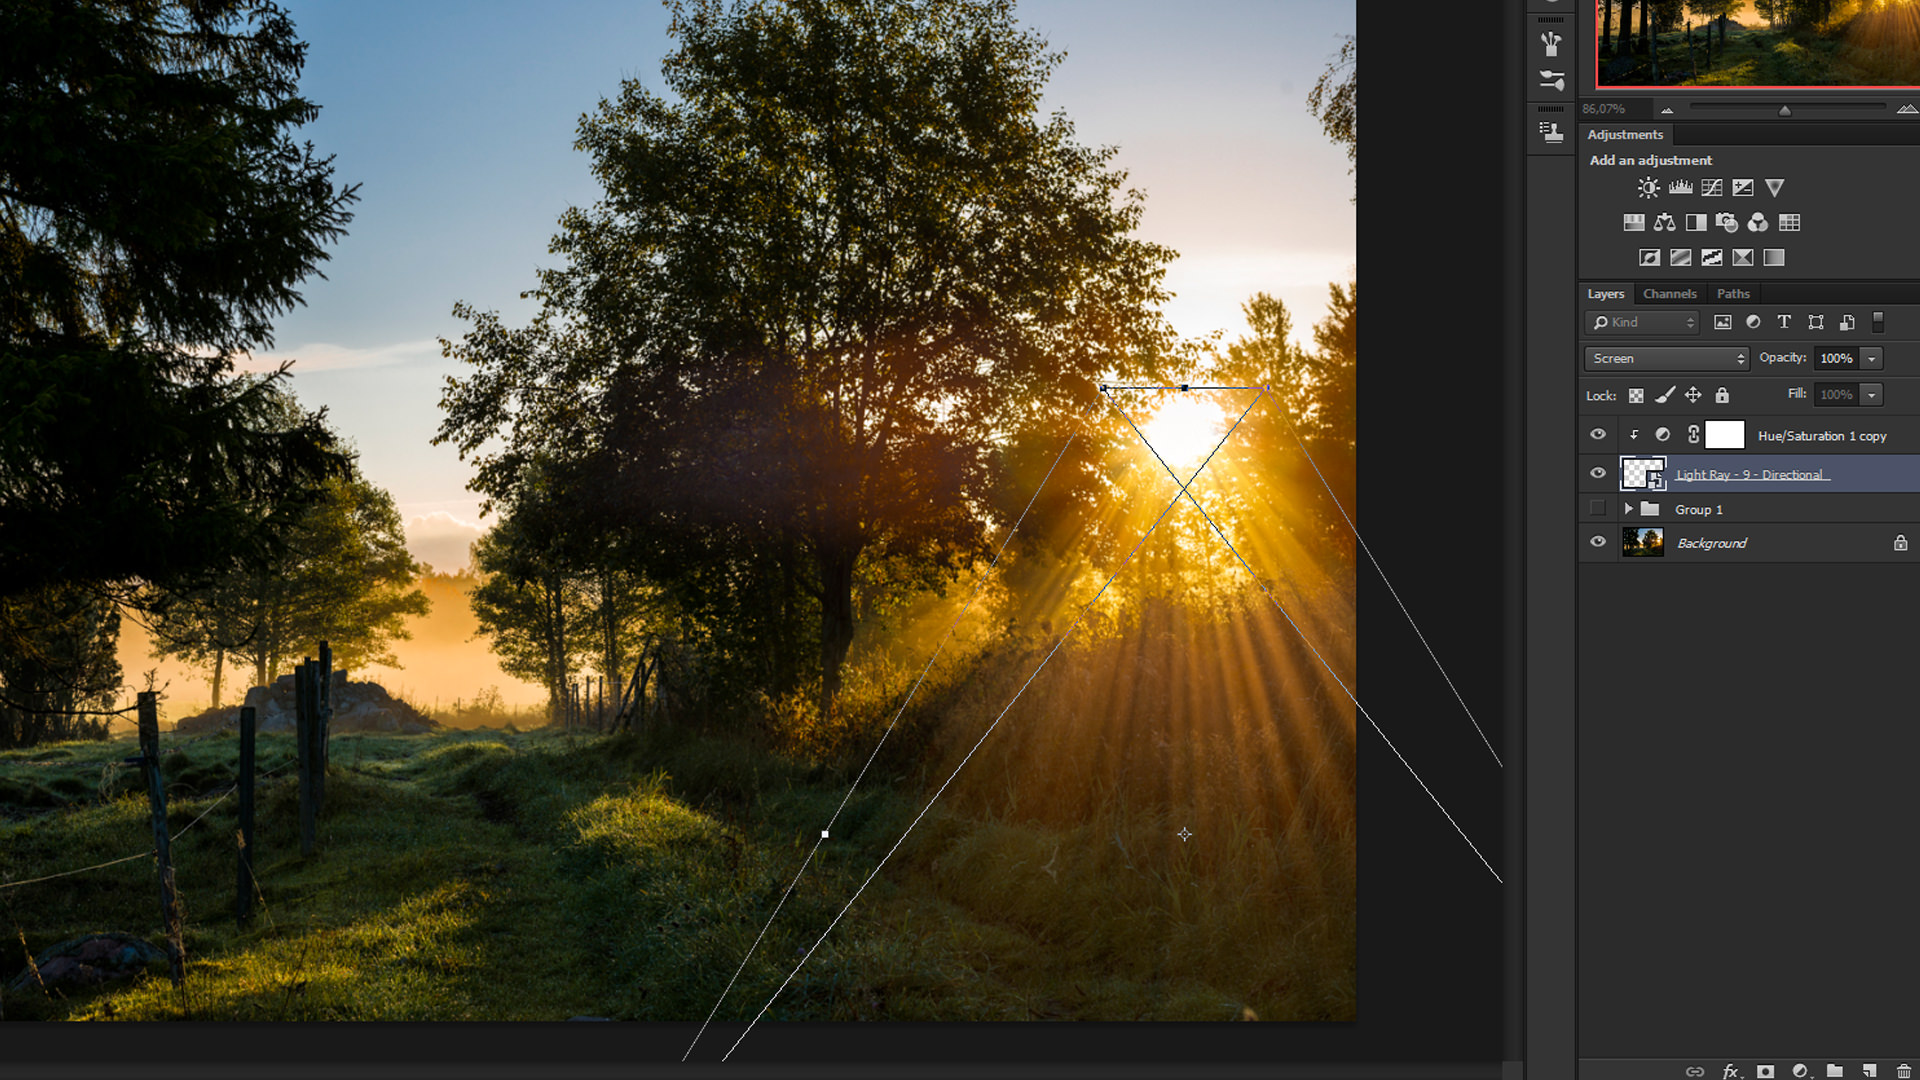
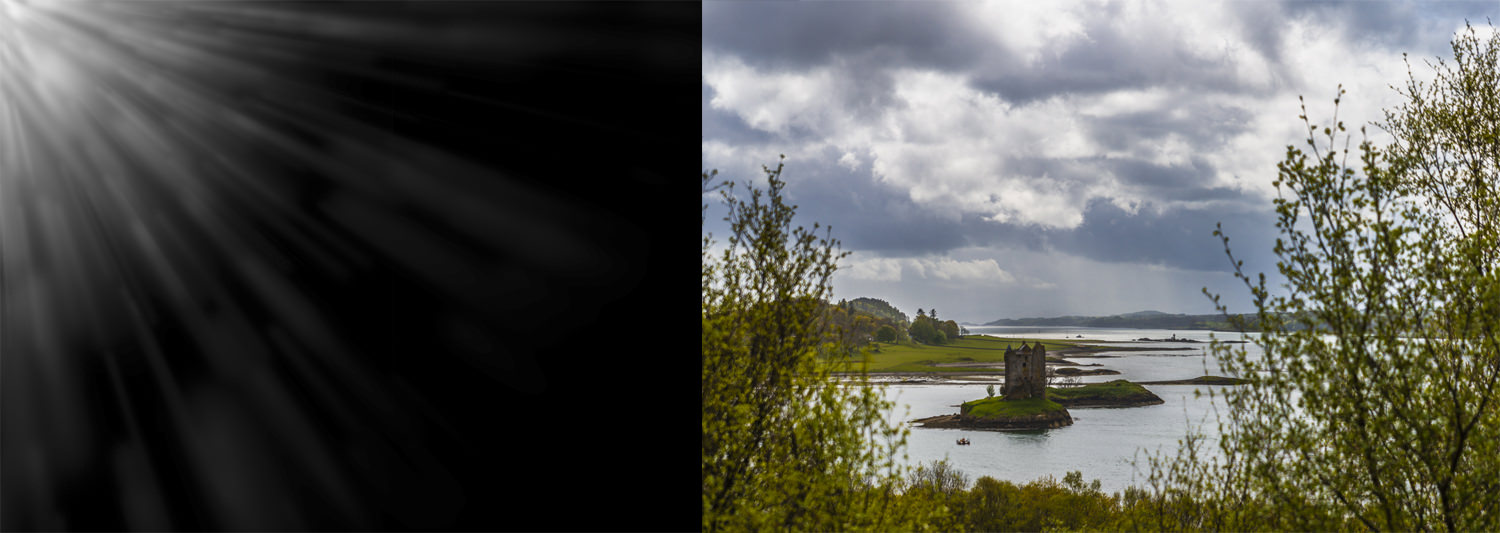
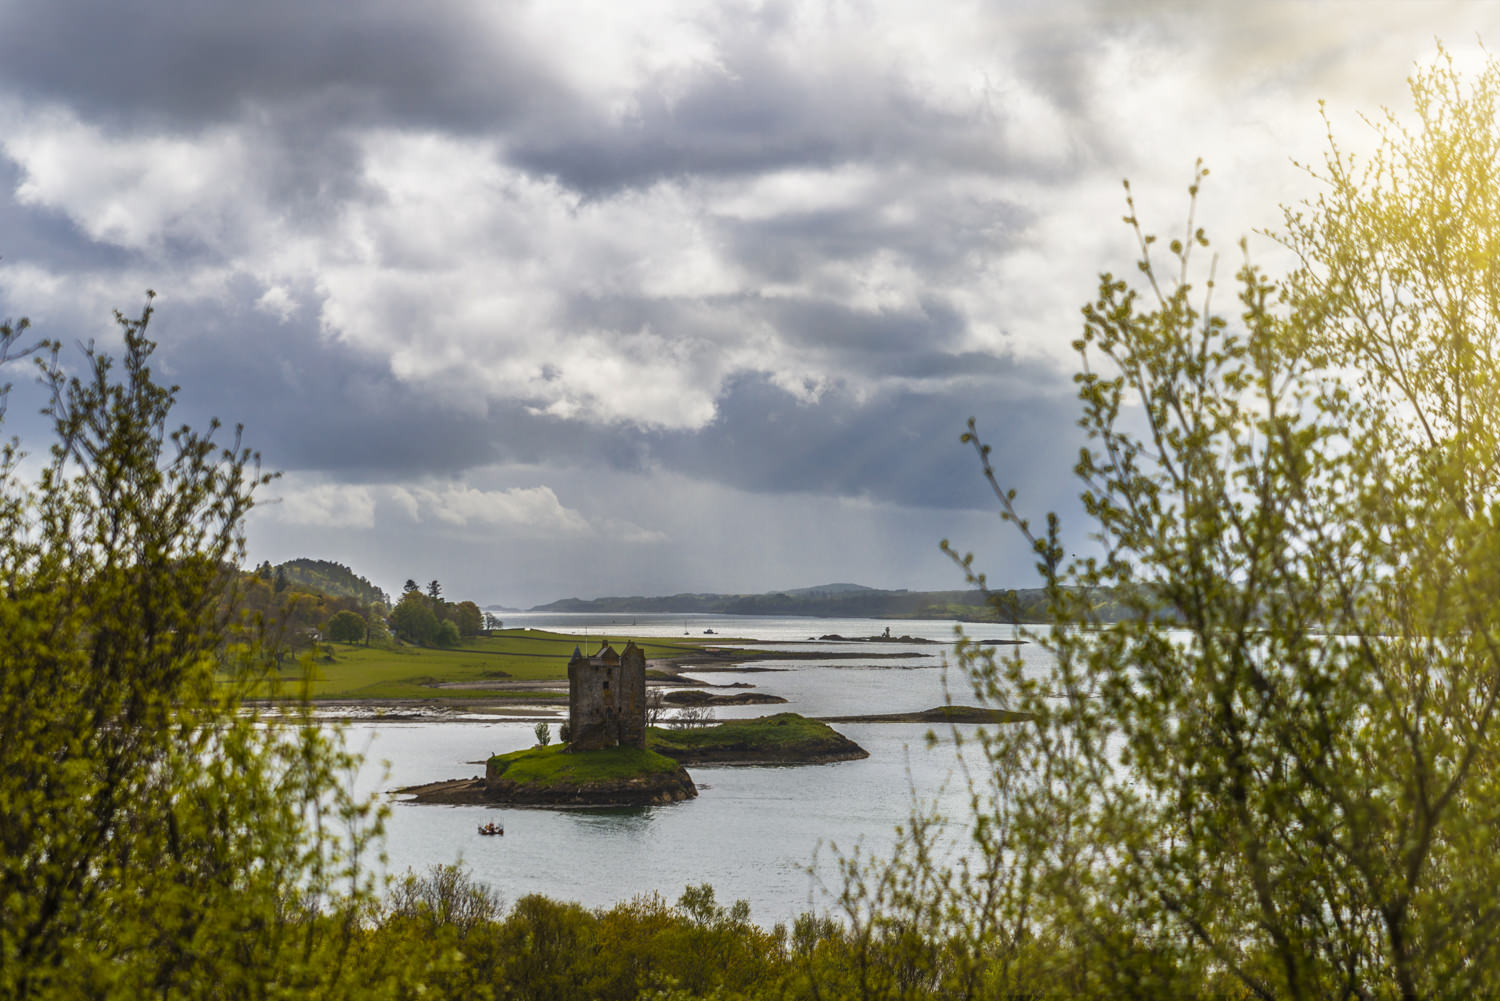
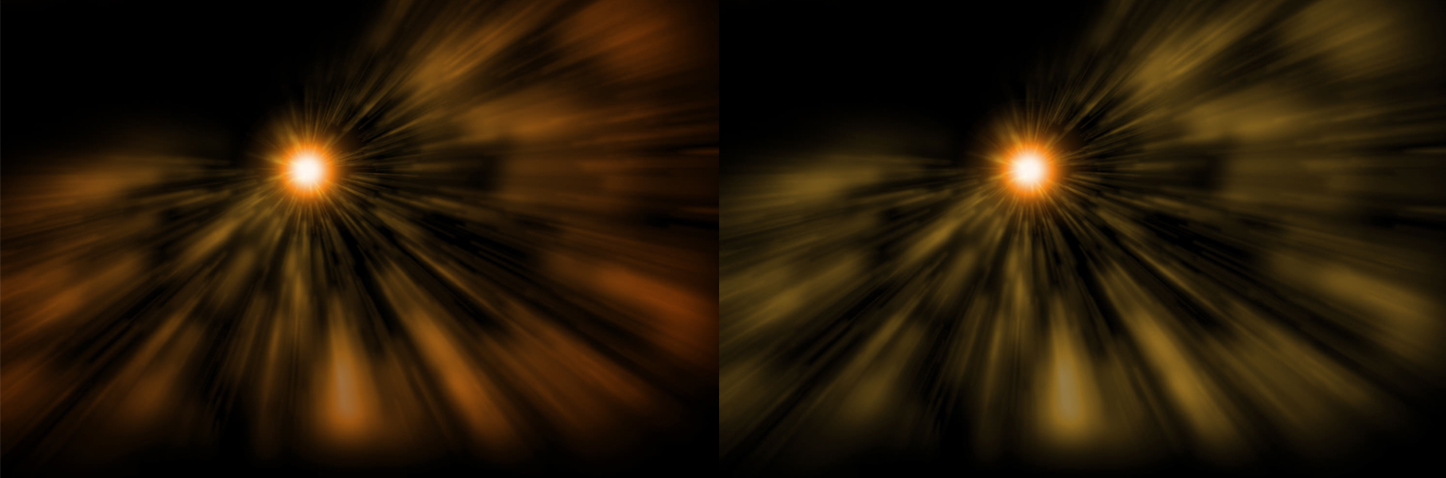
Every time you apply an overlay you must resize and move it to fit the image, but in the “Free Transform” tool there is also more advanced ways to shape you overlays into the form you want. In the case below we can see a light ray that we want to fit the image, but right now the rays look weird as they are not all coming from the sun.To fix this I will right-click on the “Free Transform” tool and select “Perspective”. This lets us change the perspective of the overlay and in this case, we will use it to shrink the top of the overlay to fit all rays into the sun. To shrink the top of the overlay we simply drag one of the corners towards the middle while pressing “Alt” (to make the same change to both corners on top).Now the two corners are closer together while the two corners below are the same as before, resulting in a more cone-shaped overlay, which fits this image.Above you can see the result of changing the perspective. If there is an overlay you want to use for an image but it does not match the elements of the picture you can try to adapt the overlay to it by using the different modes in the “Free Transform” tool. Apart from “Perspective”, there is also “Scale”, “Rotate”, “Skew”, “Distort”, and “Warp” that you can use. A more simple but very important way to change the shape of the overlay is flipping it. Since not all overlays are symmetrical there is sometimes a need to flip the overlay. An example of this is “Light Leak – 2”, with light coming into the photo from the left. This can be a problem if I want it in an image where the light should come from the right. Luckily the solution is easy. You simply select the “Free Transform” tool and right click, now choose “Flip Horizontal”. In this case, I want the light to come from the right since there is more space between the castle and the right edge compared to the left. To do this I simply flip the overlay horizontal and continue with the standard procedure.
Combining Overlays
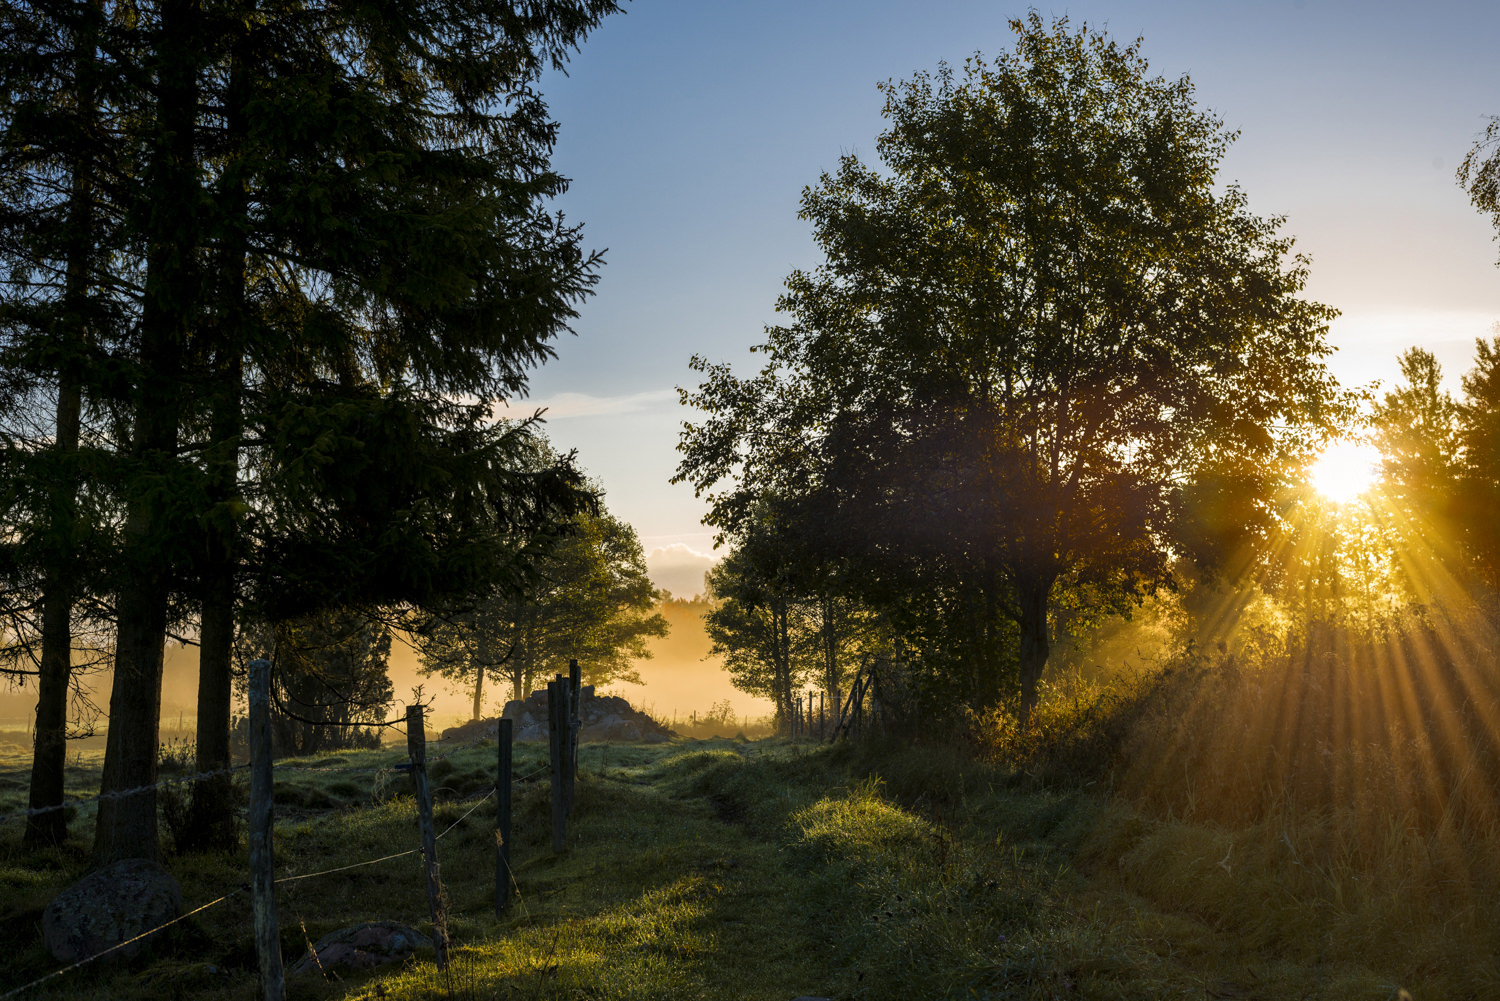
By combining overlays you can essentially make your own overlays, picking the things you like with various overlays and putting them together. You can also have many different overlays in the picture, one of the most common examples would probably be to combine a flare and/or a starburst with a light ray overlay. Combining overlays can be as simple as just two overlays next to each other, or as advanced as multiple overlays with different opacities and colours. To combine overlays you should first have a vision for the image, how you want it to look when it is finished, and then figure out what overlays that can help you achieve it. The picture above was taken an early morning in October, it was beautiful clear weather and a layer of fog on the ground. The rising sun lit up the fog and created beautiful light, and when the sun shone through the bush it created rays of light. It is already an interesting picture but it can be made even more interesting by enhancing the elements already present in the photo, like the light rays and the sun. The first thing I will do is to add an overlay with thin rays of light (since the bush would divide the light into thin rays) and lower the opacity to about 50%. Using a “Hue/Saturation” adjustment layer I will colour the overlay to match the sunlight. A layer mask is used to remove the rays from the sky (since it would look weird to have rays of light in the sky in this situation) The next thing I will do is to add a light ray that is a bit thicker, and repeating the process to adapt the overlay to the photo, but rather than using “Screen” as blend mode I have used “Linear Dodge” (and reduced the lightness of the “Hue/Saturation” layer) on this overlay. The purpose of this was to create more depth and contrast in the picture.The last overlay I will add is a starburst to enhance the sun.Here you can see the before and after versions.This was a combination of three overlays, you can, of course, add even more, but this shows the difference between just having one single overlay compared to a combination of several.
Multiple Colours
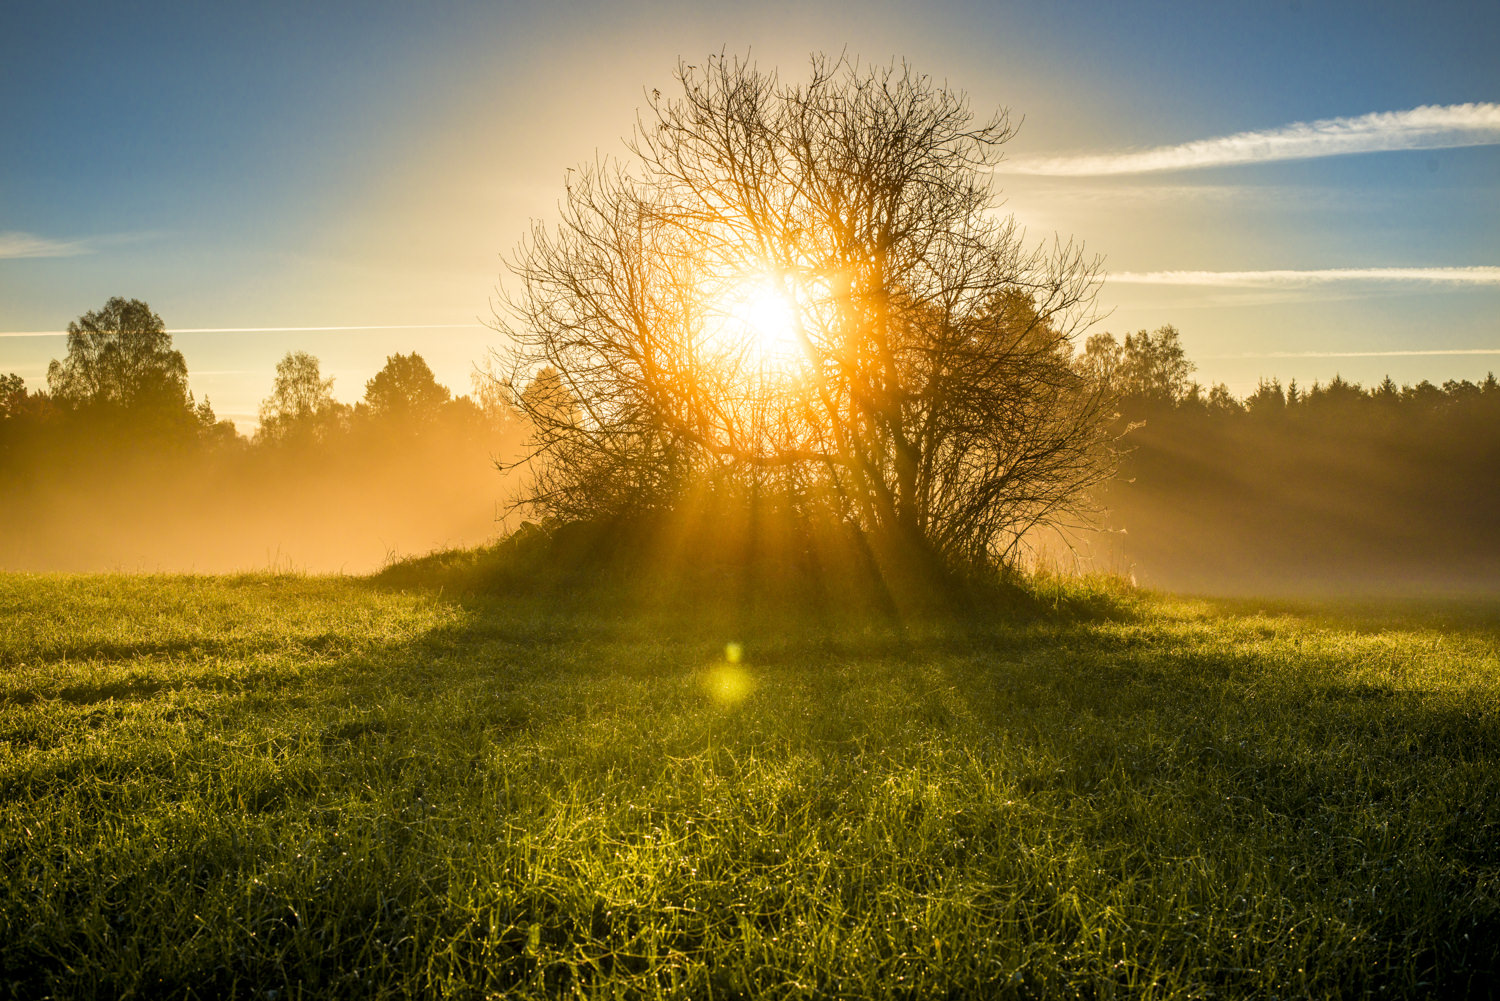
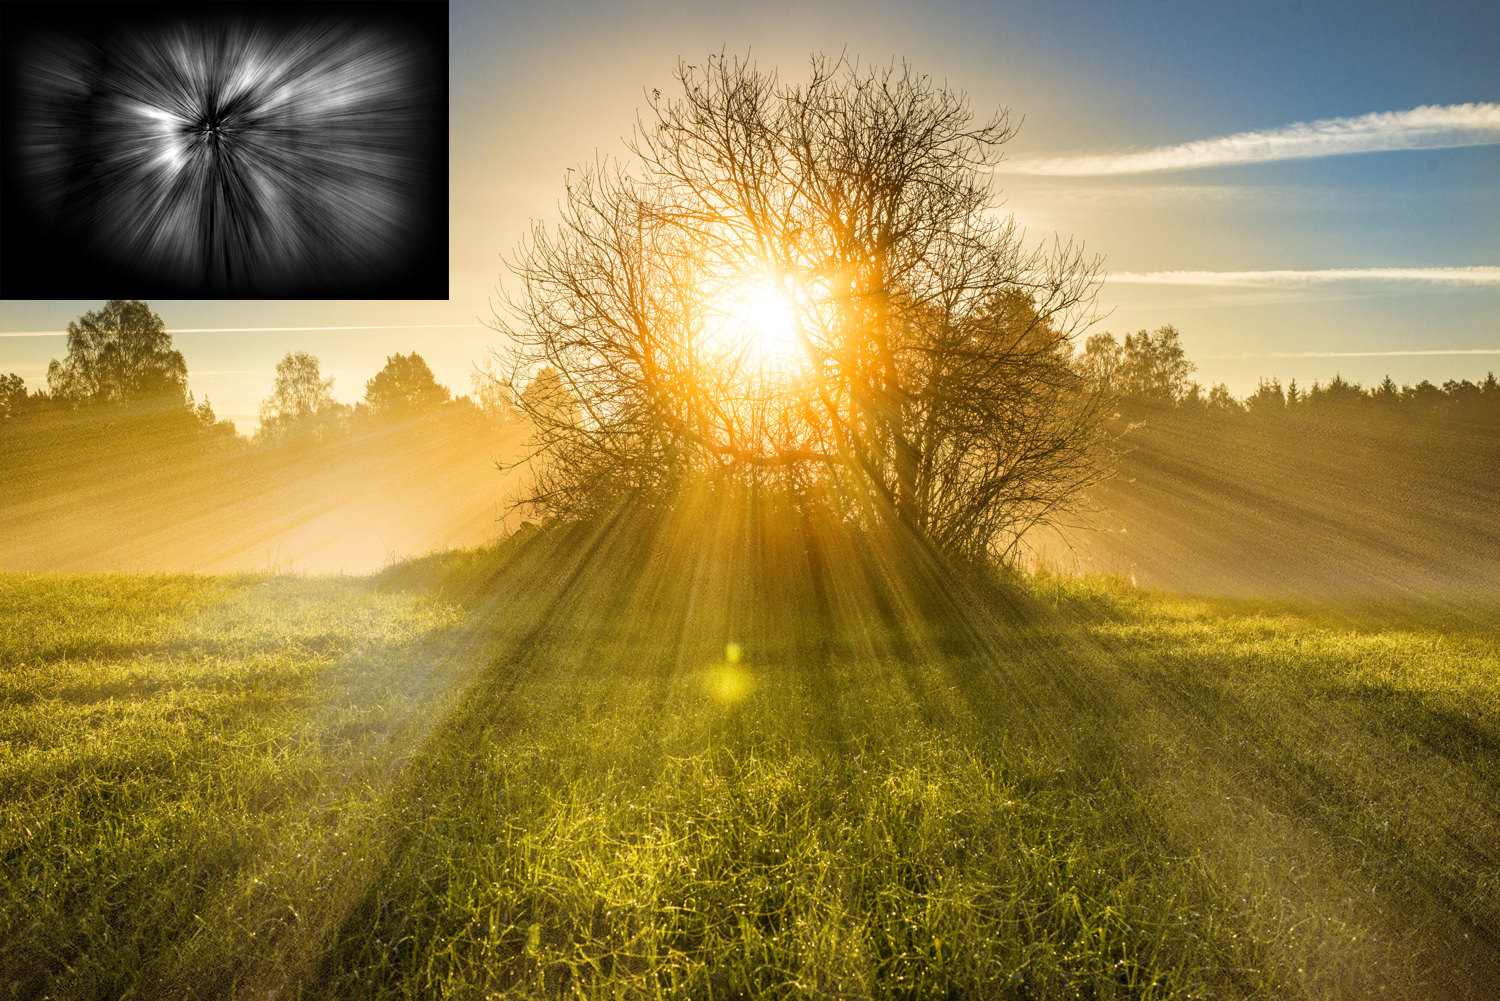
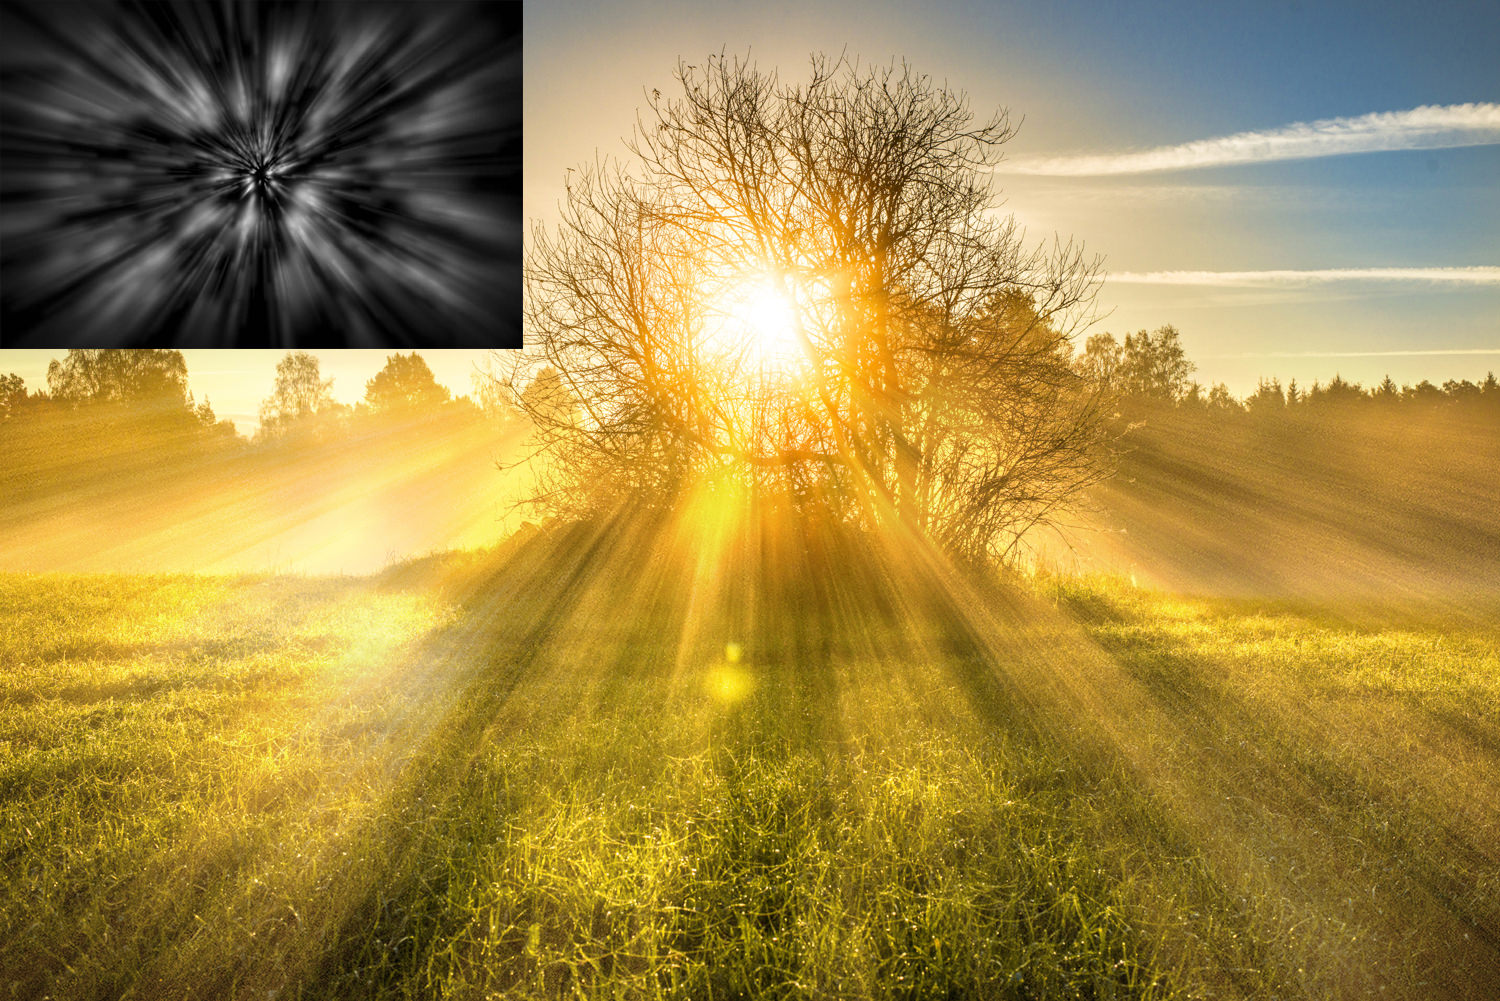
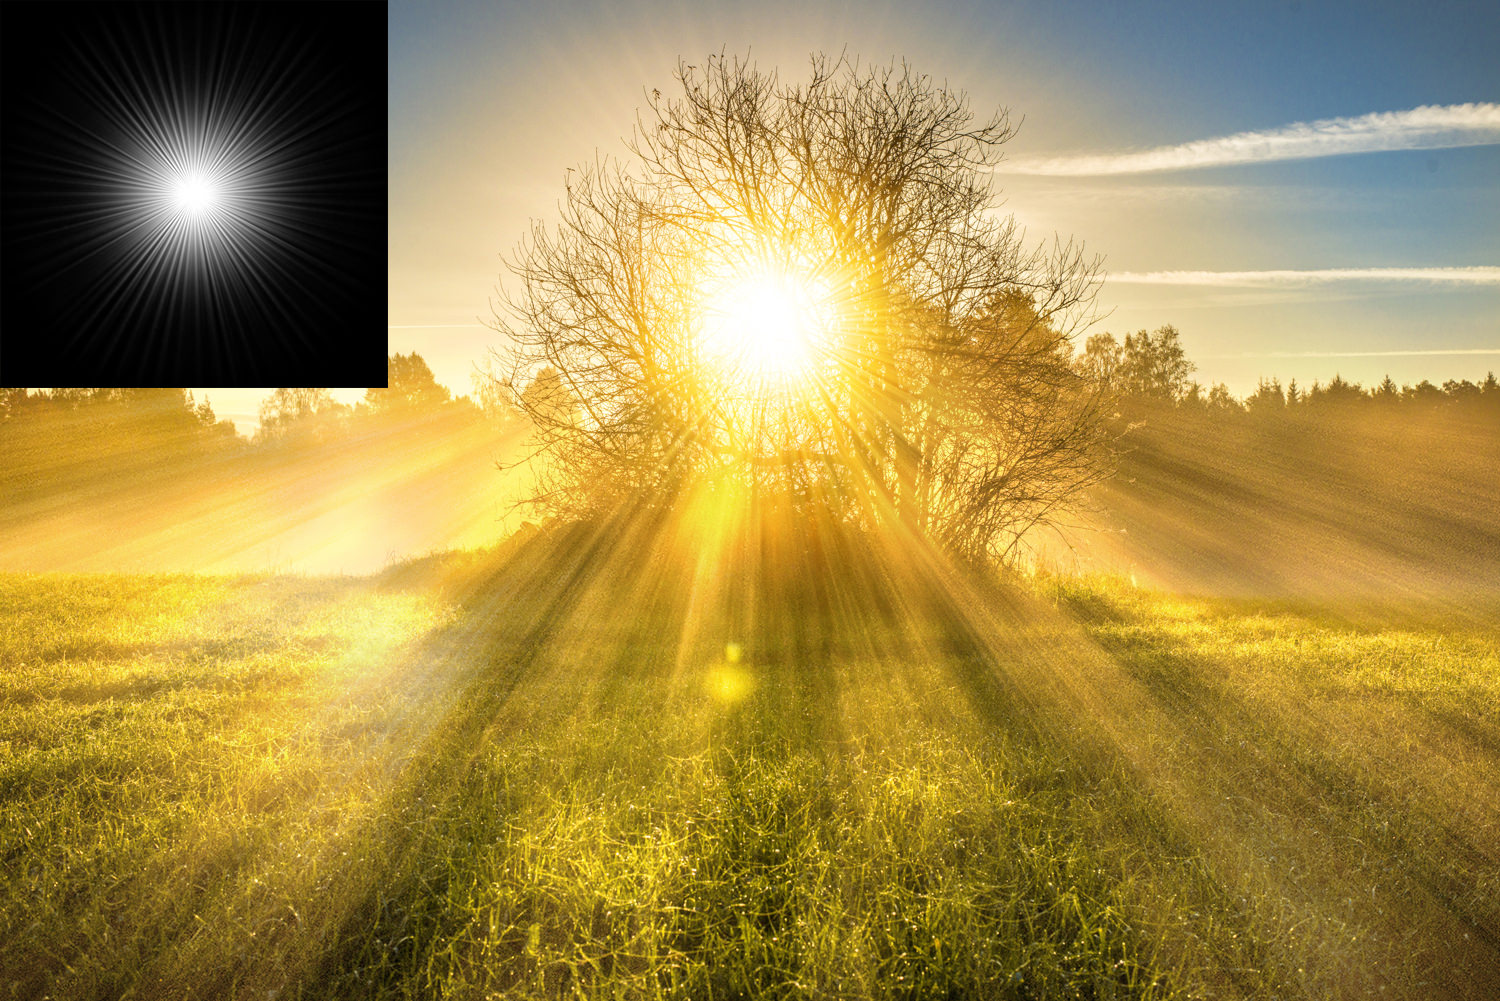
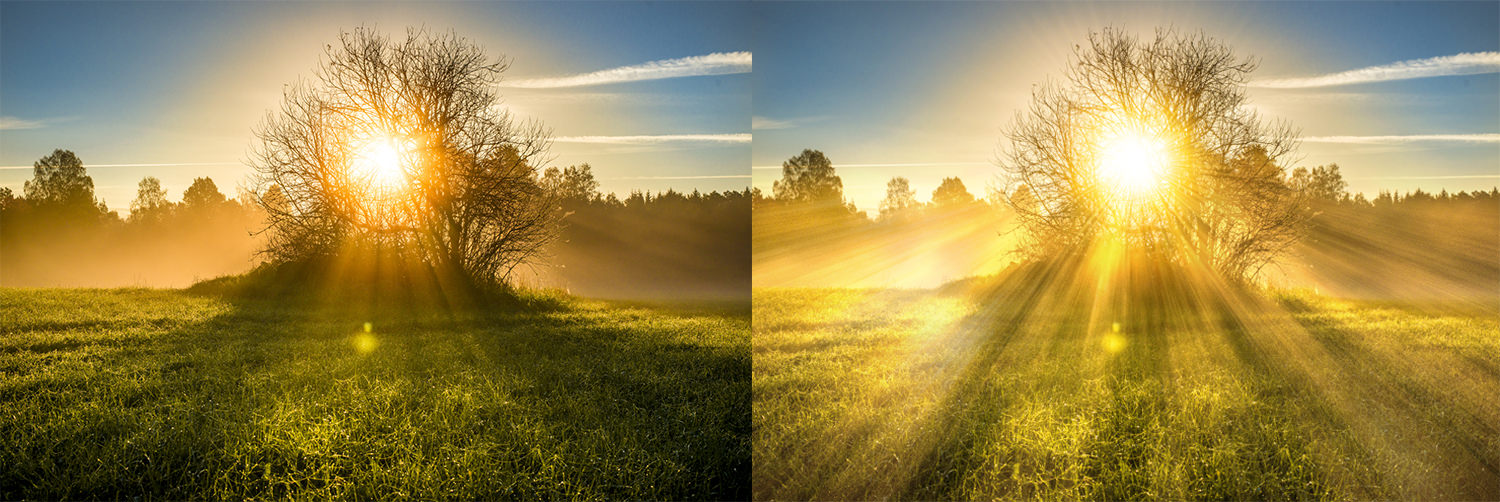
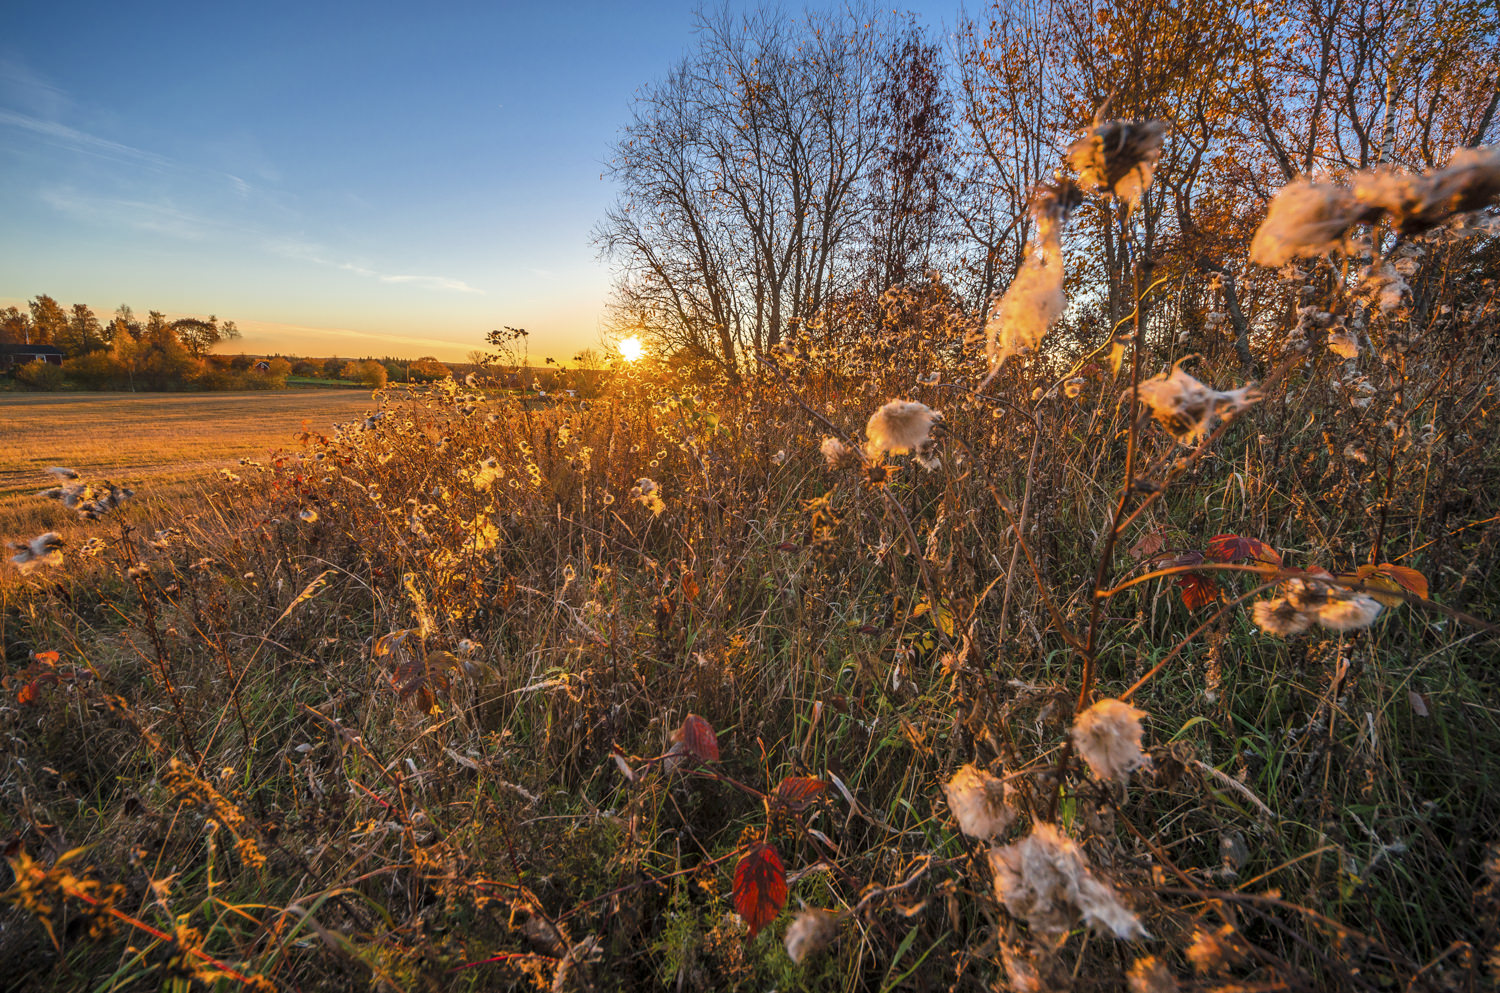
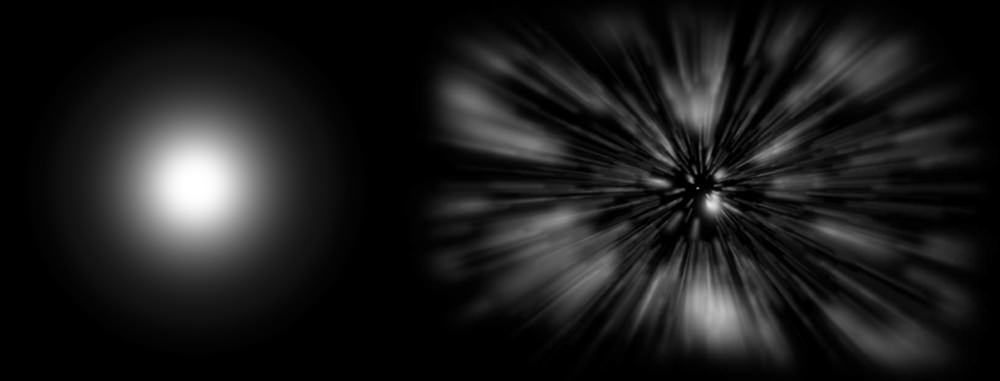
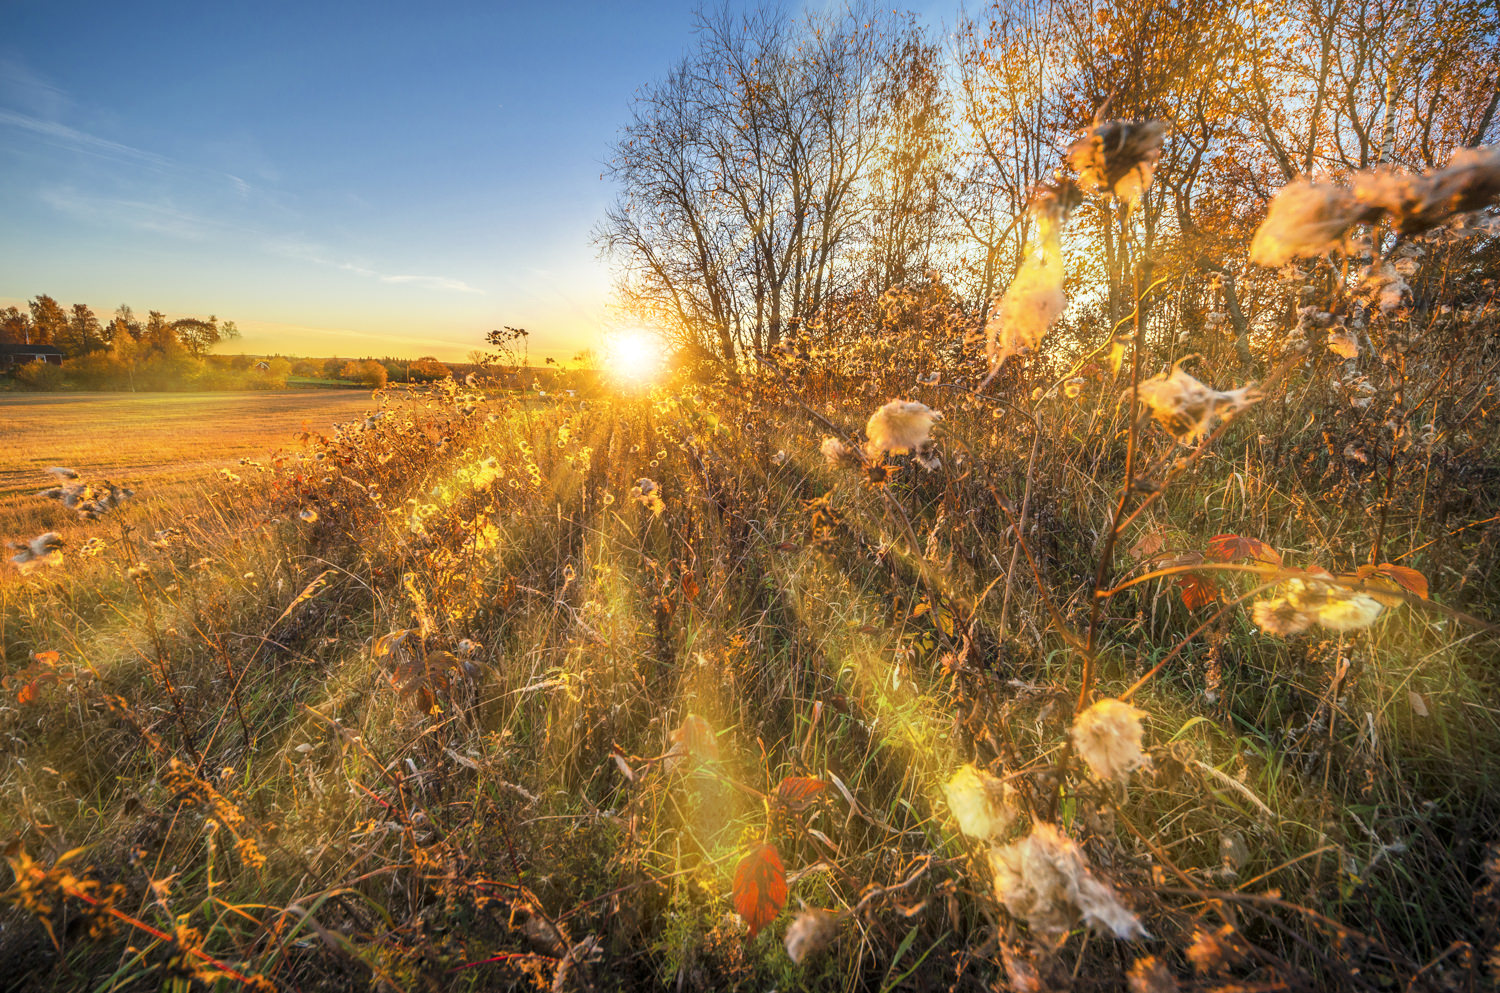
Another more advanced technique that can add more complexity and interest to the photo is to use multiple colours for one overlay. This will create a look where the colour of the light is fading to another colour. For example during a sunset the light may appear to have a different colour in one part of the image compared to another. As an example, I will use this image of a sunset over a field in Sweden. If you look closely you can see that the sun shines through a tree, and therefore I think it is a good idea to add light rays. I will choose a light ray overlay that is not too strong, and I will also add a flare to enhance the sun. I coloured the flare and the light rays to match the sunlight in the centre of the image, but as we can see this has resulted in the light ray is too yellow in the edges, it should be a bit warmer to match the ambient. To correct this I will create a new “Hue/Saturation” adjustment layer linked to the overlay (it has to be on top of the first “Hue/Saturation” layer). I will set the hue of the adjustment layer to a warmer shade of orange and increase the saturation all the way to 100. Since I just want the edges of the overlay to be effected of the new adjustment layer, I need to paint the other parts black in the adjustment layer’s layer mask. The easiest way to achieve this is to set the foreground color to black and select the “Gradient Tool”. The “Gradient Tool” must be set to “Radial Gradient” in the upper toolbar. Now we can just drag the gradient from the overlay’s centre to the edge, and thus creating a radial gradient that is black in the centre and white at the edges. Now the edges are much better adapted to the photo. To make it clearer you can see the two overlays on black below. Notice how the light rays are much warmer in the edges in the version with the second adjustment layer is applied.This technique is the same for all types of overlays, with the only difference being that you might want to use a linear gradient, or even a paint brush, on the adjustment layer’s layer mask.
Advanced Photo Manipulation Using Overlays
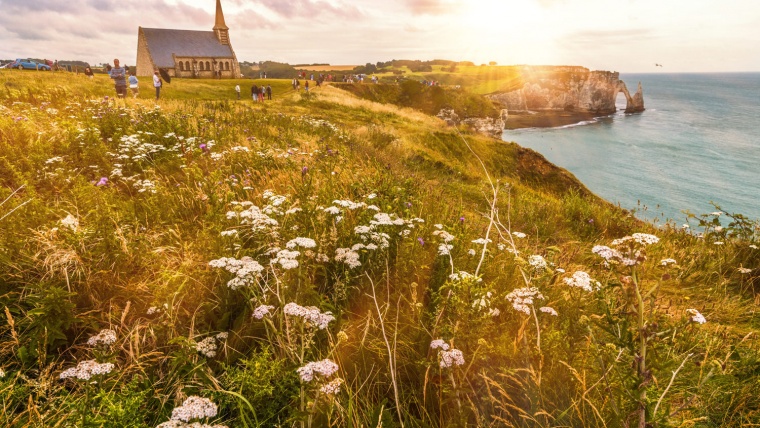
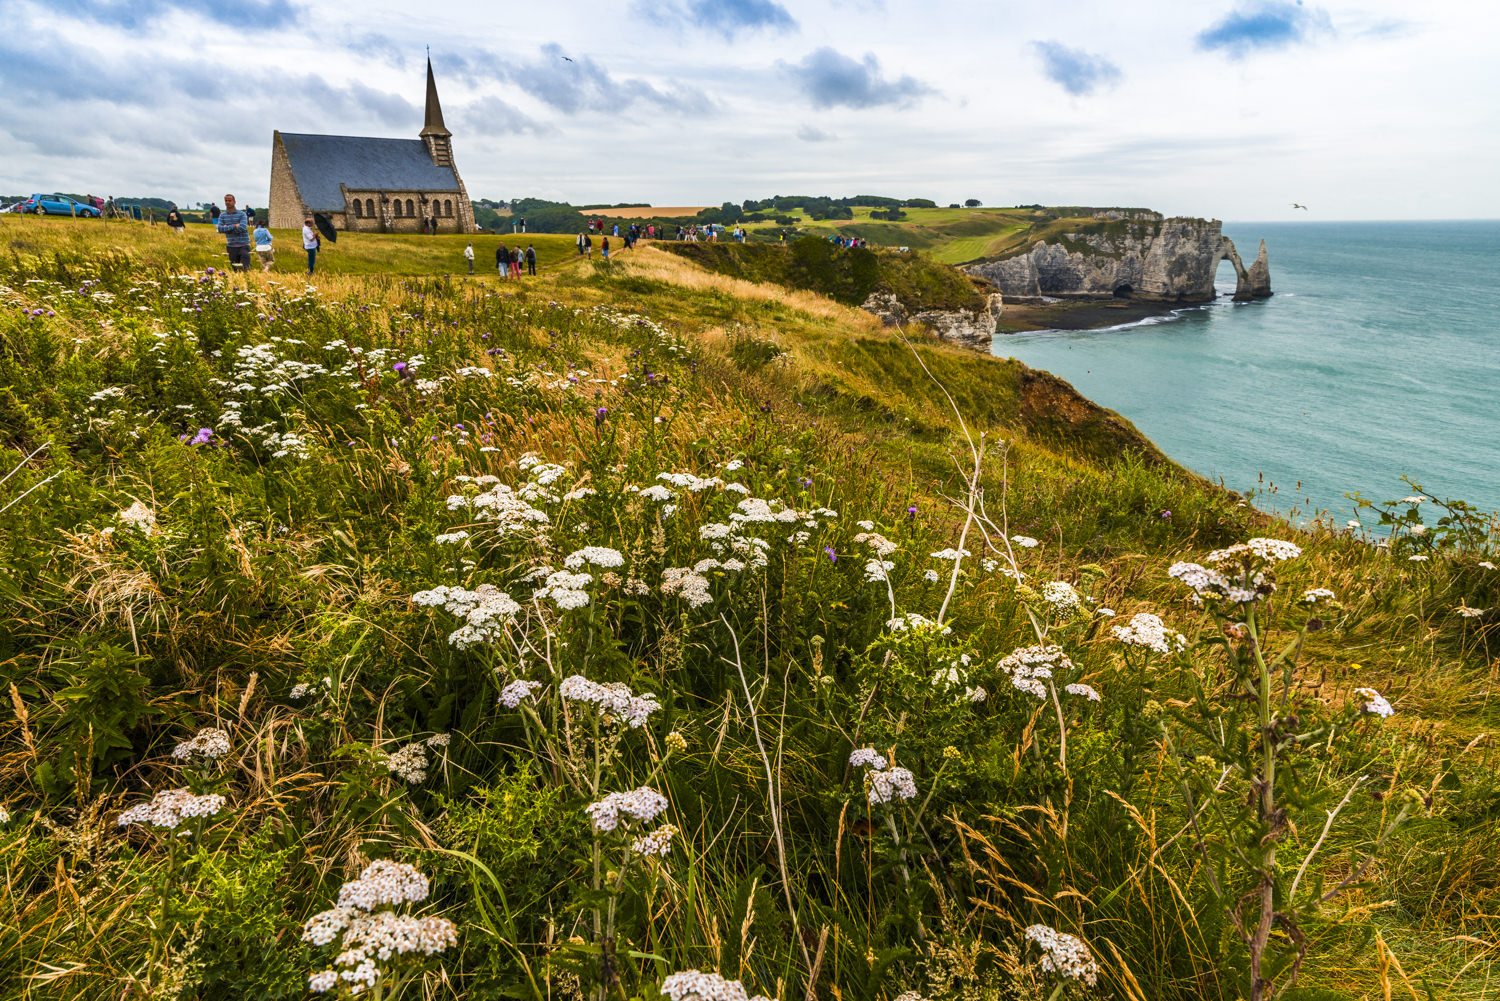
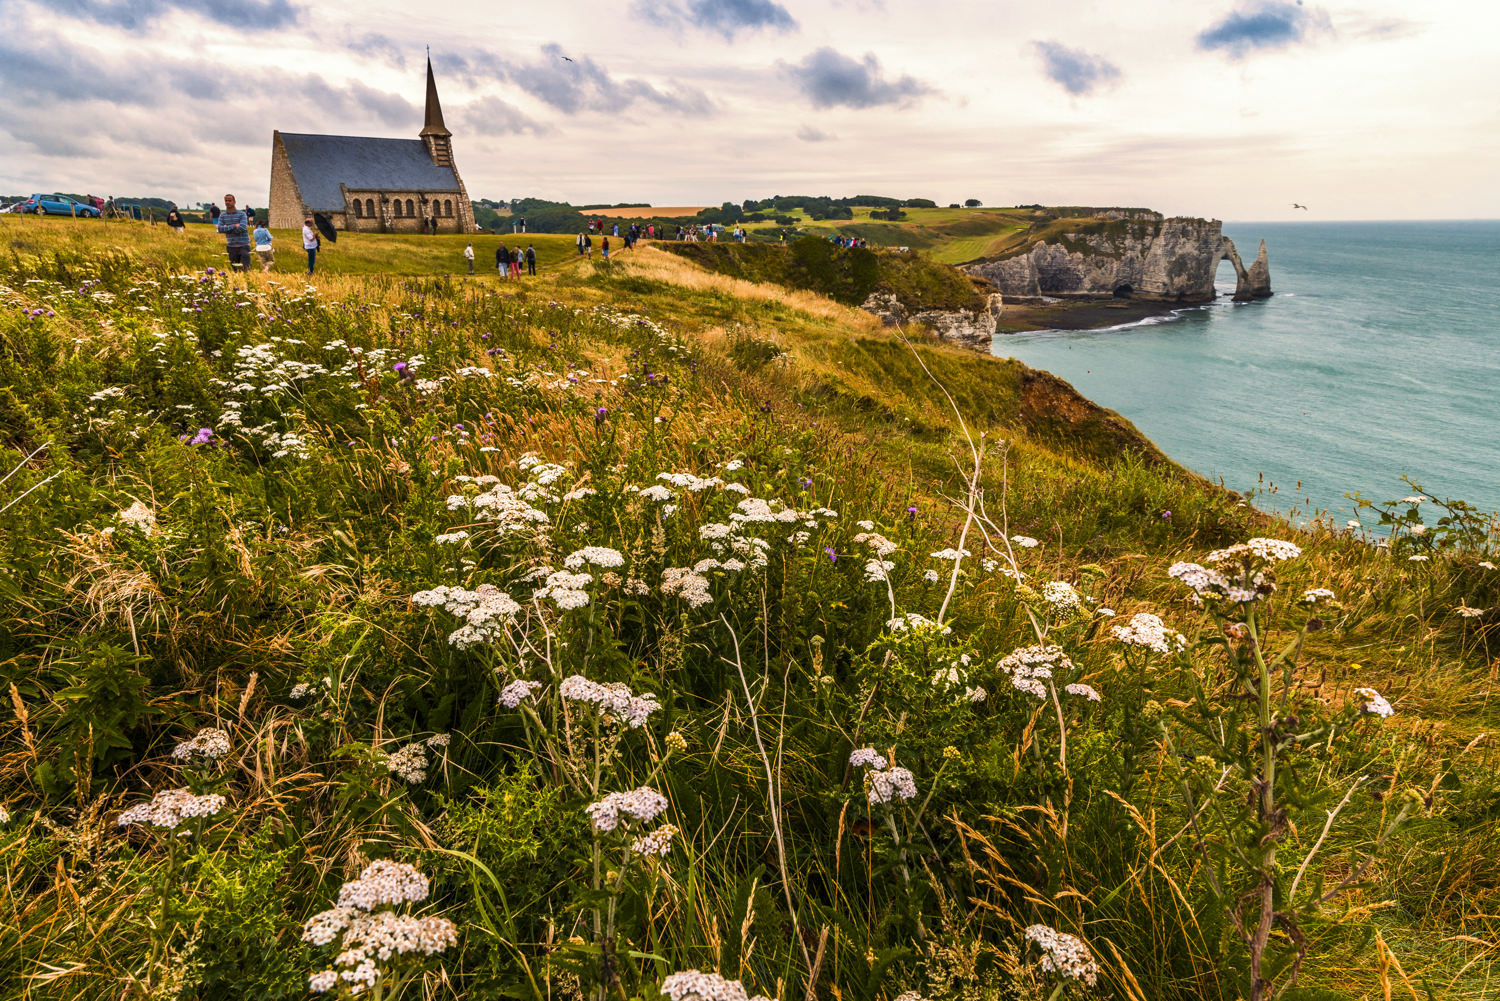
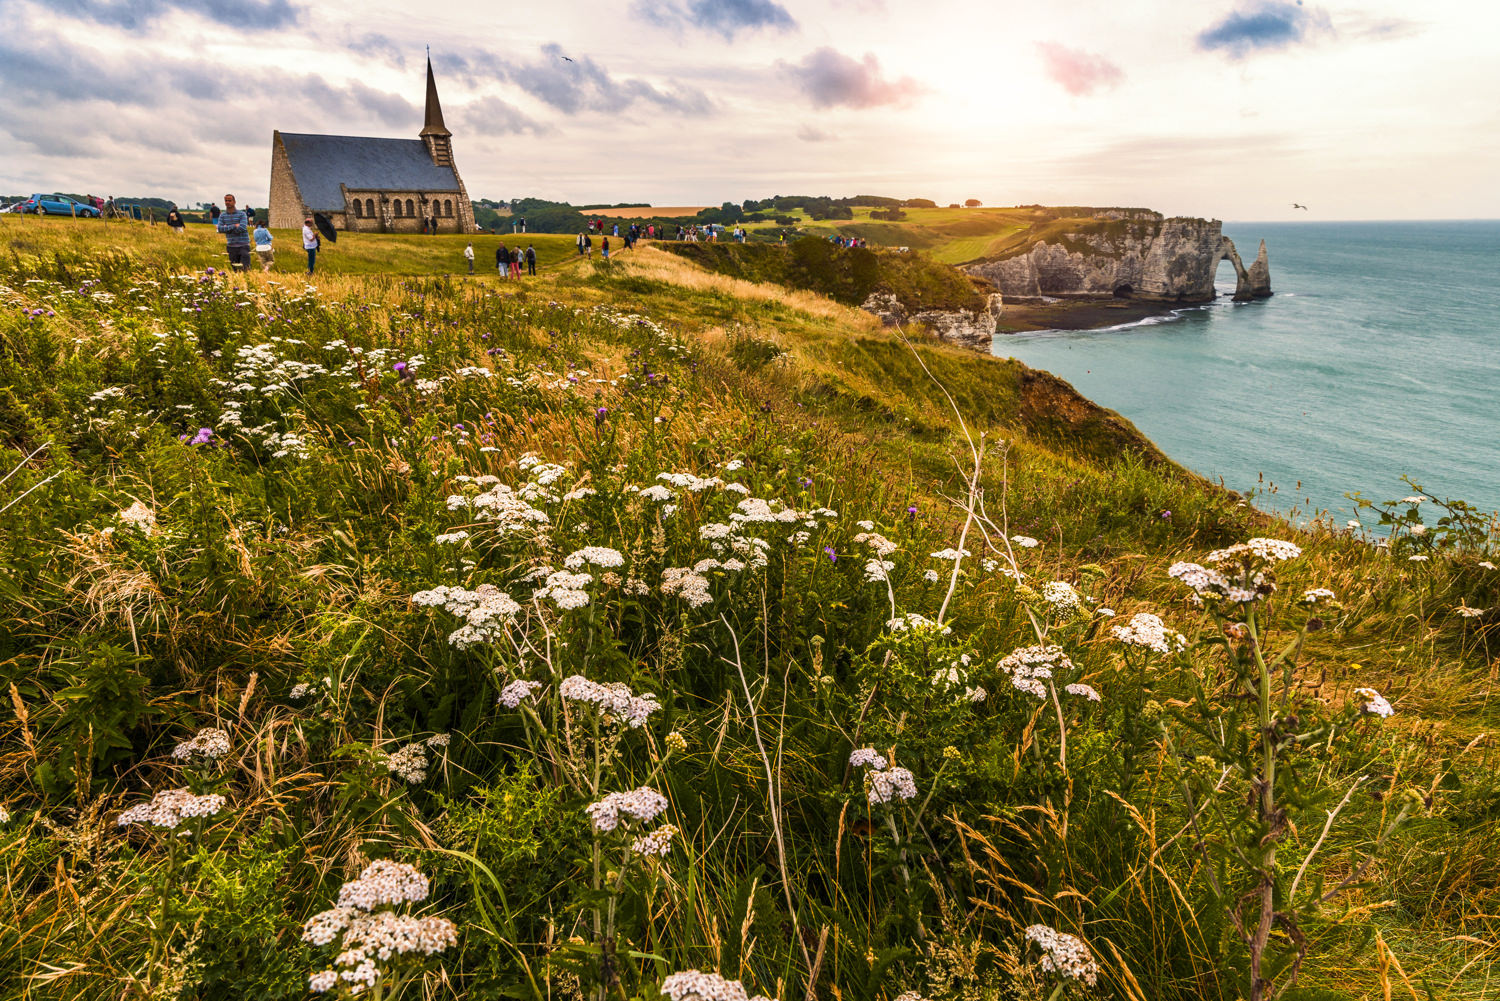
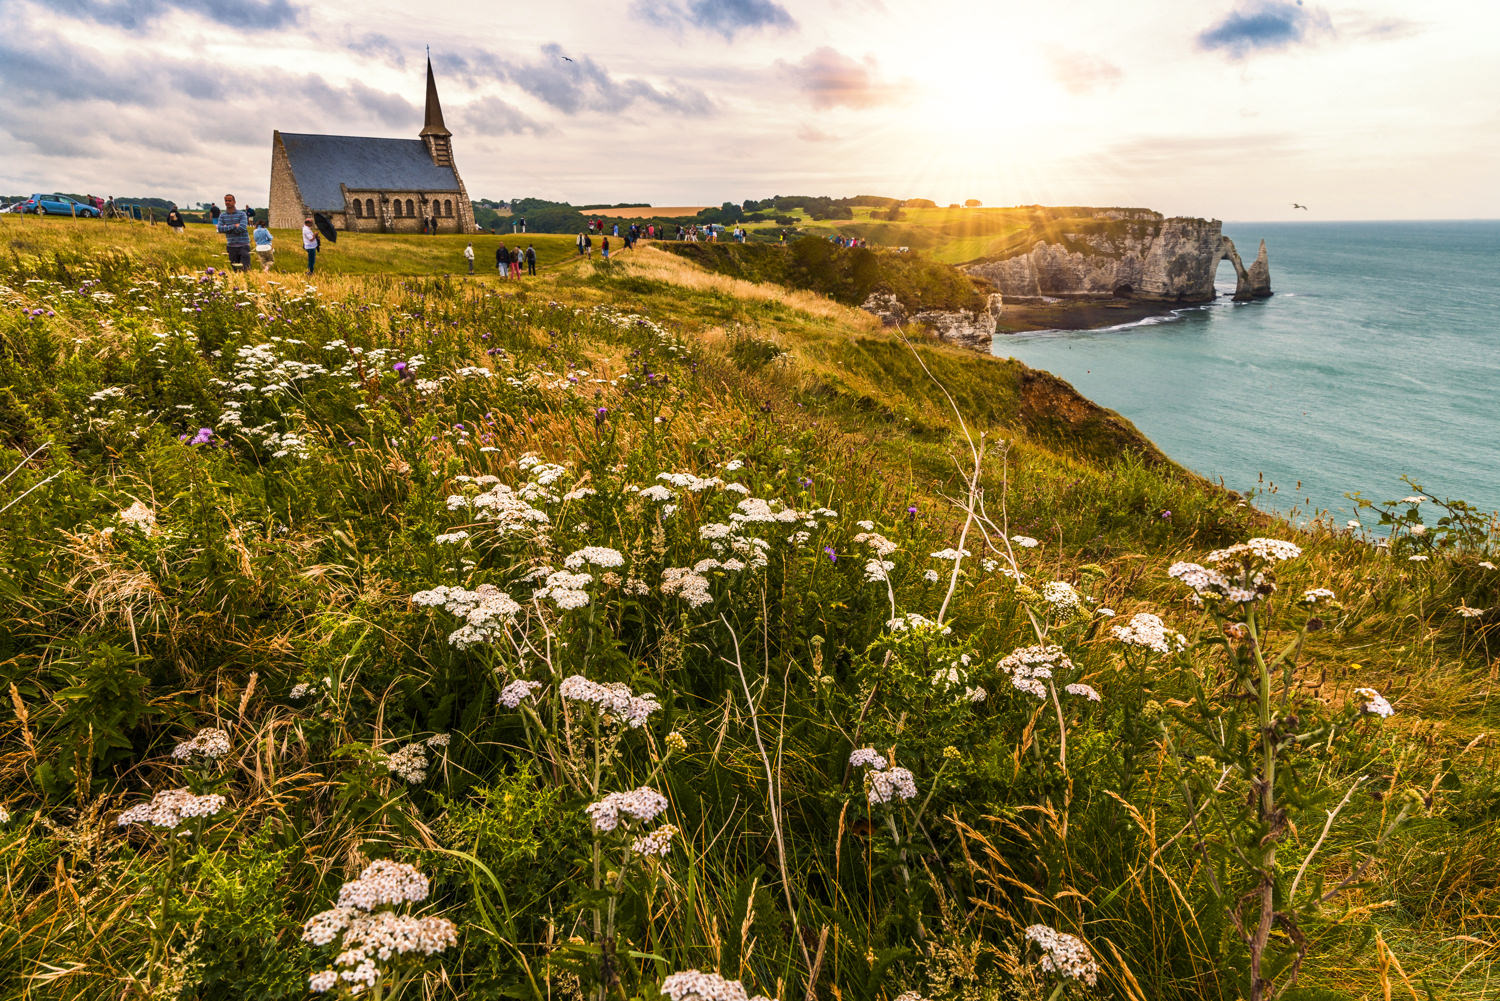
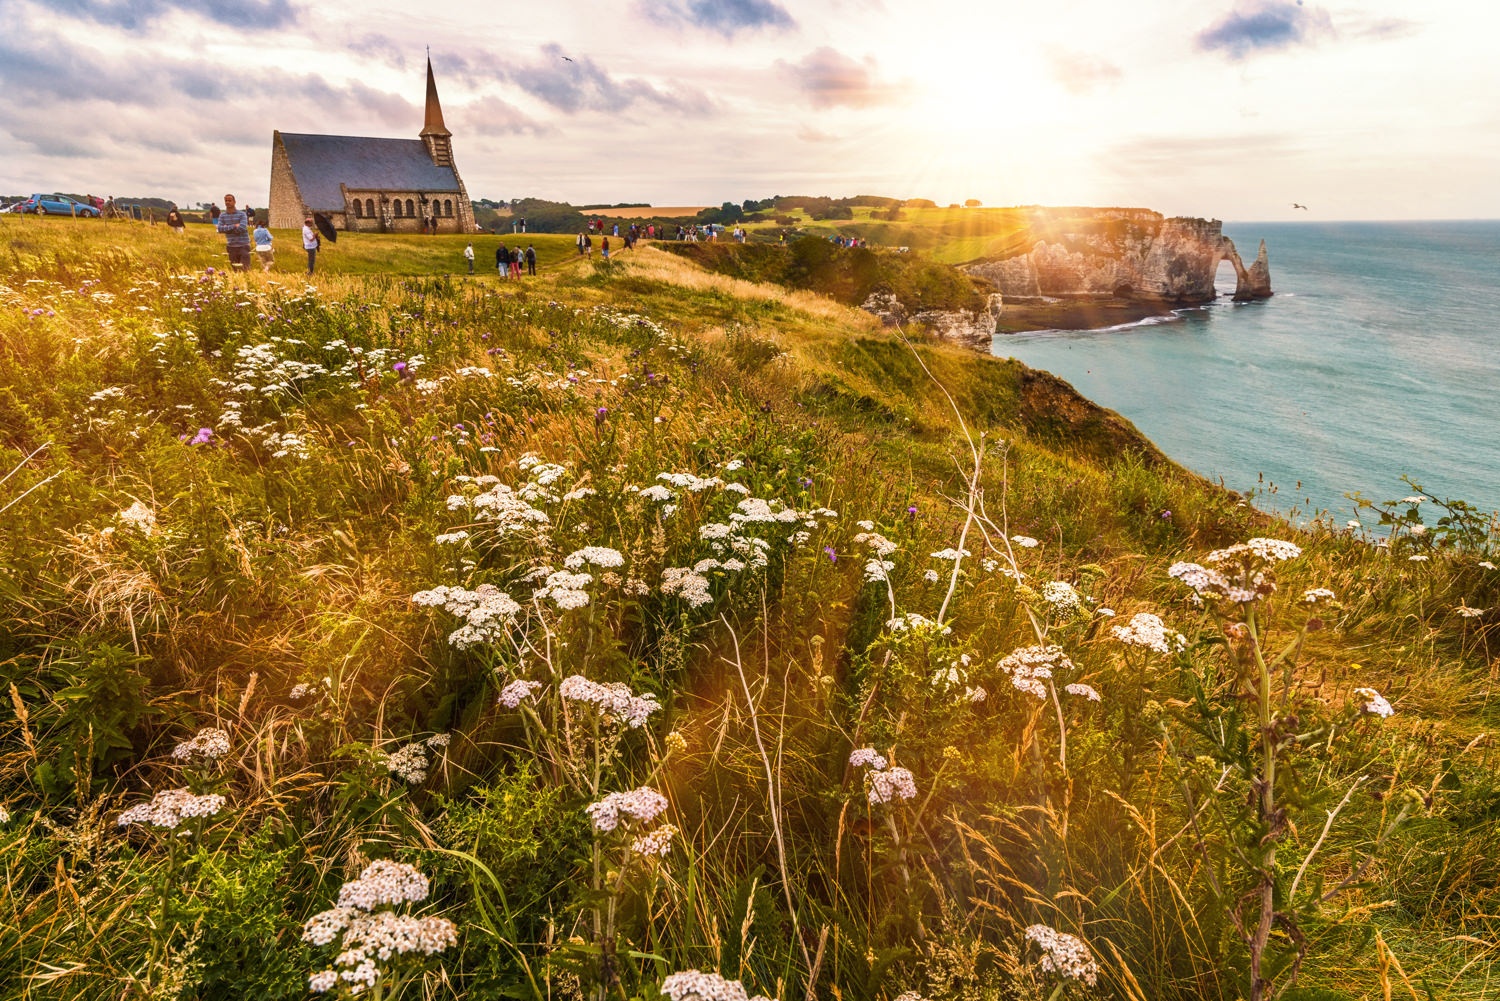
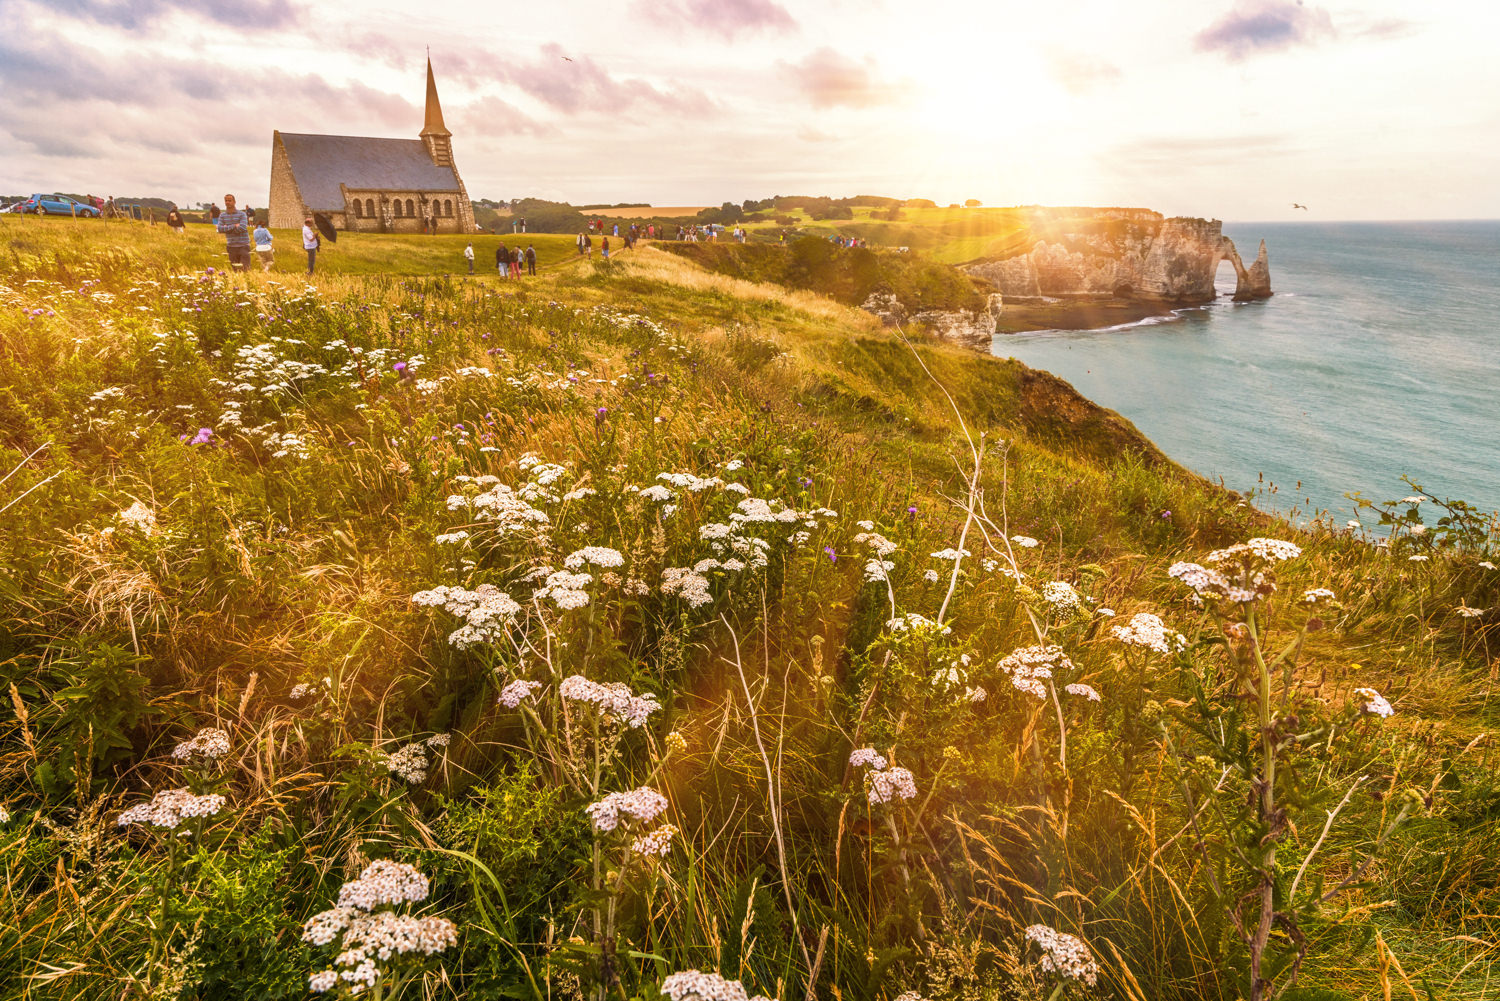
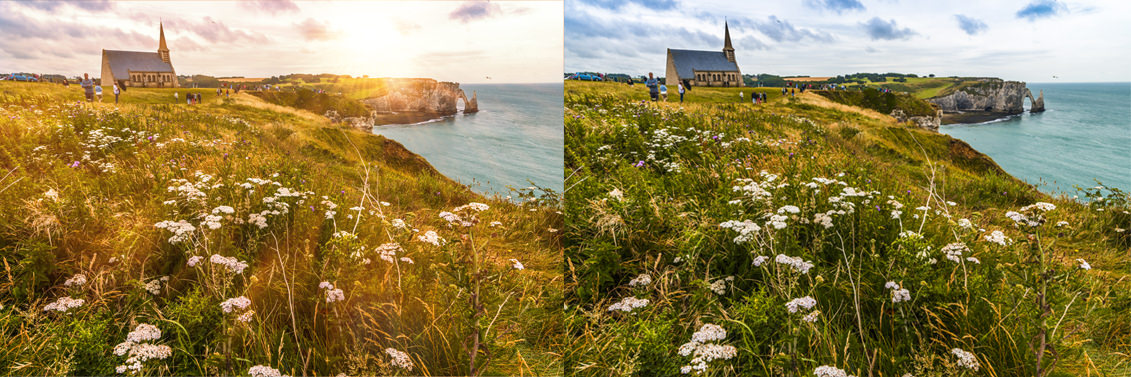
When we combine all of these techniques it is possible to creative advanced manipulation of photos, for example changing the (visual) time of day. If you were to take a photo in dull lighting conditions you can use a combination of lighting overlays and various techniques in addition to making changes to tones and exposure in the picture itself. In this manner you can turn a daylight photo into something that looks like a sunset, but actually isn’t. First off we need to select an image, and I will choose this picture from Ètretat in Normandy, France. It was a cloudy early afternoon without the possibility to stay until the golden hour. This is not saying that the photo is bad, I actually like the feel of it and the cloudy sky, but let’s try to make it look like a golden hour.Before we start applying the overlays we should modify the tones and exposure of the photo, through Lightroom/Camera Raw or adjustment layers in Photoshop. The objective is to make the tones warmer and changing the exposure (usually making it darker) to make the place for the lighting overlays that will make the photo brighter. As you can see the photo now looks a bit rough and not very much like a golden hour, but don’t worry, the reason for this is that it will just act as a backdrop for the overlays, which will brighten it up and add colours. Now we can add the overlays. The first overlay I will add is a flare, placed where I want the “sun” to be.Next, I will add a starburst on top of the flare to create a bit more of interest. Now it’s time to add light rays, to spread golden light over the image.The last step is to add a light leak to warm up the sky and make it a little bit brighter.As you can see below the difference is huge between the manipulated version and the one we started out with.
Conclusion
This guide has demonstrated a few more advanced ways to use the Sleeklens Lighting Overlays that can be useful and fun to know. These techniques can help you achieve even more amazing photos and opens up new possibilities to explore We hope that you will continue to find creative ways to use our Lighting Overlays in your pictures.
I am a photographer from Borås, Sweden, specialised in travel, city- and landscape photography as well as image retouching. At the age of 15 I got my first camera and photography as been my passion every since. The best thing I know is arriving at a new location and just being immersed by the beauty of it, and hopefully capturing some of it on camera.


 Facebook
 Google +
Comments (0)
There are no comments yet.