Tag: Depth of field

What is DOF? An introduction to one of the pillars of photography

Depth of field (DOF) is a crucial concept in photography on a technique and artistic scale. Since photography is a two-dimensional art form, depth of field gives us the ability to feel as though we are stepping into an image. Your depth of field is also known as your focus range. The “field” is the subject you are photographing, and the depth is the distance between the nearest and furthest objects that are sharp and in focus.

You might often hear of a “shallow” or “deep” depth of field. A shallow DOF has less focus around your main subject, and a deep depth of field shows more focus around your main subject. The aperture easily controls the depth of field. Aperture is made up of f-numbers (f/5.0, f/16, f/22) and is also known as f-stops. The higher the f-stop number, the deeper your depth of field will be and the smaller the f-stop number is, the more shallow your depth of field will be. Aperture also has an effect on your exposure. The numbers represent the lens opening diameter size, and that will also determine how much light passes into the camera. The range starts at a larger diameter size and works down. The smaller the f-stop, the larger the diameter of the lens opening, this also adds more light. The larger the f-stop, the smaller the diameter and the less light will pass through.

The easiest exercise to demonstrate aperture and how it affects your depth of field is to set your camera on a tripod and find a subject that shows a foreground, middle ground, and background. A tripod is not only important in this because you want to have a continuous shot but because your shutter speed is going to start slowing down to compensate for the light as your DOF goes up. Set your camera to AV which is aperture priority. This will let you change the aperture how you please and lets the camera choose the shutter speed and ISO for your best lighting.
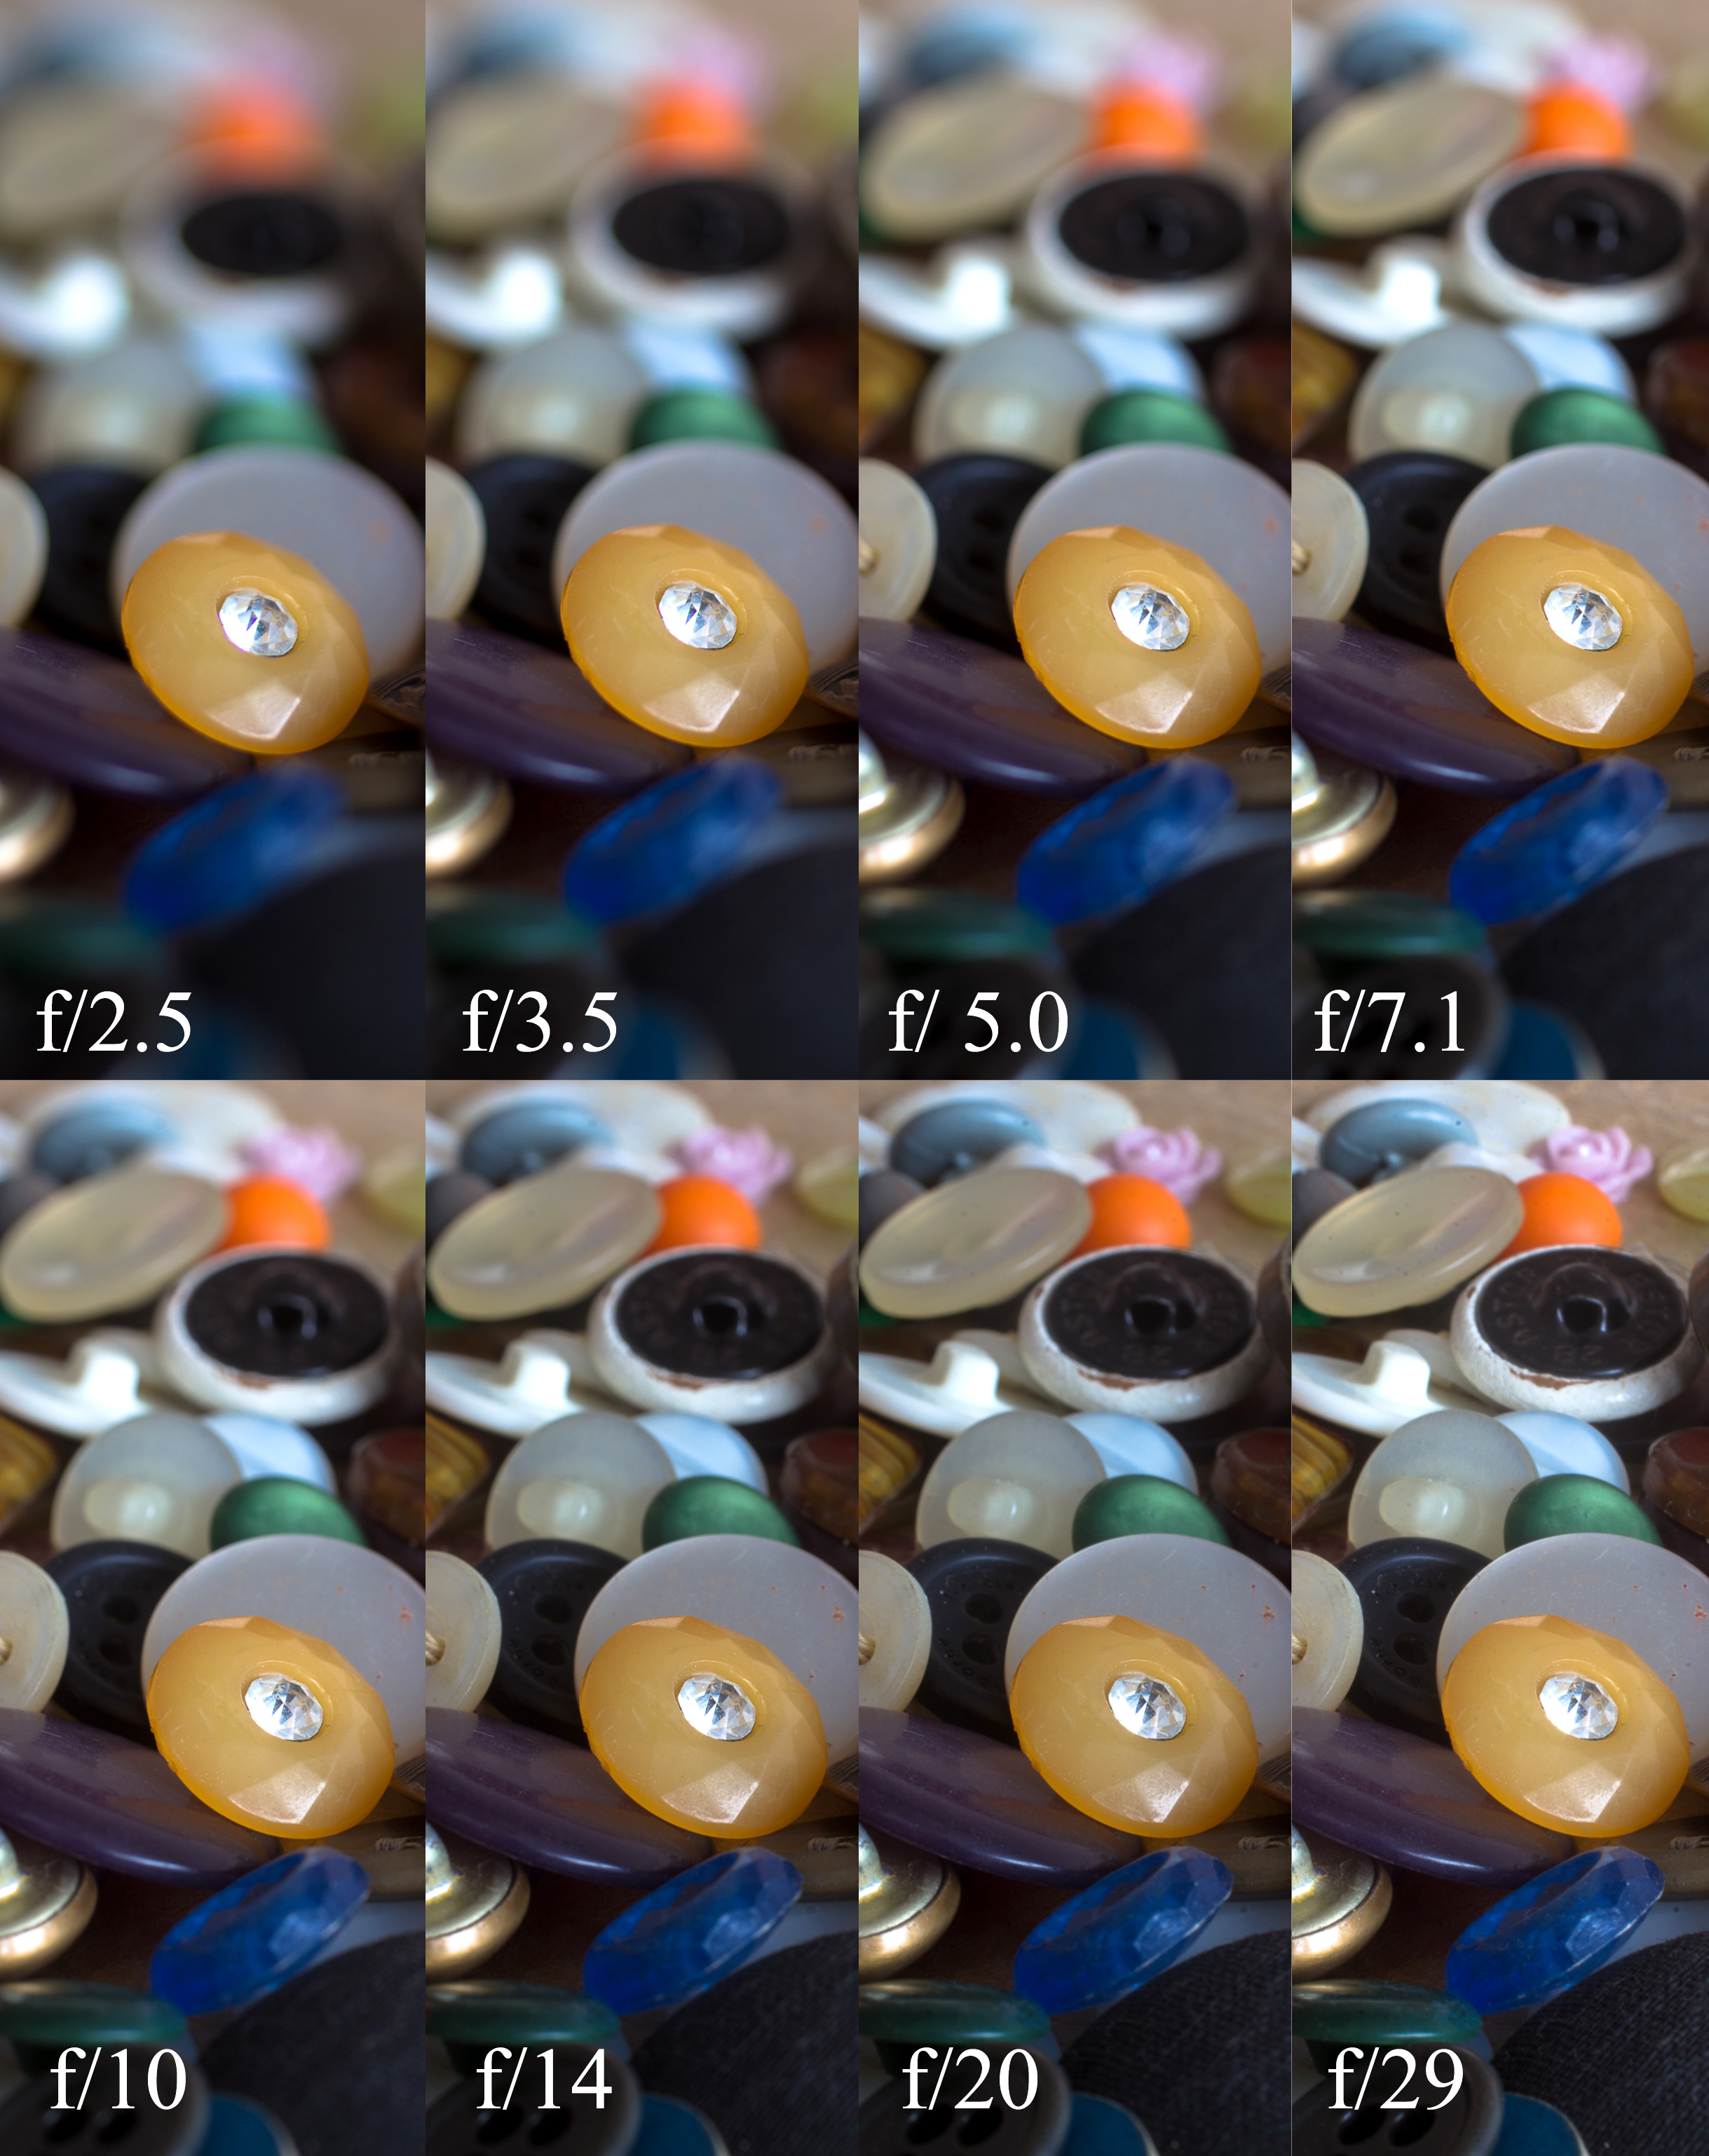
apeture

You can also change your depth of field based on your camera lens; this can get a little more tricky. The more you zoom, the more depth you will receive because it is also compressing your image and you will have more of a focus on your field rather than use a wide-angle lens. Using a wide-angle lens is great if you want a deeper depth of field and more in focus. The higher the focal length, the shallower your depth of field will be because it is compressing your image.

How to DOF in your photography

Shallow depth of field is very common in portrait photography, wildlife photography, sports photography, and detail shots. Portraits are best with a shallow depth of field because it blocks out any distractions which can also apply to wildlife photography. Another good reason to use a low aperture is that it will add more light in. This will give you the ability to use a faster shutter speed to catch candid moments and a great tool to have for fast sports photography.
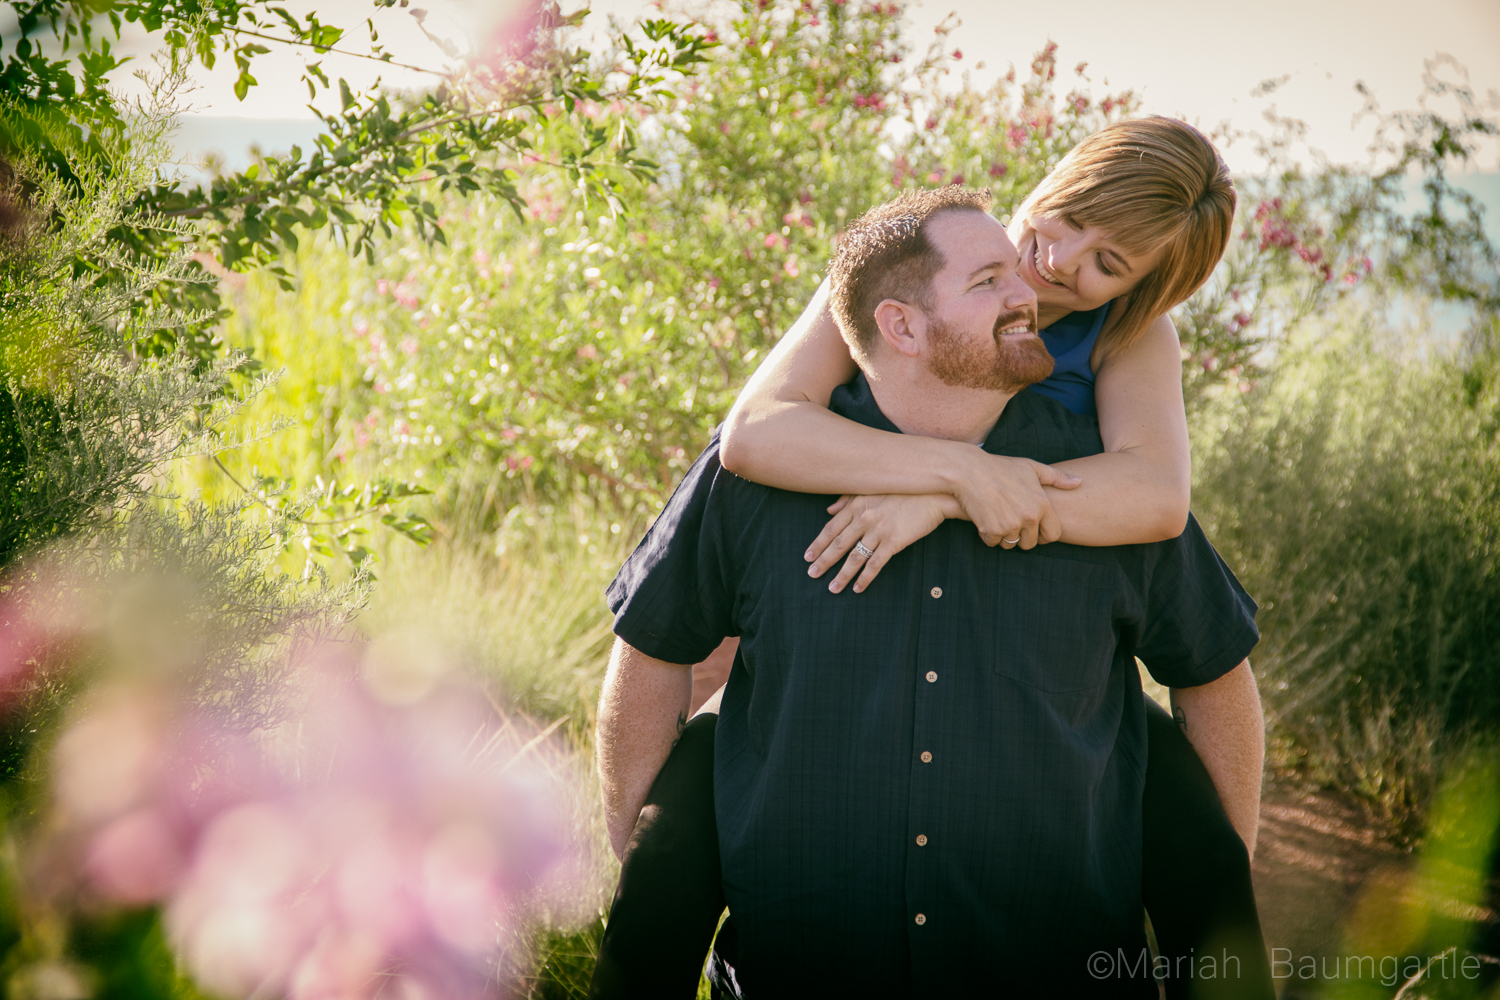
mariahbaumgartle_shallowdepthoffield

A deeper depth of field is common when photographing a landscape and architecture. When shooting a landscape, you will want to have your foreground, middle ground, and background crisp and in focus. The higher your aperture is, the slower your shutter speed will be to get a correct exposure so always be prepared with a tripod while shooting landscapes in lower light to avoid any camera shake.
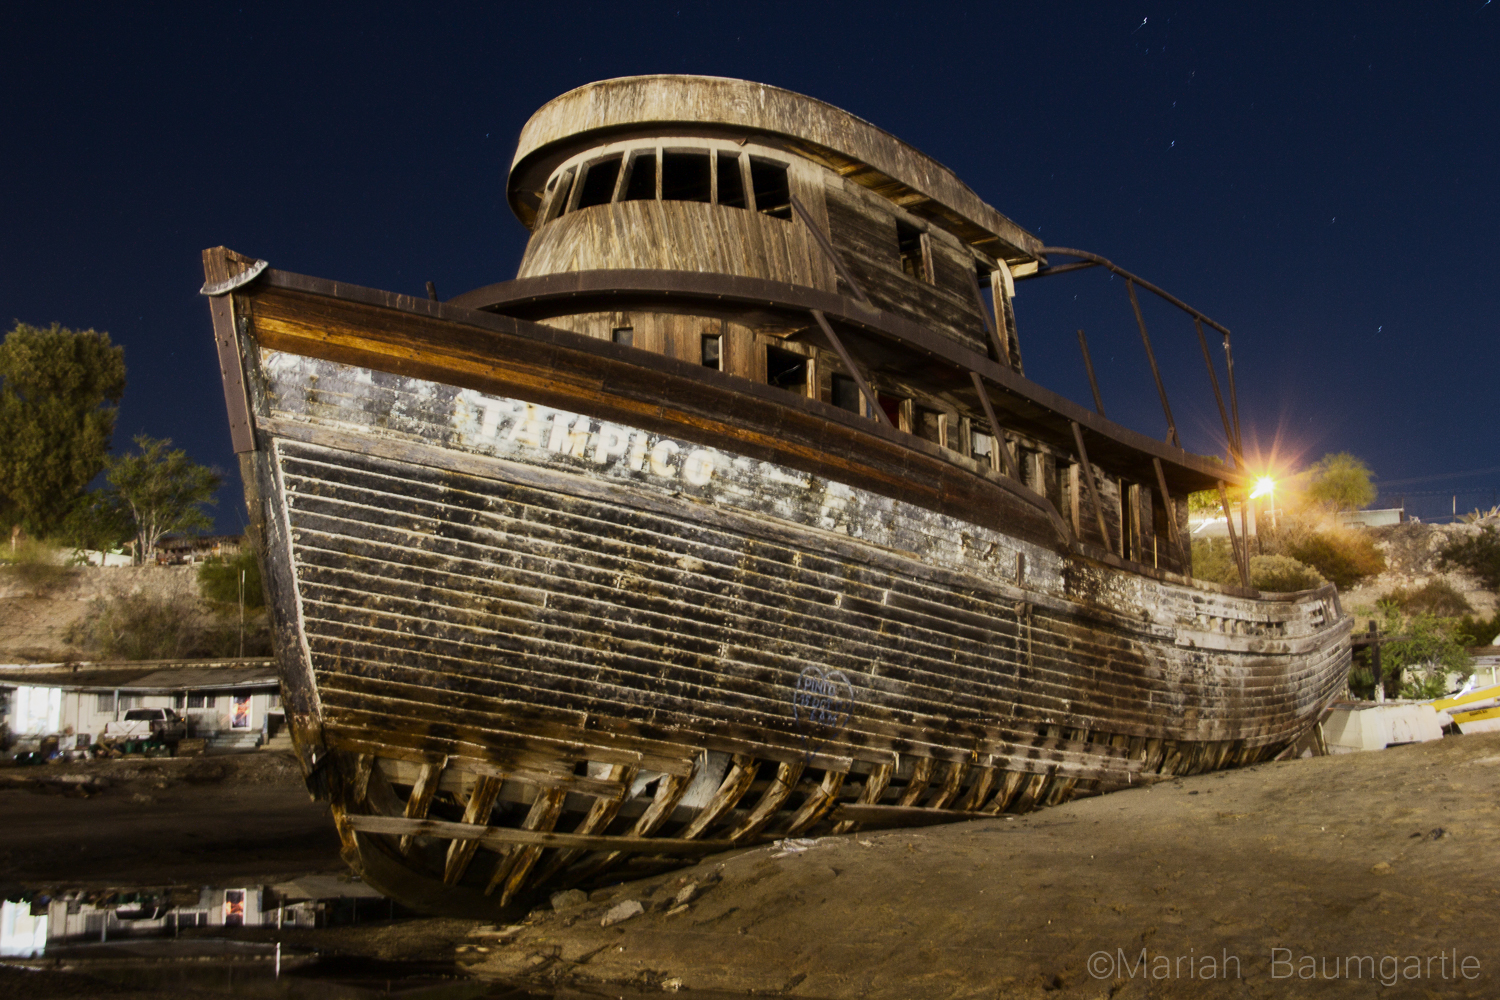
mariahbaumgartle_deepdepthoffield

Depth of field can give you as much or as little texture that you are looking for in an image as well; this comes in handy while shooting macro photography. You can see in this example just how much the background texture changes from 2.5 to 5.0.
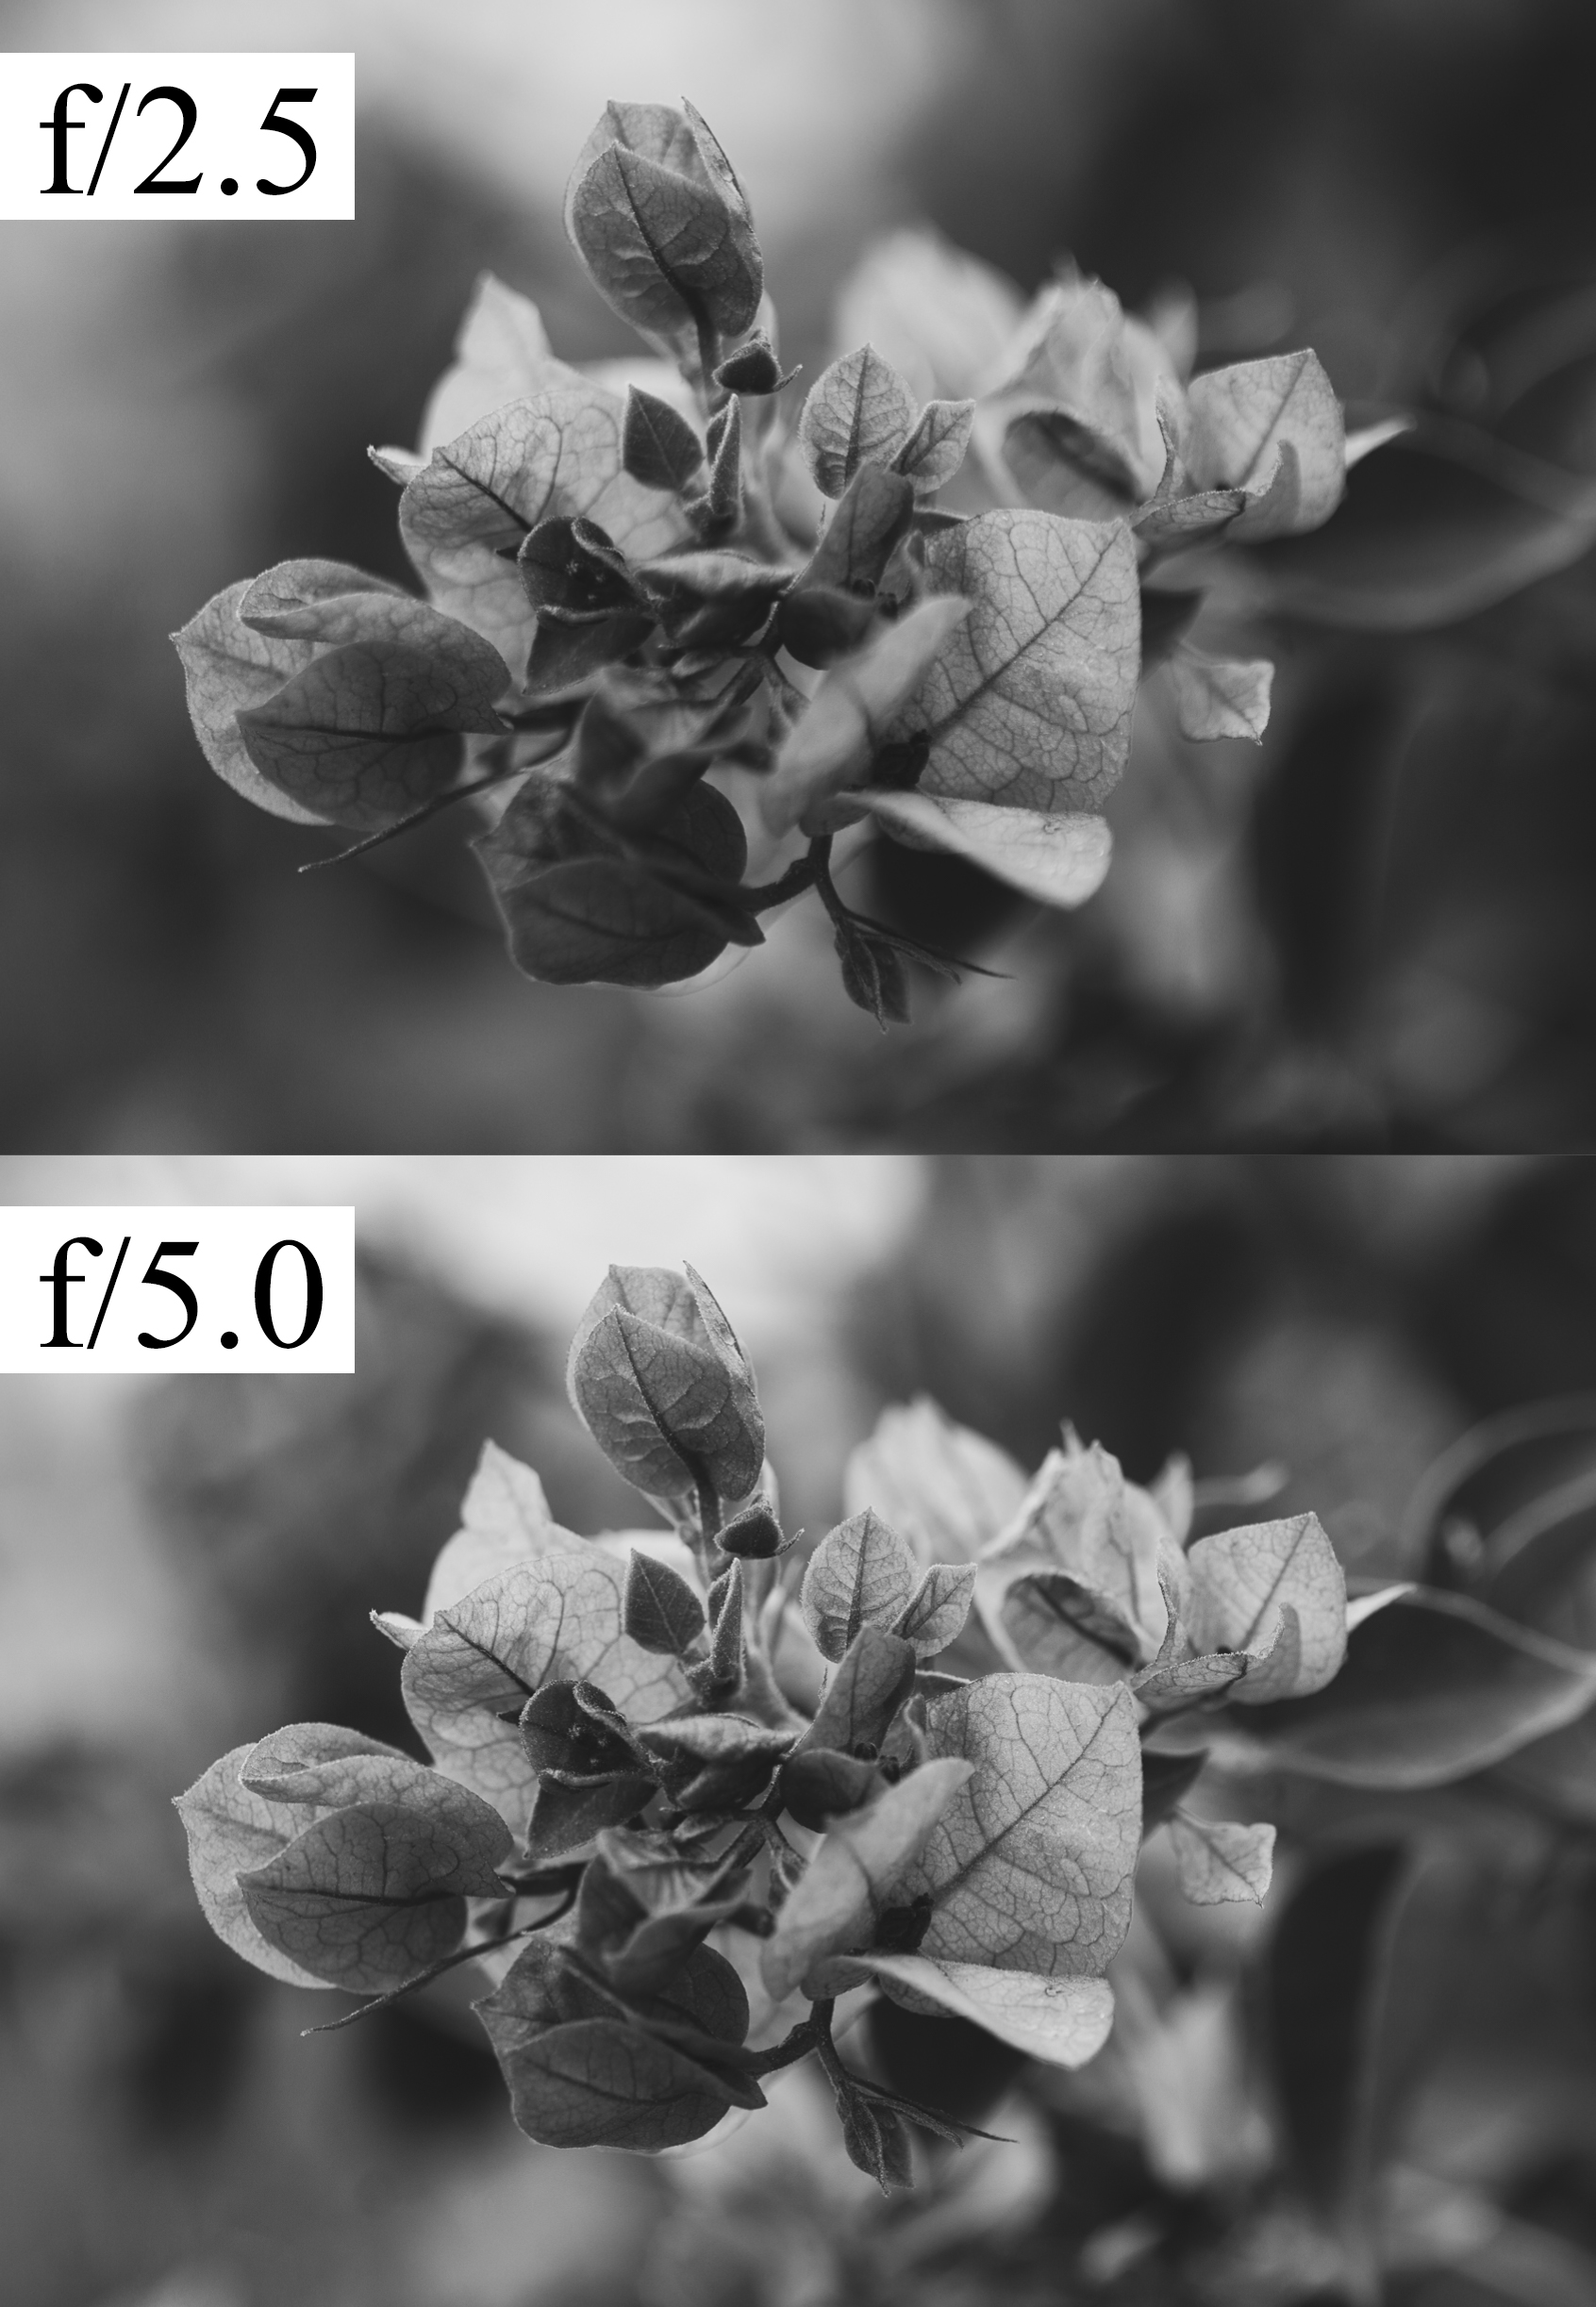
aperture

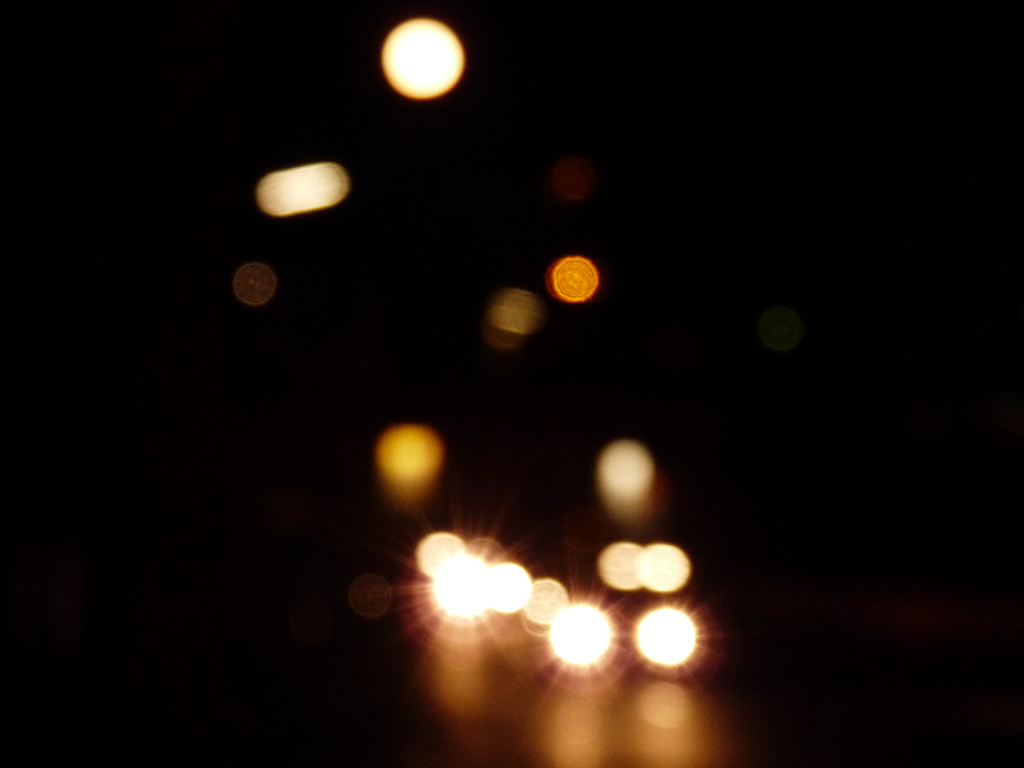
You can also use shallow depth of field when learning and working with bokeh, a popular style in fine art photography.

Depth of field is only one piece of the exposure triangle but, as you can see, it offers a lot of tools to make your photography stand out.

Taking Stock – Building up a bank of multi-purpose photographs

When blogging, writing or creating pages for the web finding good quality photographs that illustrate what you’re writing about, and aren’t restricted by copyright laws, can be difficult. However, if you’ve got a camera handy (even if it’s just a smartphone) there are plenty of ways to capture attractive images that you can use to your heart’s content without worrying about the legal implications.

Below are a few things to keep in mind that will help you if you find yourself stuck for a key image to insert into your copy.

Pictures of pictures

Sometimes just a picture of a picture can make an interesting image in a blog post. Think colourful and think bold lines. Simple designs can work well, especially on a white board (or even a chalkboard) which can lend images an academic look. Even if it’s just a hand-written message it can look artistic if you choose your medium carefully. And if you need to add a little extra something to make the image pop there are plenty of filters that can be quickly applied in Lightroom, often just a little bit of vignetting can make a big difference.

Taking Stock Photos

When taking pictures of pictures a good camera is not necessarily essential, depth of field won’t be an issue and with simple designs, you don’t have to worry about capturing a lot of fine detail. And even lower quality images from smartphone cameras can be brought to life in Lightroom.

Think outside the box

Light bulbs can represent good ideas, interesting light trails could be linked to anything vaguely futuristic, and computer screens can look if intriguing if you get in close and capture the pixels. Anything that’s colourful, clear, and simple can make great pictures and create interest. Post-it notes are always a good option, as are alphabet fridge magnets. Sometimes cliches are unavoidable but are still better when shot right than low-quality images in a blog post.

It’s worth remembering that some pictures will come out well with a basic camera, at least well enough to sit on a web page, if the lighting is good. Others will require a DSLR to capture or create really interesting effects like light trails, depth of field, or bokeh.

With a DSLR it’s possible to create all kinds of abstract images by experimenting with longer shutter speeds and different apertures. For example, longer exposures can be taken during the day, without ending up with a completely white image, by using a higher aperture value. This will create a smaller hole for the light to travel through, so you get a longer exposure but with less light.

mjm-copywriting-images_2000px_002

The night is the perfect time to take light trails – head out to any busy road and set your camera up. The lower the shutter speed the longer the light trails. Use bulb mode to leave the shutter open until you press the shutter release again.

For any shots where you’re leaving the shutter open for longer than 1/30s, it’s worth getting a tripod to ensure you don’t get any camera shake.

Be obvious

Some things that can be photographed are simple and less abstract. A padlock with a key in it could be used in an article on security, while close-up shots of tech like a USB stick is a solid general image for a technology blog.

taking-stock-usb-photo-2000px_001

When taking images of everyday objects try to make things look a little more professional by creating a narrow depth of field. The above picture was taken against the screen of my laptop, displaying the following graphic:

matrix-background

The background becomes unrecognizable when out of focus and shows that sometimes all you need is a computer screen to create a more interesting image.

Don’t worry about resolution

Although the high-res imagery is important for banners which stretch across a website, most blog posts won’t feature images which are more than 500px wide, 1000px at most. Even a camera with a 1.2mp sensor will offer enough resolution for the web, the quality of the sensor and the way the camera processes the image will have just as much affect on the quality of the end result.

taking-stock-low-res-is-ok-2000px_001

The above image was taken with a smartphone camera, and when displayed within a blog post at the same small scale it doesn’t look much different to the first image taken with a DSLR. The vignetting added in Lightroom also helps to make it look more professional and less like a smartphone shot.

Change what you can control

If you’re taking images on the fly, or are in a hurry, remember to focus on changing what you can control. You might not have a proper lighting set up but simply thinking about moving your subject to where the light is better can be a great help. Areas close to windows will allow you get better shutter speeds though if the light is too direct, or there are strong shadows, this can be just as dangerous for an image as too little light.

sleeklens-lightbulb-moments_2000px_013

Learn to enjoy improvising interesting backgrounds. If shooting on a small scale it’s not hard to find everyday objects that can be used to make a backdrop more interesting. Colourful paper, fabrics like cushions, and anything with an interesting texture can work and lots of things can be disguised by taking advantage of a narrow depth of field and making sure they’re out of focus.

Next time you’re creating a blog post or article and don’t have an interesting image, or need to spice up a post on social media, don’t panic. Even if you’re writing about something that’s impossible to stage and recreate with your resources, thinking about how they can be represented in an abstract way can lead to some interesting and creative shots.

Depth of field – A general overview

Photography is inherently two-dimensional. After all, we are capturing a scene into a 2D sensor or film to later be displayed in a screen or any material where we might print it. However, the original scene is actually three-dimensional, and the final image will in fact contain part of that 3D information and will display it in ways that allow our brain (used to deal with a 3D world) to interpret the different layers or distances involved.

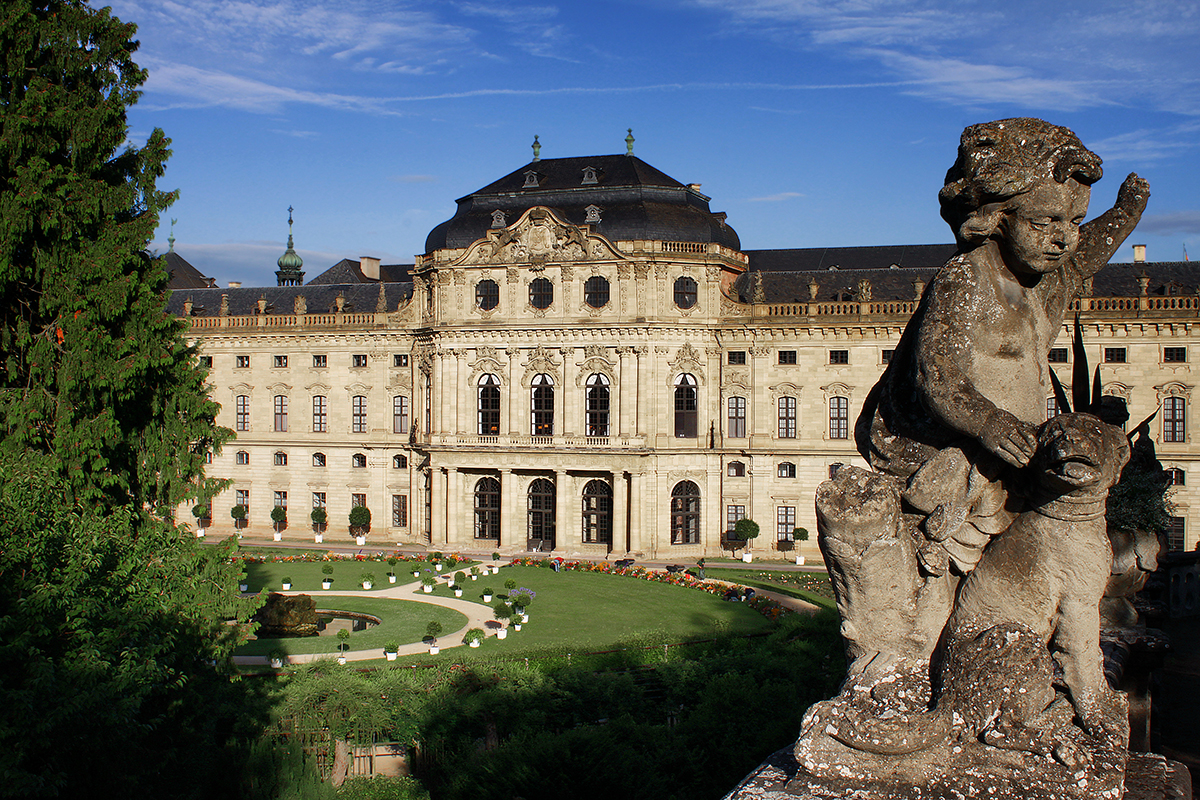
There are two main elements in a photo that can produce this sense of depth. The most natural one is perspective, where the relative difference in size of objects, together with the knowledge of proportions our brain has, allows us to automatically interpret the relative position of objects within an image, like the statue and the palace in the following image of the Residenz in Würzburg.

websites01

The fact that our brains already possess information about the relative size of a statue with respect to a building (and of trees and plants for that matter), automatically gives a sense of depth and, even when looking at a 2D image, we are able to capture the 3D nature of the scene.

The other element, a more subtle (and you could say artistic) one, is the depth of field. Broadly defined, depth of field is the depth in a given scene that is focused in an image of that scene. This means that everything that falls outside the region of interest will be blurry or out of focus.

In general terms, you can classify a photo as having a narrow or a wide depth of field and, while the creation process is a highly subjective one, there are some general rules photographers follow when using one or the other option. But let’s first take a look at how to control the depth of field in your photos.

Depth of field and aperture

The technical aspect of controlling the depth of field of an image is in fact very simple. It all comes down to the aperture you set. The wider the aperture (the smaller the f-number), the narrower the depth of field. Similarly, the narrower the aperture (the larger the f-number), the wider the depth of field.

DSCN1995_withsharp

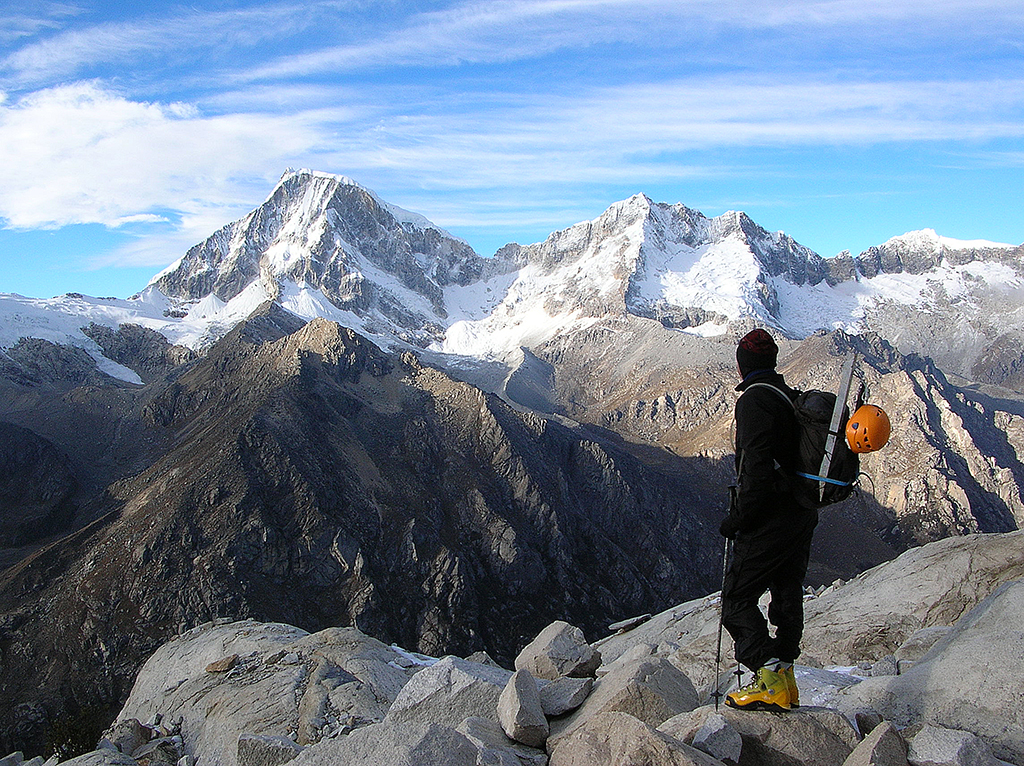
The use of different depth of field configurations is a great way to drive the viewer’s attention to where you want. It is for this reason that most of the landscapes are captured with very wide depths of field (usually apertures of f/16 to f/22) and portraits are captured with very narrow depths of field (around f/2.8 or even less). Most of the times, when taking a landscape photo (as in the photo above) we want to capture everything contained in the composition, while when capturing a portrait we want to avoid any distraction and center the attention on the subject.

modes3

Why does this work?

There is a clear reason why the depth of field is directly related to the aperture of the diaphragm of your camera, and it can be visualized with the help of the simplest camera model that can be built, the pinhole camera.

A pinhole camera is basically an opaque surface with a tiny opening on it, through which light can pass and be projected on another surface located in the back at a specific distance (the focal length). In order for the image to be projected, no interference from other light sources can be present and thus the pinhole camera is usually depicted as a closed box. The camera does not contain a lens since the small opening acts as one with a very narrow aperture. This means, as I mentioned before, that the projected image will have a very wide depth of field (in fact, a pinhole camera can have equivalent f-numbers of about f/100!).

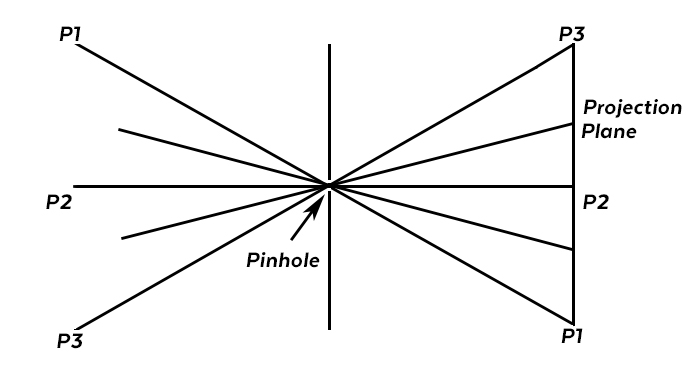
So what happens when light enters such a narrow opening? Since light will travel on a straight line, no matter where the rays are coming from, ideally only one ray will hit the projection plane and thus the whole image will be perfectly focused as shown in the following image.

pinhole2

Notice how the image in the projection plan is inverted with respect to the original scene. This is something that happens in every camera and the human (or any other animal’s) eye as well (after all, cameras are imperfect recreations of the eye!). Although a bit weird, this is irrelevant when it comes to depth of field. The interesting thing is that, as you can see, all the points are projected on the wall and can only follow a unique path between the original location and the projection. This is a consequence of the aperture being so small.

If the aperture were larger, you can imagine that light rays from each point of the original image will be able to reach different locations on the projection plane and thus the whole image will be out of focus. In fact, it is impossible to achieve narrow depths of field with a pinhole camera and that is why lenses are needed. The complex construction of the lens will guide light in a way that, if you have a large aperture, only the light rays coming from a narrow region will be in focus. Achieving this is difficult and this is why ‘fast’ lenses (those with apertures larger than f/2.8) are so expensive.

bokeh

If you have any question regarding the contents of this post, just leave a comment and I will get back to you. Enjoy!