
Adobe’s focus on the development of its Sensei AI technology is astounding. From what simply began as a method to perform faster, more accurate selections evolved into what’s known today as Neural Filters. But what exactly are Photoshop Neural Filters?
The logic behind Neural Filters is that they are a broad set of tools, in constant development thanks to user’s input and feedback, tailored to use AI to perform different kinds of edits. This follows the line of other competitors such as Skylum, whose usage of AI technology has made users love its performance for fast, accurate editing sessions. In Photoshop’s case, the Neural Filters work as if it were a third-party plugin, much like ACR, allowing us to use the tools with ON/OFF options.
Depending on the tool being used, the sliders that shall become available to us, or the option to use extra images to help us further develop our original photo.
Table of Contents
Since Neural Filters go hand-by-hand with Adobe’s latest release, first you need an Adobe CC account with a subscription in order to access the filters, otherwise, they won’t be available to you.
The second thing I’d like to highlight is that these tools are intended for machines with dedicated graphics cards and a powerful CPU/RAM combo. The reason for this is that the calculations being made to process the effects require some time, thus the faster and more resources it has to work, the better.
Do keep in mind that some filters are flagged with ‘Beta’, which implies they are still under the test phase. This can result in unexpected behaviours such as PS suddenly closing, so beware to save your project prior to starting toying around with the neural filters.
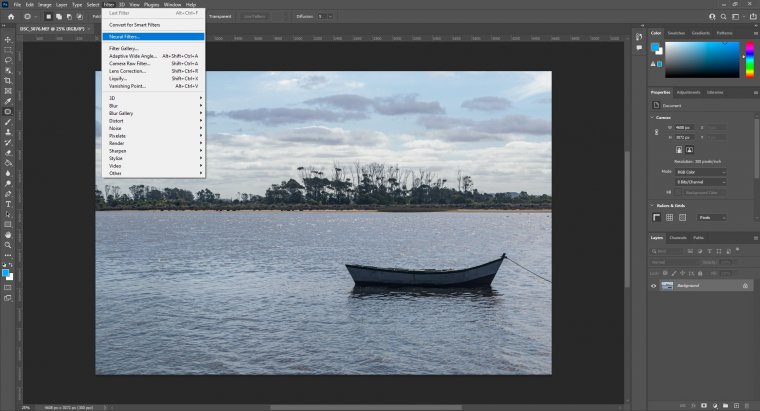
Let’s start exploring the range of neural filters by going to Filters > Neural Filters.
The first thing you’ll notice when you open the neural filters panel is that there are two main tabs. One labelled as ‘All Filters’, and then a second one as ‘Wait List’
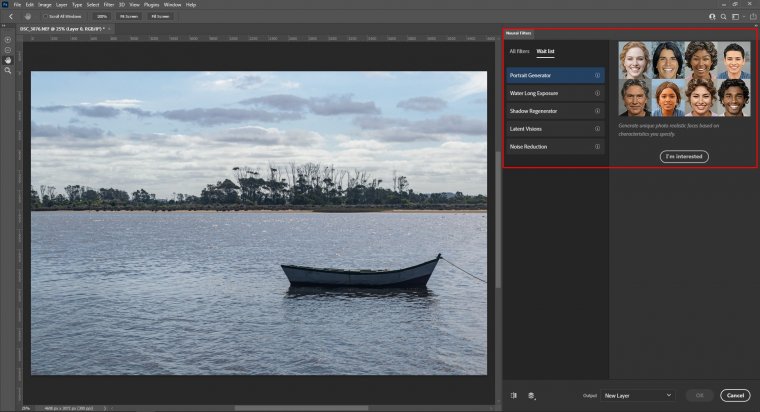
The Wait List filters are neural filters intended to be released over time, depending on how many votes they get from users is the priority. From that shortlist, I’m particularly curious about the performance of the Noise Reduction neural filter, as Nik Collection remains the #1 option in the market for this purpose.
So, let’s move on to the different options in Neural Filters. Notice that some filters won’t be available to use if Sensei AI doesn’t find your image to match the criteria (i.e.: landscape images and you intend to use portrait neural filters).
For this first section of Neural Filters, I switched to a portrait shot. Say I want to focus on the woman sitting with the blue clothing; with the Super Zoom Neural Filter I can zoom in as many times as I want, without losing detail and sharpening the image at the same time.
The calculations for this process, as Photoshop compensates for pixelation, do take some time.
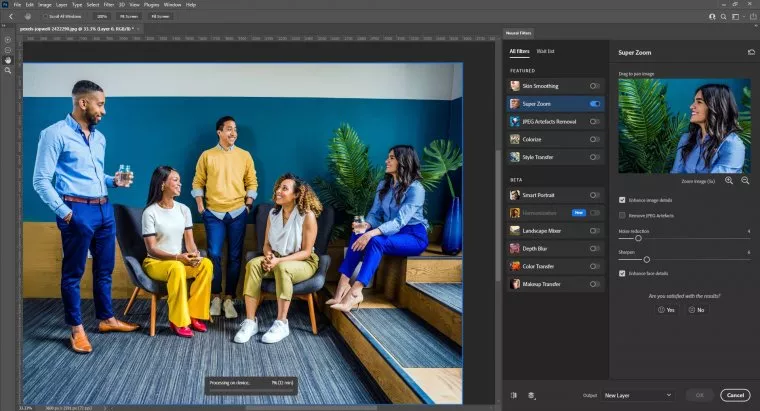
My PC is by no means sleazy, still, it took 10 full minutes to process the result of this neural filter with a 5x zoom (and barely touching any slider!). At the screen where you can pan you see the selected area to zoom in. Next, you select the output format (the best one is to place it on a new layer so we keep the non-destructive workflow). After that, you can apply as many edits as you like to your new portrait photo.
Regarding this one, I’d say the best advice is: DON’T overdo it. The skin-smoothing can look incredibly fake and baked if used as if, so you should consider it an ally for aiding your skin retouch workflow instead of an all-in-one solution.
The filter is not as powerful as Luminar AI Skin tools, still, I like to use it to remove tiny details as blemishes, or subtle suntan marks. If you aim to fix scars or acne with this tool, my advice is to first apply manual corrections in Photoshop, then use the Skin Smoothing Neural Filter to even the details, something that takes a long while to do manually.
One thing commonly known by photographers is the fact that JPEG images, especially if uploaded to the internet, endure extreme compression rates to reduce file size, which results in direct quality loss. Over the years, many processes fix this issue, mostly by using noise removal filters but it also required some tweaking in ACR. Today, Photoshop offers one neural filter that can fix all those items in just one click (and some time of calculation).
The perfect usage for this is when we download a photo shared via WhatsApp or Facebook, something that could be a memory from long ago shared by a friend, or a selfie recently taken.
Process your image by using this neural filter but, remember, this doesn’t result in the same quality you can expect out of a RAW file.
This one works for old, scanned photos, as long as they are not under the grayscale mode. It retrieves the suspected tint for the colour and applies it for a very vintage looking but coloured photo. Its best application is for scanned images in high-quality devices, otherwise, the result may not be accurate.
The Style Transfer filter takes your image and applies a pre-established “art” style based on some sample photos used as presets. You can add your own photos via the Custom button.
Honestly, not my kind of thing; but if you like these effects now you won’t need actions or third-party plugins to create them.
![]()
In a previous post, we discussed the recently released Landscape Mixer, Depth Blur, Harmonization and others. The issue with beta filters is that they aren’t stable enough; so you’re prone to encounter the message: “We’ve temporarily disabled this filter because of an error”. If that happens, you can try again, or reset Photoshop and try again. Sometimes it’s simply that the process is not possible, hence why it shoots that error message.
I’m still not a fan of neural filters except for Landscape Mixer and Harmonization. Some of the tools are simply not useful, others are way more refined in Luminar. My advice is to try and test to see which one works best for your workflow. By no means consider them a replacement for the old-fashioned tool workflow – that’s the only 100%-accurate method to work with digital post-production.


Please verify your software version before proceeding.
 I’ve verified my software version


 Facebook
 Google +
Comments (0)
There are no comments yet.