In this video, I will show you how easy it is to add rain to your photos. Sleeklens offers a variety of different Photoshop Overlays, and one of my favorite to use is the ‘Rain Overlays’. From the Complete Overlays Collection, you will find lighting overlays, rain overlays, and snow overlays. Just click on ‘Overlays and then choose ‘Rain’ and you’ll be presented with an extensive list of rain textures to choose from. You can preview all of them to see which texture will be added to your photos as they range from slight drizzles to torrential downpours.
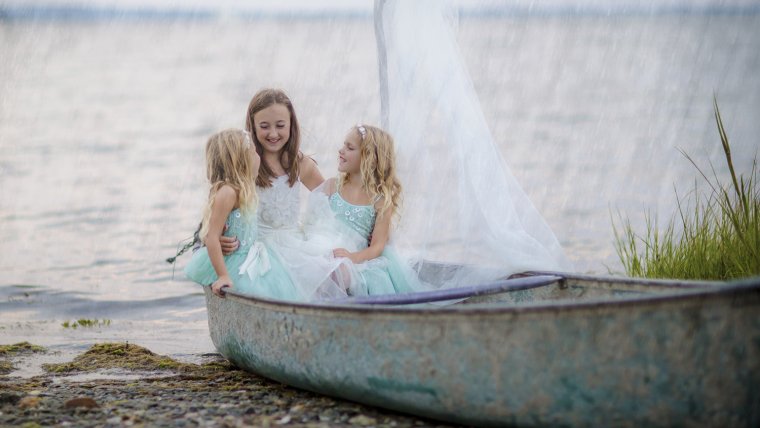
I will show you three different pictures and show you how easy it is just to add rain to your photos. I will move the rain overlays list to the side of my screen and choose a couple of the rain textures and drag the selection on top of the document. It’ll be in free transform mode, and all you can do is resize it to fit the whole screen. With the mode covering the whole screen, I will press enter, and we will have our rain and the photo underneath. From there, we will get rid of the black areas of the photo leaving the white rains to come through. The easiest way to do that and the only way that maintains the quality of the image is to change the blending mode to screen. Screen means you will remove the black areas in your photo and allows you to see the rains right there in the image.
One way to increase the intensity of the rain is to choose another rain texture or duplicate the overlays. You can duplicate the overlay in the channels panel by dragging it down. This leaves the image with more intense rain texture than in the previous overlay image. I will duplicate it a second time, and as you can see in the video, the rain has more intensity and shows pretty good without looking fake. From here, I will add one more rain texture, and instead of keeping the little spring parts, I will add some heavier points to the image. Again, do the same thing and stretch out to the screen and enter, change the blending mode to screen and if you toggle off, you’ll realize that it adds a little bit of depth, which doesn’t leave it looking fake. You don’t want to be layering on top of rain added as this looks very fake.
We will then move on to another photo, and this has a nice scene and the even though the people are walking in the rain, the wet-looking ground makes it look as if it’s been raining or is still raining at the moment. We will do two different ones, and just as we did with the other ones, we will stretch each free transform mode to fit the screen. We will then change the blending mode to screen, and this gives more clarity to the individual rain drops. But since the scene is warm and the rain is mainly cool (white color), we can group them together by hitting ‘Command/Ctrl + G’, go down to photo filter and make sure that the photo filter is clipped to the group by holding Alt Option and clicking between the two layers. This will change the warmth/ color of the rain to match with the warmth of the photo.
We will do one last photo, and the one we have has a nice road, misty scene, and again the photo leads itself to rains since it’s foggy and will help sell these effects. I will get two different textures and stretch them out and change the blending mode just as we did with other images. This makes the image look as though the rain is pounding heavily right in front of the camera. We can choose different rain overlay levels depending on the intensity of the rains we want to achieve.
That’s how easy it is to make rain in your photo. Using overlays is super simple and beats having to make a custom brush and applying it yourself. The overlays help pop rains on your photo and give the impression of actual rains within a short time.
If you liked this tutorial, you could visit Sleeklens.com for more overlays and Photoshop Actions to help do your post processing photo edits.


Please verify your software version before proceeding.
 I’ve verified my software version


 Facebook
 Google +
Comments (0)
There are no comments yet.