How to Make Impressionism Photos with Photoshopwww.sleeklens.com
The inspiration that leads the creation of your photography can come from sources that are not exclusively photography. The different art movements can be a great source of creativity. Romanticism, impressionism, realism, art Noveau… all these tendencies can give you ideas about color palettes, subjects, composition… In this article I want to show you how to add an impressionist look to your photos in few simple steps in Photoshop.
Impressionism
Impressionism is a paint movement that started in France in the 19th century. They were pretty innovative at that time because of their new approach to their work. Briefly, some of the characteristics of Impressionism are:
They focused in visual effects and not details. Photography just appeared at that time and painters felt that this new field was able to represent all the details in an image. For that the reason they decided to change their strategy and aim for sensation instead that for accurate representation.
They painted mostly outdoors
They used bright colors
Their main subjects were: passage of time, seasons, weather, leisure…
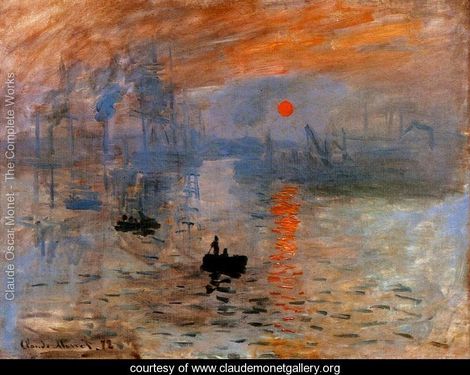
One of the most famous painters is Claude Monet (1840-1926). In fact, its paint “Impression, sunrise” is the one that gave the name to the art movement. Others are Renoir, Bazille, Sisley…
“Impression, sunrise”, Claude Monet.
To get the desired effect, impressionism artist used different techniques. One that relevant to us is the “Impasto”. They apply thick layers of paint. For that reason brush strokes are visible. Keep this in mind when you are creating your impressionism images.
How to create an impressionist looking image in Photoshop
Creating images that look like coming from an impressionist artist can be done in few steps using Photoshop.
#1. Choose an image
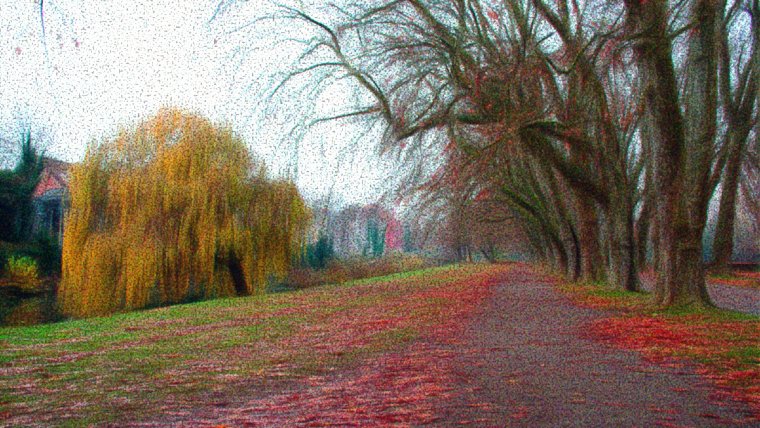
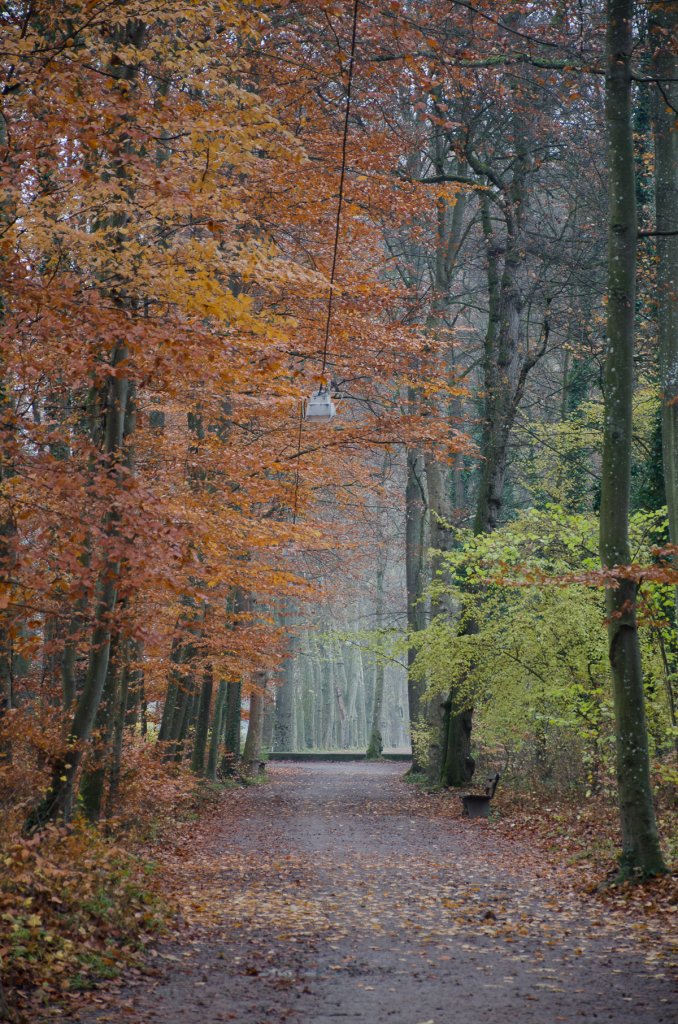
You can choose any image you want, but I think it is more meaningful to respect the Impressionism ideas. They optimize the technique in order to represent their vision of reality, so if we try to think with an impressionist mind, we have more chances of getting a nice result. Impressionists painted mostly outdoors and they loved to paint about sensations. I would recommend you to start by choosing a nature photography.
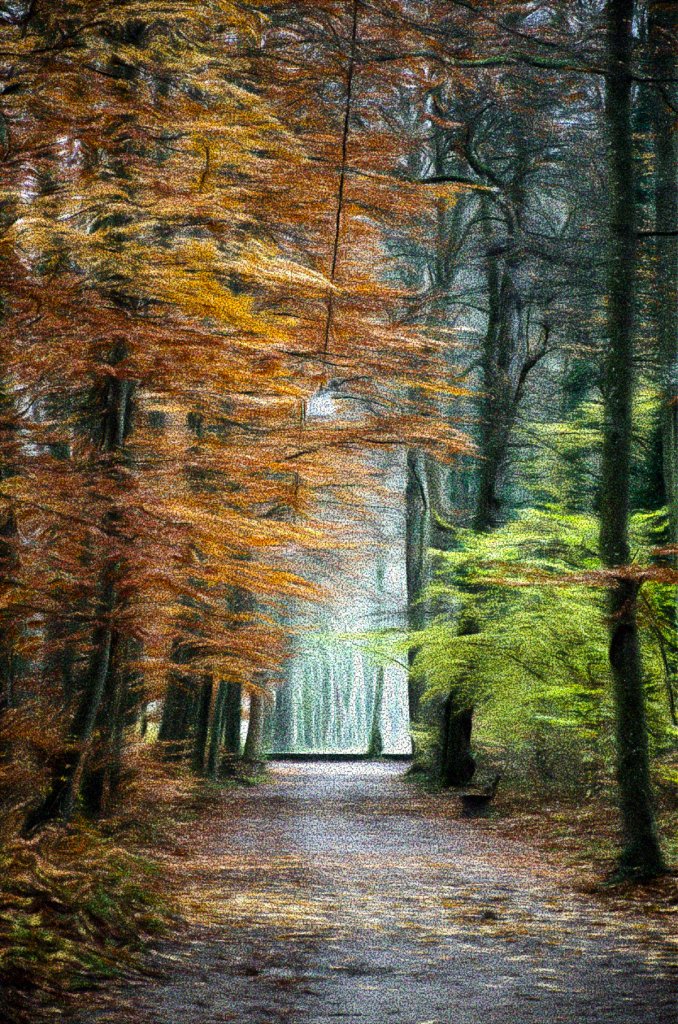
For this tutorial I chose an autumn photo because of the impressionist’s love for seasons and passing of time.
#2. Choose an impressionism paint you like.
We are going to use the impressionism paint for its colors, so focus on them when you are choosing them. You can, of course, choose any other photo with colors you like or skip this step. But I think that spend some time looking for impressionism paints is a source of inspiration that can have a positive influence in your photography.
I chose “The Avenue”, a work of Claude Monet
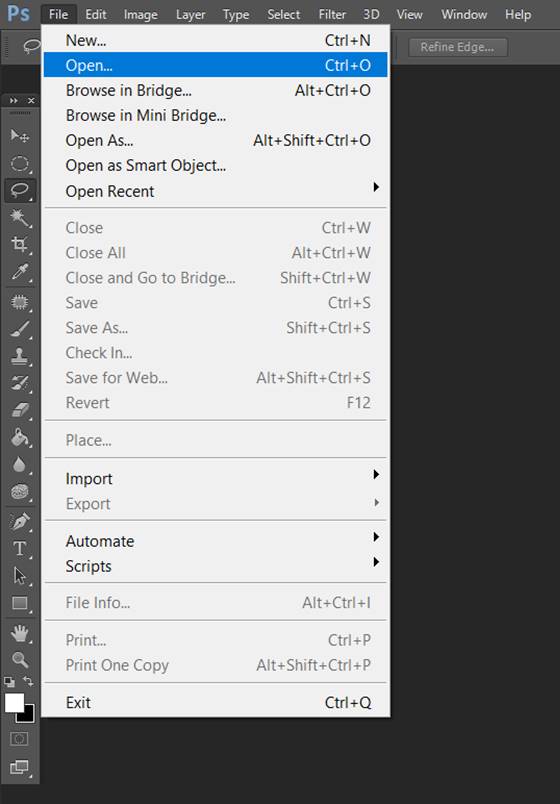
#3. Open both images (your original one and your impressionist paint) in Photoshop
It is important that you open the 2 photos in Photoshop (Learn about photoshop here).
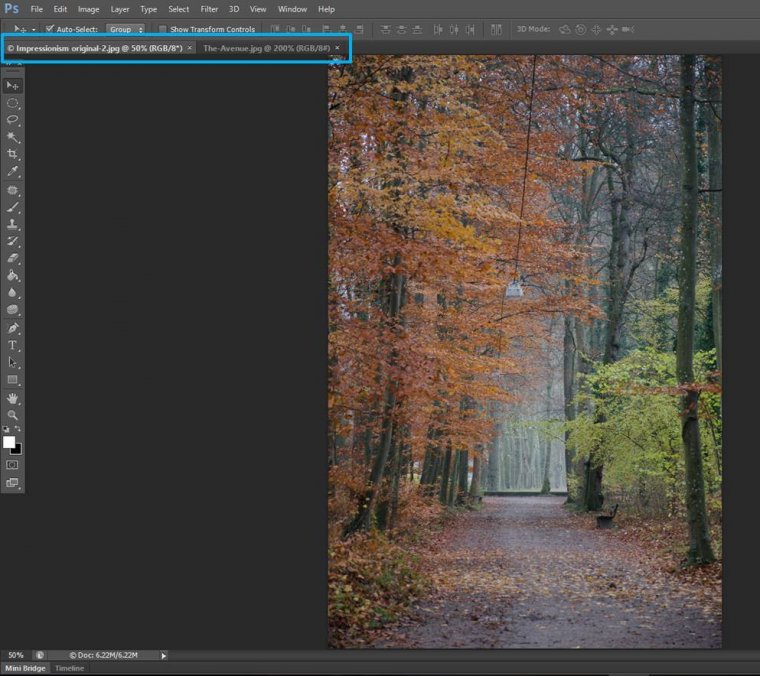
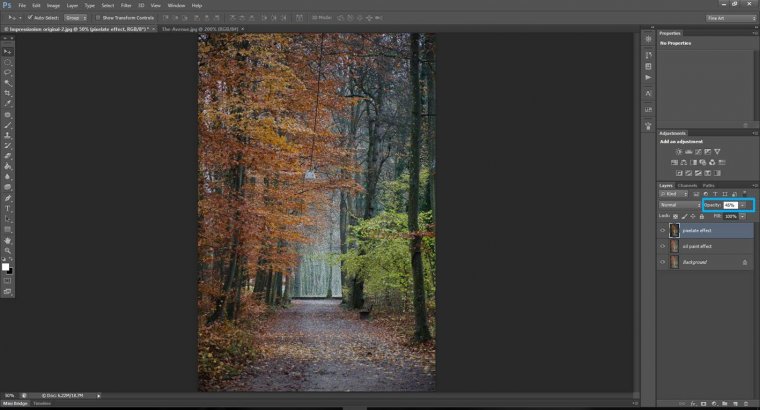
As you can see inside the blue rectangle, I opened both files.
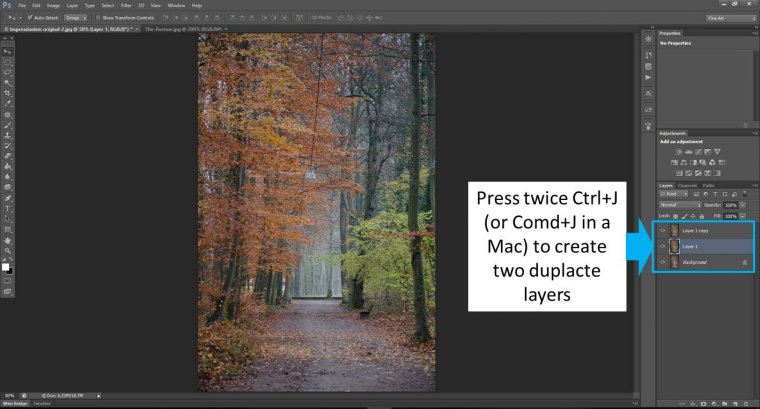
#4. Create 2 new layers in your original image
In your photo, click Ctrl+J twice to create 2 duplicates of your background. You will now have: background, layer1 and layer 2 copy.
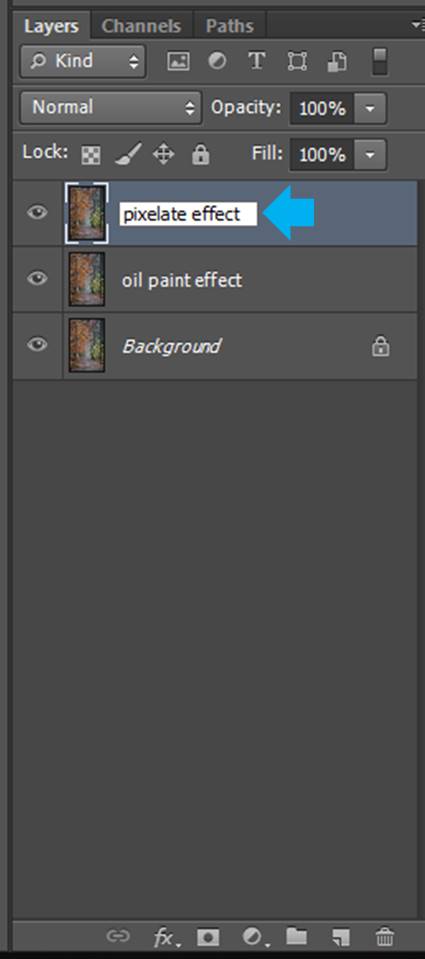
You can rename them to “pixelate effect” and “oil paint effect” if this makes things easier for you.
You can rename a layer by double-click in its name.
#5. Add impressionist effects to the “pixalate effect” layer.
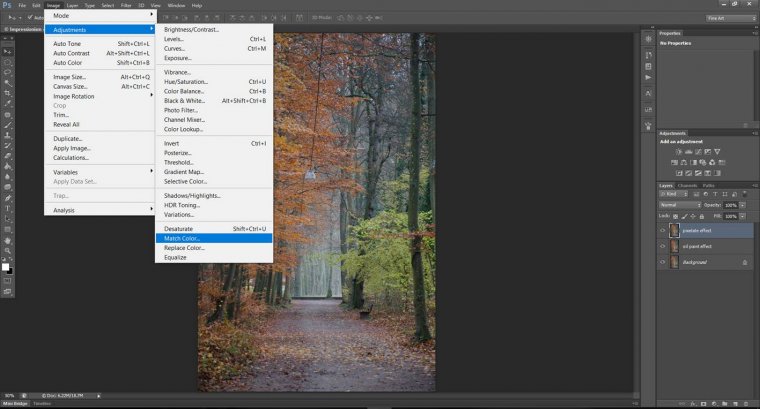
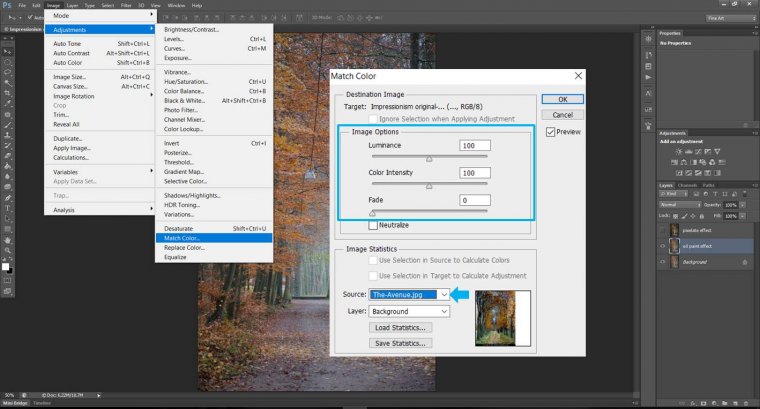
You can change colors in Photoshop in different ways. Here we are going to use the “Match color” tool. To do so, with the “pixelate effect” layer selected, go to Image>Adjustments>Match color
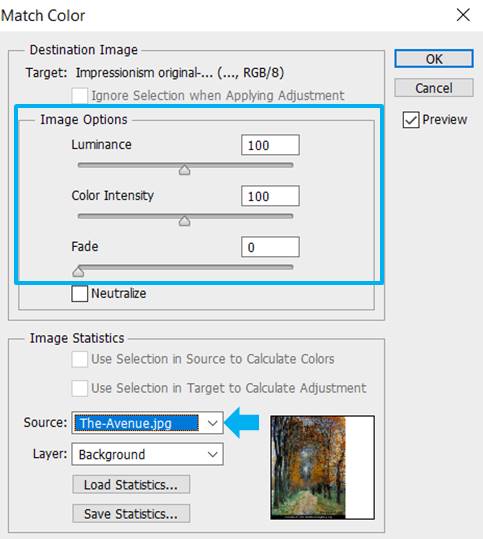
A Match color dialog will appear and here you need to select 100 in Luminance, 100 in Color Intensity and 0 in Fade. Then, in Source you need to pick the Impressionist picture you previously chose (step 2) and open in Photoshop (step 3).
Press OK and voila! You have the colors of the impressionist picture in your photo! (I love the Match Colors option in Photoshop!!)
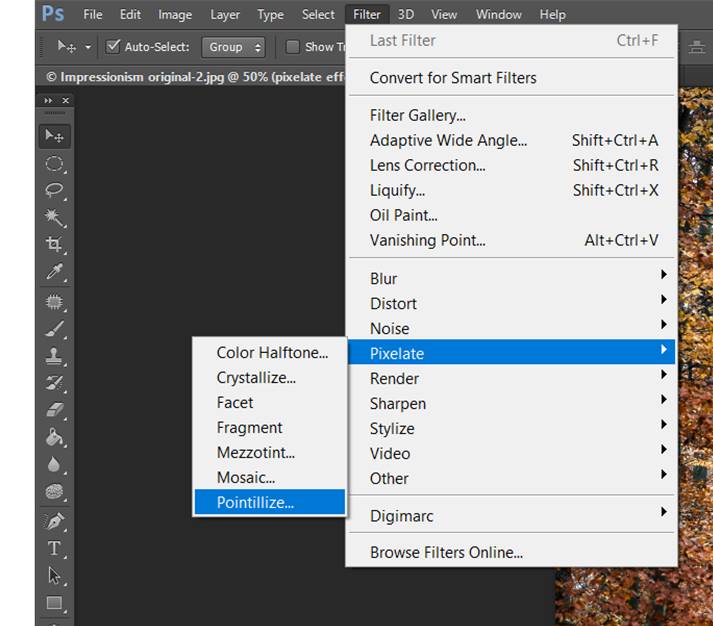
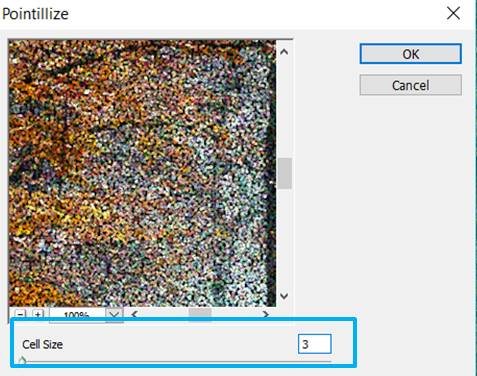
Now we will add the pixalete filter. For this, you just need to go to Filter>Pixelate>Pointillize.
This filter will add points to your image. You can play with the size of the points by changing the Cell size value. I personally like them small, so I am leaving here 3, that is the minimum value.
Press OK to apply the filter. The last thing we need to do in this layer is to change the opacity to for example 40-50%.
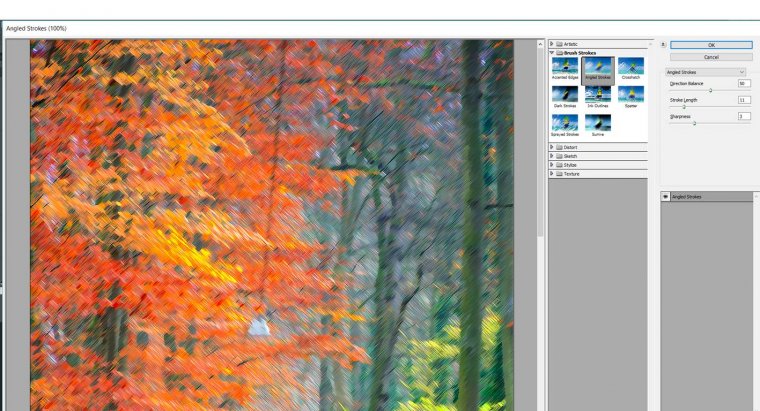
If you don’t like the Pointillize filter, you can try others by going to Filter>Filter Gallery. I personally like trying different filters from the section called “Brush strokes”.
This is how the Filter Gallery look like. There are different “Brush stroke” filters that might work really nice (like the “Angled strokes” filters. I think this one is my favorite!). Fell free to experiment with them.
#6. Add impressionist effects to the “oil paint effect” layer.
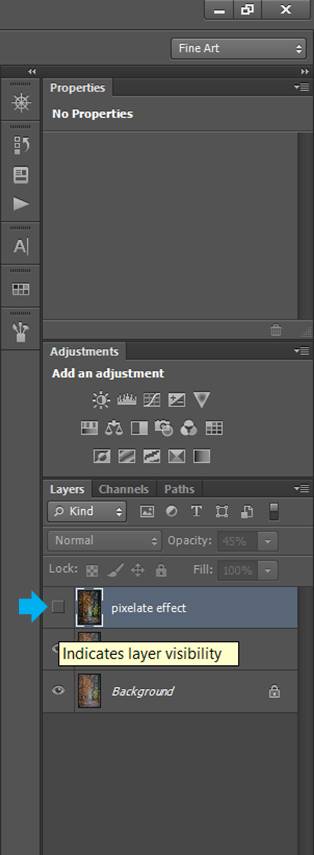
If you want to see better the changes you are going to make in the “oil paint effect” layer, you can deselect the “pixalate effect” layer.
As in the previous step, we will Match the color to the Impressionist paint you chose. Select the “oil paint effect” layer, and go again to Image>Adjustments>Match color. Same than in step 5. You select 100 in Luminance, 100 in Color Intensity and 0 in Fade. In Source, you pick your Impressionist picture you previously chose and press OK.
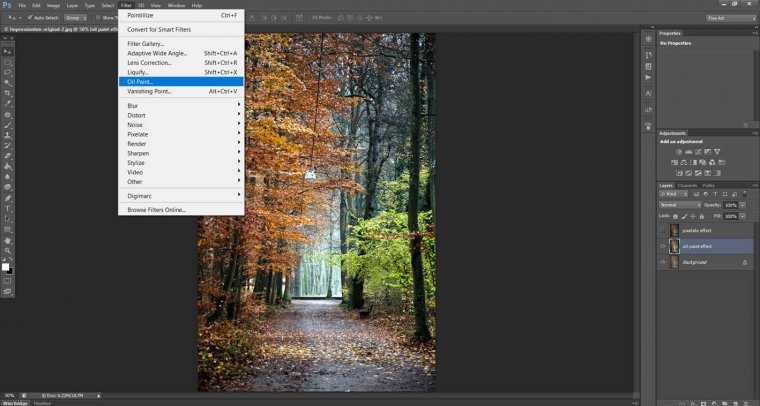
Now we will add the oil paint filter. This filter will add the look of the brush strokes to your image. Select Filter>Oil paint.
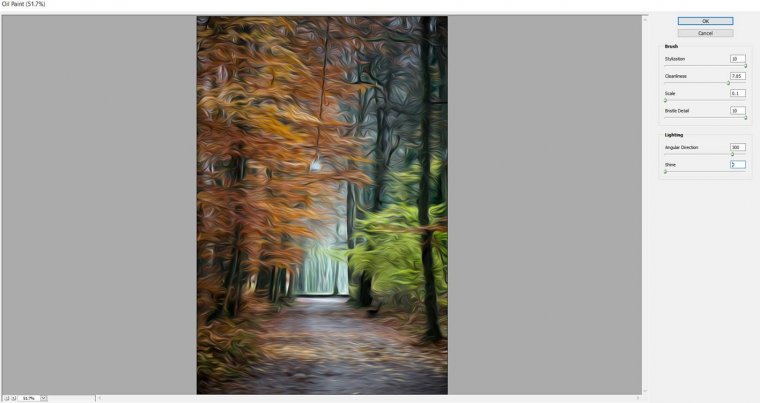
A new screen will open. In this screen, you can play with the different values until you get the result you like the most. I personally go for Stylization=10, Cleanness around 7-8, Scale= 0.1, Bristle Detail=10 and Shine=0. You can play a little with all these values until you find one that you like.
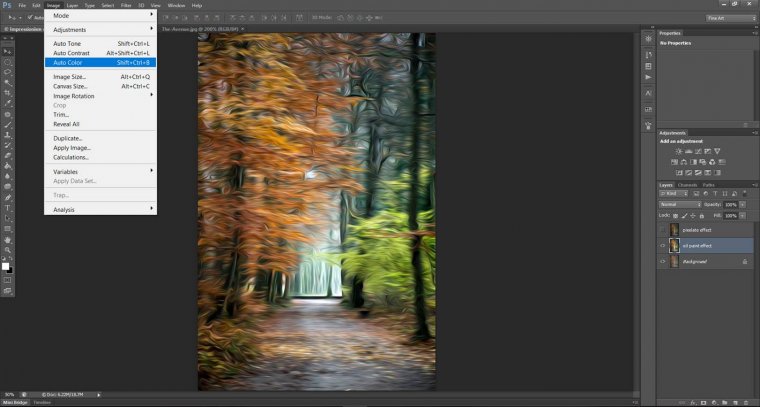
Press OK to apply the filter. You can now adjust a bit the colors, tone and contrast of the image by selecting Image>Auto Color, Auto Tone and/or Auto Color.
In this screenshot you have highlight in blue (selected) the “Auto Color”. The two options on top of it are “Auto Contrast” and “Auto Tone”.
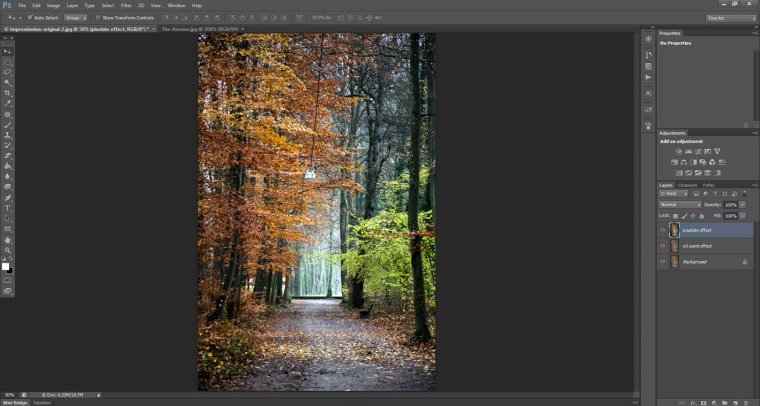
Now select again the “pixalate effect” layer to make it visible and that’s all! You have a nice impressionist looking photo!
You can play with your image by changing the impressionist image to witch you Match colors.
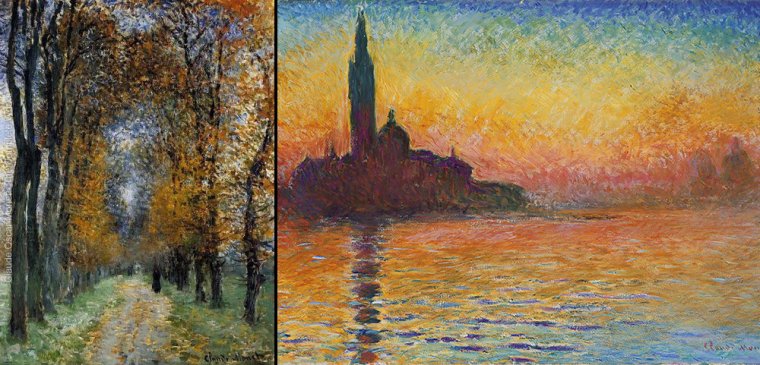
These two Monet paints have 2 different color palettes. On the left you can see “The Avenue” and in the right “San Giorgio Maggiore At Dusk”, both courtesy of www.claudemonetgallery.org.
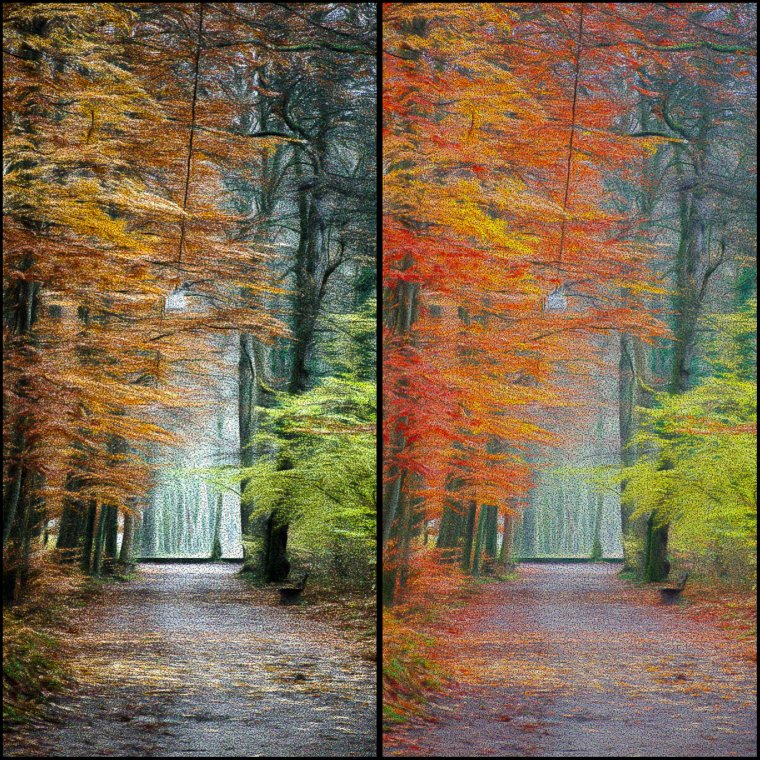
Here my two impressionist looking versions of the same image: On the left you can see the one that matches colors with “The Avenue” and in the right the one that does it with “San Giorgio Maggiore At Dusk”.
How to get the impressionist look just using my original photo
If you want to keep your original colors, you can follow the same steps skipping all the “Match colors” parts.
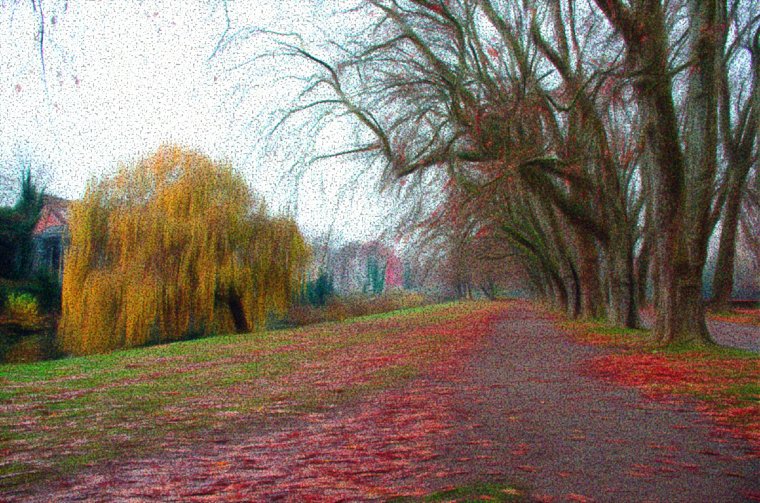
Here the same photo that we used before, but just with the pixelete and oil paint filter. I didn’t matched colors with any impressionist paint.
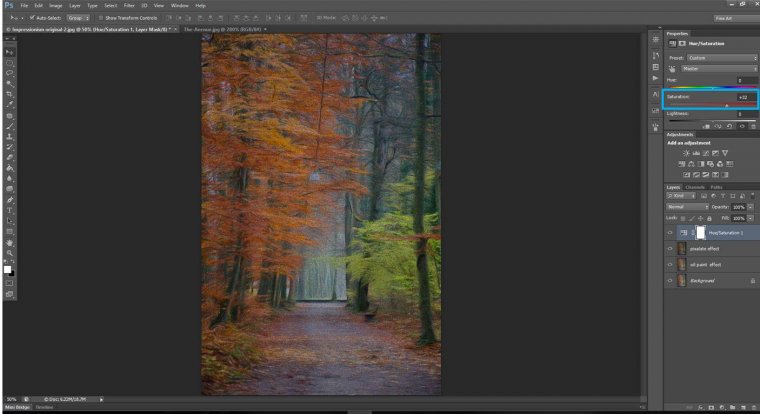
If you do so, you might need to increase the saturation of your images color to get the impressionist look. No problem. You can just add a Saturation layer on top of all the others.
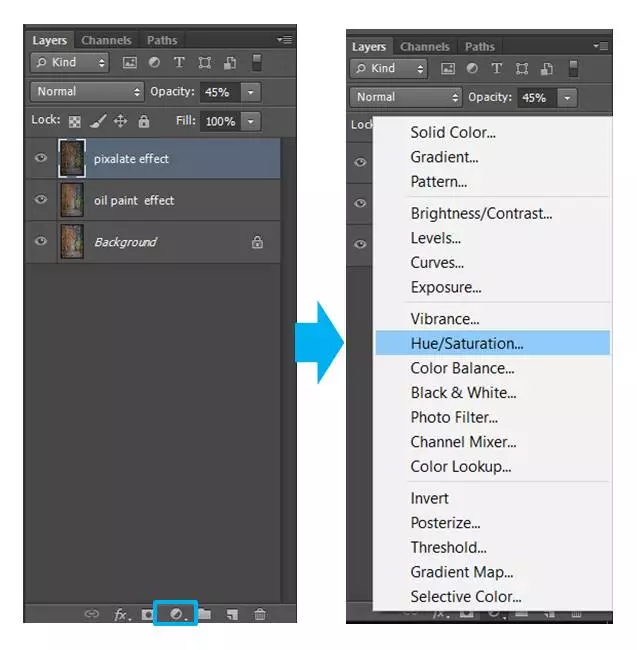
Add a saturation layer by clicking in the icon in the lower part of the screen, here marked in blue and then selecting “Hue/saturation”.
Move the saturation slide until you get the bright colors that are the signature of the Impressionism.
I hope you enjoy this tutorial! Now it is your turn to experiment with your own images. Have fun!
I am a biologist and a self-taught photographer based in Barcelona (Catalonia). Buddhist philosophy has a strong influence on me: I have a deep appreciation to life and I give a huge value to the little things that makes our days happier. I became a passionate about photography when I got my first camera and I understood that photography allows me to express my way of approaching life. I love learning so I am always willing to trying new things. These days I am shooting mostly nature and portraits.
An superb tutorial. I’ve been trying to create this effect without success but with the help of your tutorial I’m producing very satisfying images. Thank you.
Alesa •
Guest
i sont have the oil paint feature in my P. shop. 🙁


 Facebook
 Google +
Comments (2)
An superb tutorial. I’ve been trying to create this effect without success but with the help of your tutorial I’m producing very satisfying images. Thank you.
i sont have the oil paint feature in my P. shop. 🙁