The love for the cars is something not so easy to explain, but that phenomenon is widely spread around the globe, in every class stadium, and not knowing about politics or religion. So therefore when you are taking photos of cars you should be very careful because automotive photography has a huge audience.
There are various ways of taking pictures of cars, but we are going to stay focused on three techniques
Table of Contents
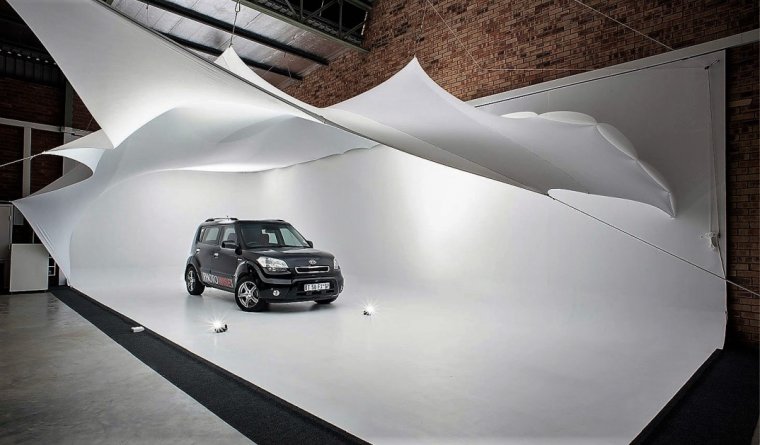
The studio has to be big enough to drive a car inside. Next, you need lighting (Lightning strobes mounted on metal poles, shooting straight down. Also, you can make a backdrop if you have a large piece of fabric. Keep in mind that for this shooting the cars are often clean and polished to mirror finish, so you will probably have a reflection on the car from the objects around, so carry a black piece of fabric for masking objects if nasty reflections appear.
First be sure that batteries are fully charged because out there you are in trouble if you are out of power.
You will need a multiple choice for locations, pick two or three because some things you can’t plan, such as working on roads or parking lots, people in your spot, etc. Keep in mind the position of the sun, and pick the right timing, try to avoid shooting at noon in summer because of overexposure, and in winter noon would be the time for a start of your session. Also one of the most used filters for this kind of photography is the circular polarization filter (A good polarization filter will eliminate any reflections from both the bodywork and the glass sections). Be sure that the car is immaculate because if it’s dirty it will not look good on the photos unless it’s an SUV or some other type of vehicle that people are expecting to be dirty. We are recommending burst mode for these kinds of shootings just in case your first shot has some camera shake. For the shooter speed on a bright sunny day on 50mm focal length we recommend 1/100. Remember to use a lens with some stabilization so that you could drop down the shooter speed for longer exposure.
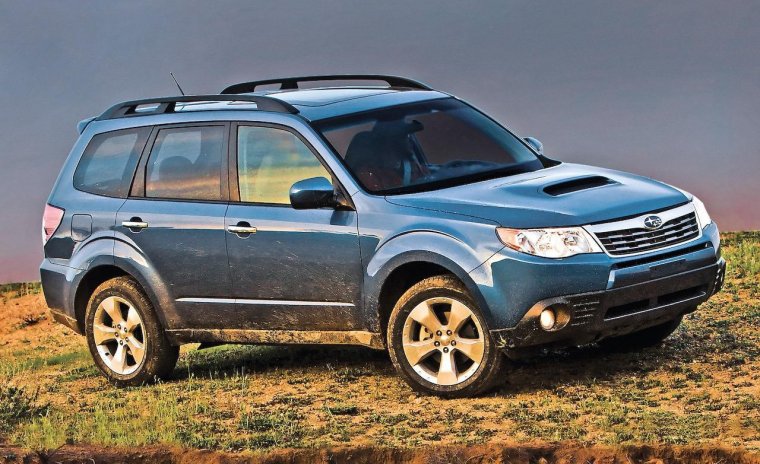
Outdoor vehicle shooting is probably the next best thing after the studio session, but with less charge for renting studios and lighting equipment. Also keep in mind that on Sundays the industrial zones are not working and you could use that as scenery for your perfect outdoor photos. For example, a modern car should be photographed in front of a modern building, a classic or muscle car in industrial surroundings and 4×4 SUV depends on the context of your story it could be dirty or clean, but in a suburban terrain.
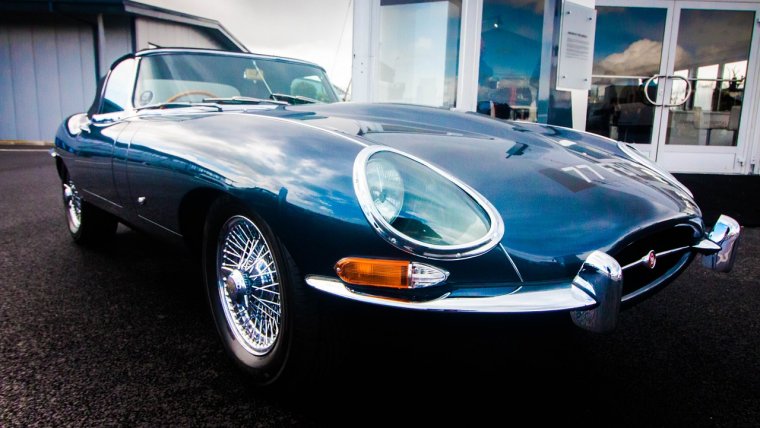
Be sure that the car is photographed from all of the angles: front 3/4 view, rear 3/4 view, full side view, full front view, full rear view, engine shot, dashboard, and interior shot. Try to lower your angle a little bit (get down on knees, or even lay down); this will give a great effect and a different perspective. Also pay attention to details such the logo or the sign of the manufacturer, the model of the car or other shiny chrome parts. If you are shooting for details, use a wide angle lens and focus on the detail (shifter stick, detail of the dashboard, the polished wheels, etc.), and the backroad of the photo should be blurred. That’s how you will get a mighty photography
There are two primary techniques for capturing motion. The first is “blurred subject with a background in focus,” and the second is “blurred background with the subject in focus.” We are going to stay focused on the second technique that is called “Panning.” We are only going to introduce this technique and give basic information. Please stay “tuned” because we are going to elaborate on a separate topic.
For some objects, such as a moving car or even a racing car, there may not be a shutter speed high enough. That’s why action photographers’ pan with the subject to keep it centered in the frame. No one can guarantee perfect pans, but with practice, patience and some knowledge, dramatic images of subjects in motion are within reach. Panning its movement, and that’s what makes it challenging.
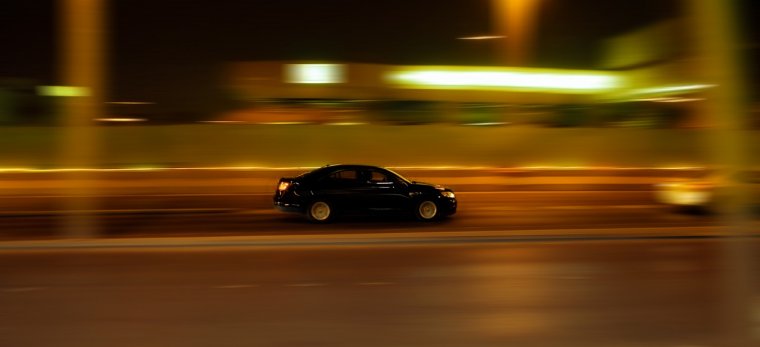
You need to twist from your waist until facing the point where your subject will be coming. As they come into frame, follow them, keeping pace and twisting from your waist. Continue to pan evenly and keep it smooth, paying close attention to make sure your object is in the same part of the frame while you complete your pan. Continue the pan even after the exposure is complete to ensure the blur is smooth. Don’t hit the trigger button too hard either as this can cause shake which will blur your image. The shooter speed is variable for thus technique, from 1/50 if your object is bicycle up to 1/160 if it’s a car, or even faster if it’s a Formula 1 race.


Please verify your software version before proceeding.
 I’ve verified my software version


 Facebook
 Google +
Comments (0)
There are no comments yet.