How to Improve a Dull Photo in Lightroomwww.sleeklens.com
Lately, I have been sharing with you several photographic journeys around Catalonia. I have shown you places as La Garrotxa, Sitges, and Barcelona. For me, nature and portrait photographer, it has been a nice challenge to take photos of streets and buildings. I discovered I like it a lot! Once back home, with the photos already in my Lightroom presets catalog, click here. I faced a new issue: how to improve some of the street photos I took? Some of them looked quite dull. My brain is used to think about softening images: I soften flowers to make them look more delicate, I soften wedding photos to make them look dreamy… but softening a street or a building?? It didn’t seem right to me. I did a bit of thinking and a bit of trying and I ended up finding a post-processing workflow that I like to use to improve dull photos. Are you interested in installing presets? See the details here.
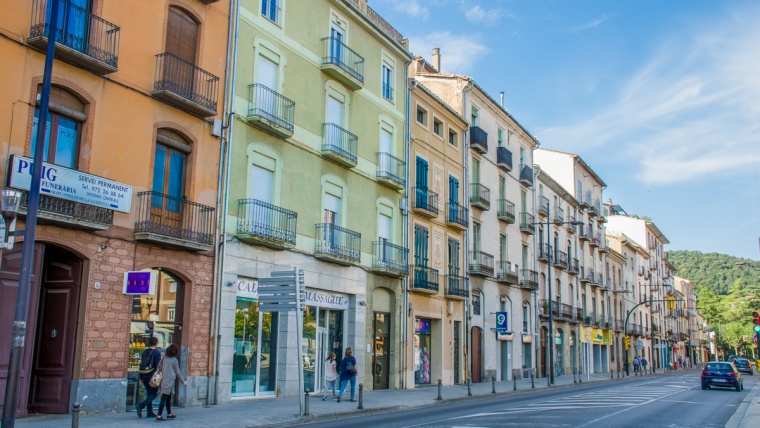
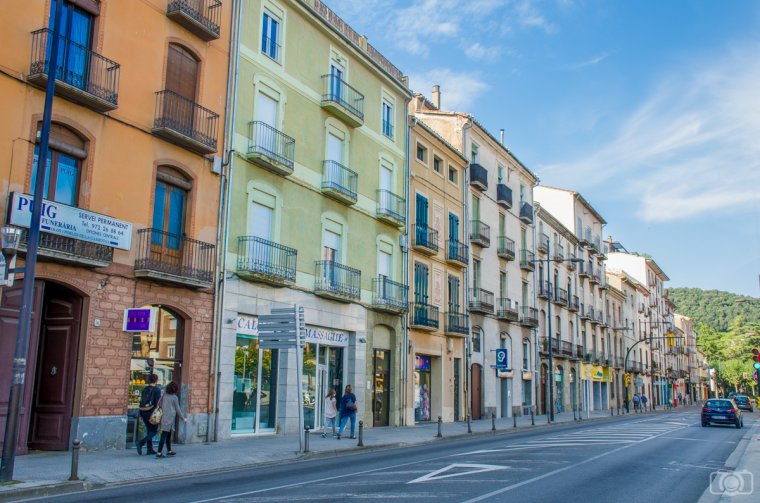
I shot this photo in Olot. It might be familiar to you because I used to illustrate one of my last articles.
You agree that this photo looks pretty dull, don’t you? However, if you look at the histogram you can see that this image has a lot of potential because no pixels were either too bright or too dark. They were all inside the dynamic range of the photo (If you are not familiar with histograms I invite you to take a look at the article of Julian H about Lightroom Histograms. Before starting working in Lightroom, I recommend you to stop and think what you want to achieve. This will give you an indication of which slides you need to move. In this photo, I wanted to do 3 important things: increase the contrast, give a bit of color to the buildings and recover the sky.
Table of Contents
General adjustments
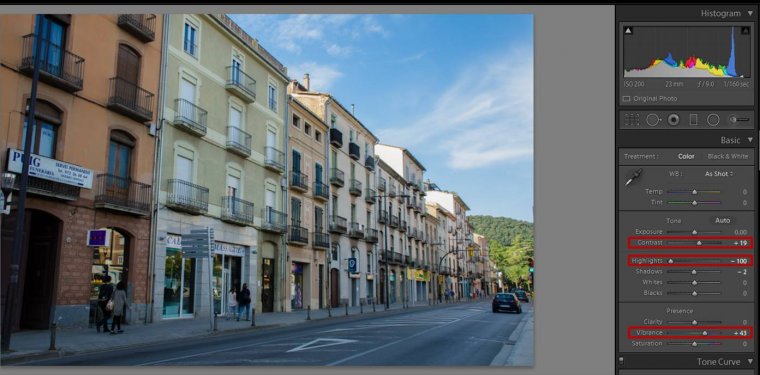
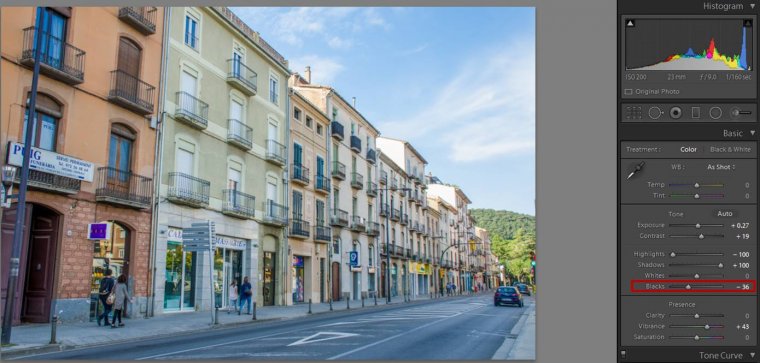
I always start by doing general adjustments (they affect the whole photo). For the first steps processing this photo, I used some of the slides in the Develop Module, specifically in the Basic panel. I wanted to increase the contrast, so I moved the Contrast slider to the right (+19 in this case). To recover the sky of any photo, you can start by moving the Highlights slide to the left. In today’s photo I moved it to -100. And to gain a bit of color I increased the Vibrance by moving its slide to +43. Just these 3 adjustments can already improve a dull photo, a lot.
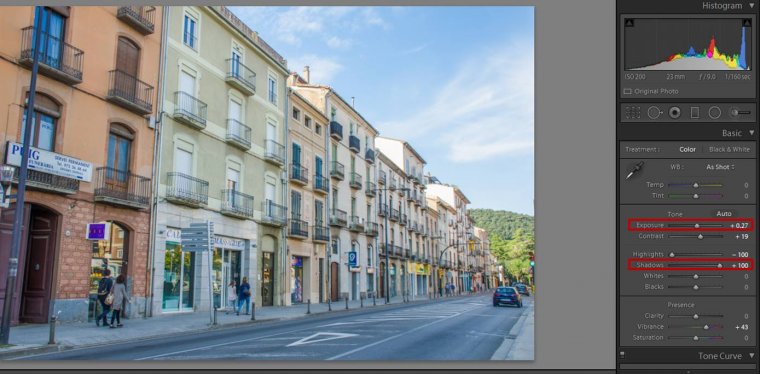
However, the buildings had too many shadows, so I moved the Shadows slider to +100 and I increased the exposure a little (+27).
It is quite common that when you reduce the shadows of a photo, the contrast gets weak. But it is ok because just by darkening the blacks a bit (-36) you can recover the contrast.
Local adjustments
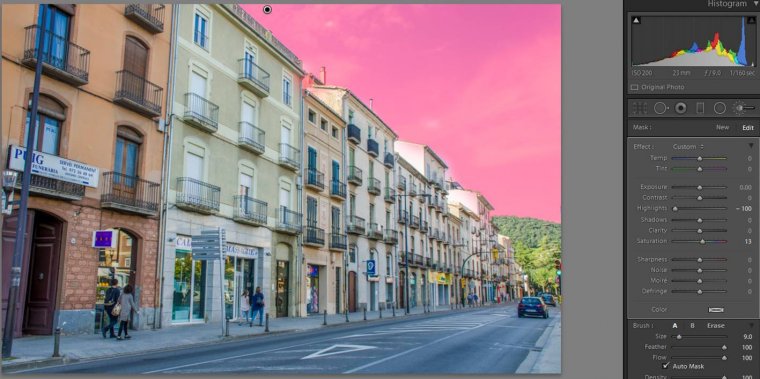
The photo looks better already. However, it can be improved much more by doing adjustments to just some parts of the image (local adjustments). In this case, I wanted to recover the colors of both the sky and the buildings even more. There are several ways to add local adjustments to a photo using Lightroom. Today I used 2 brushes: one for the buildings and one for the sky. If you are not familiar with Lightroom brushes, don’t worry! There is a guide written by Mantas O. Ciuksys on how to use them that will help you a lot! The first brush I used all over the sky and as I wanted to recover the colors I moved the Highlight slider to -100 and I also gave a punch to the saturation (+13). More uses of brush in editing, see here.
In pink, the area I brushed for editing just the sky.Here is the sky after applying the local adjustments using a brush with the settings marked by the red square.
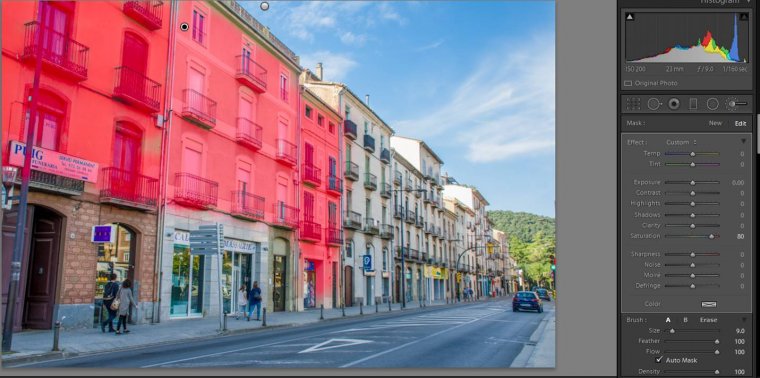
The second brush was used on the houses. BUT just on the houses that I wanted to emphasize (the 3 first houses from the left side). This time I increased the saturation quite a lot (+80).
In pink, the buildings I brushed in order to apply the local adjustments.
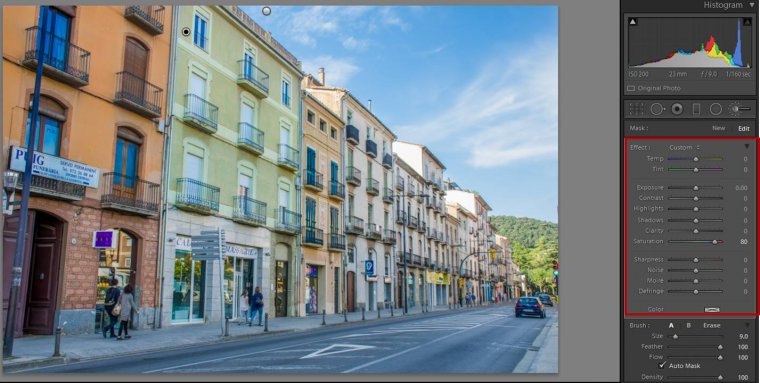
You can see how the 3 houses changed after applying the brush to increase the saturation.
Final sharpening
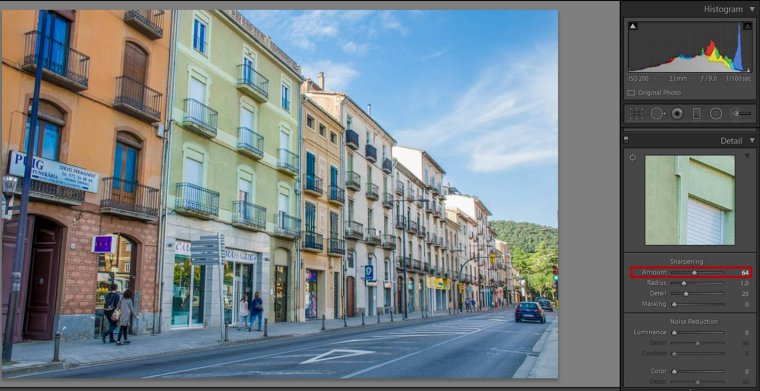
The last adjustment was to increase the sharpening of the whole photo to +64 (Sharpening is in the Detail panel).
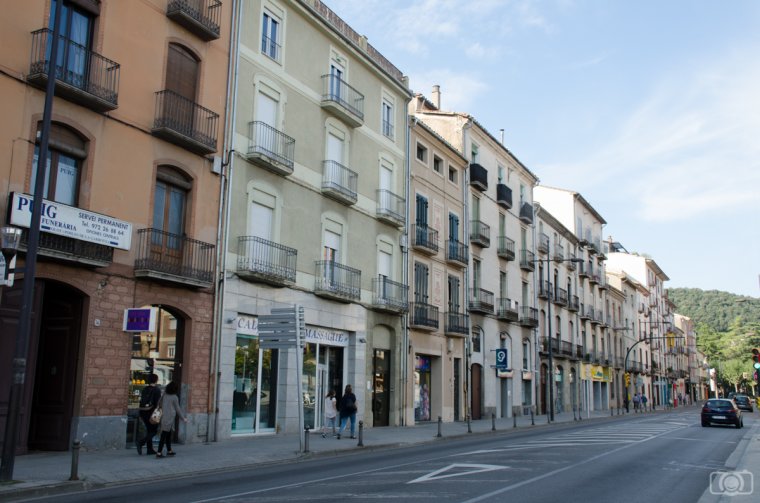
Here you have the final photo. Much more colorful and vibrant than the dull original one!
If you want to save time in your editing like the one I just showed you, I have good news for you!! You can use the Brick and Mortar Workflow, that comes with 78 presets and 28 brushes. I have been trying it for editing urban photos from my last articles and I am really happy with the results I got with just a few clicks.
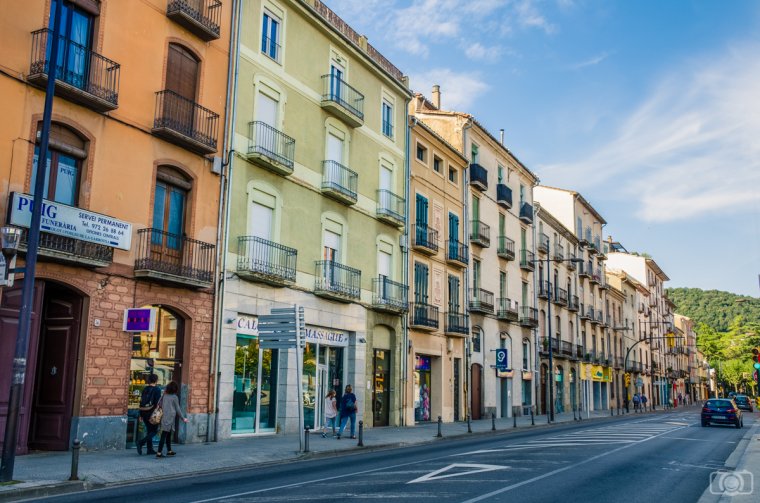
The thing I like the most about these presets is that you can stack them, meaning that you can use several of them in the same photo. I will give you an example of this workflow using the same photo from before. I started by applying the following presets:
0-All In One – Beautiful Daylight. This gave already a great improvement.
5-Polish- Make it Pop (to increase the colors of the image).
5-Polish-Sharpening.
6-Tone-Warm-Highlights.
For local adjustments I used 2 of the Brick and Mortar Brushes on the 3 first houses on the left:
Exposure-Brighter Shadows.
Color-Saturation.
And that’s all! It took me less than 2 minutes to edit the photo! Here is the final result!
I hope you enjoyed giving a bit of color to some dull photos. Feel free to contact me with any question or suggestions. What do you do with dull photos? Do you do something similar to what I do? Do you have a totally different workflow? Have a happy post processing!!!
I am a biologist and a self-taught photographer based in Barcelona (Catalonia). Buddhist philosophy has a strong influence on me: I have a deep appreciation to life and I give a huge value to the little things that makes our days happier. I became a passionate about photography when I got my first camera and I understood that photography allows me to express my way of approaching life. I love learning so I am always willing to trying new things. These days I am shooting mostly nature and portraits.


 Facebook
 Google +
Comments (0)
There are no comments yet.