Hot, bright, and full of possibilities, the summer months are a great time that photographers deserve to enjoy. As you soak up the warm sun, challenge yourself to grow as a photographer and make the most of all that a hot summer night has to offer.
Table of Contents
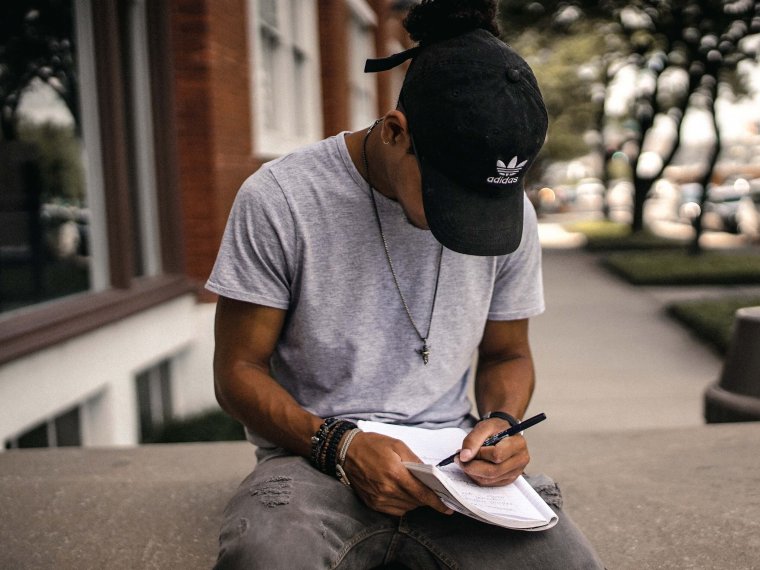
What do the people in your area enjoy doing on hot days? Answer this question through your photographs. If you want to take it a step further, start a project that focuses on summer street photography.
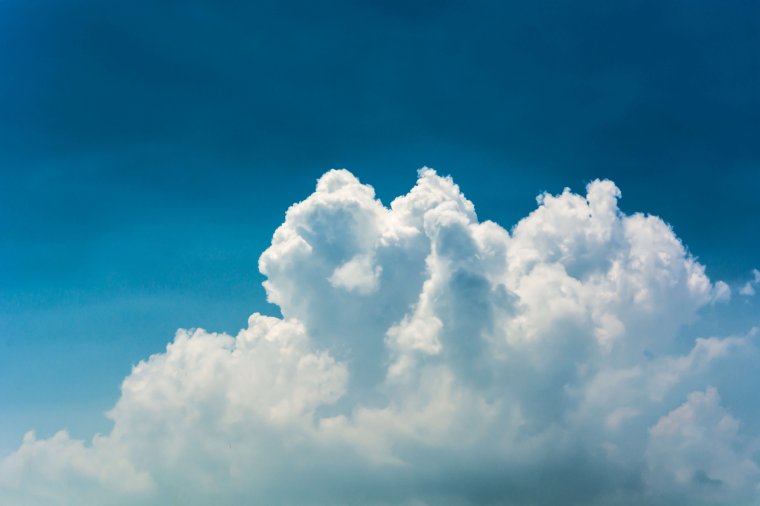
Thanks to August’s bright daylight, everything looks stunning. This is the ideal time to take resources for future editing projects. A great photo of a cloud could help you create a breathtaking double exposure. A closeup of a colorful flower could end up complementing a portrait in a diptych. Even if you don’t have any specific ideas in mind, store these summery photos in a special folder. Your future self will thank you.
If, like me, you’re eagerly looking for ways to escape the heat, go to the countryside. You’ll get to ground yourself, photograph new locations, meet new people, and refresh your body and mind.
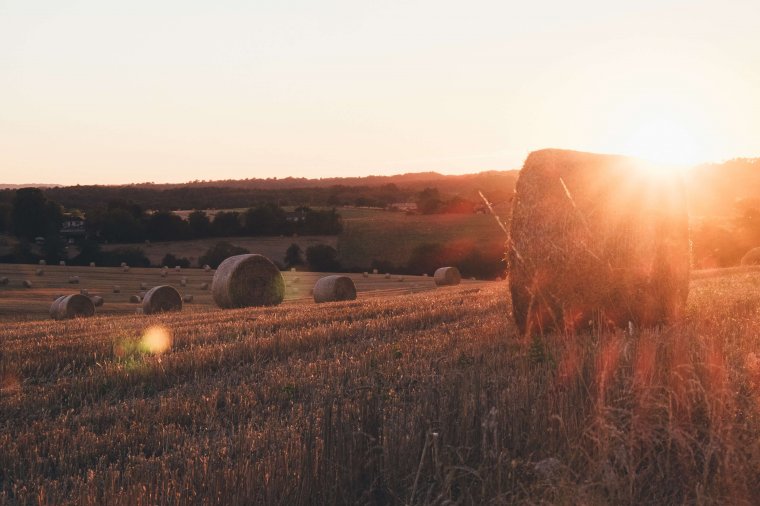
Shortly before sunset or after sunrise, the sun creates an ethereal glow. The golden hour lasts longer in the summer; use this fact as an excuse to spend some quality time with your friends. You’ll have the chance to bond with them and sharpen your summer photography skills.
There are lots of affordable hobbies that are perfect for hot August days. In addition to learning something new, photograph your experience. Here are a few ideas:

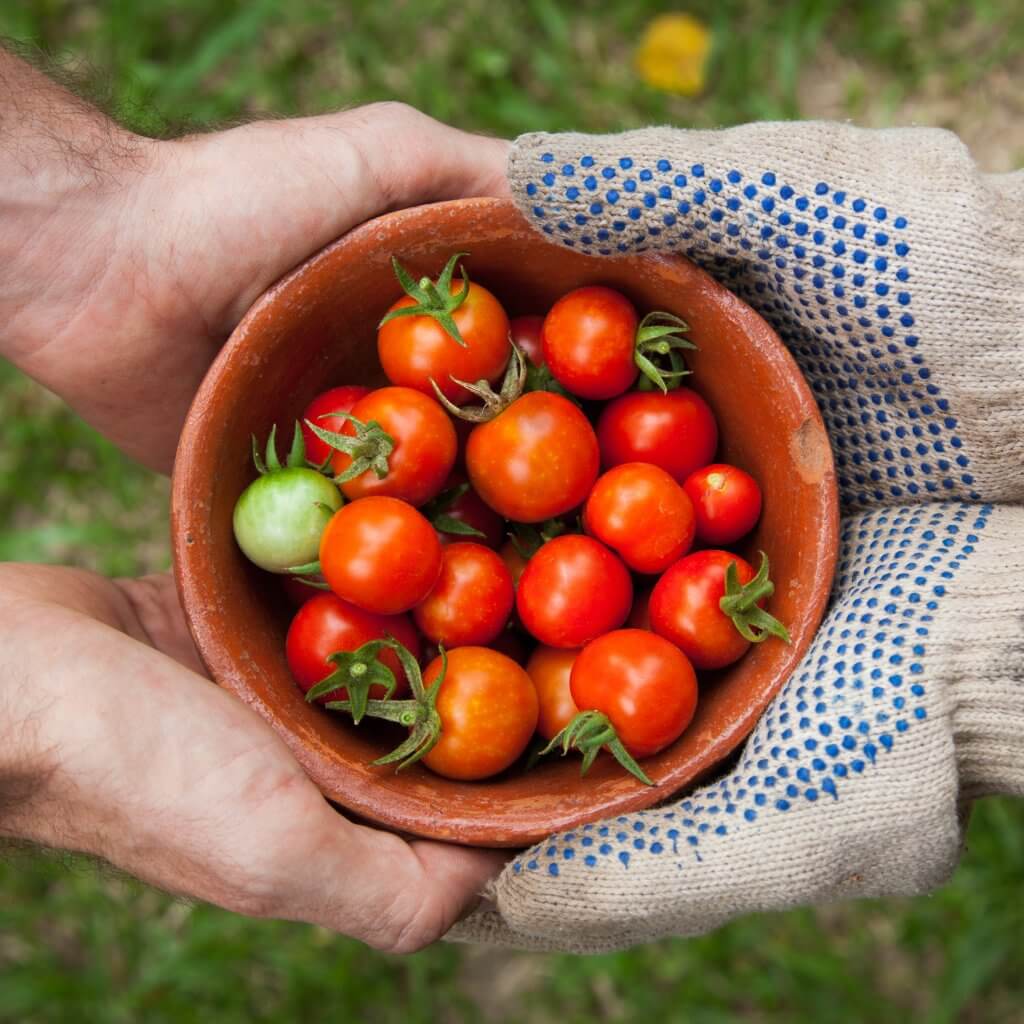
Food photography is an exclusive genre that many of us have yet to try. Fortunately, August is the ideal time to dive into this genre. Thanks to the abundance of fruit and vegetables available, you can create your own food photography challenge without spending a lot of money.
Fractal, haze, polarizing, neutral density. All of these things are lens filters that will help you photograph landscapes on bright days, add a surreal touch to your portraits, or enhance the colors in your photos. If you can’t afford them, make your own! There’s an abundance of incredible tutorials out there, from paper filters that will change the shape of your bokeh, to simple cling film that will make your images look dreamy.
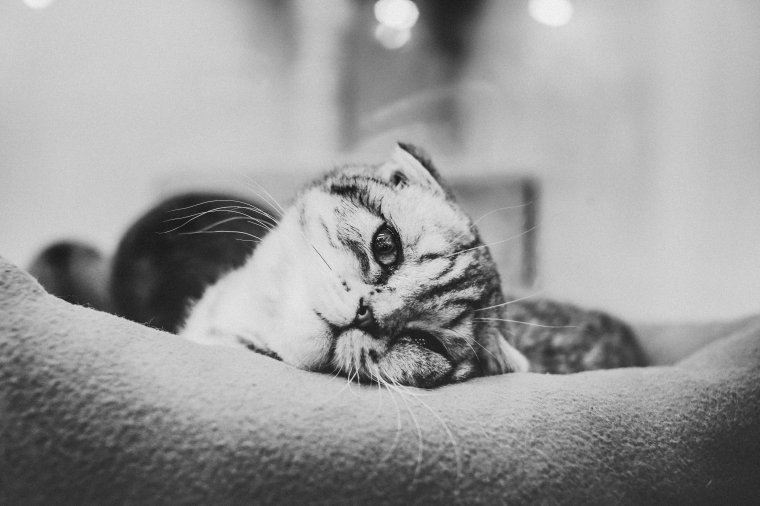
August is known for its bright, vibrant colors. Why not challenge this idea by photographing the summer’s colorless side? By introducing yourself to a world you’re not used to seeing on a daily basis, you’ll improve your imagination and create a great photo that will beautifully enhance your portfolio.
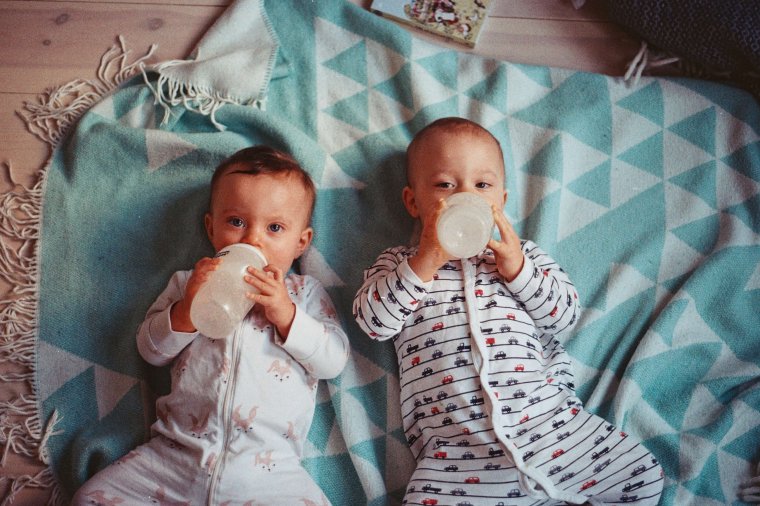
The warmer months are a time when family members come together and go on summer vacation. Use this opportunity to photograph activities that you cherish.
Camping will expose you to a plethora of photo opportunities: gorgeous landscapes, breathtaking details, candid portraits, and stunning night skies.
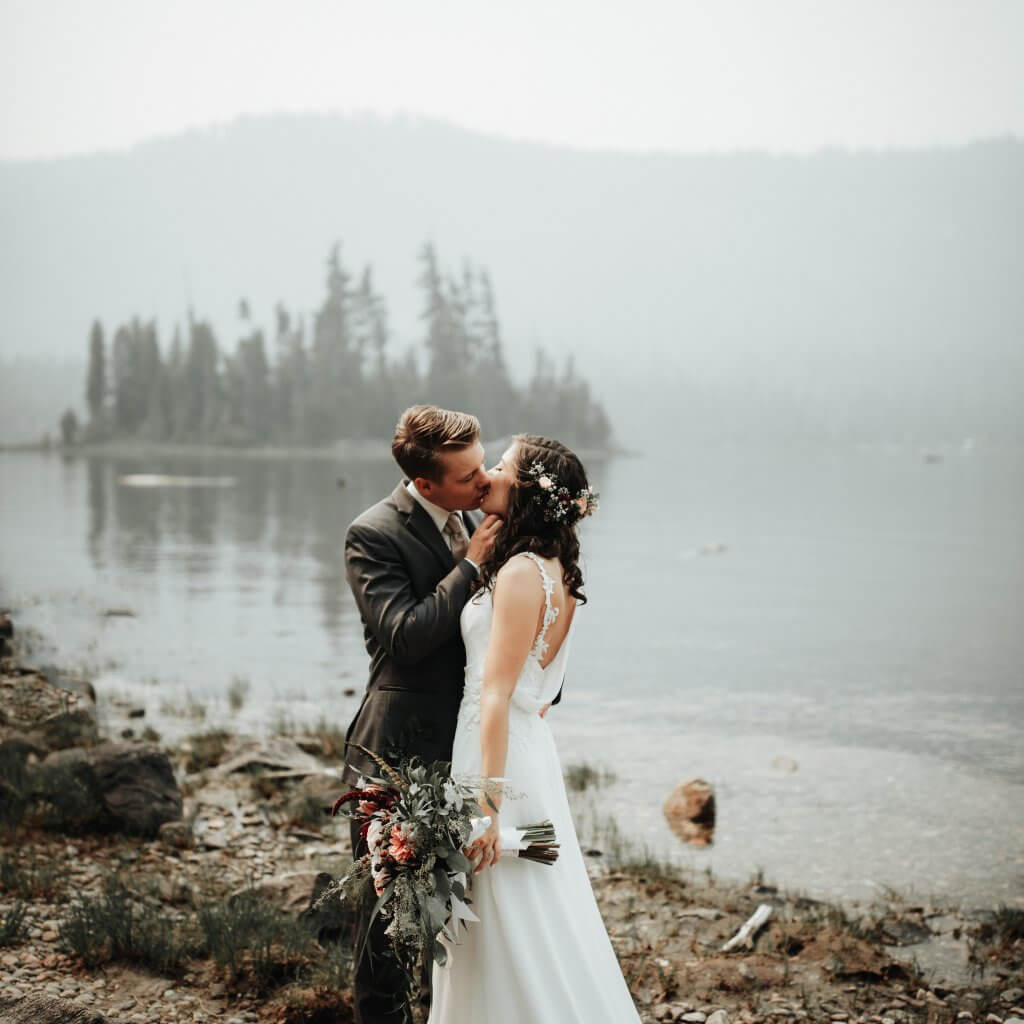
Weddings are usually very busy. Since there’s so much going on, it’s likely that one photographer won’t be enough to capture every special moment. Contact a local wedding photographer and offer to help them shoot. You’ll get to earn some money and improve your wedding photography skills.
Every challenge must have a conclusion and a reward. Write down your accomplishments, highlight your strengths, and think about the skills you’d like to improve. Most importantly, reward yourself with something you love, be it a guilt-free day of laziness, a day out with your friends, or a mouth-watering snack.
There’s an abundance of exciting things you can do during the month of August. These activities will not only relax you but give you an opportunity to become a more experienced photographer.
Make the most of the extra time you spend with friends by setting up a summer portrait session! Not only will you take advantage of the season’s golden sunlight, but you’ll also appreciate appreciate its spectacular colors and improve your photography skills.
Here are 10 portrait ideas that you can use in your photoshoot today.
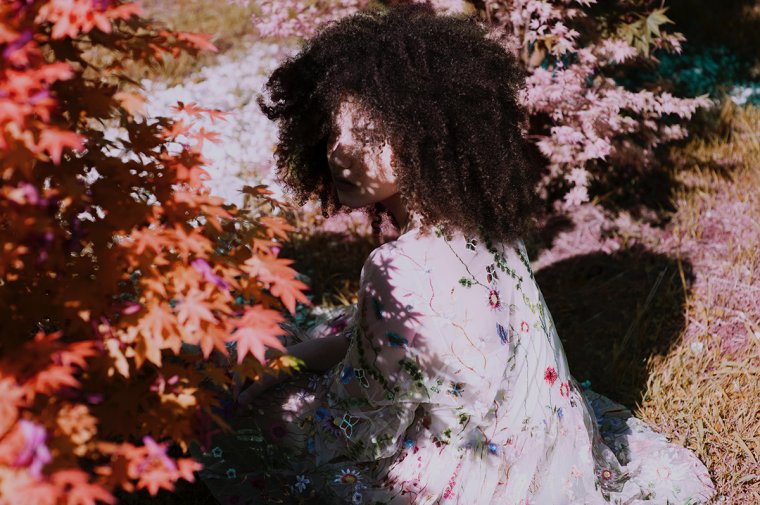
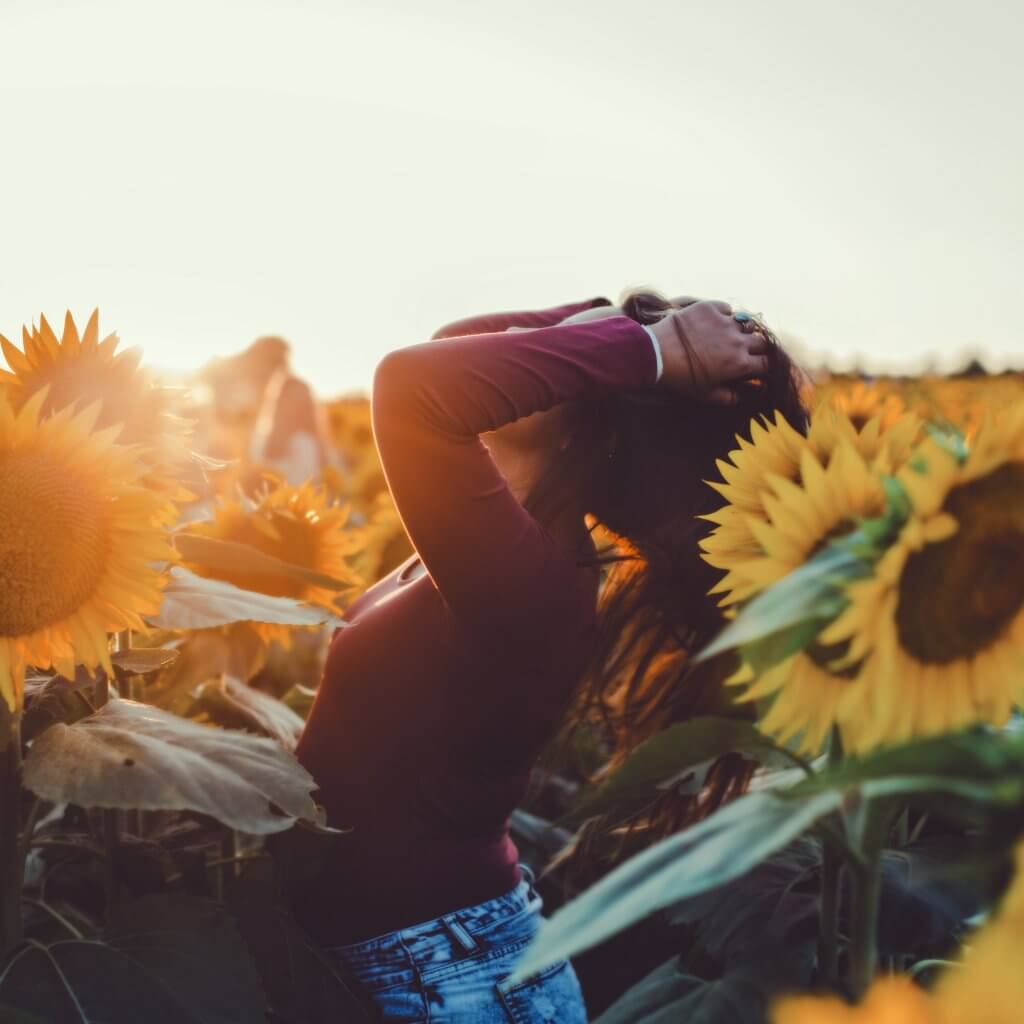
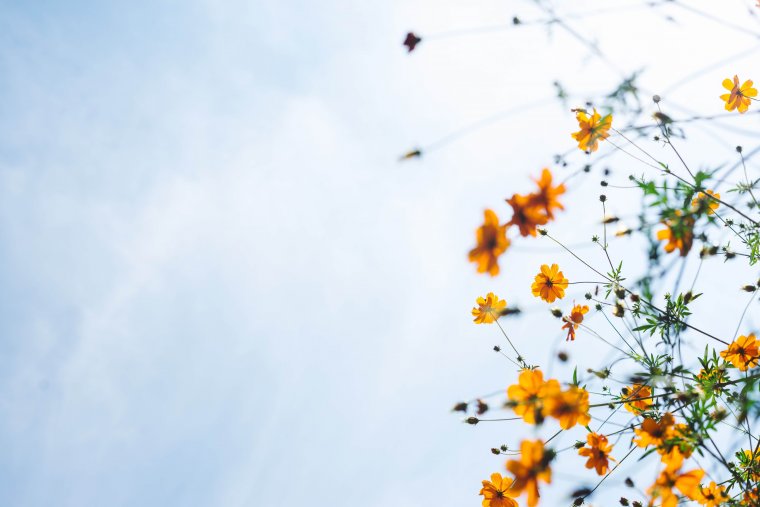
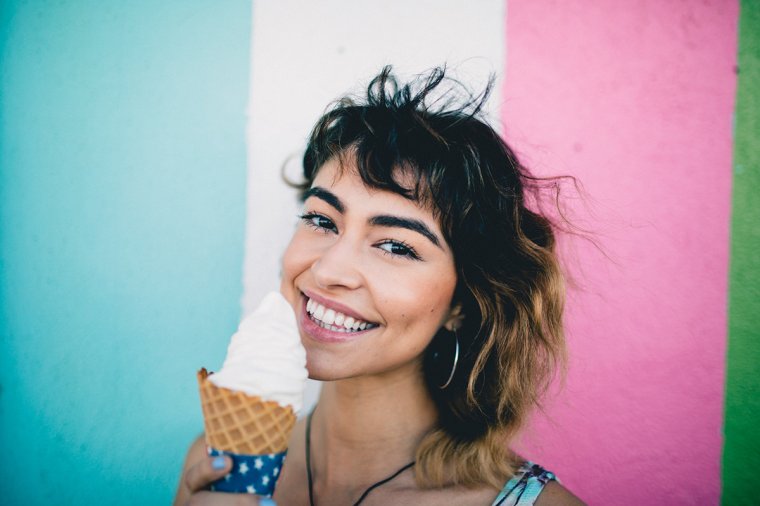
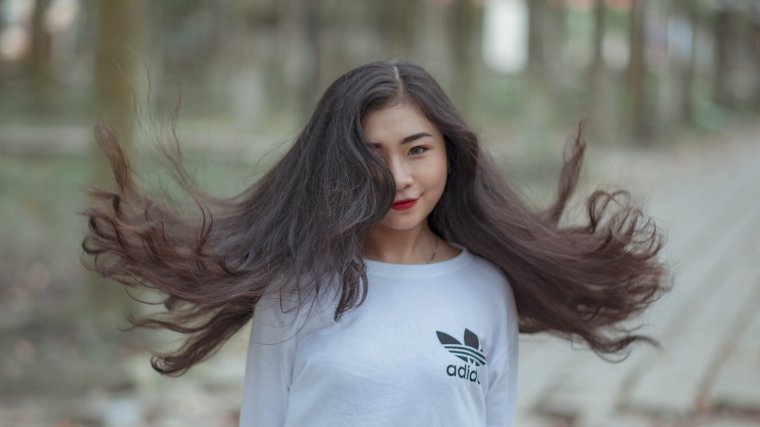
Hold a summer hat, hair, or a patterned object against the sun to create beautiful shadows on your subject’s face. As you can see in the photo above, even a simple flower bush will do!
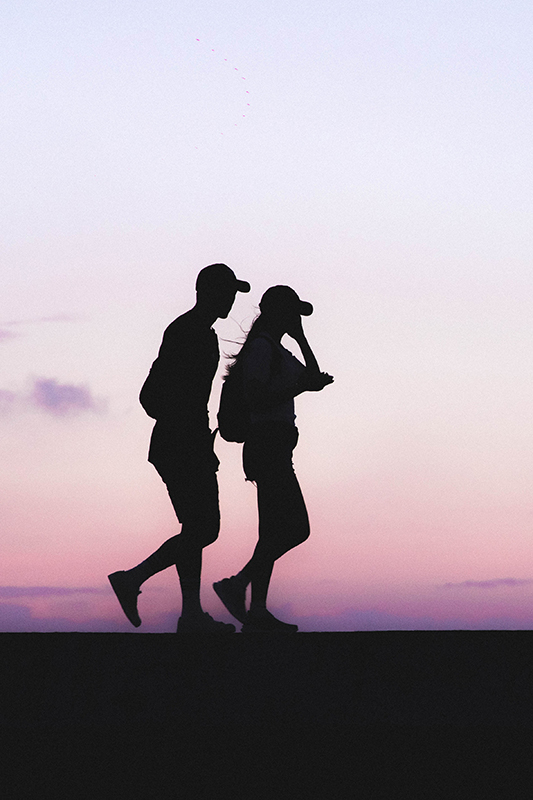
Summer landscapes are nothing short of breathtaking. You can include them in your portraits by creating silhouettes. (Have your subject stand or walk in front of a brighter background and lower the exposure until you see a silhouette.)
My favourite silhouette-making times are during a sunset and on a cloudy day.
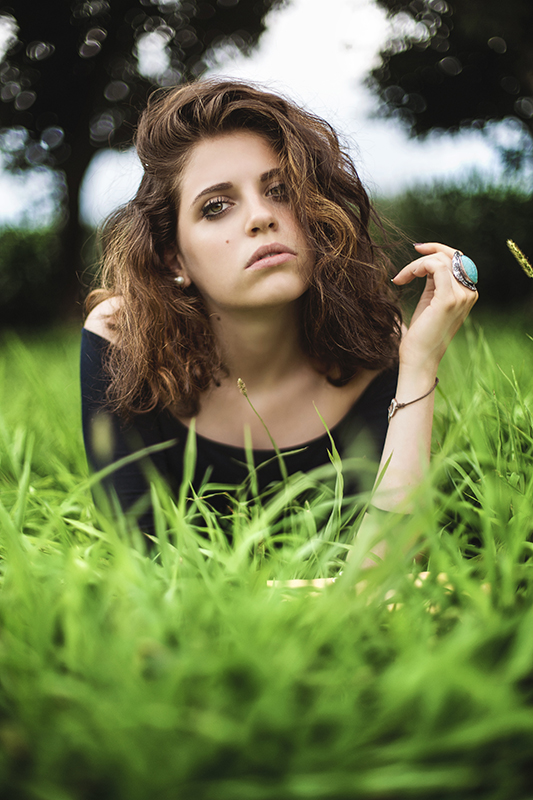
Parks are ideal for photoshoots of any kind. They’re accessible, free, and always open. This is a great opportunity to challenge yourself by limiting your resources. Try to take stunning portraits in simple locations. You’ll be surprised by how many ideas you’ll get in the most “boring” spots!
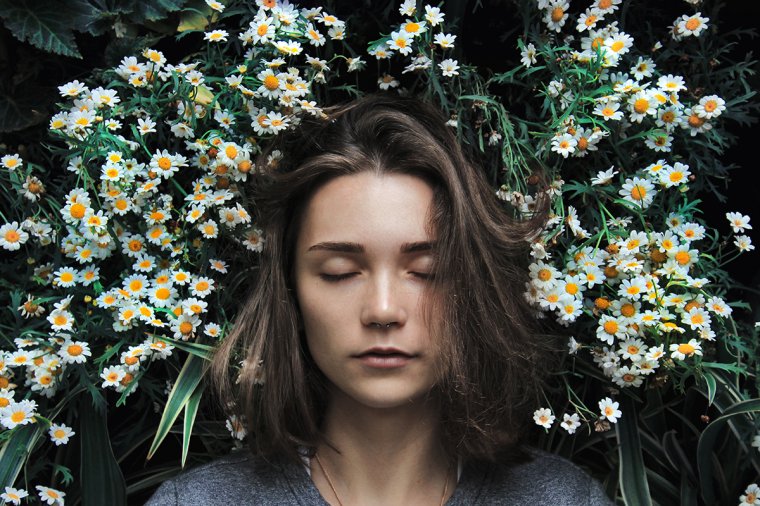
If you have access to a botanical garden, have a flower-themed photoshoot. Flowers can be used as alluring foregrounds, detailed backgrounds, or simple props. Despite their simplicity, they’ll light up your subject’s face and add a pleasant pop of colour to your photographs.
(If you don’t have access to a botanical garden, try experimenting with flower bouquets or flower bushes.)
What words come to mind when you think of the summer season? Could you use a simple keyword as inspiration for your shoot? If you’re completely out of ideas, challenge yourself with 1-word themes. By limiting yourself to only one word, you’ll encourage your imagination to work hard. This might lead to a lot of surprisingly inspiring ideas.
Here are a few keywords to get you started:
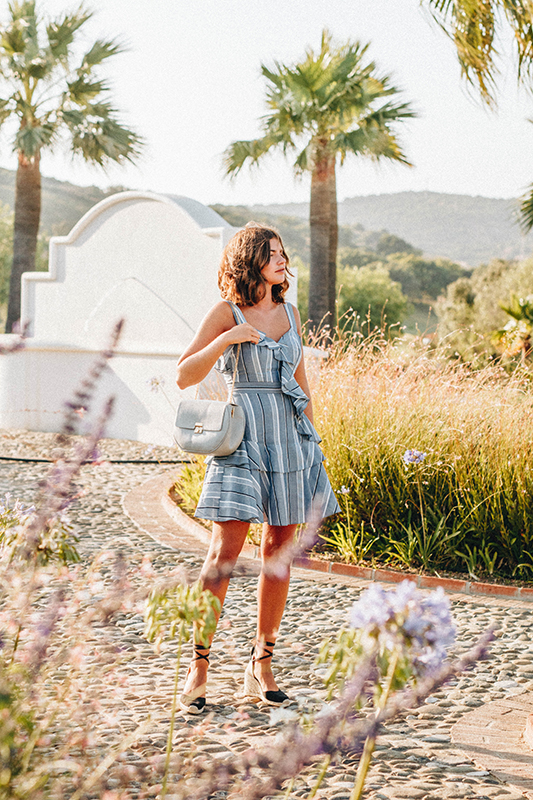
The warm weather is ideal for a fashionable look book. If you want to improve your fashion photography skills, now is the perfect time to do so. You don’t need to have an indoor studio or live in an exotic country to achieve this. Experiment with street fashion or have photoshoots in parks (or even in your own home). You’re bound to find inspiration wherever you go.
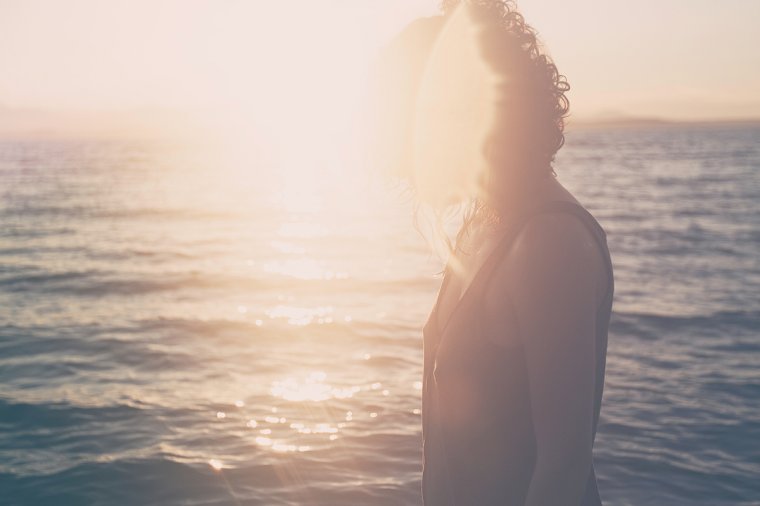
There can never be enough golden hour photoshoots. Right after sunrise or before sunset, go to the beach and have a cozy photo session with your favorite person. The warm light will enhance your model’s features and create an ethereal atmosphere in every photo you take.
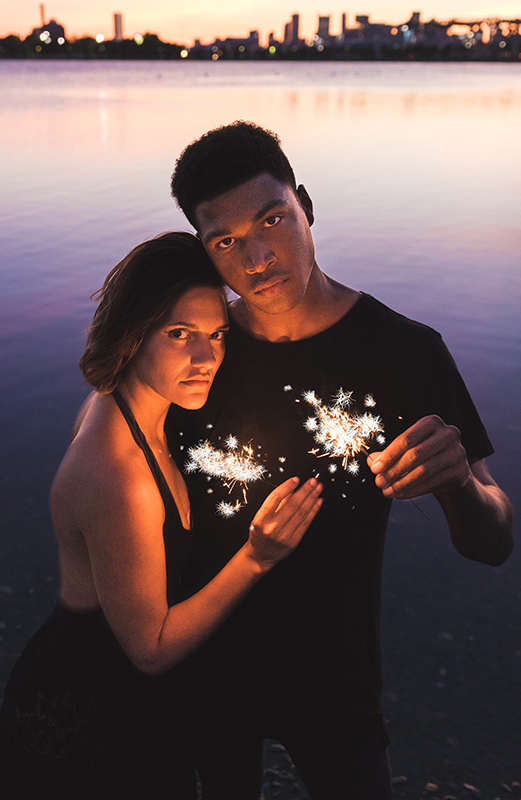
Summer nights are relatively warm and colorful, which makes them ideal for creative photo adventures. If you want to strengthen your nighttime, portrait, and couple photography skills, take photos of people in love using a limited source of light.
Some of the most affordable and efficient light sources for evening/nighttime shoots are:
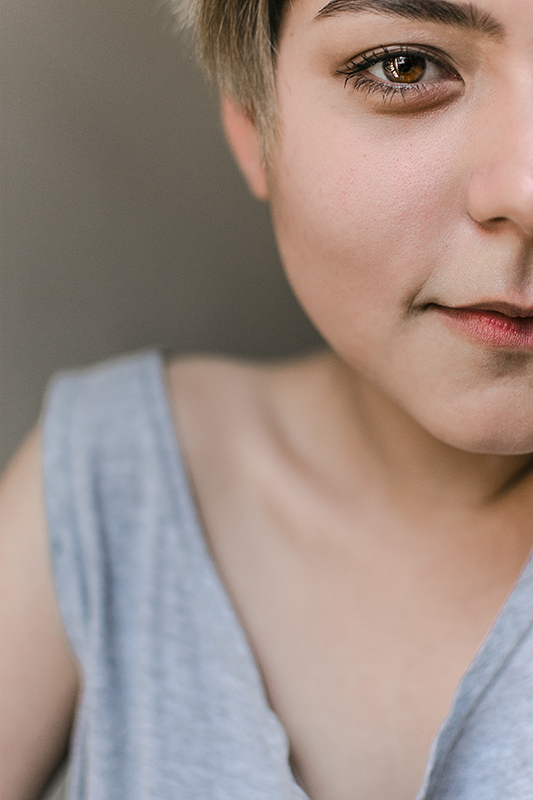
If it’s too hot to go outside, take self-portraits indoors. To create well-lit portraits, photograph yourself next to a window. The soft light will give you a glow reminiscent of classic portraits. If you want to take it a step further, take closeups of yourself. Your results will look unique and might even end up in your portrait photography gallery!
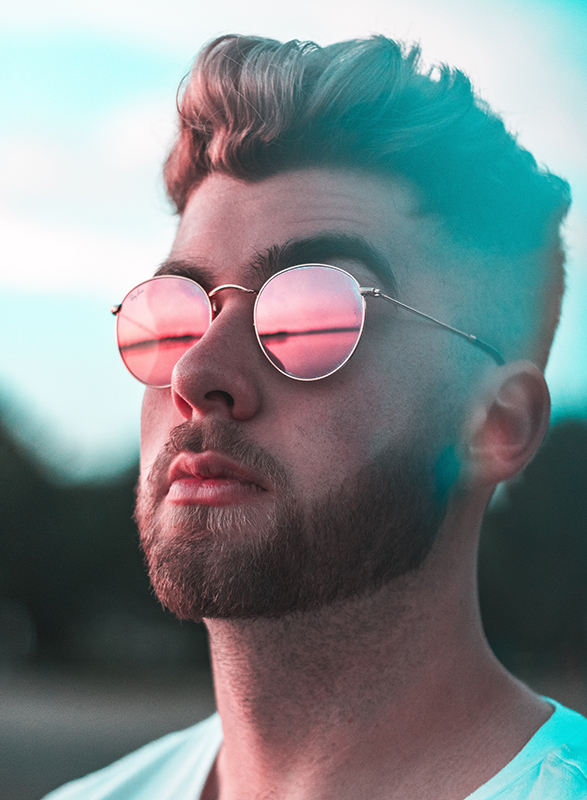
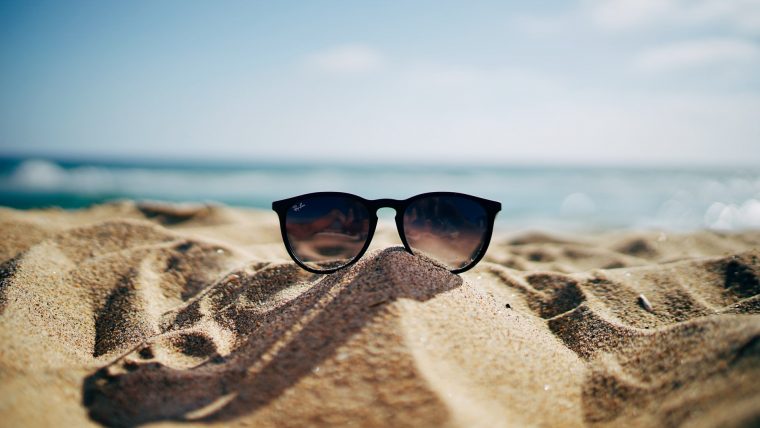
Sunglasses or windows reflecting summer landscapes are the perfect way to capture both nature and people simultaneously.
You don’t need to have a lot of money to take incredible photos this summer. Just use your imagination, have fun with your friends, and enjoy 2018’s wonderful summer days.
Which of these ideas stood out to you? Let us know in the comments!
The one downside of summer photos is that the sunny day can create unwanted shadows and lights. But fear not, Adobe Lightroom is to the rescue. You don’t need to know how to rock Adobe Photoshop, you just need to know some basics about Lightroom. With a few simple settings, your summer picture can look as amazing as you imagined.
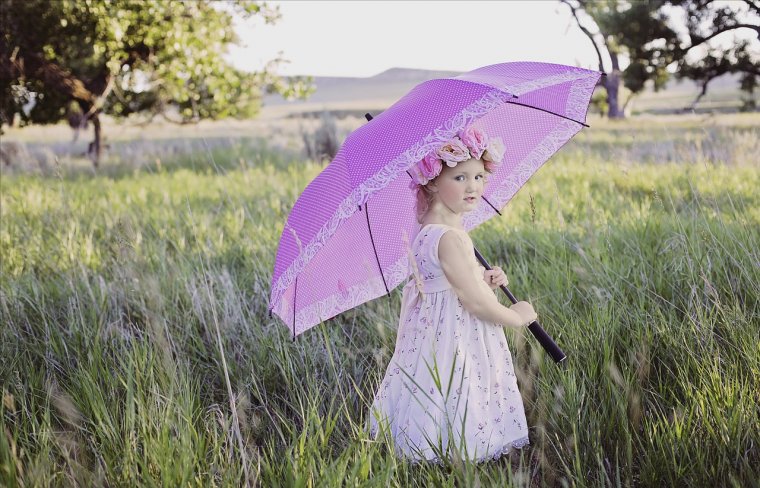
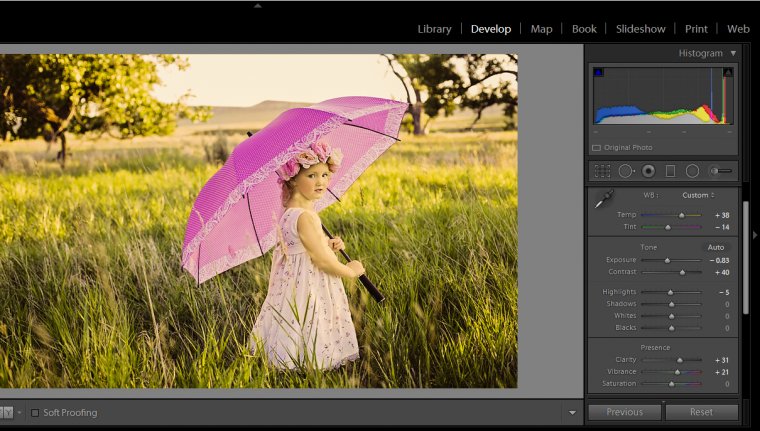
We’re going to be using the below photo for editing. Shooting in the shade is a good way to avoid lights and shadows, but, as with this picture, the end product can look dull and more in tune with spring or fall. We’ll be fixing that with some simple adjustments that anyone can do.
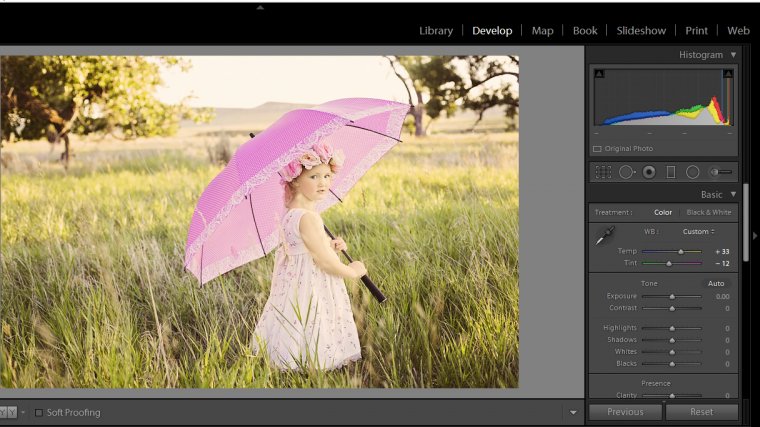
The first step in editing your photo is to adjust the temperature and tint. Temperature will give your photo that warm glow that you associate with the summer season. By increasing the temperature of the picture, you can heat up your image and immediately make it feel more summer-like. Lowering the tint a bit will also help. The shade in the image has toned down the green of the grass. But green grass and bright colors are exactly what people think when they think of that perfect summer day. When you lower the tint, you increase the green in the picture, making the grass stand out more.
Already the image looks a bit more like a summer photo. However, now everything is a bit soft, too washed out.
To fix this image more, and make it stand out, we’re going to adjust the exposure and contrast. First, we’re going to drop the exposure a bit. This may make it seem like the photo is getting more washed out, but it won’t for long. After that, we want to increase the contrast. This is why we lowered the exposure. The contrast will sharpen the lines between the objects, making them stand out. Then the exposure helps soften the lines, making the picture look more natural.
See? With just a few simple sliders we’ve turned a dark, lack-luster image into a bright, colorful summer picture. But there’s still some more we can do.
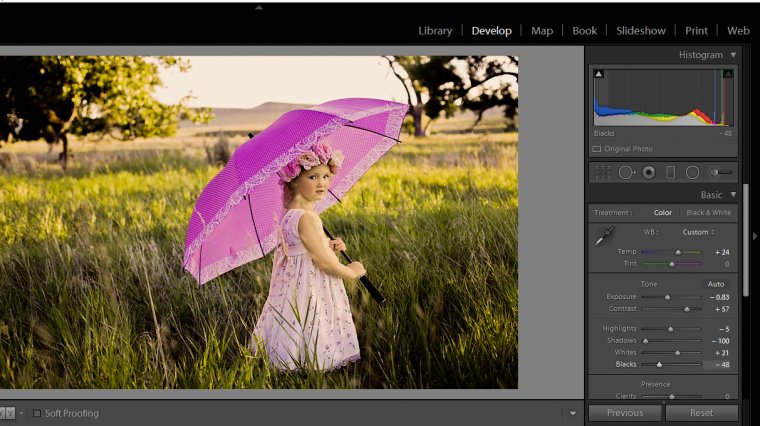
The next step we’re going to take is to adjust the highlights, shadows, whites, and blacks. For this image, we lowered the shadows and blacks and increased the whites. We did this for two reasons. One, we can’t ignore that the image is in the shade. Even though we can make the image look more bright, we need to pay attention to the shadows. By lowering the shadows, it actually darkens them to show off the shaded areas. Then we have to compensate by increasing the whites to help the model stand out.
Now there’s just one last step to making this the perfect summer picture. This next step is a bit more advanced than adjusting sliders, but it’s simple enough, and in the end, it will really make your image stand out.
You’ve probably noticed that a lot of summer images have a flare in one corner or one side of the image. This happens when you shoot directly at the sun. But it’s not always a good idea, or possible to get this effect. If you can’t capture it naturally, you can produce a sun flare effect in Lightroom.
First, create a Radial Filter in the area of the picture you want the flare to occur. It’s a good idea to create it where the sun would naturally be, so look at shadows in your image. For this image, we chose the top left corner to help show off how the filter works, even though the sun is most likely on the left/behind the camera.
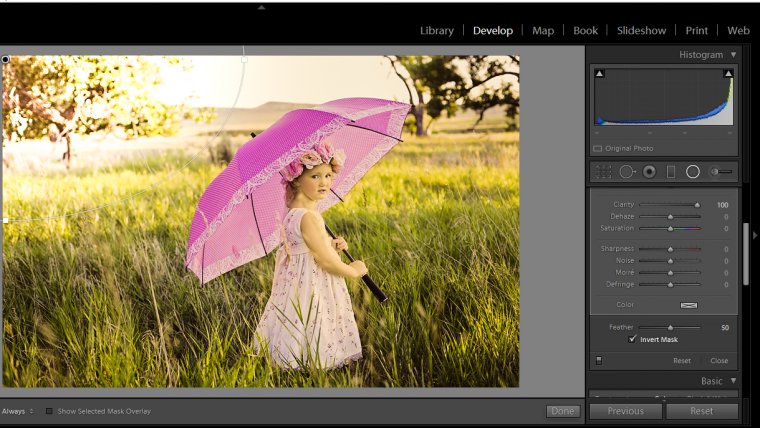
When you first create your filter, you’ll notice that the effect is opposite of what you see above. To change this, simply scroll to the bottom of your options on the right and click the Invert Mask box. Then lower the feathering a bit to make the circle look more natural.
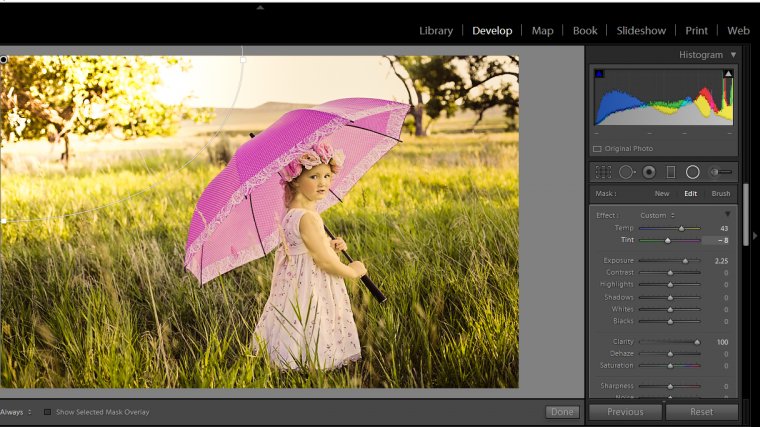
Now to make it look more like a real sun flare, we want to increase the temperature, drop the tint, and up the exposure. This process is similar to editing your original photo, but we want to take things to more of an extreme to make the flare bright enough.
With a few simple adjustments, we just turned a dull picture into a bright summer masterpiece. With a few spare minutes, a small understanding of how Lightroom sliders work, you too can edit your photo to look like the perfect summer photo.
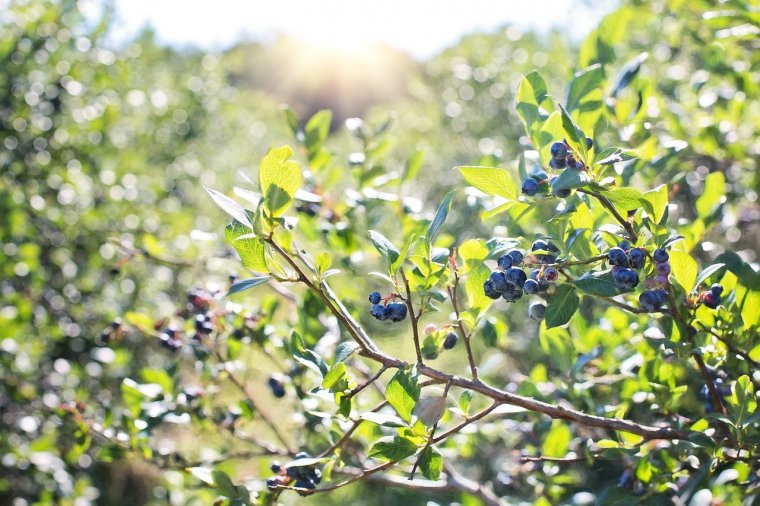
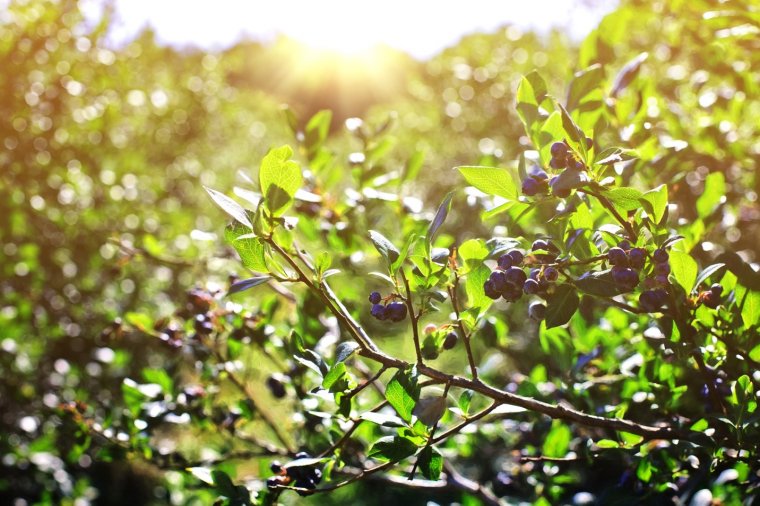
Summer has its own unique aesthetic to it that’s hard to capture in a photo sometimes. Luckily we live in the age of Photoshop. By following these simple steps you can turn a good photo into a great summer photo. We’ll be working with this photo today, because what says summer more than picking fruit straight from the vine on warm afternoons. This Photoshop tutorial works great with plant photography but can also be applied to portraits and landscapes.
Before we get into the specifics of summer day aesthetics, we have to make sure we’re working with a good base picture. The most important fix for this picture was adjusting the curves. This warmed the picture up. It also gave the picture a more pronounced solar flare. This isn’t wanted for every picture, but the sun is a big part of summer. So having a sun flare in your image is an excellent way to bring summer to your photo. If you don’t have an image with the sun already in it, we’ll be learning how to artificially create the solar flare later on in the tutorial.
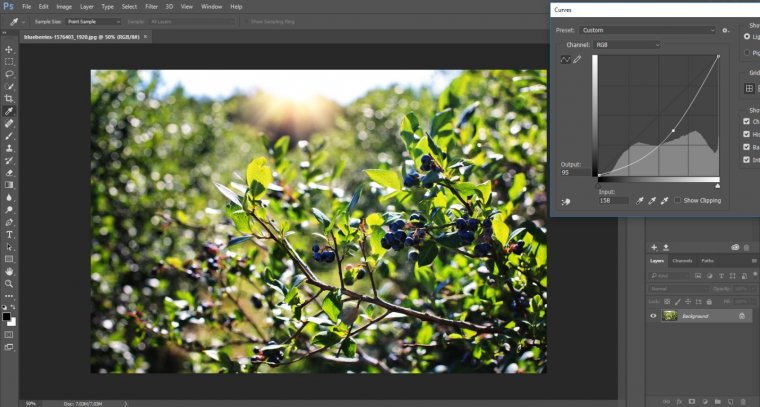
This is the step to experiment and see what works best for your individual picture. Before moving on, we adjusted the blue hue a bit to bring out the color of the blueberries. But be careful, going too far into the blues and greens will overshadow the yellows and oranges. Yellows, reds, and oranges are key to a summer photo. We’ll be adding some of that color soon. For now, just keep it in mind as you adjust until you find a good starting point.
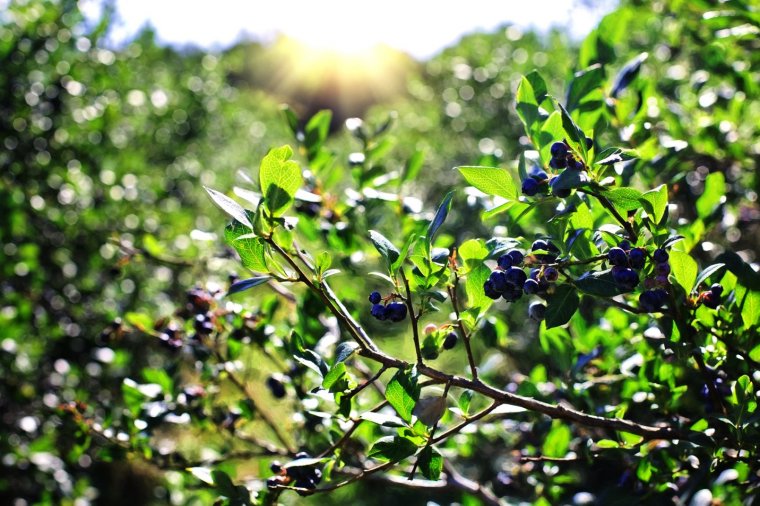
Something that most summer photos share in common is the glare from the sun or the solar flare. After all, the presence and intensity of the sun is what gives a photo a summer vibe. But if your picture didn’t allow for the flare, or if the flare isn’t just right, your picture is less likely to be noticeably summer related
First, create a new gradient layer. For the color pick a nice warm orange and make sure it’s going from color to transparent. For the angle, you’ll generally want sometime around -120, to get the flare in the top right corner as is a common location. If, like in the example, you have the sun already in your picture, try and align the angle to fit with its natural location.
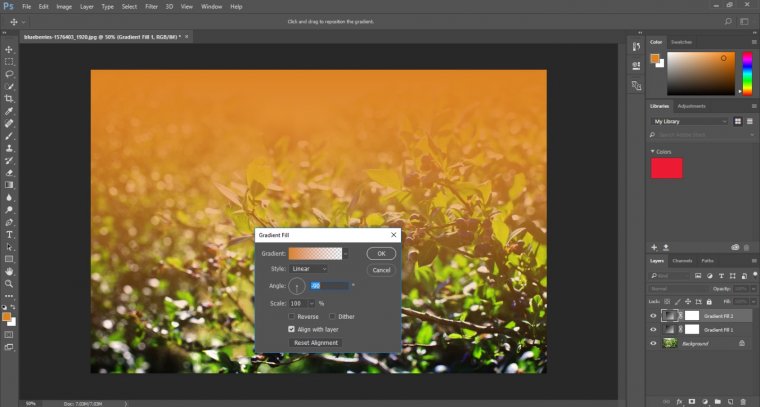
To keep the picture from looking overwhelmingly orange, you want to blend it into the picture for a more natural look. To do this, go into the blending option on this layer. Set the mode to screen and lower the opacity just a bit. You still want it mostly opaque so it doesn’t overshadow the whole image. Here’s the picture with the added/improved sun flare.
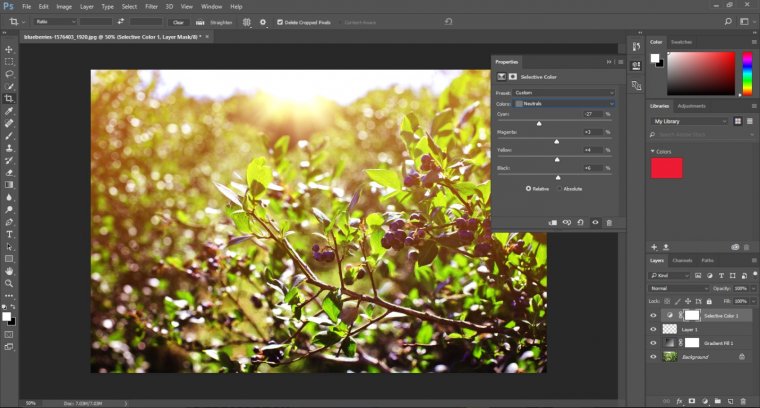
Next, we’re going to bathe the image in warm color. To do this, create a new layer for selective color. This layer will allow you to adjust the overall shading of the image, much like adjusting the basic hues and colors. For most summer photos you’ll want to set the colors to neutral. This ensures that you’re targeting the whole image. Play around a bit until you find the shading and colorization that looks good to you.
Now we’re going to do something a little weird. Generally, warm colors dominate in a summer photo. But to totally ignore the cool colors is to do a disservice to your image. So let’s bring a little bit of coolness back to your photo. Create a solid color layer, but this time pick a very light blue. Set the blend mode to soft light and lower the opacity a lot; it takes a lot of effort for the blue to show through. It may not look like much of a difference right away, but it’s very effective for your overall finished product.
Once you’re certain that everything looks the way you want it to color and glare wise, merge all of your layers. After this point, you can’t change the settings easily so make sure this is the last thing you do. Next, create a duplicate layer. Give this new layer a Gaussian Blur with a setting around 25-30. The last thing to do is play with the blending. Set the mode of this layer to soft light with a setting around 50%. This will blend the blur down and create a more emphasized focal point to your picture.
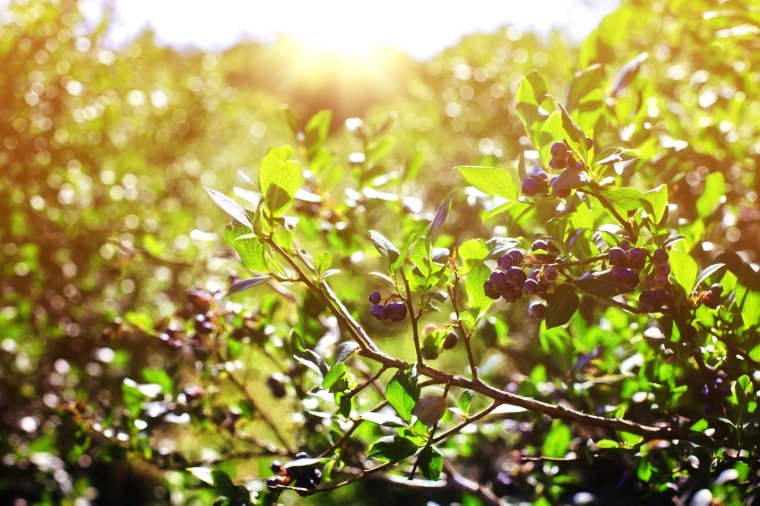
By following these steps you’ll create an amazing summer photo using Photoshop. So give it a try and let us know what you think!
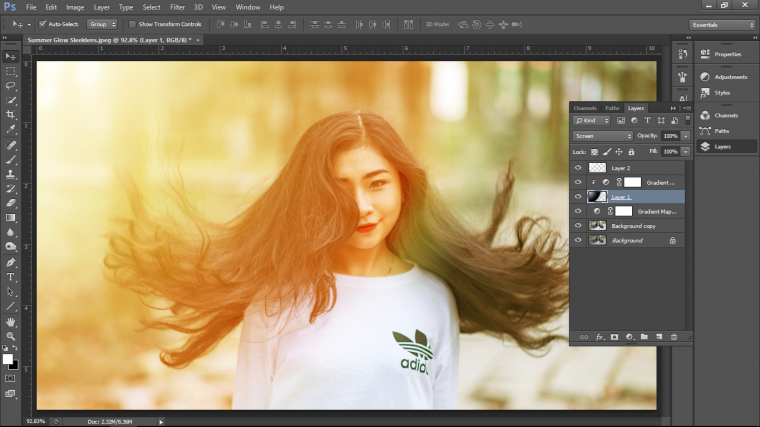
Now, let’s add a little sunshine to our summer pictures.
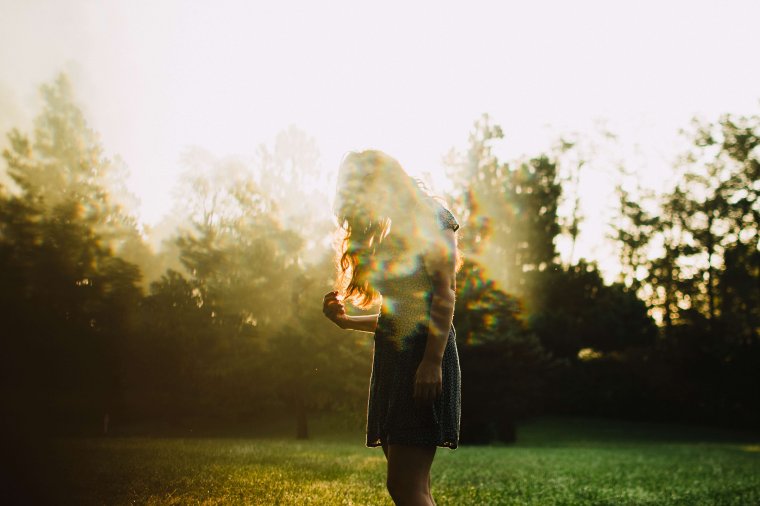
We’re going to be using this Image below today for our Photoshopping.
So this image isn’t exactly the brightest of Images so we’ll have to do a little bit of editing to it first to bring it to life before we add the summer glow.
The types of images that you need to be looking for, for this would be images that have the light coming from behind the subject or a light neutral one, mine is more neutral.
Things that you could use this for is social media images, you could really add a bit of life to a few of your shots and maybe have people asking “Hey were you on holiday? where is this?!” but in reality, you were just chilling at you mansion haha.
Ok let’s get to it… your Photoshop is open I assume…
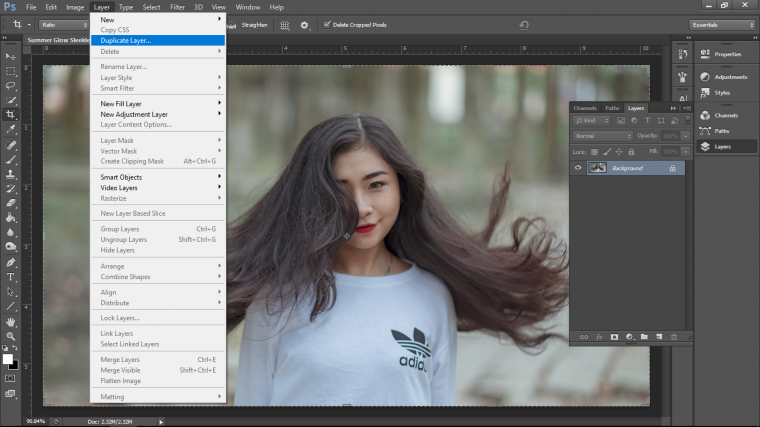
Cool, so the first thing I’m going to do here is to go to Layer and create a Duplicate Layer.
Next, I want to fix the dullness of my image, your image may be fine as is but if you want to create another duplicate layer and try this out just to see what happens then, by all means, follow along, you can always delete the layer afterwards if it didn’t work out too great.
So go up to Image – Adjustments – Curves
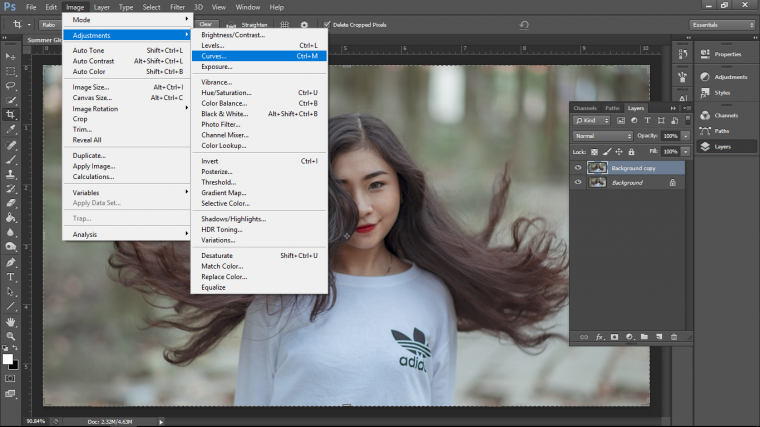
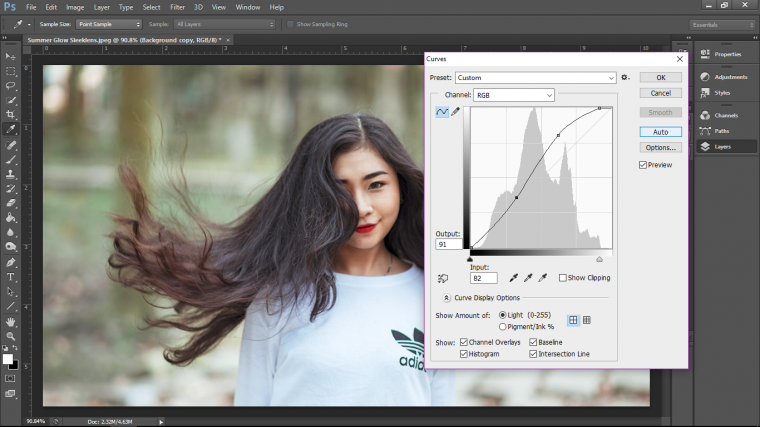
Just to keep this mega simple we’re not going to mess around with anything manually, instead, you’ll see “Auto” so click on that and that should improve your image.
Then I’m going to go up where I found Curves, only this time I’m going to click on Levels, then again I’m just going to hit that Auto and see what happens.
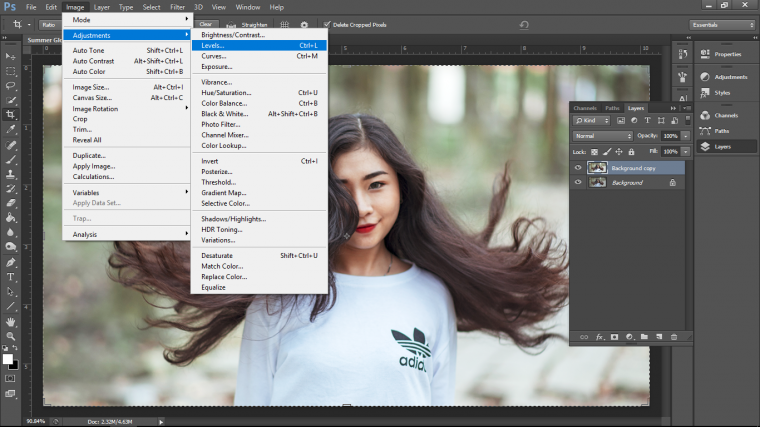
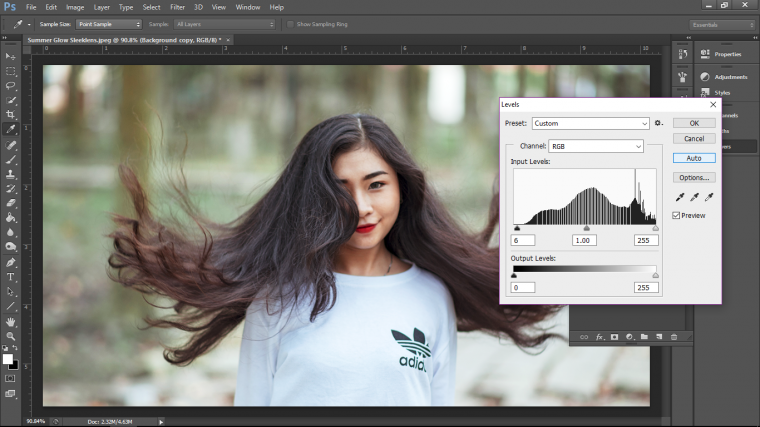
Don’t worry if it doesn’t work out for you, you can always key in on your keyboard Ctrl + Alt + Z for taking a step backward, I do this just as a test anyway to see what I get out of it.
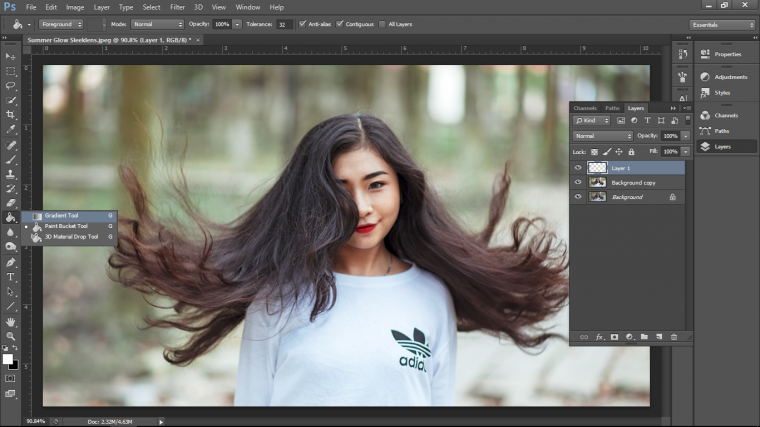
Next, create yourself a New Layer
Layer-New – Layer

Then we’re going to open up our Gradient Tool as shown below.
Now, look at the top left-hand corner of the image below.
You will see [File Edit Image etc]
Directly under Layer, you will see a few little icons that look like squares with little gradient images in them.
You want to choose the second one there, that’s the Radial Gradient, it’s between the words Layer and Type
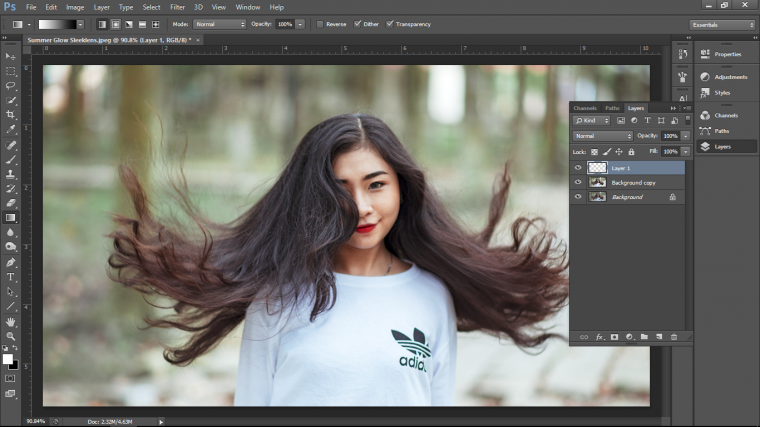
Beside those Icons you will see a Gradient Bar that is under File, Edit and Image, it’s the bar that blends from White to Black when you click on that you’ll see all the different Gradients that are available to you from the standard Photoshop Presets.
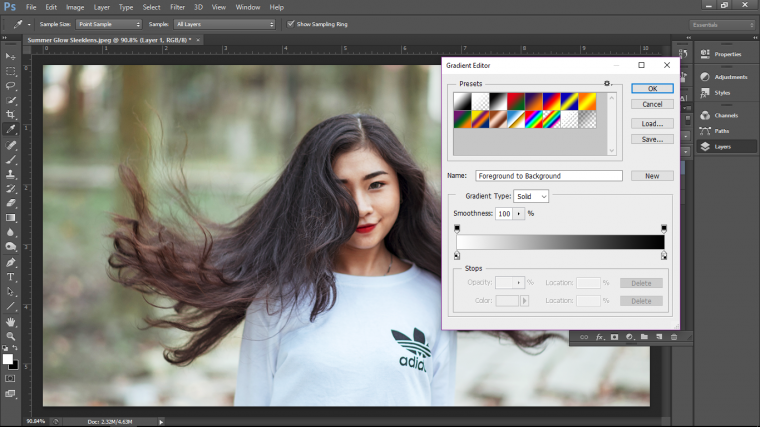
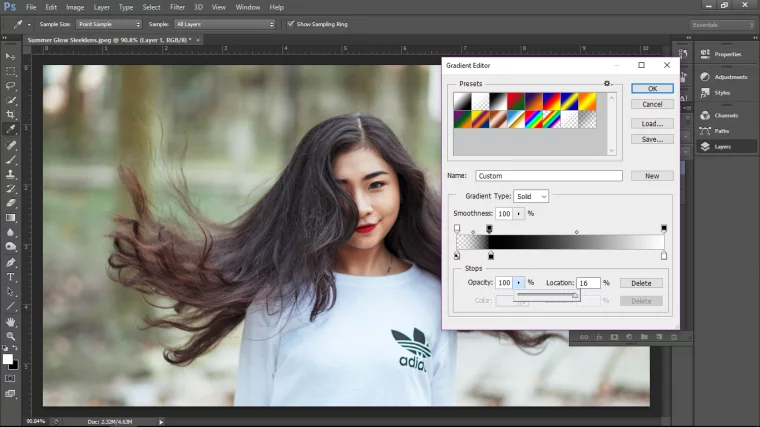
This is your Gradient Editor.
At the top, you’ll see the standard Presets Swatches.
And underneath that, you’ll see the gradient bar itself with the little tabs at the top and bottom at each end.
So if you grab those bottom tabs and slide them you will notice the color on the bottom will shift to more or less.
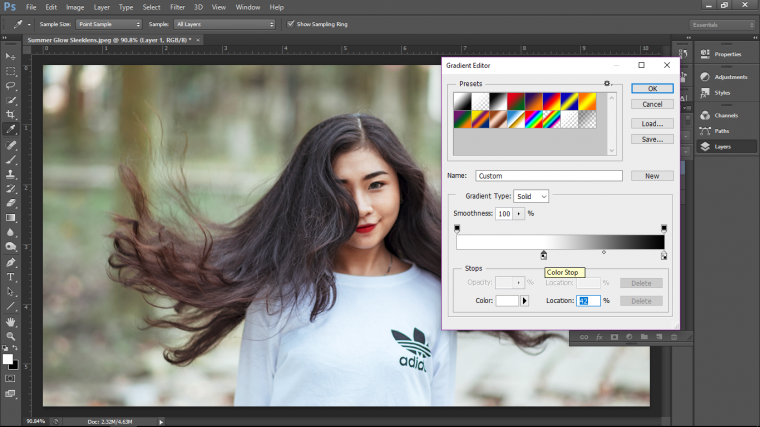
So move everything back to where it was and click on the top one, the top one indicates the opacity, you will see the option for this underneath the Gradient Bar.
Drop the Opacity of the first stop to 0%
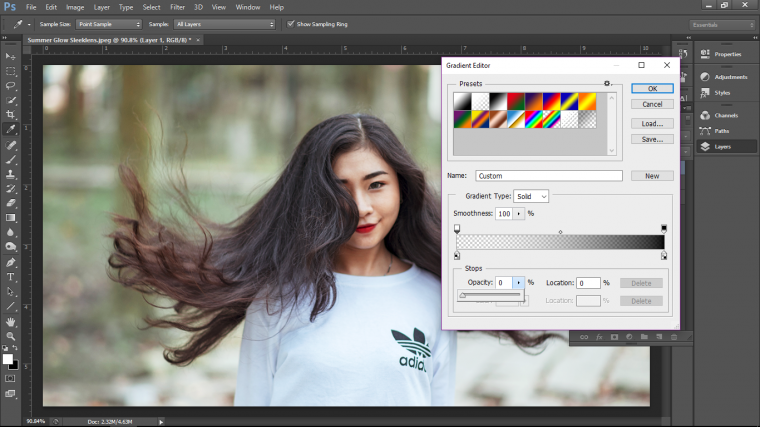
Then when you do this, click on the bottom just under the bar beside the first little tab, you will now see a new one that has been created.
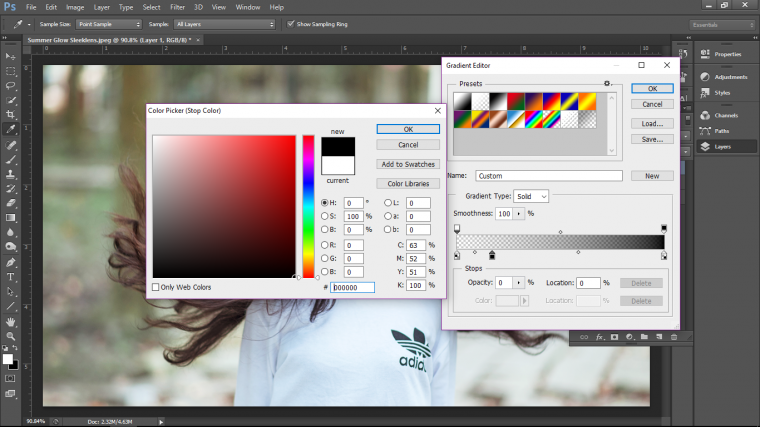
When you double-click on the tab it will open up some color options, click at the bottom for Black, you can click and drag on this by the way.
Then make the one on the right-hand side all white.
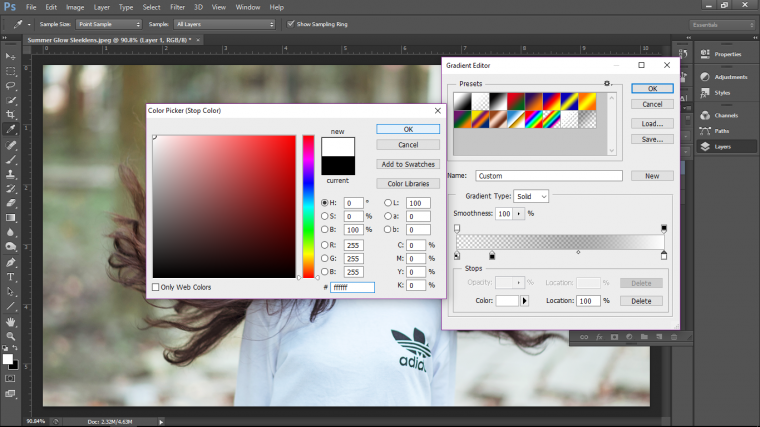
When you have done this go back to the black one and just above it click on the top bar to create a new opacity tab for it, then change it’s opacity to 100%
You can move the black bottom tab out a little bit to where I have it or just a little bit further.
Now go to your screen, click and drag on the top left-hand corner and test it out on your Image, does it end with Black on the end of the Gradient?
If not then you’ll have to click on the reverse box to correct that, you find this in the three options at the end of the Gradient options (you know the ones with the icons and Gradient Editor on it at the top of your normal workspace) below File, Edit etc.
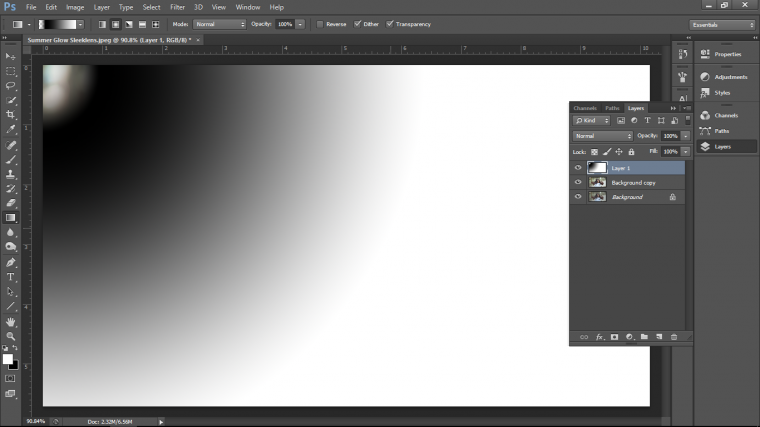
When you have this correct, create something similar to what I have below.
When you get here we will be able to start colourizing the Gradient, because what we have right now is only the foundation of what’s to come so don’t worry.
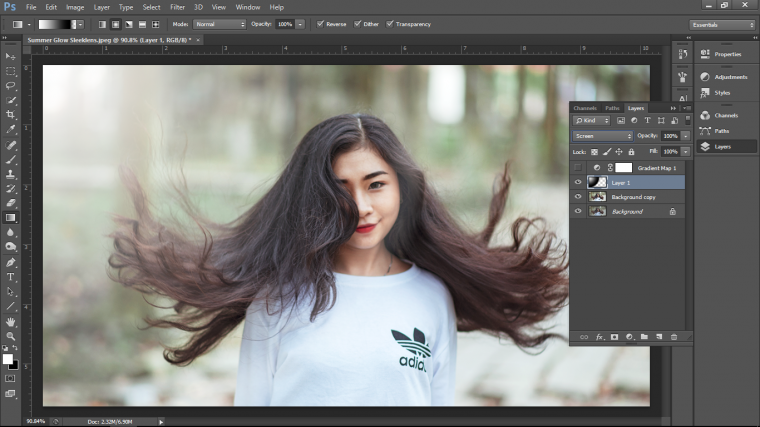
Ok, for now, you can click on the little Eye Icon in your layers panel [you will see that in the image below sticking out on the right-hand side] beside your Gradient Layer to turn it off for now.

Next up we’re going to be creating what is known as a Gradient map, it’ is something similar to what we have created already only it’s an Adjustment Layer.
So to create this you have to go to…
Layer-New Adjustment Layer – Gradient Map
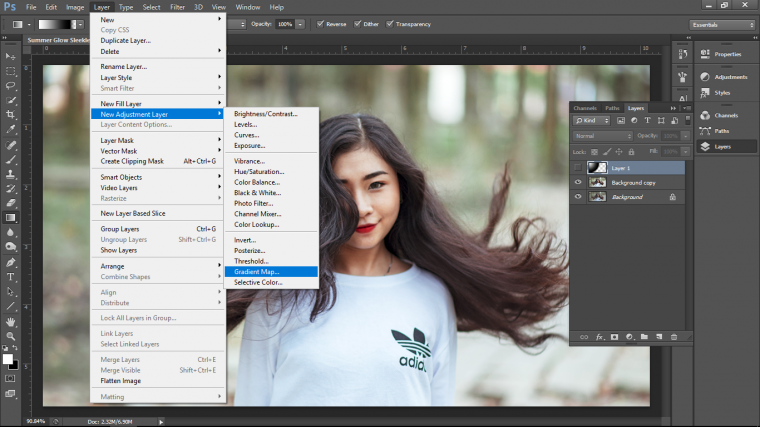
You can see that it is sort of similar, the same kind of rules apply and you’ll see what I mean in a minute, the major change is that it affects your Highlights and Shadows.
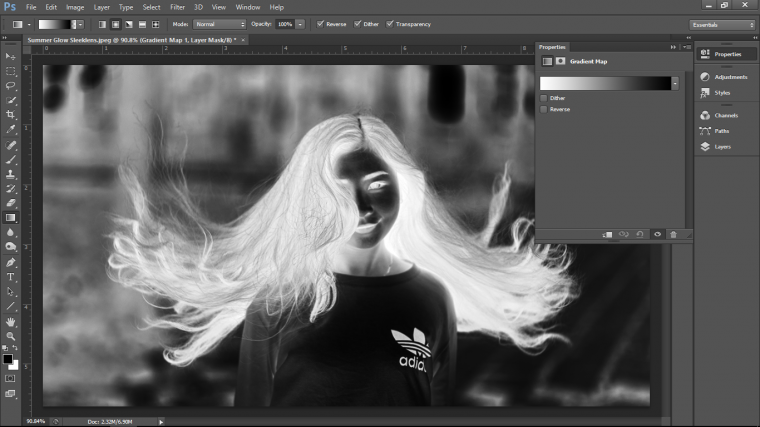
When you click on the Gradient bar you see the same Gradient editor as before appear.
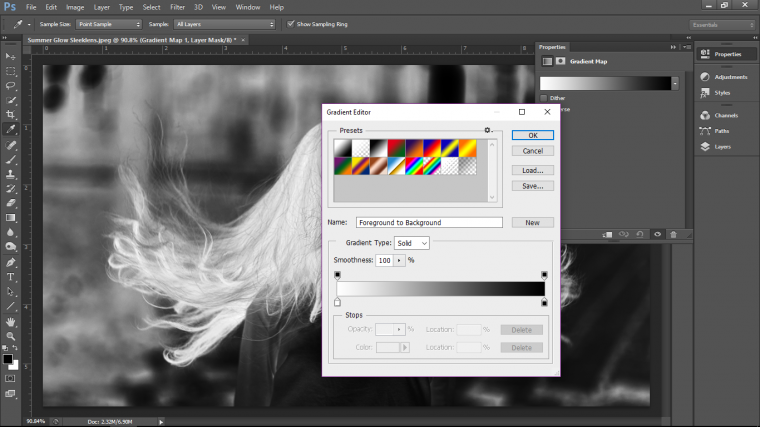
Ok, so what we’re going to do now is to create the colors for our image.
As before remember we talked about clicking on the bottom of the bar to create brand new tabs were we could double-click on to create our own colors for our Gradient.
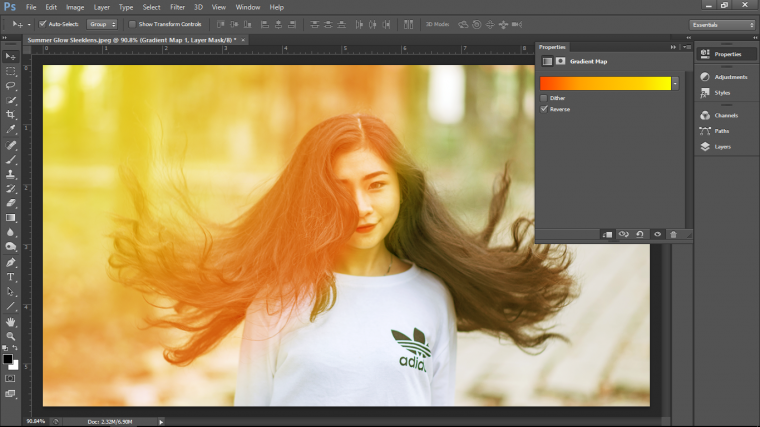
Well, I want you to create 3 new ones just like I have done below.
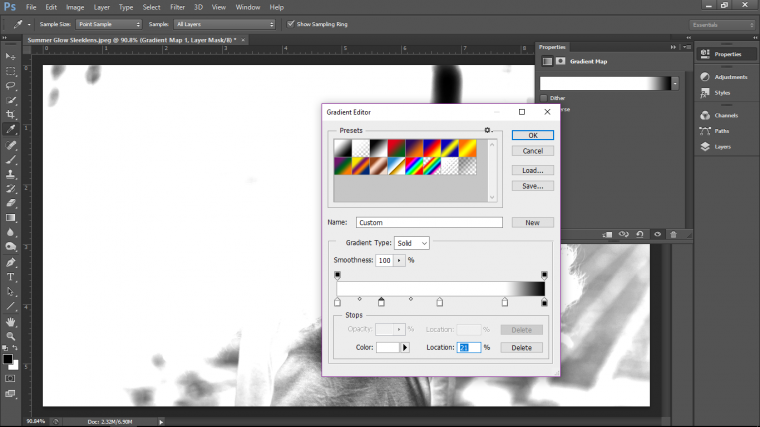
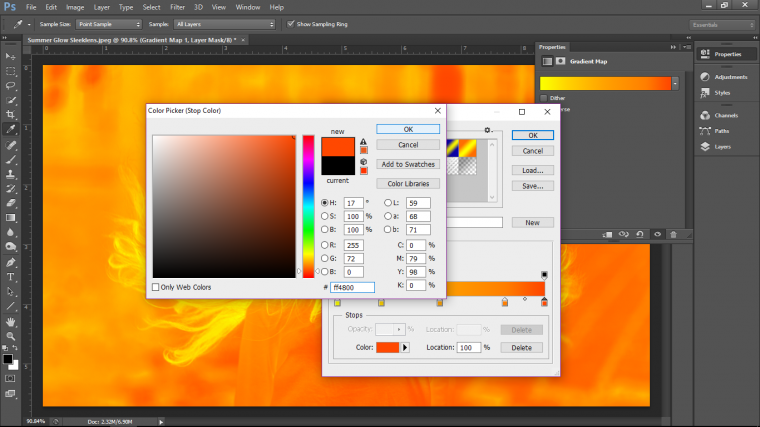
Once you have created the colours then you’ll change the blending mode, but first I just want to note that you want the colours to go from light to darkest, so from yellow to almost red, it doesn’t really matter what end you start from either because you can always reverse the Gradient when needed.
Now click on the Eye icon to turn that layer off temperately.
Now click on the layer with the first Gradient that we created.
Where to find the Blend Mode? well, when you look at your layers panel you will see the word “Normal” in there.
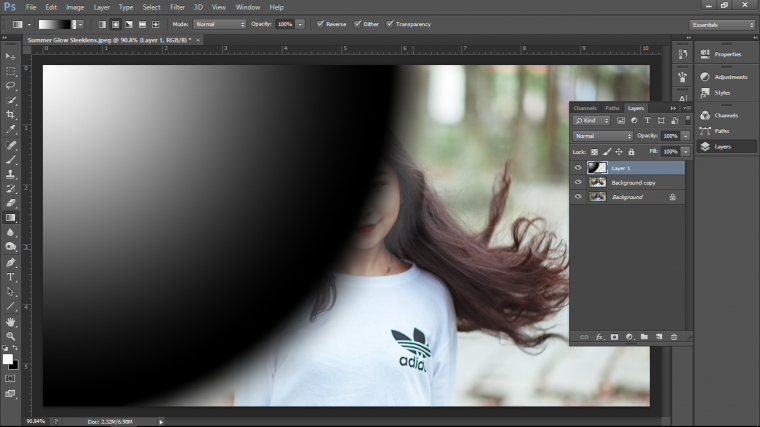
Click on this to open up your Blend mode dropbox and choose Screen
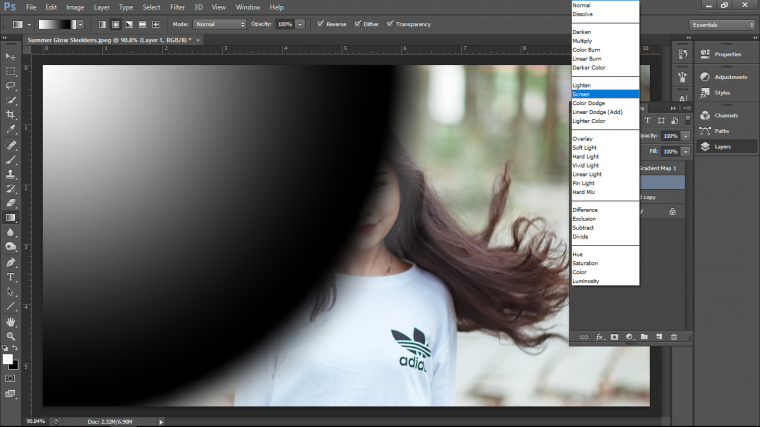
This will now hide the Black part of your gradient and just leave the White.
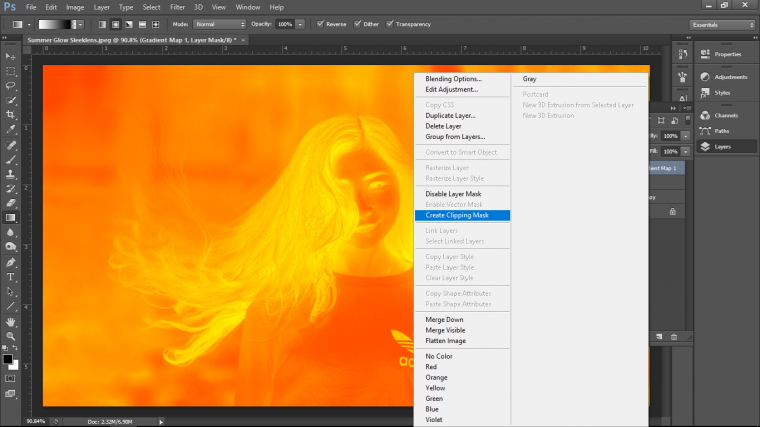
Cool now go back to your Gradient Map, click the eye icon to activate it again and right click on the layer, you’ll see a panel appear, find where it says Create Clipping Mask and click on that.
Now we’re going to duplicate this layer, the easiest way to do this is to click on it and drag it down on the layers panel to the icon beside the little recycling bin at the bottom of the panel, it looks like a little bot with a paper fold on it.
Drag it down click and release, or go to Layer – Duplicate Layer.
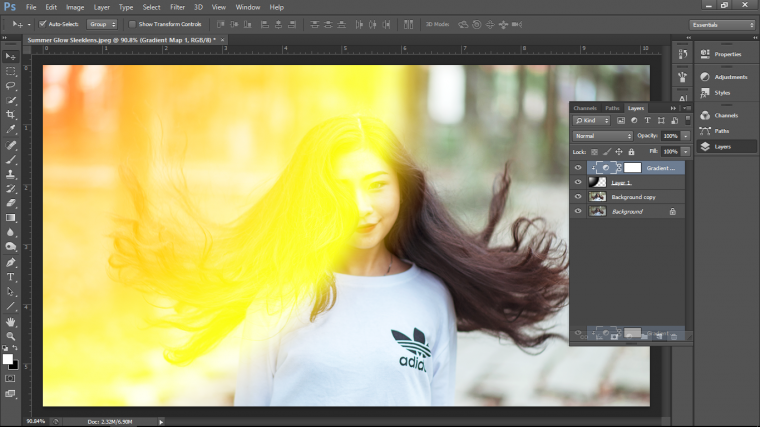
When you have done that then click and drag the duplicate down to position it just above your original image copy.
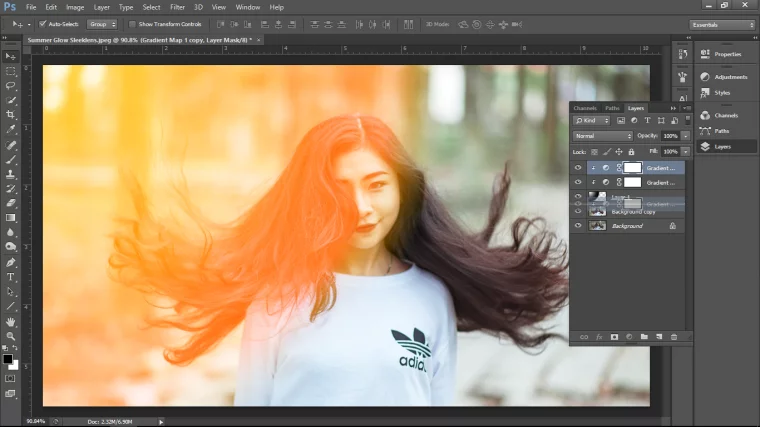
You can now drop the opacity of the layer to make it more realistic.
If your Gradient is as mine is below you can go back into your Gradient Map and click on Reverse.
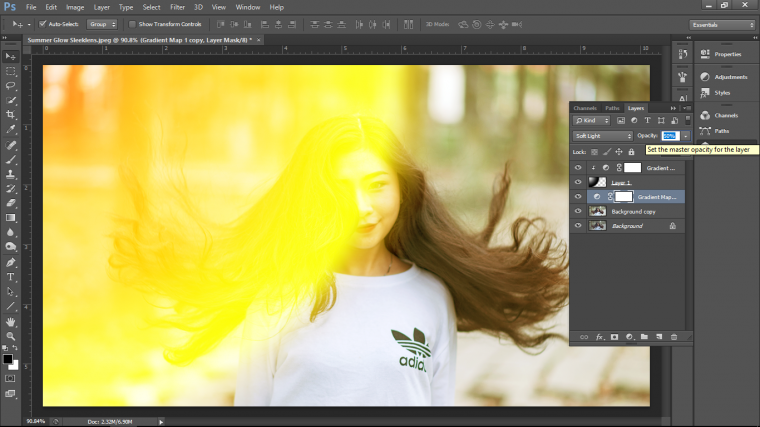
The last little touch before I play around with the positioning which is done by clicking on the layer and keying in Ctrl + T to open up the Transform Tool which will let you resize your Radial Gradient, is to open up a new Layer and to select the second gradient over on your Presets which should just be White with zero opacity, if it’s not there than as an exercise create your own using the information we have discussed here today.
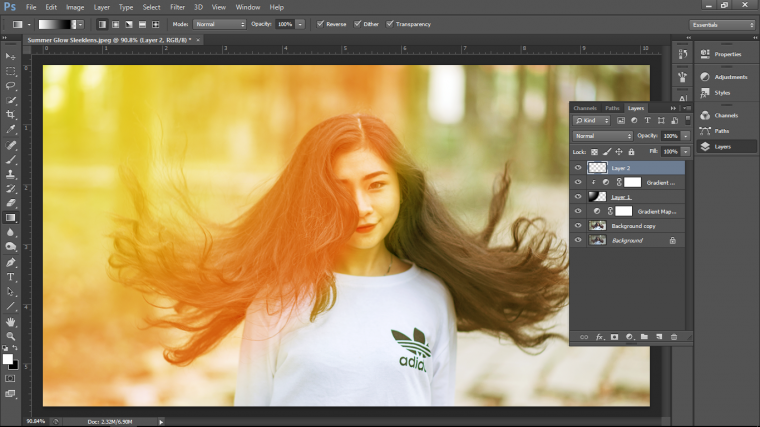
Then just give the image a little bit more of a White glow Gradient at the top left-hand side to complete our image.
As you can see from what our original image is we have dramatically changed the overall feeling of the image to something that was rather dull to now something that feels warm and welcoming.


Please verify your software version before proceeding.
 I’ve verified my software version


 Facebook
 Google +