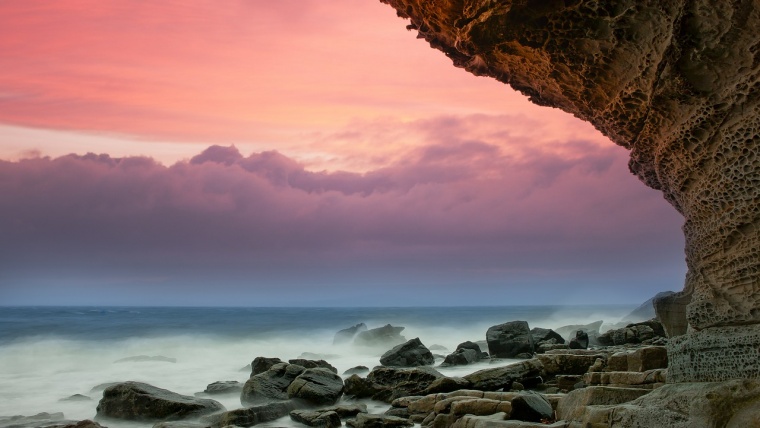
Bright blue skies are always great when taking a photo. However, it is not always that you will have such but your photos don’t have to be all gloomy and unappealing. You can easily replace the sky using Adobe Photoshop is a few simple steps. When doing the sky replacement, it is always important to match some of the colors to make it look more realistic. Learn how to do this easily
Start by clicking on the quick selection tool or click and hold the magic wand and then choose the quick selection tool. Once this is done, select the entire sky and then reverse and inverse this selection to select other parts of the image and not the sky. Click select, inverse and then do the refine edge tool.
Click on your image and the sky you intend to use. Move the sky down below so it doesn’t show the original image there. It is easy to do this since there is no definition here. You can use the magic wand tool for this and select the entire sky currently featured in the section before creating a new cover and then fill the selected part with solid color. You have multiple options to use and can choose black or white background just to give you more contrast
The best thing with the Magic Wand tool is that it offers great tolerance on the different colors you can pick up during yoursky replacement. Once you select the tool, it will be easy to decrease or increase the shade by altering the figures at the top. Some images might require lower tolerance while others will need higher tolerance in order to work perfectly.
Table of Contents
Once you are done with the second step, select your sky layer and place it over the dense fill layer. Then press CTRL/CMD, Shift + G or select Layer and then go to Create Clipping Mask. This will position the sky layer inside the solid fill layer. You can move it until it’s positioned fittingly.
While at it, you might want to refine the rough edges created by the magic wand. To do this, highlight the solid fill sheet, press CTRL/CMD and click on layer preview. Doing this will select the sketch of the structure. With the selected marquee tool, right click and select Refine Edges. Soften the rough edges slightly using the tools.
After the smoothening, zoom a little bit and then use the layer mask to put a new layer so that you cut out the rest of the image. To do this, just select the sky layer you’ve reproduced and then trace the small square box which acts as the ‘Add Layer Mask’ tool and is situated at the bottom of layer panel. It should contain a circle inside. This button works the same way as the Clipping Mask Layer, allowing you to see the parts of your cloud layer via the mask.
Once you tidy up your image and have put the basic sky replacement, move the sky right behind the original layer to make sure it is in the right position. Once this is done, add some color to the sky to make sure it matches the warmth and ensure that everything blending together. You can use color balancing but the easiest way is the photo filter. Choose a warming filter to play around with until you get the right kind of blend that makes the sky in the image look original and attractive.
During some sky replacement projects, the Magic Wand tool might not work especially if the photo isn’t easily selected all at once or if it has clouds. However, you should not worry since there are other tools available and which you can use to achieve your desired results. If this is your challenge, you can fill in the spaces as outlined below.
To use this technique, you will start by creating a duplicate layer of the sky and then hide it. The main purpose of this approach is to fill all the gaps that Magic Wand tool could not select. Just identify the gaps across your image and then select your main photo before going to ‘Select’> Color Range. Then select the shades in the gaps using the Eyedropper tool. By moving the fuzziness slider you will be able to cover the most ideal selection for use in your project. At this point, you should go to ‘select preview’ and choose ‘quick mask’ so that you are able to get the right preview for the selected areas. Once this is done, you can now go back to the layer mask stage above.
Once you are done, it is important to look at your image closely and ensure there is no white line that is obviously visible between the landscape and the sky. This kind of a line simply shows that the image is a combination of different scenes and clearly betrays your skills. In case you see it, just use Clone Stamp tool to get rid of it. You can do this by selecting the Clone Stamp tool and then press Ctrl+ to zoom the image in. Work on the different areas of the edge by brushing away the obvious white line.
When doing your sky replacement, it is always important to be on the lookout for things that are likely to betray your efforts. For example, if you are replacing a clear blue sky with some clouds, it is always important to be keen on any reflections in puddles, glass or other shiny objects and surfaces. You do not want to replace the sky with a dull, cloudy layer but leave those reflections looking obvious as this will clearly show that the images were manipulated. Always take away those dull grey reflections before completing your assignment.
Want to learn Making Water Vibrant in Photoshop?


Please verify your software version before proceeding.
 I’ve verified my software version


 Facebook
 Google +