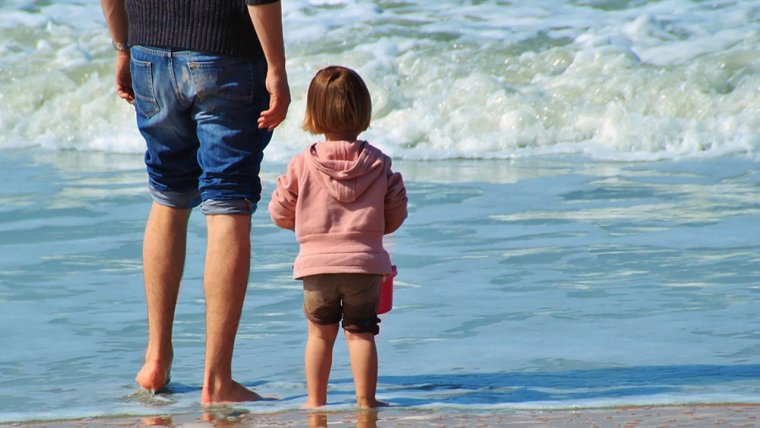
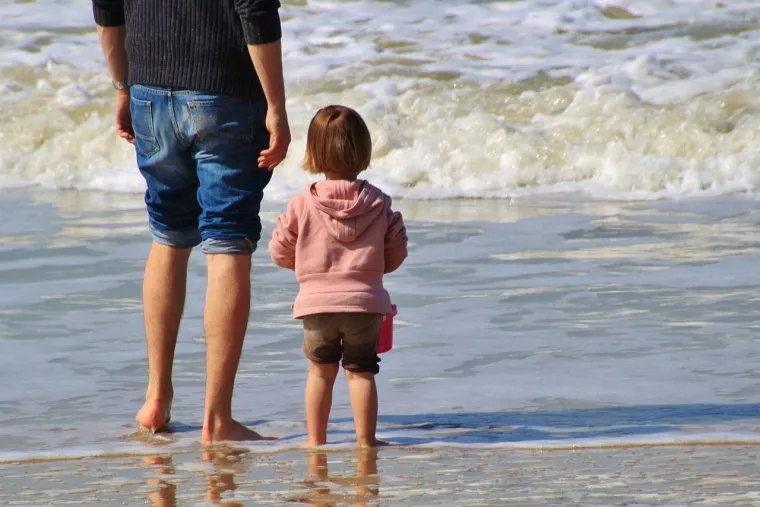
Have you ever taken a vacation to a beach, or followed a river up a mountain? It’s hard not to want to take pictures of the beautiful scenery that water provides. Photographing water can be tricky, however. Often times the picture you take and the image you saw don’t match up. Whether it’s the way the sun reflects on the water or that your camera picked up more of the vegetation around your stream, sometimes the water in your picture comes out looking dark and muddy.
No one wants to remember a good time through pictures of murky water. Fixing this problem in Photoshop is easy, and can turn your dark pictures into beautiful memories.

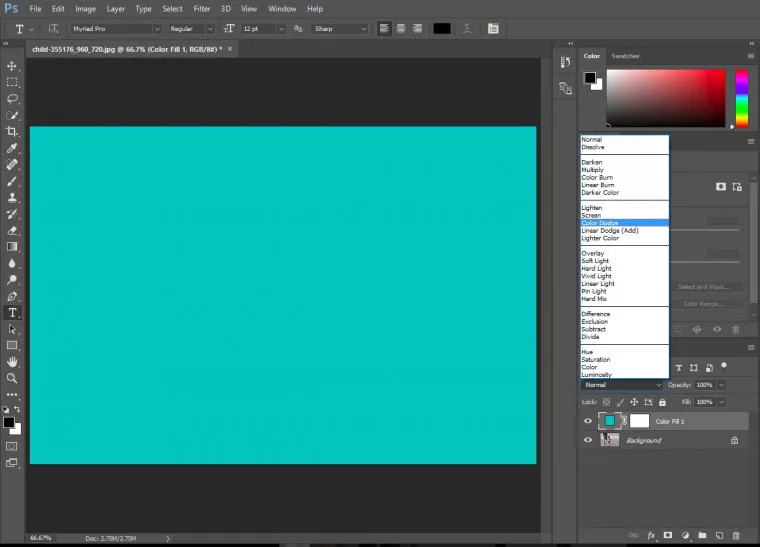
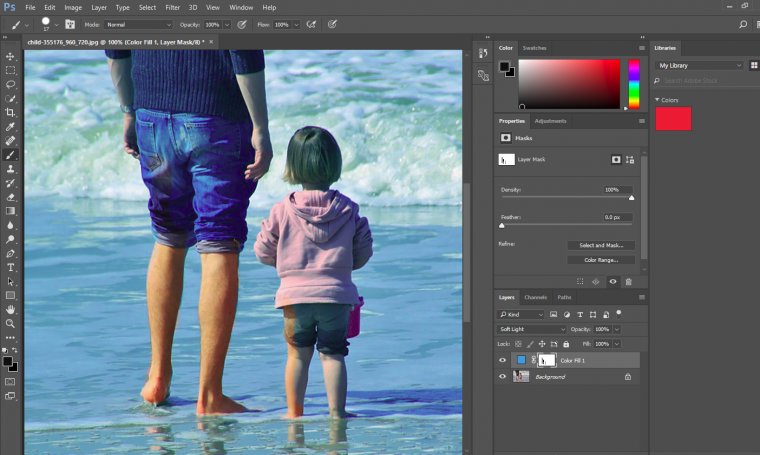
The first step in making your picture amazing is creating your new layer. Add a new solid color layer. Pick out the color that you eventually want your water to look like. (This is a fun opportunity to make fantasy pictures by using an unusual color, like purple). Your picture will then change to that whole color.
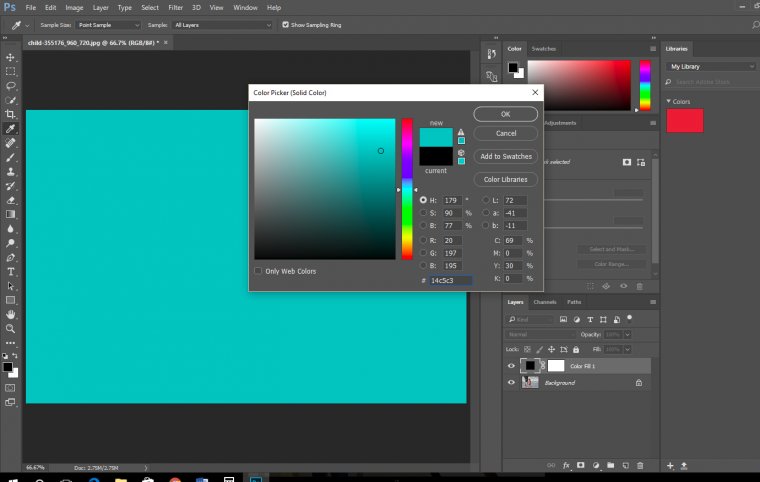
In order to see your original picture you need to change the type of layer mask you have set. Different pictures require different settings. The most common are color dodge, color burn, soft and hard light, and overlay. In this example, we use a soft light. Play around with each of the different settings to see which one works best for you.
In this step, it’s important to only pay attention to the water. Don’t worry right now about how the surroundings or any people/animals look in the picture. We’ll be touching those up next. For now, keep your focus on how the settings make the water look.
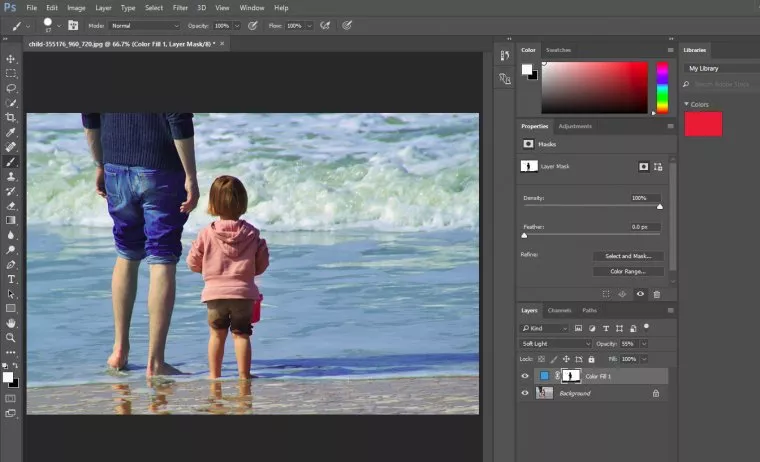
Now that you have your water looking amazing, there’s the issue of the background and any people or animals that also inhabit the image. While the water got the special treatment, this often leaves everything else looking weird and out of place. But, there is a simple fix that doesn’t take too long.
Once you’re ready, click on the layer mask of your new layer (the white box next to your color) and set your brush to black. This process removes the layer settings from whatever you paint over. Use this to restore the original beauty to any friends or family or the natural surroundings of your water.
When doing this, use a brush that’s smaller than the area you’re filling in, and just fill in the center. When you’re ready to move to the edges of your subject, be sure to change the opacity of your brush to a lower setting. This way you don’t have to worry as much about accidentally ruining your water. This is also a useful way of painting edges if you have an unsteady hand.
There is no right or wrong here. It all depends on what you want to do. Sometimes it’s best not to paint over everything that isn’t water. If you want to make something or someone in your image pop, it’s best not to paint the background. If you’re on a crowded beach, just paint over your models and leave the rest of the crowd in the layer mask. This will let your subjects be bright and vibrant, and the center of attention in the busy picture. You might also want to paint over some parts of your water, drawing attention to a specific location in your image.
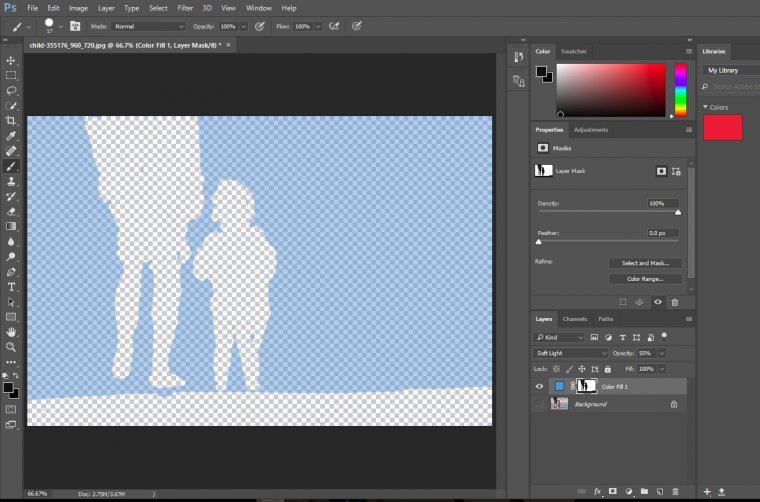
Once you’ve finished, you may notice some mistakes, or just want to check to be sure you got everything. Here are some simple ways to check your work, and fix any errors you made along the way.
If you want to see if there are any spots in your image you missed, simply turn off the visibility of the background layer. This will produce a screen that shows translucency where you painted over. If you see any spots of color in your person or background, go back over them with your black brush.
If you notice that you accidentally brushed over some water, or you decide later on that you really don’t want to paint over the crowd, it’s easy enough to go back. Simply set the brush to white, and paint back over your mistakes. This reverts that part of the image back to the layer mask settings.
Everyone loves a good picture of water, but it can be hard to produce. More often than not, a beautiful water scene comes out looking dark and murky in the final product. If this happens to you, it’s easy enough to use some simple Photoshop tools to turn your gloomy water picture into the amazingly bright image you remember seeing.
Here are the best ways to change colors in photoshop for you only!


Please verify your software version before proceeding.
 I’ve verified my software version


 Facebook
 Google +
Comments (0)
There are no comments yet.