Real estate can be an exciting genre of photography when you’re just starting. The thrill of sharing as much information as possible through an image and making a living space look visually appeal can be quite the challenge sometimes. As a beginner when starting real estate photography it is very easy to make some simple mistakes that you won’t notice until after you’ve already completed the shoot. This article will stand to point out some of those common mistakes as well as give you a solution to them so you don’t end up making these mistakes yourself. Of course, I learned some of these mistakes the hard way after completing what I thought was a successful real estate session but I later learned all the things I messed up. I hope this article helps you to avoid such unfortunate events so let’s begin.
Table of Contents
One of the first mistakes I made was not educating the client on how to prep the space for photography. Having failed to do this, I ended up spending a fraction of my time trying to prep the space myself to make the images more visually appealing which didn’t work out for the best because it was very rushed and disorganized.
Giving your client a heads up on how to prep space will save you a lot of time in correcting or fixing any elements in the space you’re capturing. Things such as making the beds, cleaning the floors, cleaning counter tops and making sure everything is spic and span is imperative to getting the best out of your real estate shots. Always keep in mind that communication is important and good communication with your client will save you a lot of trouble in the long run.
In real estate photography, it is sometimes very difficult to keep track of what you’ve already captured as opposed to what you forgot. Depending on the size of the house or building you’re shooting, simple things like forgetting to capture a bathroom or bedroom can become so easy. I recommend creating a shot list before heading to your location or the day before your shoot.
This helps you be even more prepared and also keep track of what you’ve already done. You don’t want to end up doing what I did while photographing a big house. I innocently forgot to capture a few of the guest bathrooms as well as a bedroom due to me not having a list to keep track of what I’m doing. Some photographers might not need a list based on how good your memory is or how organized you are but nonetheless it can’t hurt to create one and have on your person just in case you want to double check and ensure you got absolutely everything you need.
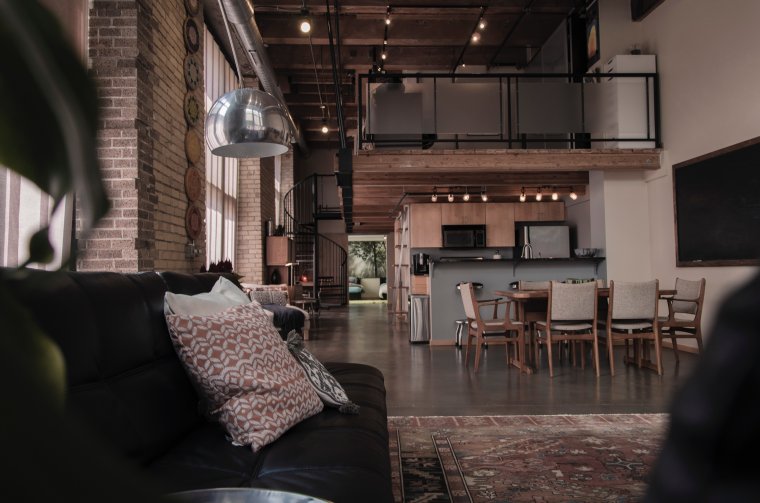
This is one of the most common mistakes seen by beginners and it’s something I’ve done myself as well. There are two sides to this mistake. The first side is when shooting indoors you do not want to close these blinds and curtains that provide you with light. As a photographer light is always your friend and you should not try to block your light sources out when doing real estate photography. I did this as a beginner because the blown out light through the windows was always a pet peeve of mine but as time progressed I learned how to work around it and use it to my advantage.
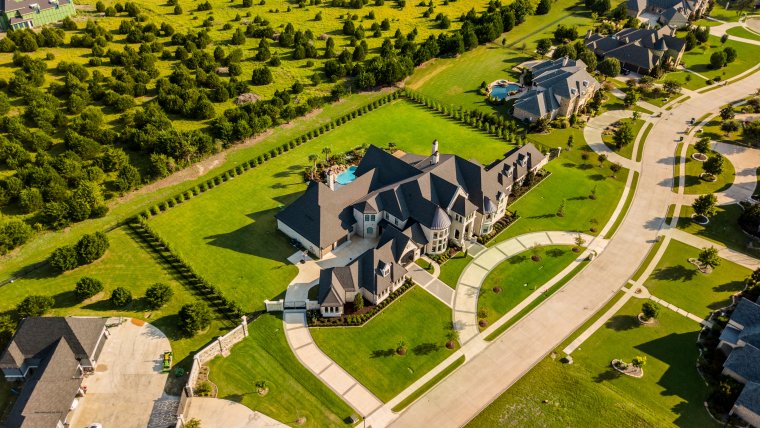
The other side of this mistake is when capturing photos on the outside of the house or building. Closed windows or blinds can sometimes make the house not look so appealing or inviting. When taking shots outside, you want to at least have a window or two open to add some personality to your shot and help the place to actually look like a home. This has proven to make viewers a bit more interested in seeing the space due to the visual appeal. As a real estate photographer, you’re like a hype man for the real estate agent as you make their job a little easier to persuade customers.
Taking crooked images in real estate photography as a beginner is more than likely one of the first mistakes you will probably make until you get a hang of it in addition to not having a shot list. Crooked Images can easily be corrected in post by using Lightroom or Photoshop, however, you do not want to depend on these programs each time to correct every photo you’ve taken. Taking the time out to make sure your images are leveled and symmetrical will actually save you a bunch of work and make your post-production workflow a lot easier. I recommend using a tripod that has a level installed to guide you in the right direction and reassure you that your images are properly balanced or aligned.
Getting settled in real estate photography can be a great learning process as things such as composition and paying keen attention to detail are some of the things that will be an asset throughout your career as a photographer. I truly hope this article helped you to make the mistakes I did and in enable you to become a great real estate photographer. Until next time, thank you for stopping by.


Please verify your software version before proceeding.
 I’ve verified my software version


 Facebook
 Google +
Comments (0)
There are no comments yet.