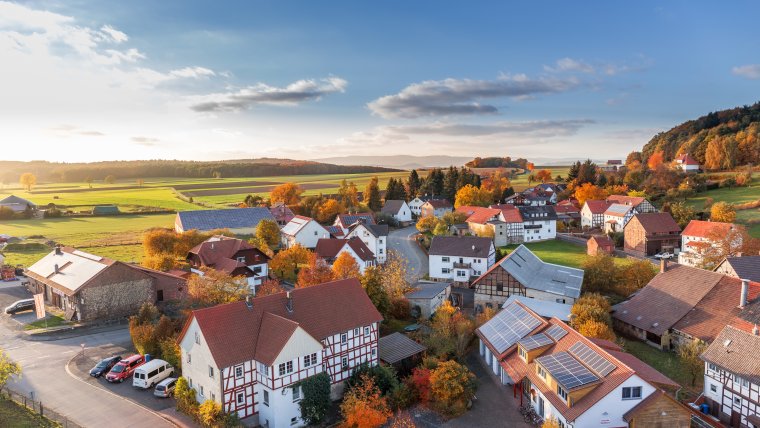
In this tutorial, I would like to show you how to use the brand new Photoshop collection from sleeklens.com known as Autumn Pumpkin Glaze Overlays and Actions collection. This new collection includes a bunch of cool stuff such as overlays, brushes, and actions you can apply to your photos.
To get started, I will start by opening my actions window by going to Windows > Actions and here I have all of the Sleeklens’ Autumn Pumpkin Glaze Photoshop Actions installed. First, I would like to bring out more details and shadows and bring down highlights to my image and to do this I will apply the “High Dynamic Range PS Actions”. I will highlight that and then click play. This gives me my final photo with the actions applied and it gives me the message to reduce the effects and all I will do is reduce the opacity of the layer. I will, therefore, click “Continue” and then back the opacity down since what I have is too much for what I am looking for. I will reduce my opacity to around 59/60 but this will depend on the image you are working with.
With just one click, we have more details on the shadows and highlights such that we can see more details on the clouds. The next thing I will do is play around with the colors. I would like to enhance the yellows and oranges a little bit by just pumping them up a little bit. I will click on “Tone >Autumn Transformation No 1- Intense Red” and then click the play button. This will give the message to decrease the effects and will do this by decreasing the opacity of the layer. I will click continue and since it is too much, I will back it down to around 60 just the way I did to the HDR Layer. Again, you should back the opacity down depending on your image and editing needs. After this, you can toggle the before and after images to see the transformation this did.
The next thing I would like to do is to apply a vignette to the photo. I will scroll down to the ‘Brown Vignette” and then click. This adds a small vignette, nothing crazy since I don’t want to make it too harsh. It adds a little vignette to draw your eyes to the center which is what you want to do.
The next two things I want to apply to this photo are overlays. When you down the presets, you get an overlay photo which will include a couple of overlays which are cool to use including birds, color filters, leaves, rain, and sky. I want to apply some birds right above the building. I will click the bird folder and you can see that the first one has a JPEG which I will apply to the photo. It looks like the birds will get scattered around the whole center area. I will drag it to the photo and since the birds are a bit large, I will scale them down to make them look realistic. I will position them where I want them to be and then click enter.
I will then change the blending mode to remove all the whites. The best blending mode to use is the “Multiply Blending Mode” which removes all the whites and leaves the black portions of the photo which are the birds. I can move the birds freely and place them anywhere I want. If I don’t want to retain some of the birds, I can apply a layer mask, take a brush and change the color of the brush to black to erase them away. The birds that remain in the photo will blend perfectly well and be scattered in a natural way.
The last thing I want to do is to do is to add some kind of light effect. I want to mimic as if the sun was somewhere on the edge of the building just to add some little interest. So I will open my Overlays >Light Overlays> Light Overlay 9”. This has a warm color to it and I’ll drag it to the color as well. I don’t want to have it in a perfect circle since if I want to mimic the sun, it is not always in a perfect, exact circle. I will squash it down a little bit and decrease the size and click enter.
To get rid of the blacks in the photo, we don’t use the Multiply Blending Mode but the Screen Blending Mode. Using it will get rid of all the black in the photo. I also have a light burst which I can apply anywhere in the photo. I will take Transform, enlarge it a little more and position it in the image. The results look perfect but if you want to back it down a little bit, you can take the opacity just as with all other adjustments and back it down. If we look it in a while and don’t like it, we can move it over and position it anywhere in the photo since we have removed all the blacks in the photo.
With this, I will have my ‘after’ photo and if we remove all the effects I have done, you can see the ‘Before’ photo which was ok but needed some editing done to it. You can also see the transformations we did to the photo which makes it look awesome. The feel in the after photo is exactly what I was looking for.
You can check more tutorials in our blog section or click the Lightroom or Photoshop tabs for more presets and actions to help you with your photo editing work.
Comments (0)
There are no comments yet.