
I think it’s safe to say that no one is really happy to have acne or blemishes on their face much less to have it be seen in a shot they really like. Moreover, as a photographer our clients often look up to us to fix their mild imperfections in post production but, if you’re anything like me this can be either a lot of work or be made easy with a few quick steps. I am personally not a fan of having a million layers in Photoshop to end up with a result for one Image when I might have a folder of 50 more images to edit.
Can you imagine how long it would take to do a folder of probably 100 or more? This inspired me to find a new and easy way to help my clients look picture perfect without spending hours on one image. The step I will be outlining in this article are open to personal adjustments in terms of opacity levels and a number of layers you would like to use, however, this will only take two or in a best case scenario just one.
Table of Contents
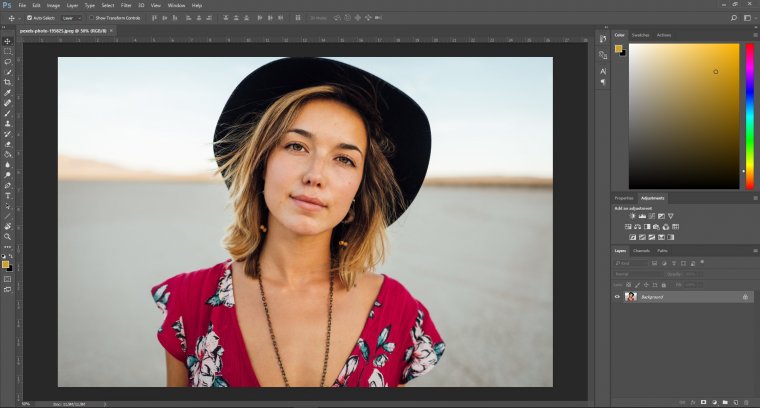
Okay, so the first step is to select the image to your liking, to begin with, and then assess the face as to where will need retouching and which areas are perfect as is. I’m sure you client is beautiful might to even need much retouching but you can’t too sure and not just do some minor edits. I’ve often ended in situations where my client is a female with makeup done very well. This often cuts the task in half or even more because she has already enhanced her beauty and all that has to be done now is to make it even more perfect.
Press CTRL + J to duplicate your background layer. This has been helpful in terms of you’re sometimes clumsy like me you tend to make a few mistakes and then helps to correct those mistakes and not having to start all over again. After Selecting the Patch tool, I head right over to my layer opacity level and put it down a bit to about 75%. My reason for that is when it’s at 100% while using the patch tool it can sometimes show up the difference in the texture of the skin where you took it from. So we ultimately end up with some parts of the face looking dark and some looking ridiculously lighter than other.

Therefore when we drop the opacity just a little bit it helps not highlight the difference. This is just one of the quick and easy ways which I use to get the job done so no worries. After selecting your tool and changing the opacity level we begin to start to touch the face. Use your tool to make a selection around the area of interest and the while holding down the mouse or trackpad, pull to an area you would like to use as replacement for that area. Be mindful of which area you use to replace it because if it’s too dark it might make it obvious so it’s safe to stick with the lighter or brighter part of the skin.
Another method I use to get the job done quickly is with my Spot Healing Brush Tool. Not effective at all times as a primary tool but it plays it part in helping to get the job done. After selecting your Spot healing brush tool, you may adjust your brush size and hardness to a level of your liking and then begin. You may see a few options right above your photo when you select this tool such as Proximity Patch, Create Texture and Content Aware. I often use Create Texture simply because it creates a nice smooth Texture over the area of interest with the correct skin tone.
The problem that I do run into sometimes is that it’s a bit too smooth and stands out on the image. We then have Content Aware and Proximity to patch which to me are very similar in nature. They both now allow Photoshop to be the boss and basically pick an area which the program feel is best to fill the space. As great as Photoshop is, it Isn’t always correct to we may end up Patches that look like a band-aid that’s not supposed to be there. These are all, however, depending on how you adjust the levels to your liking and style so I would advise to assess your Image correctly and then select the method you would like to use. Don’t be scared to use more than one if you have to, to get the job done.
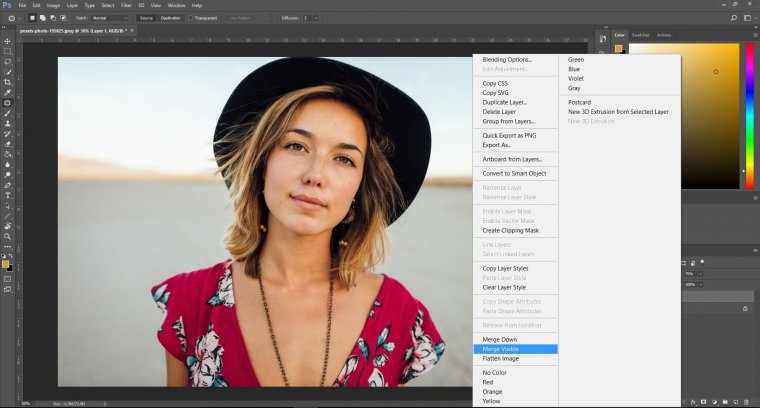
Asometimes’ve done all your retouching, it’s now time to merge both of your layers by simply right clicking on a layer and click “Merge Visible”. This will put everything you’ve done into one final layer for you to save. But wait we’re not completely done as yet, I often like to sharpen my image just a little bit to highlight some texture and help to make the areas retouched to blend right in.
Where all done and that probably didn’t take all of 15 minutes (depending on the client you’re editing). I hope this helped you in speeding up your face retouching process, until next time, Thank you for stopping by


Please verify your software version before proceeding.
 I’ve verified my software version


 Facebook
 Google +
Comments (0)
There are no comments yet.