How to Add a Vignette of Any Color to Any Photo in Photoshopwww.sleeklens.com
Ah, the vignette. A tried and true stylistic staple of photography since its inception. Even though a vignette is, strictly speaking, a result of low-quality optical design, it has been adopted by many as a technique to add instant nostalgia and depth to almost any image. The reason this look gives images a vintage feel is because every photograph used to have some level of vignetting. This is actually still true today, but with modern advancements in the lens and camera design (and in-camera software that eliminates any vignetting), we don’t often experience the extreme vignetting like we used to. But this doesn’t mean it has to disappear from our aesthetic vocabularies. In fact, it’s now pretty easy to add a vignette of any color whatsoever, not just black, opening up new possibilities to the modern day photo. Here, we’ll show you one simple technique that will allow you to change the color of you vignette to create just the right feeling in any image.
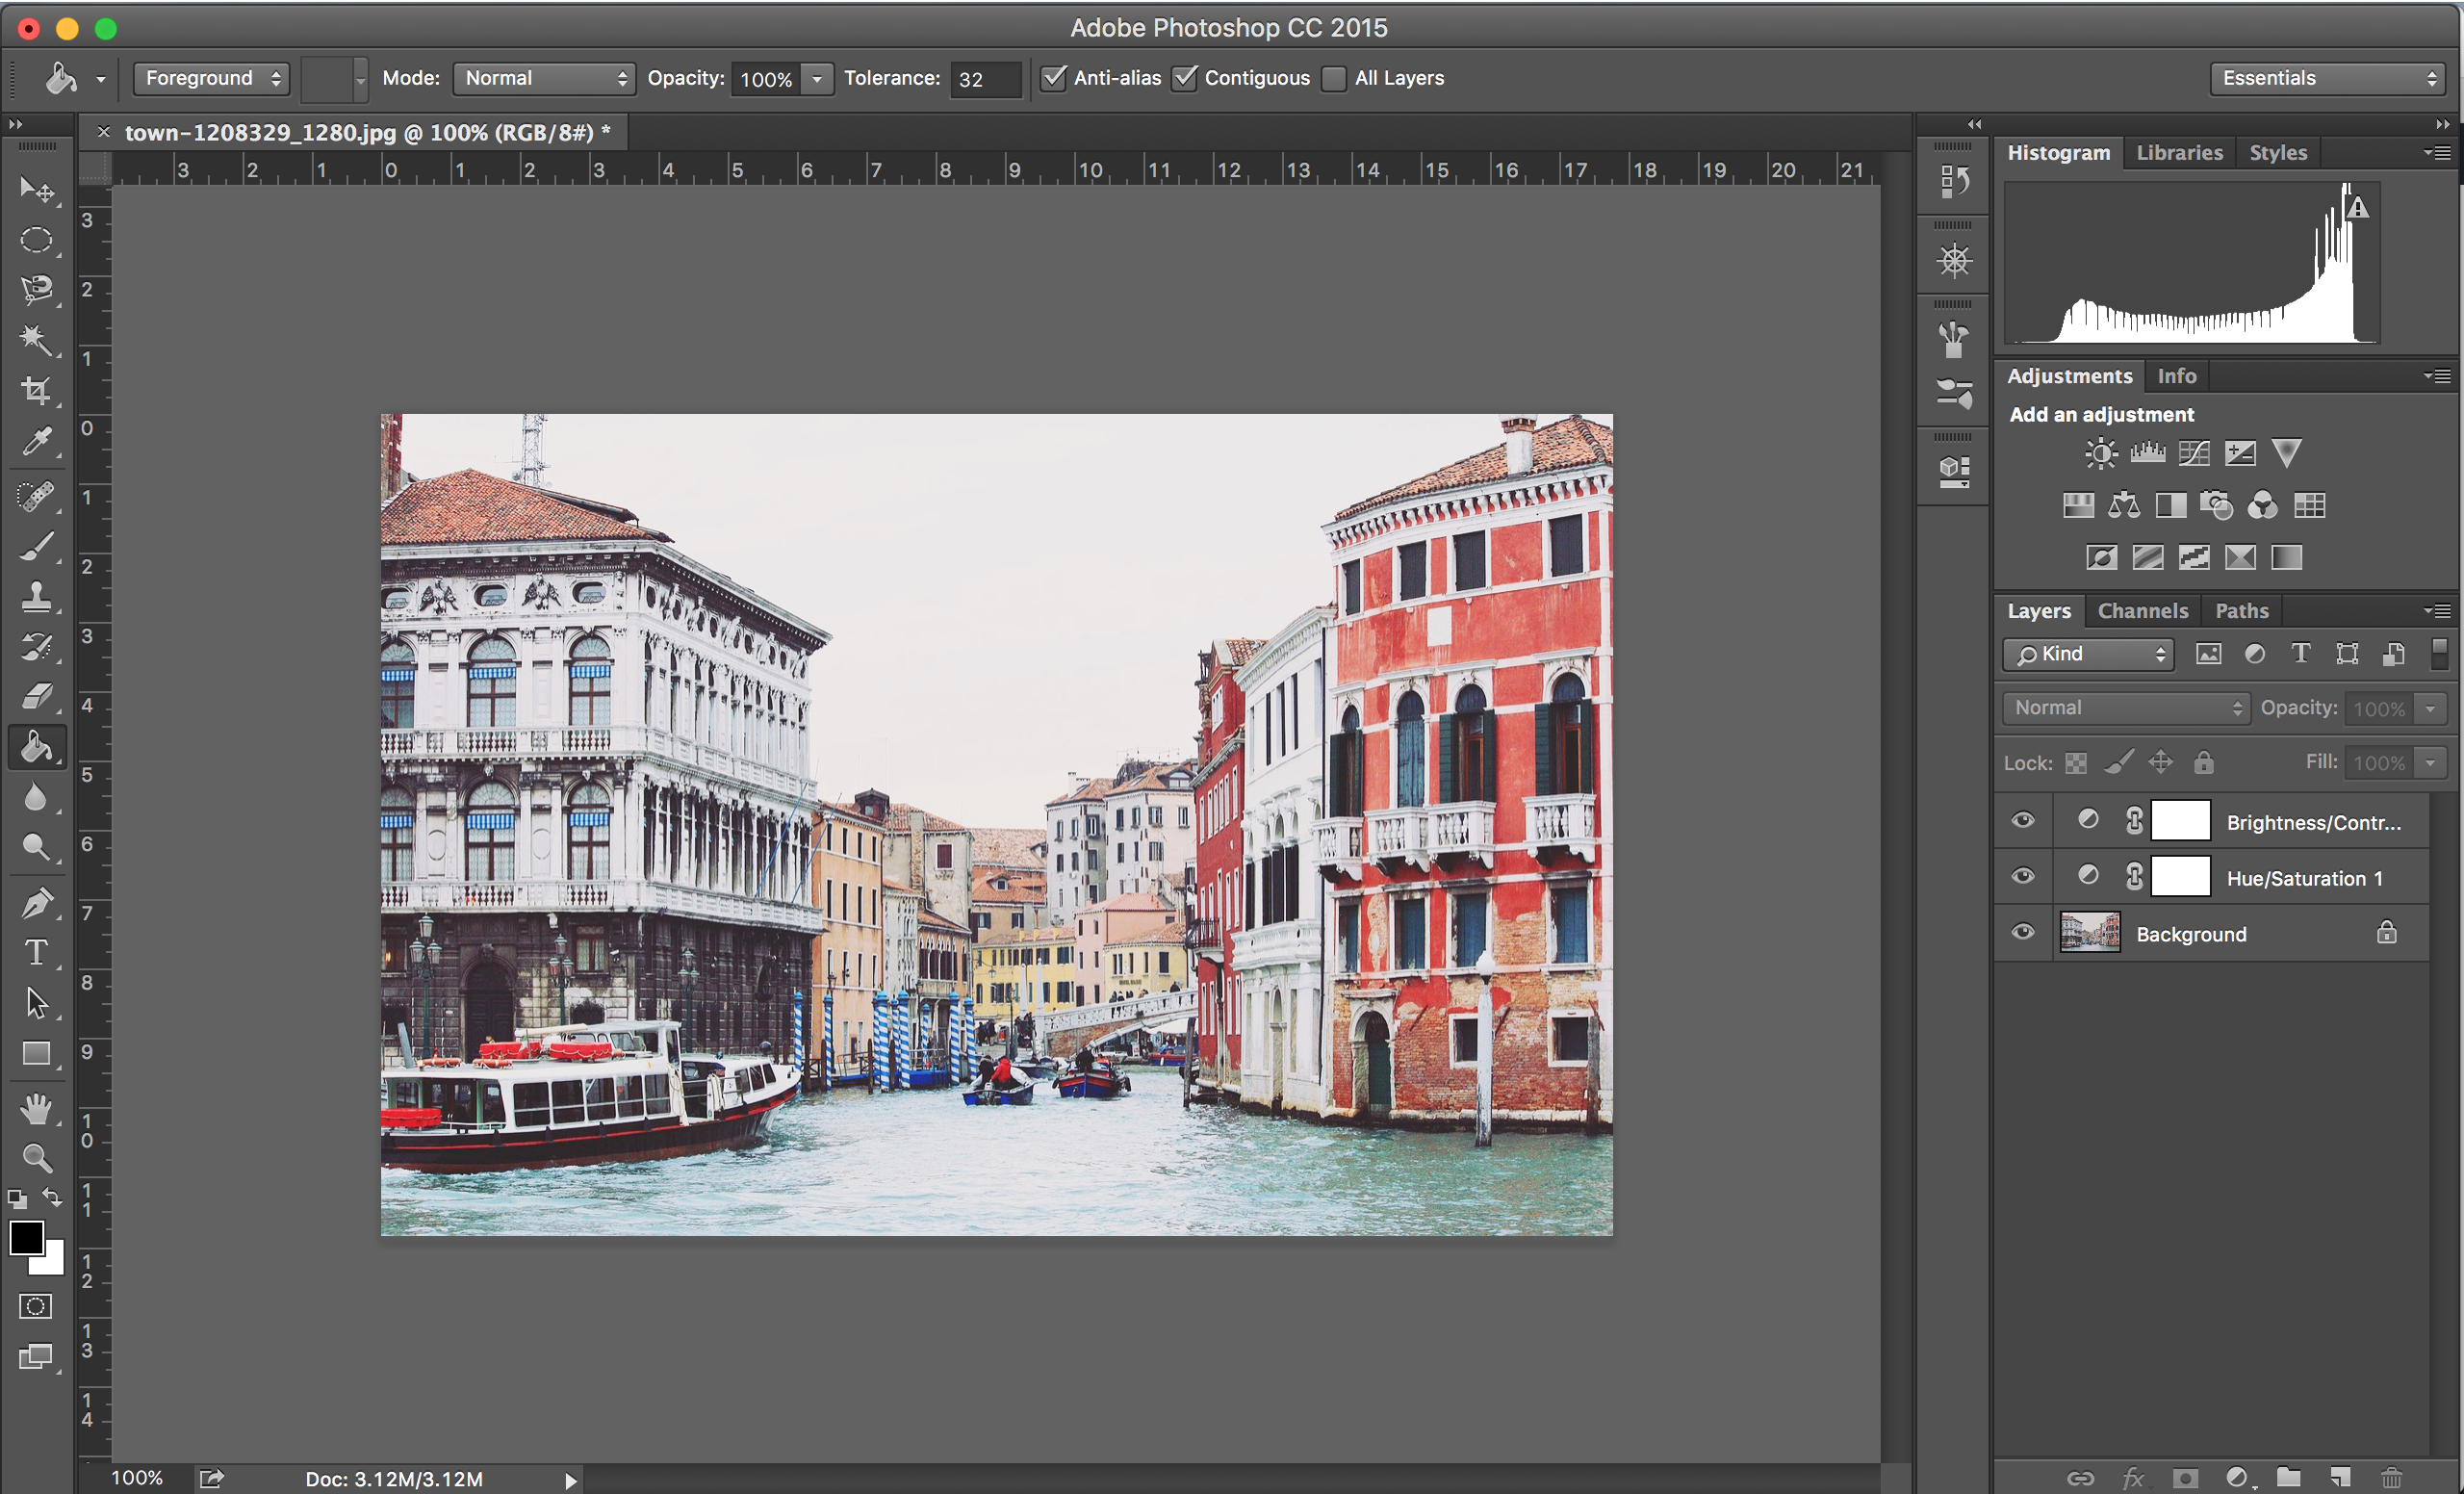
1. First, you’ll see that our sample image is opened in photoshop and we’ve already made some minor adjustments to it. It’s best to make all other adjustments and edits first so that you don’t balance your image with the vignette in mind, as this can look unnatural in the end.
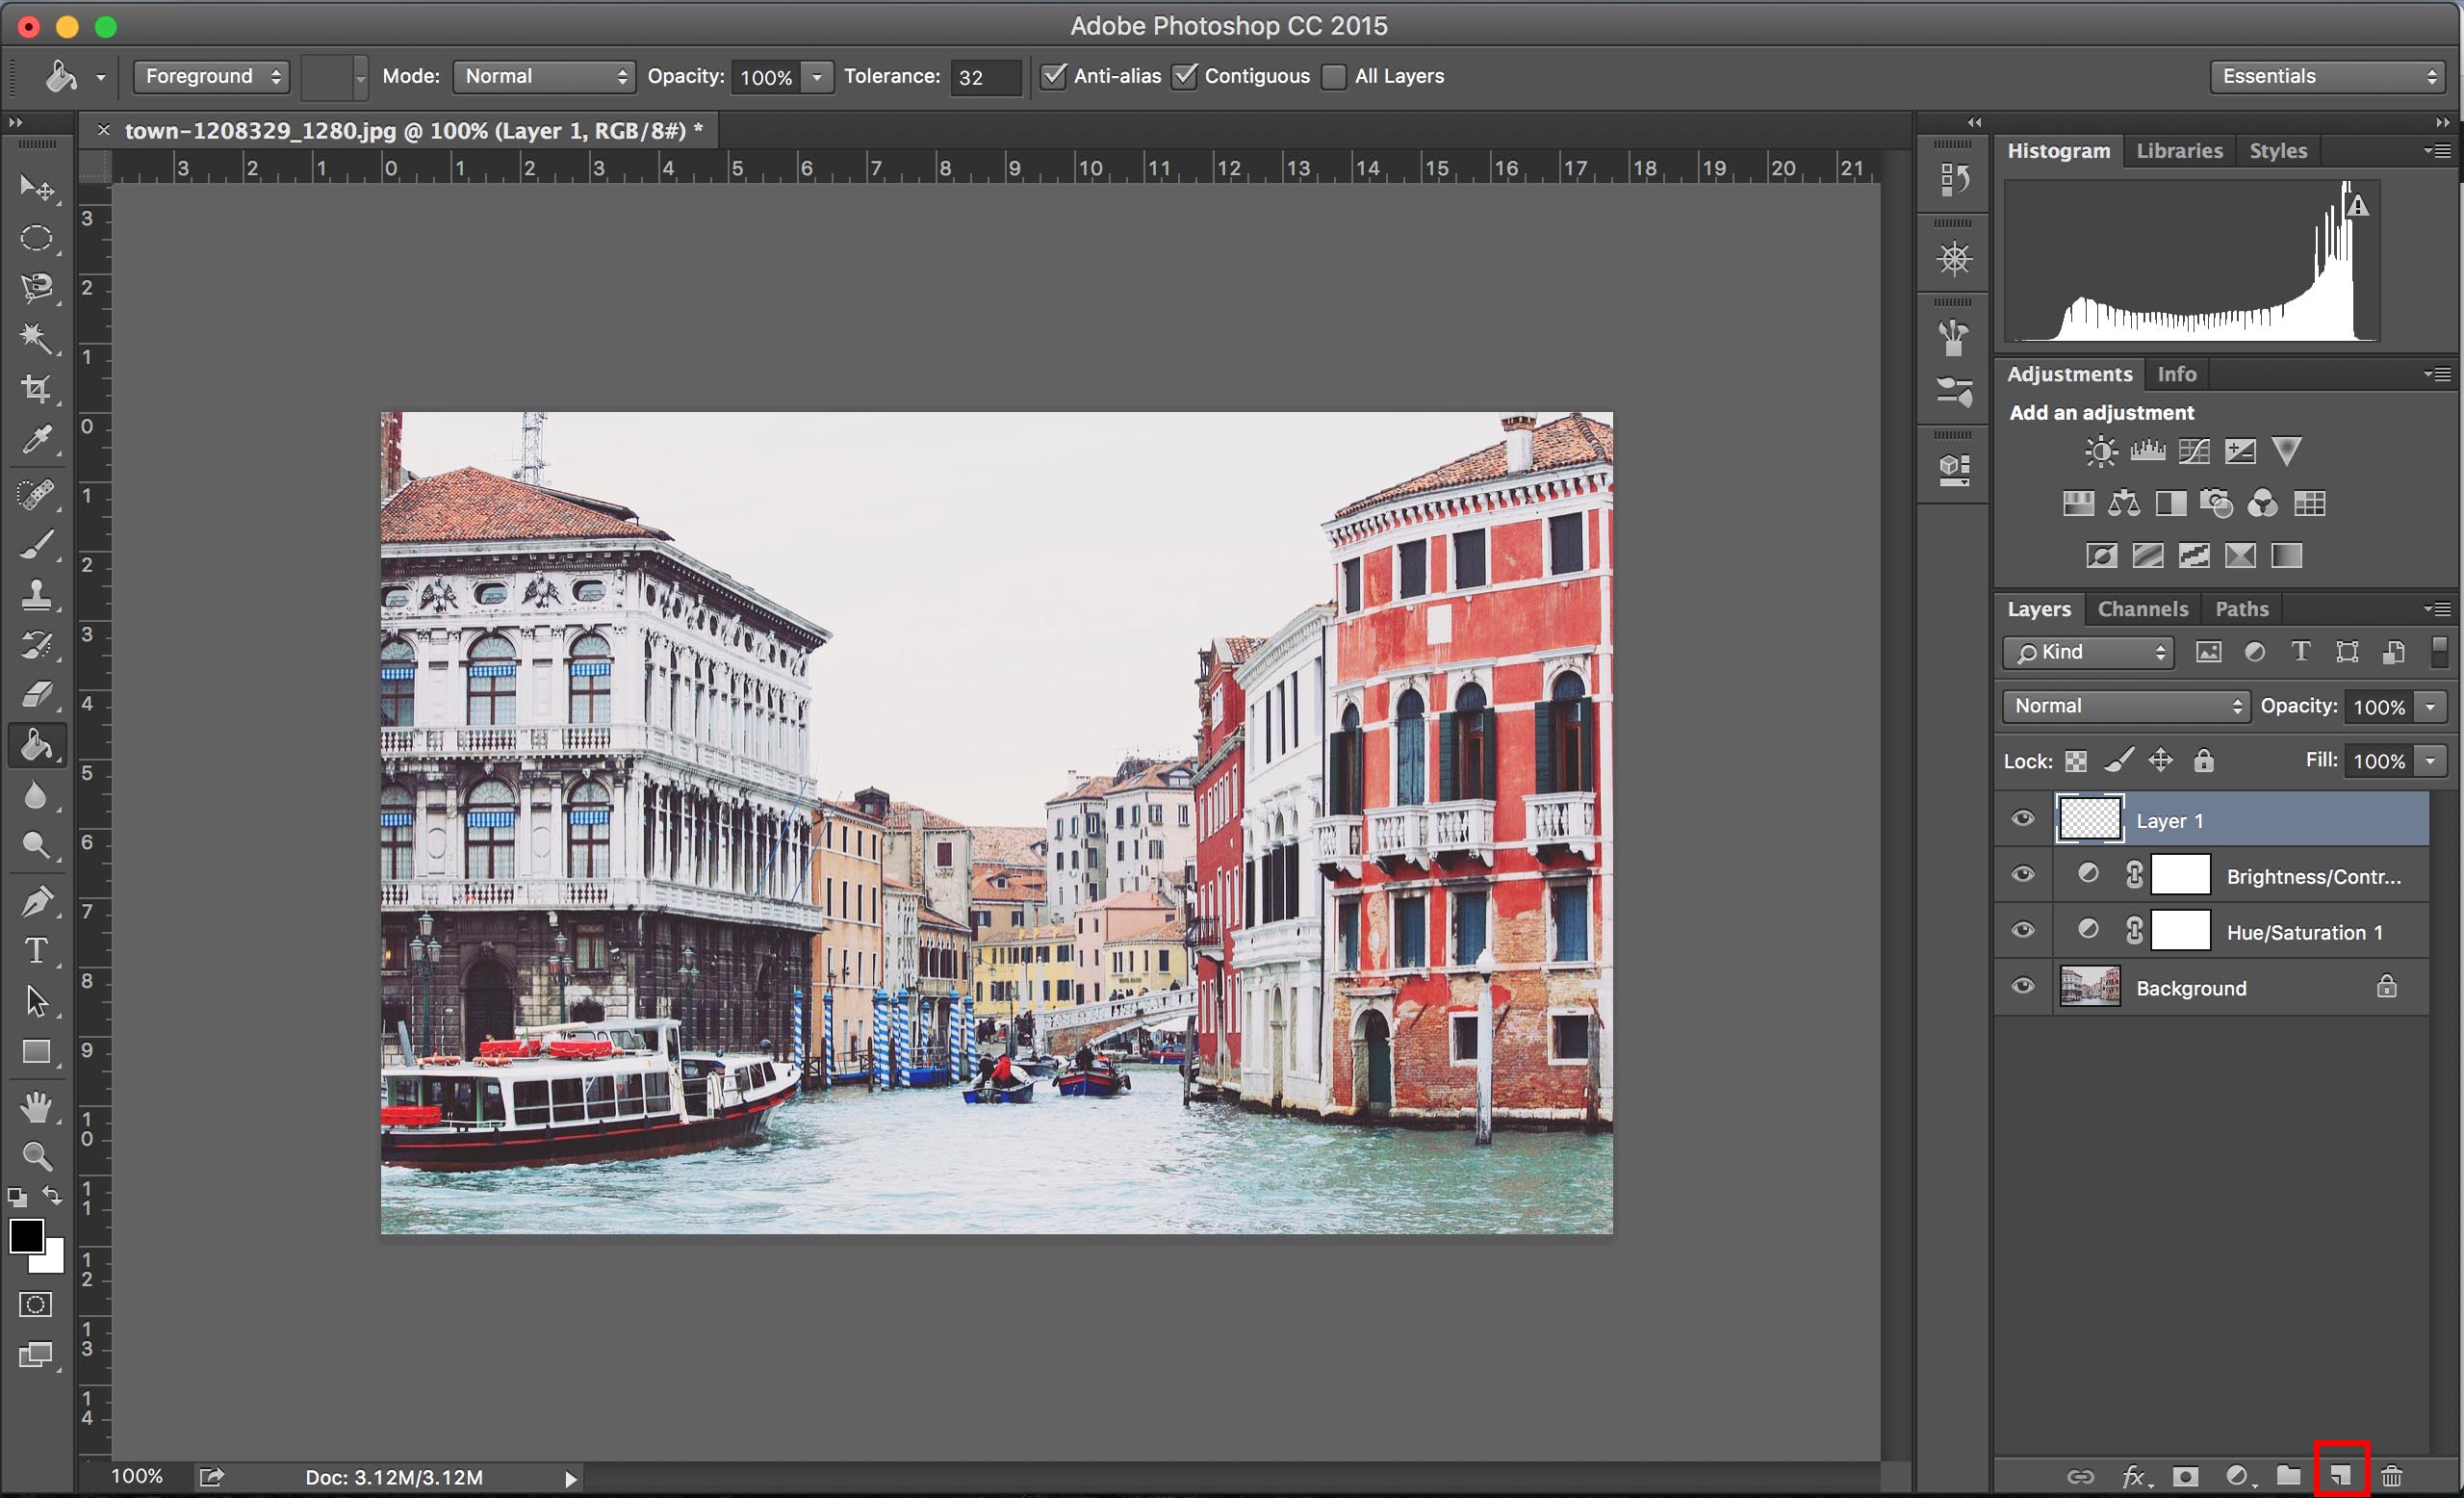
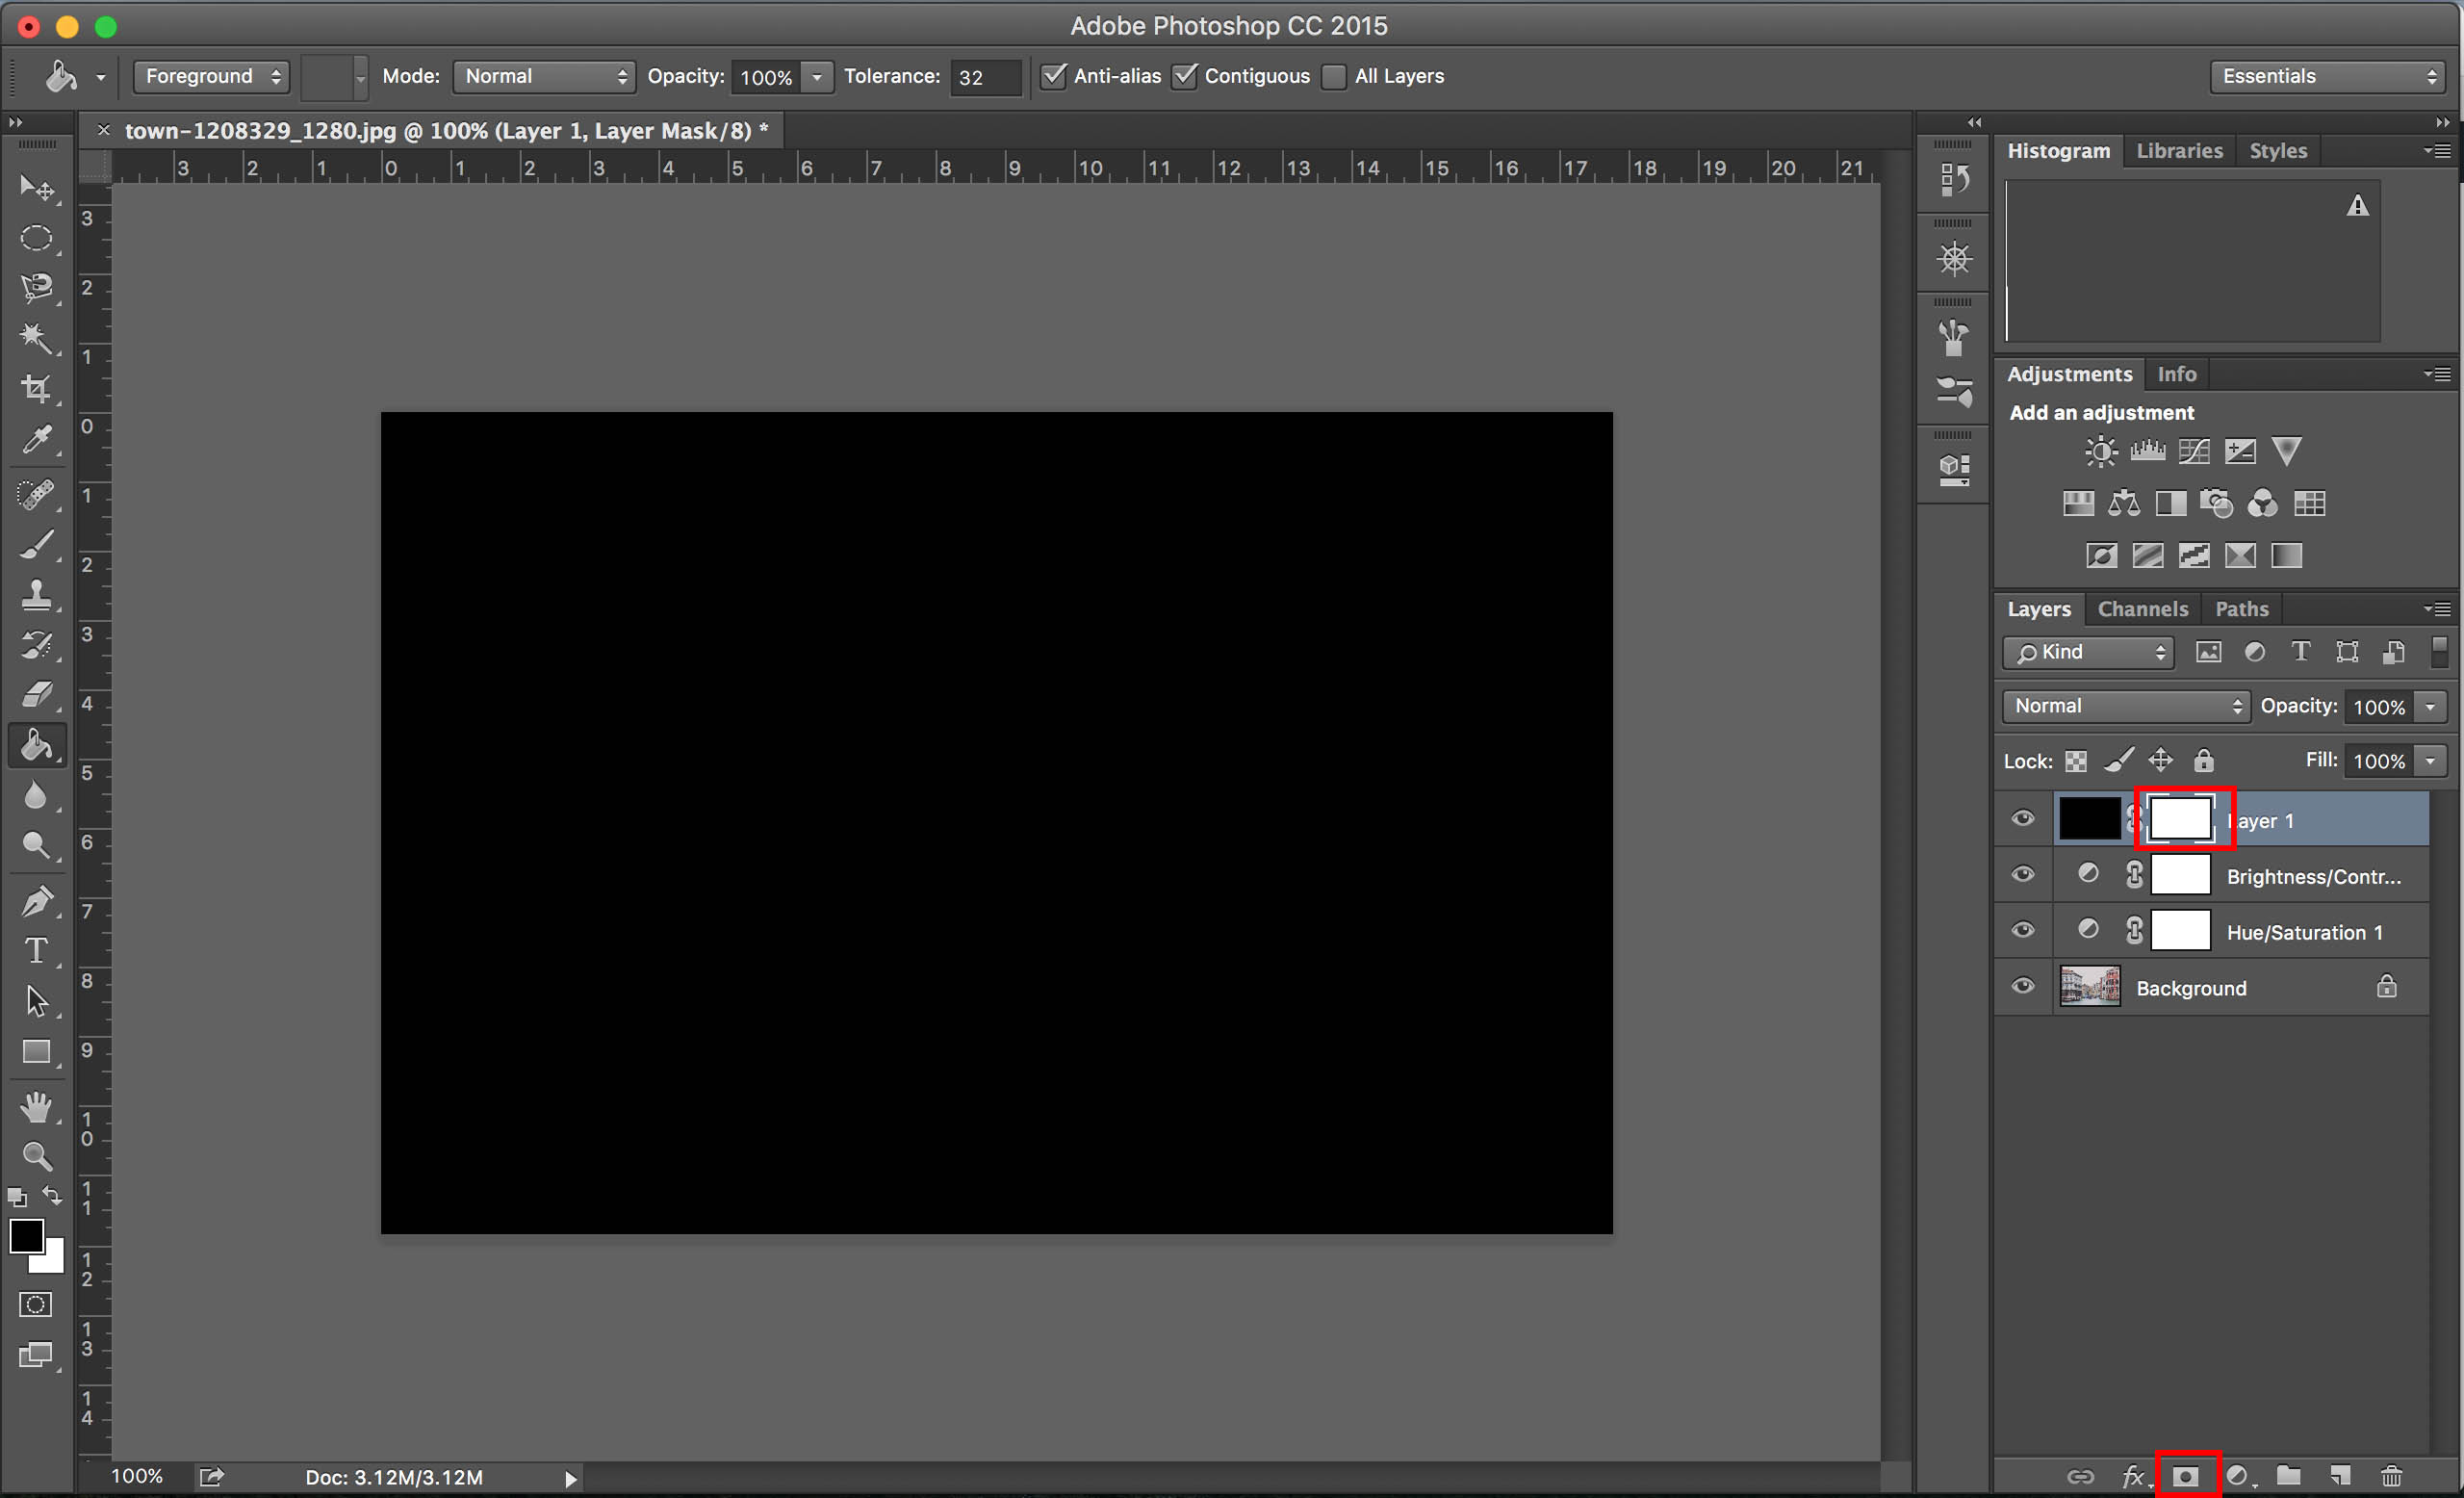
2. The next thing we want to do is add a new layer on top of all the others. Do this by clicking the “New Layer” button in the bottom right corner.
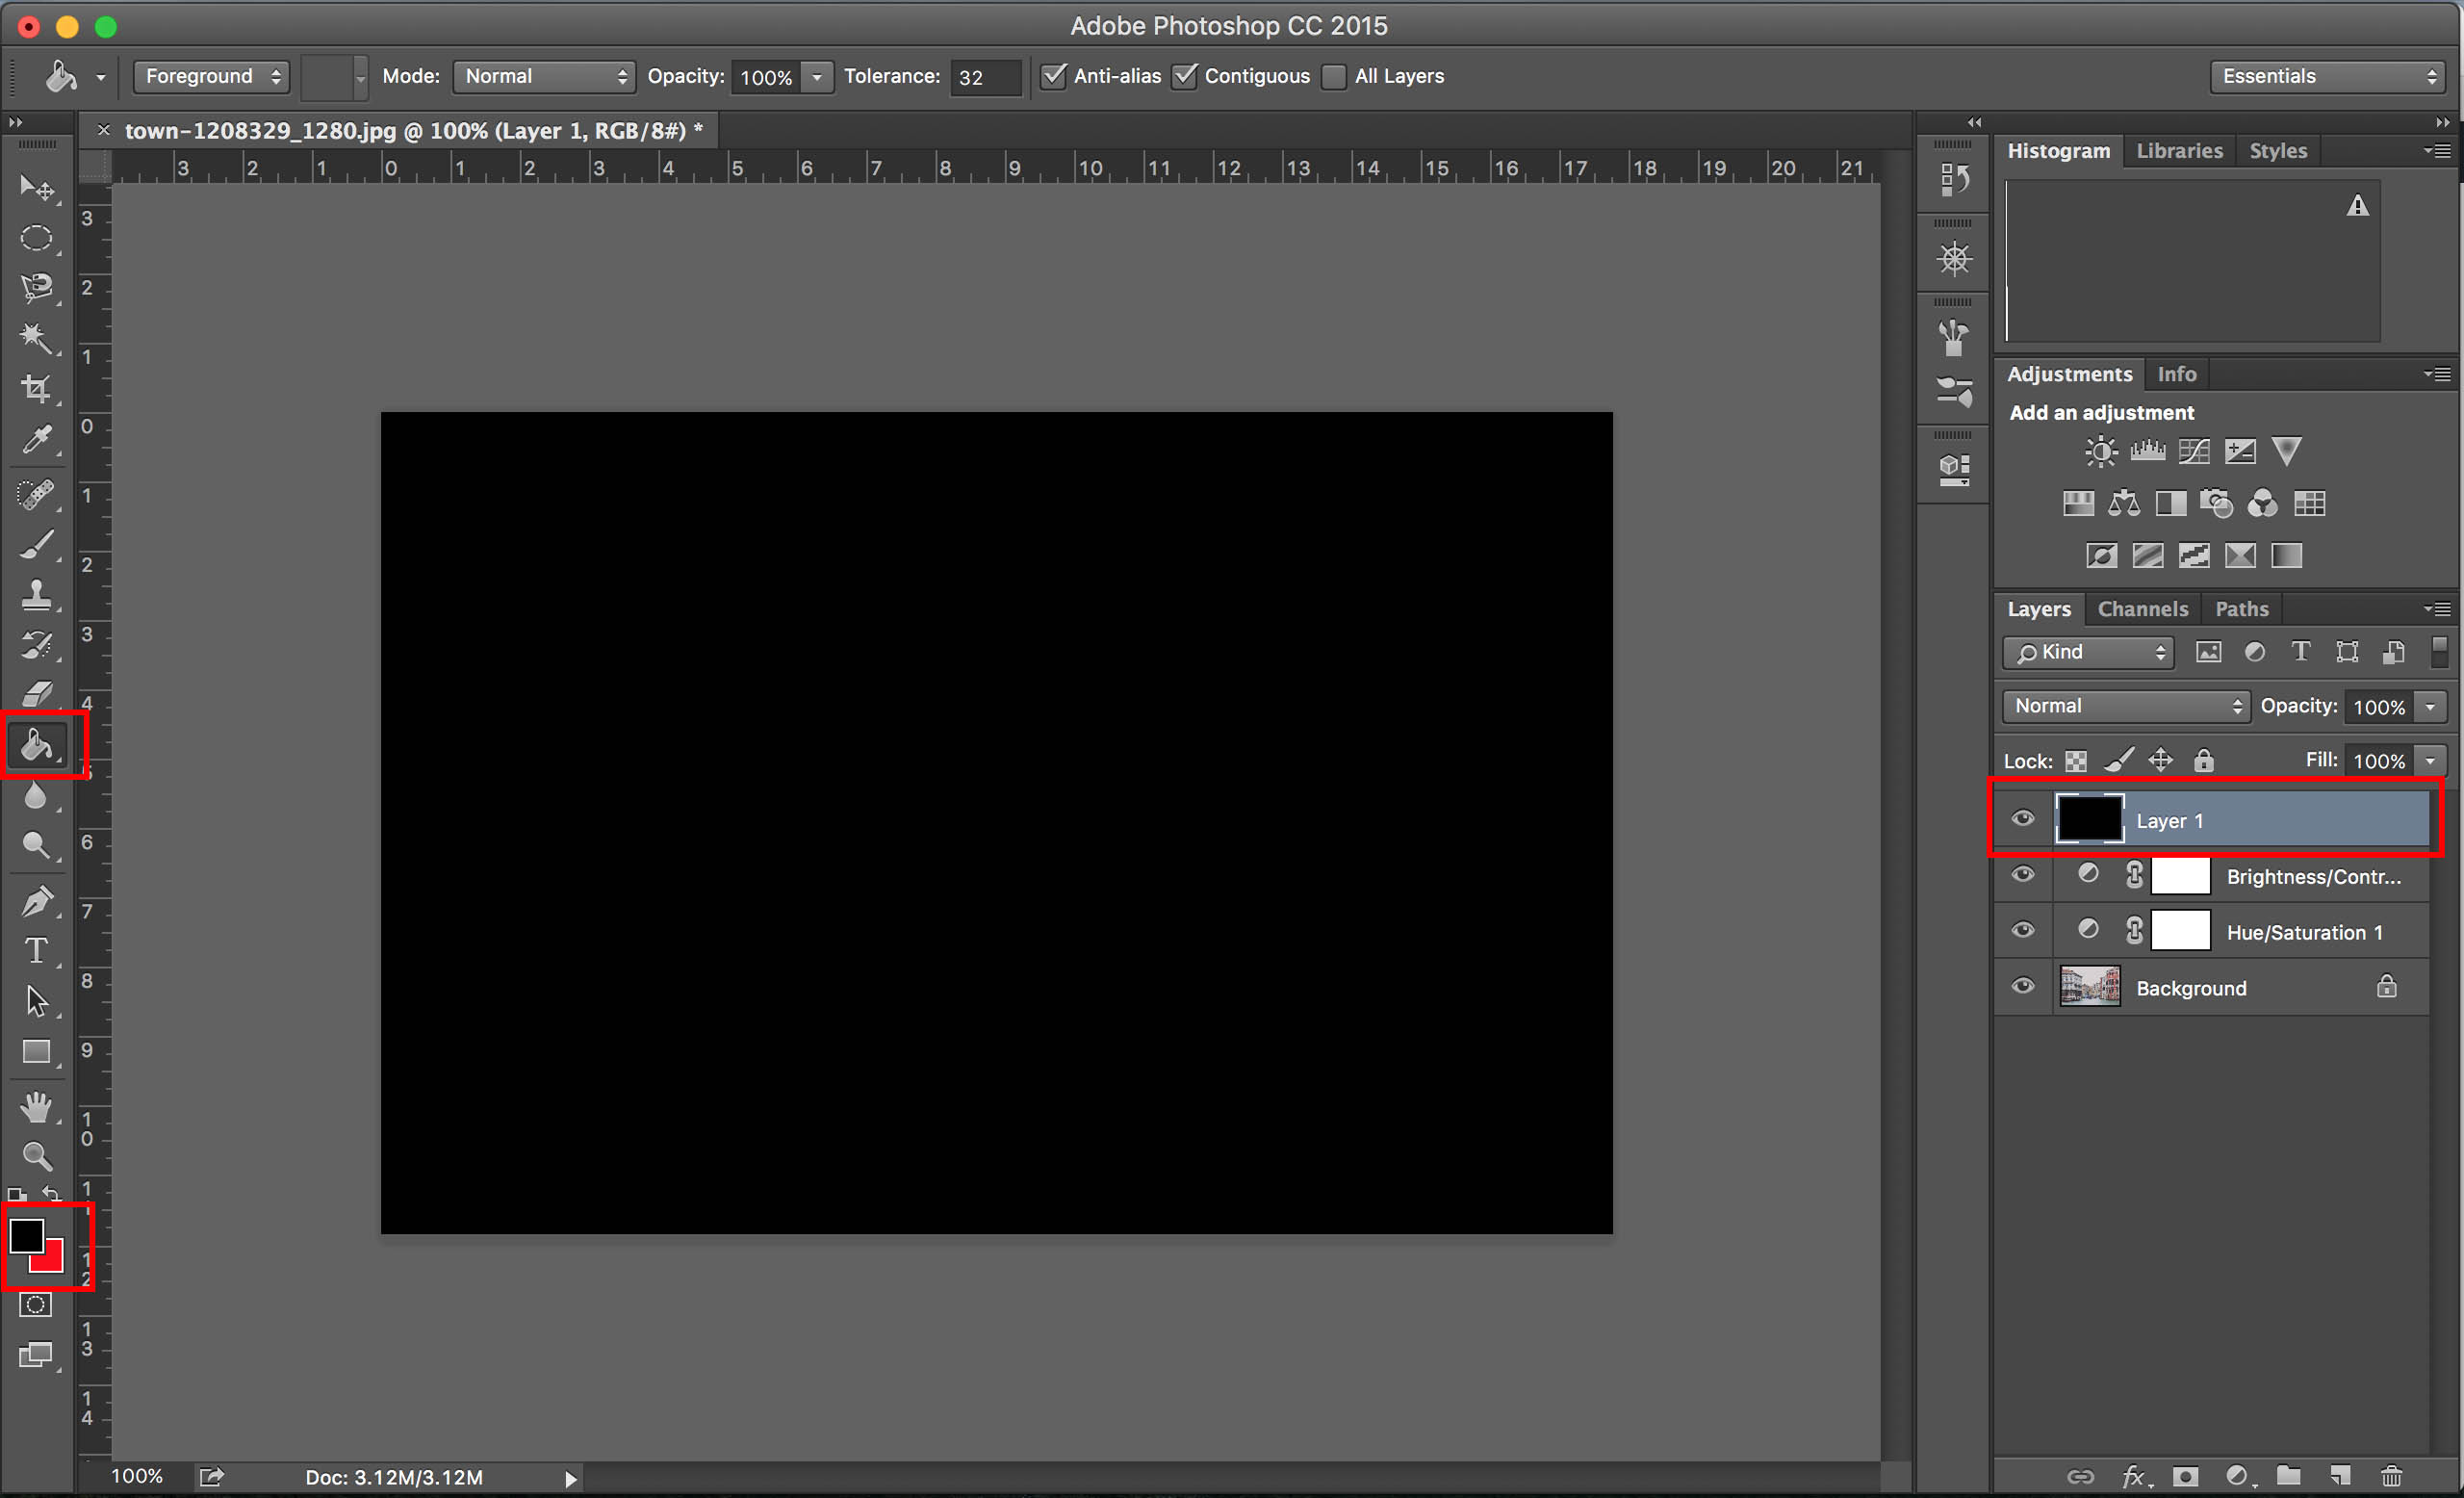
3. Using the “Paint Bucket Tool” on the left side of the screen, fill in the entire new layer with black, which can be selected at the bottom left where the two color swatches are (make sure the black is on top to use that color).
4. Then you’ll need to add a mask to the same layer you just filled in with black. Do this by clicking the “Add Vector Mask” button on the bottom right corner.
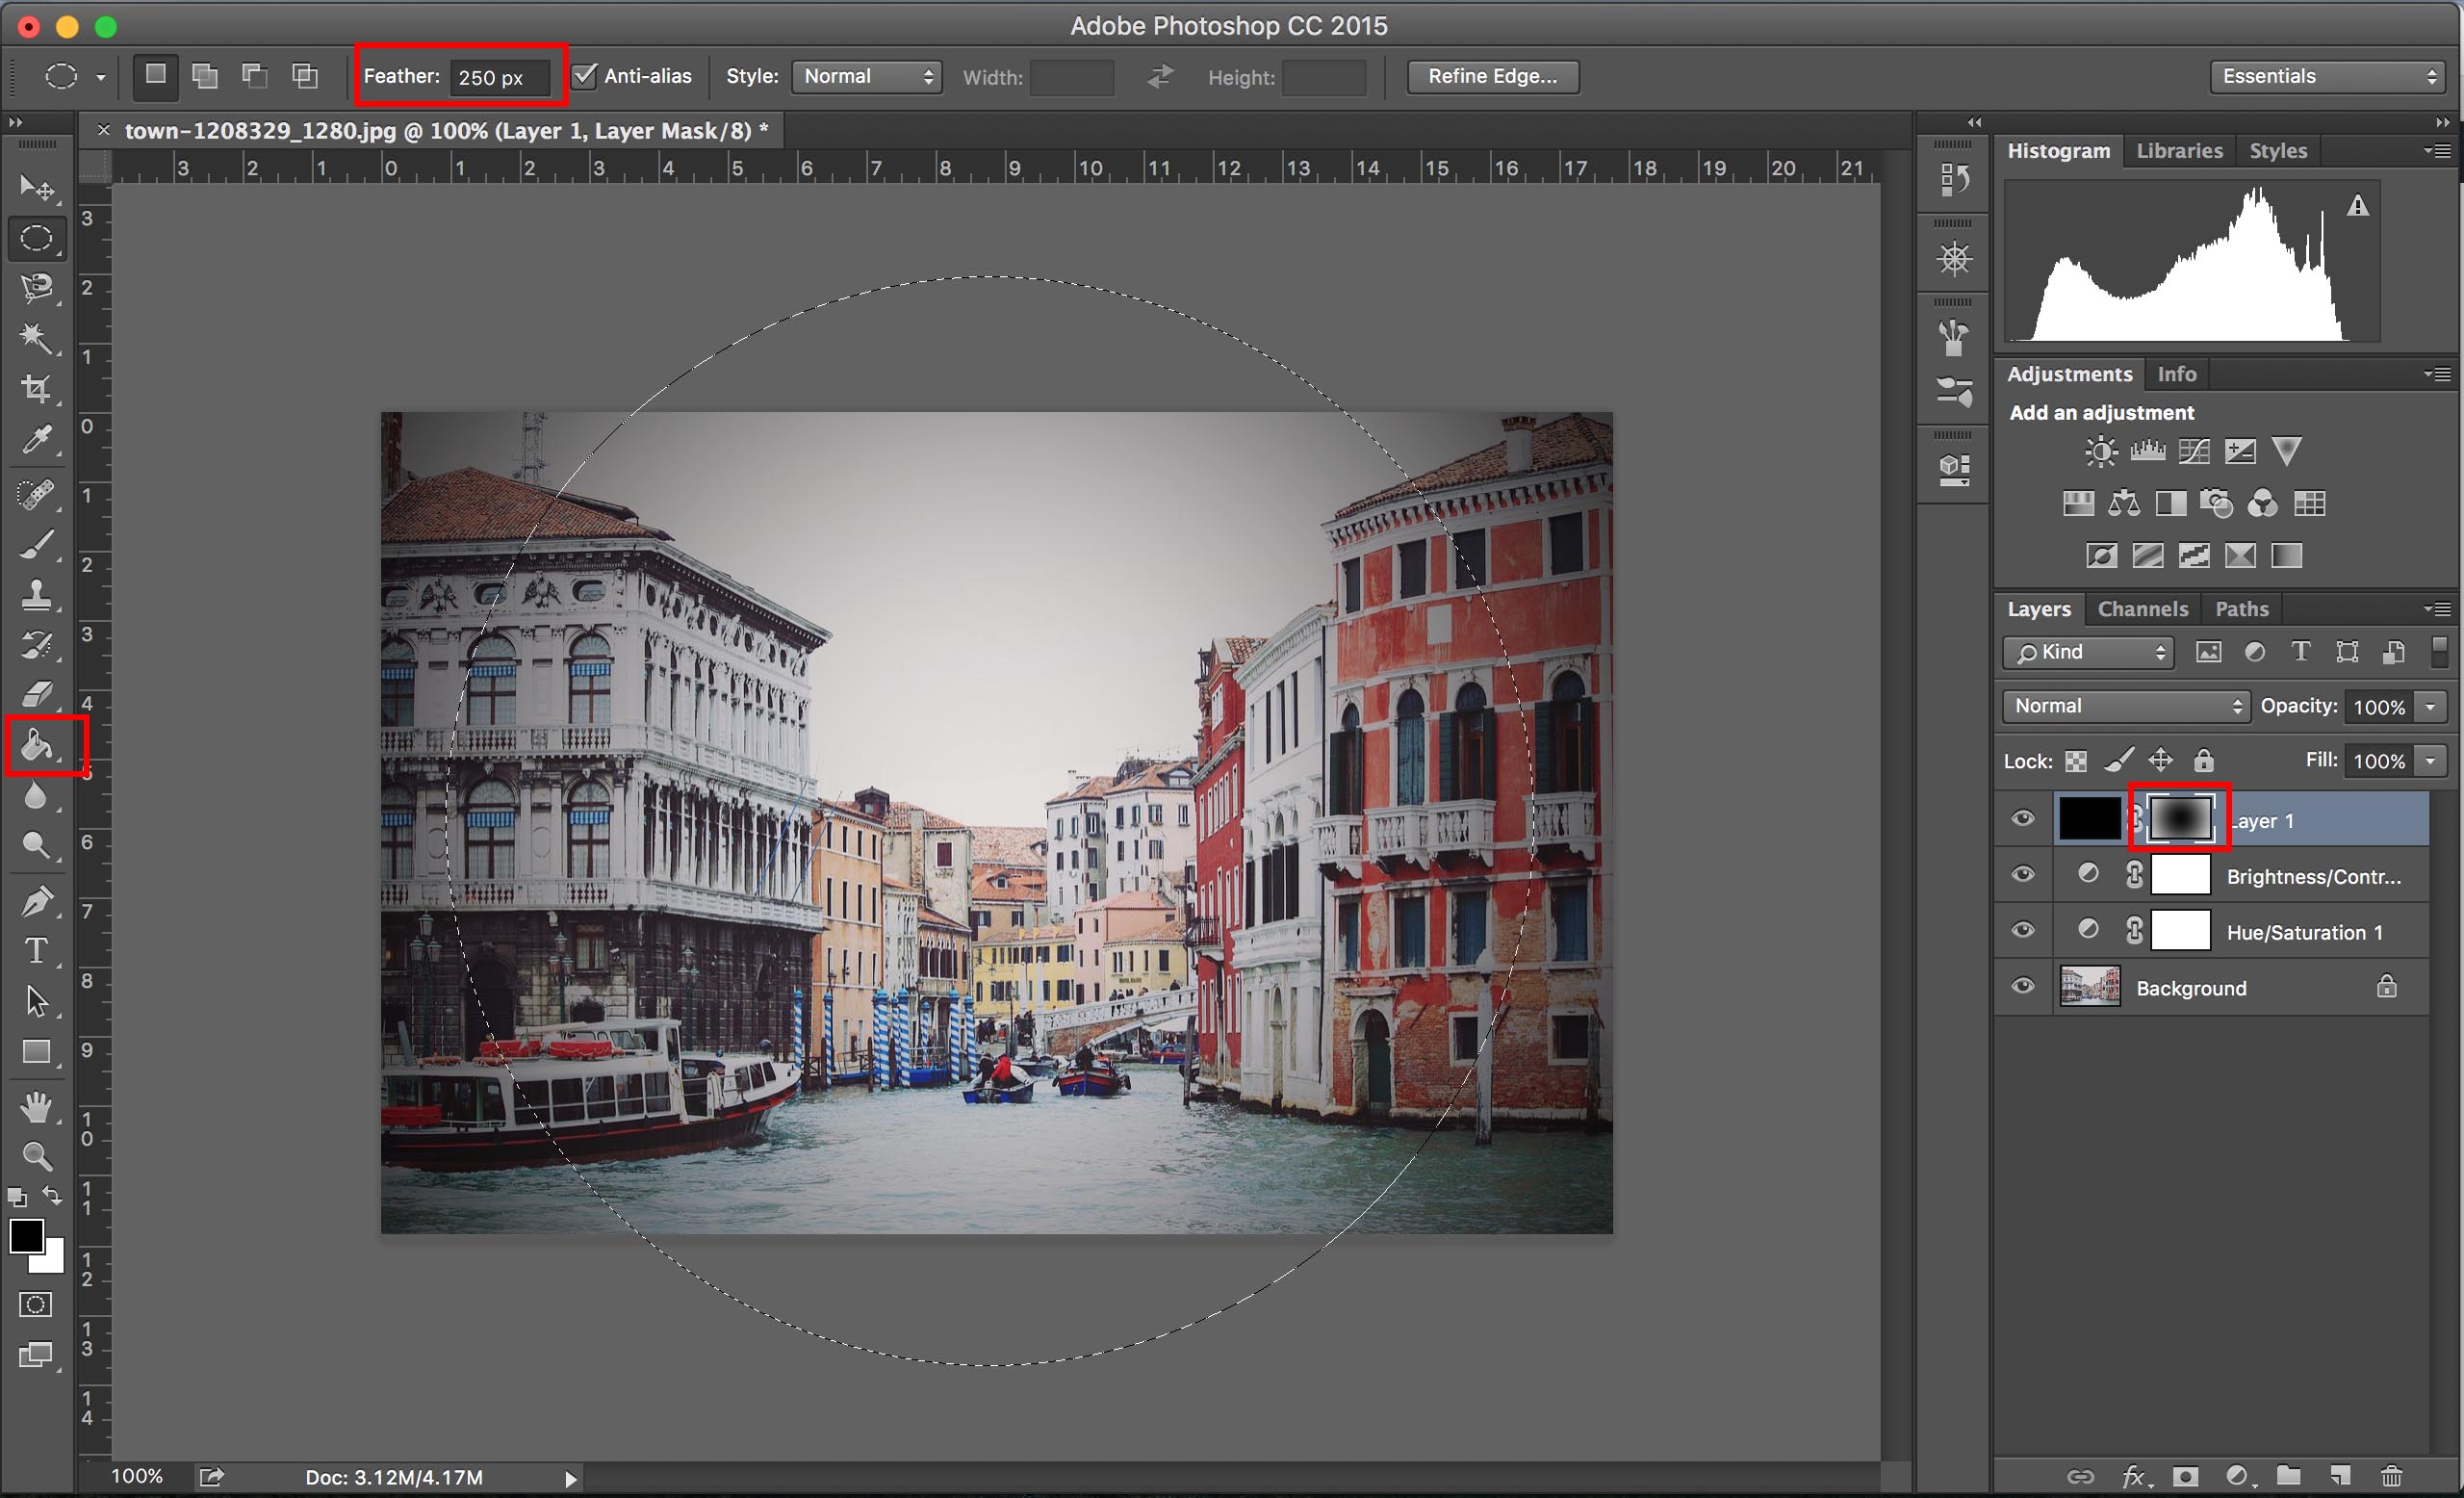
5. With the mask selected, use the “Elliptical Marquee Tool” on the top left to select a large circle in the center of your image. Even though your image is probably a rectangle, it’s important to make the selection a circle because that’s the shape of a vignette a real life lens would make, which means your final product will look more realistic. To ensure you get a perfect circle, hold down the shift key as you make your selection. Once you’ve made a circle that fits your needs and preferences (the size I have below is a little on the small side), use the arrow keys to nudge the circle to the center of the image.
6. Check to make sure you “Feather” setting is set to somewhere between 25px and 500px depending on the size of your photo and your personal preferences. Then, making sure your mask is highlighted and not the black layer itself, use the same “Paint Bucket Tool” as before to fill in the selected circle with black. This will actually hide that section of this layer since you are painting the mask with black which hides the layer. This will reveal your original image with a new vignette on top. The last couple of steps may need to be tried a few times for each image to gauge how large of a circle selection is needed and how much feathering is best.
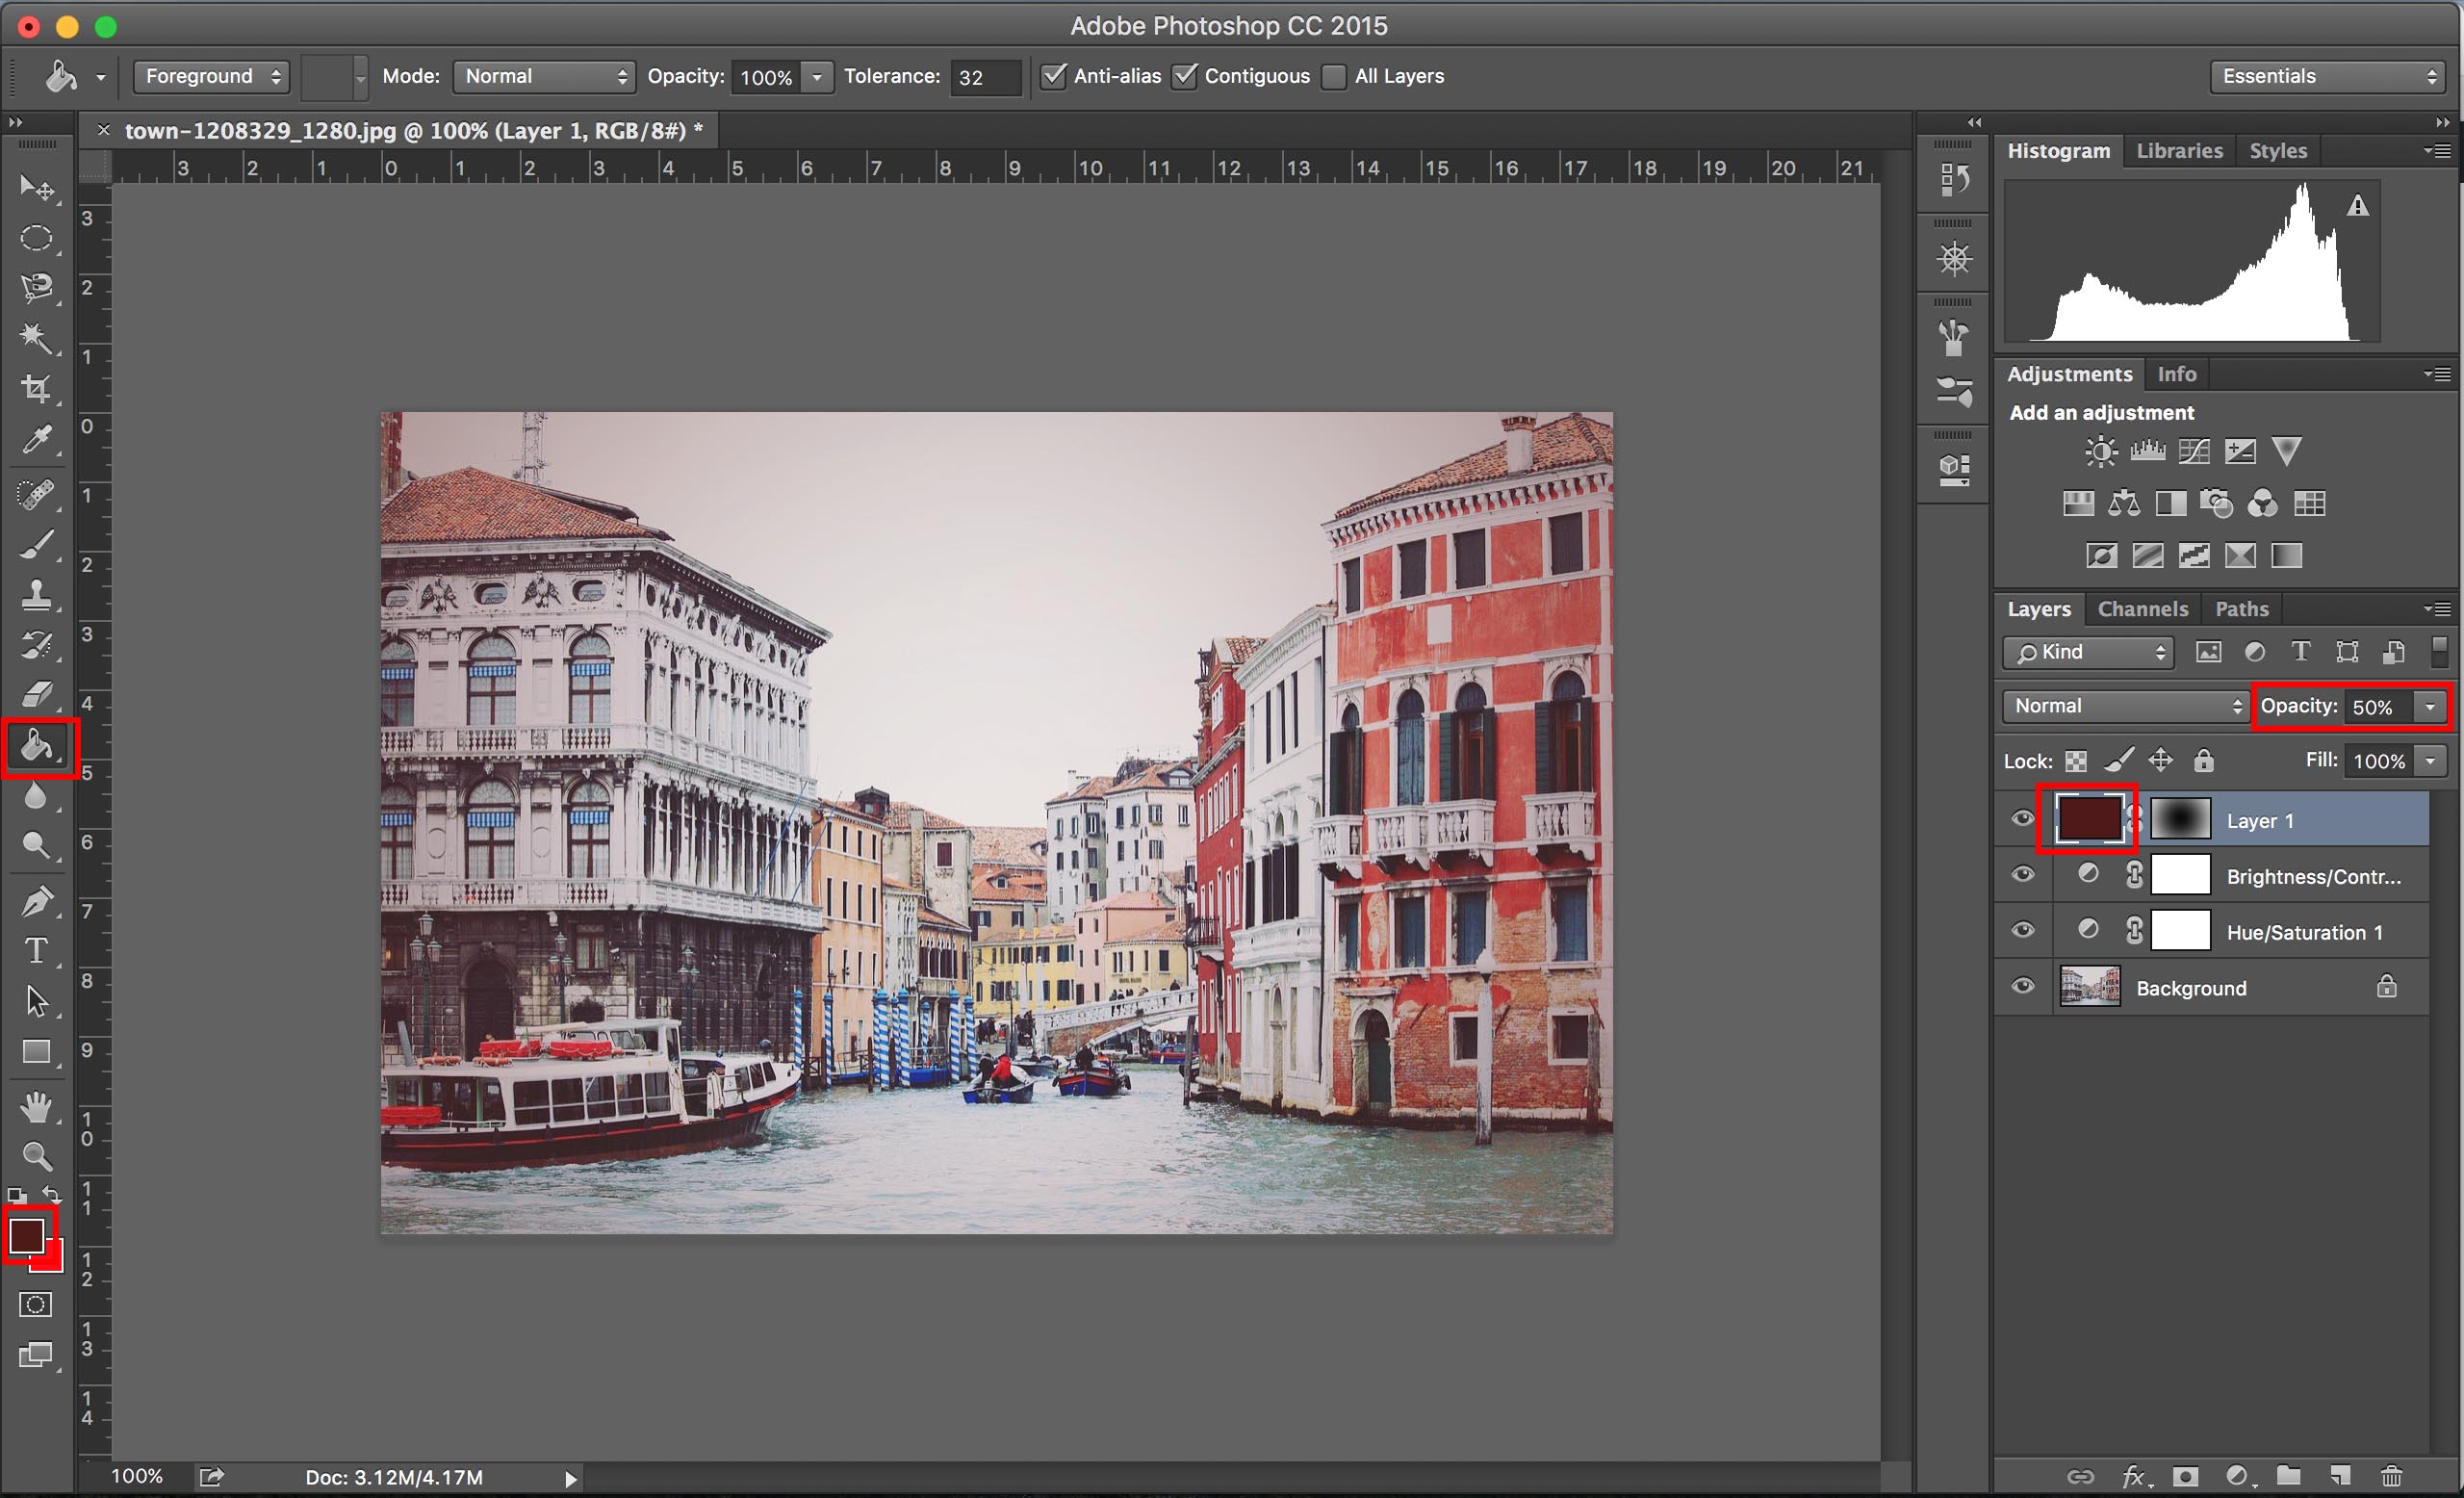
7. Finally, we can adjust the color and intensity of our vignette freely. To adjust the intensity, just lower the opacity of the layer using the “Opacity” slider on the “Layers Panel.” If you want to change the color, deselect the circle marquee by using the “Marquee Tool” to click on the circle, select the black layer itself (not the mask), and use the “Paint Bucket Tool” to fill the whole layer with a different color. Below, I adjusted the opacity to 50% and used a reddish color similar to that of the building on the right side of the photo. It’s important to keep your vignette color very dark, otherwise, it won’t look like a real vignette at all.
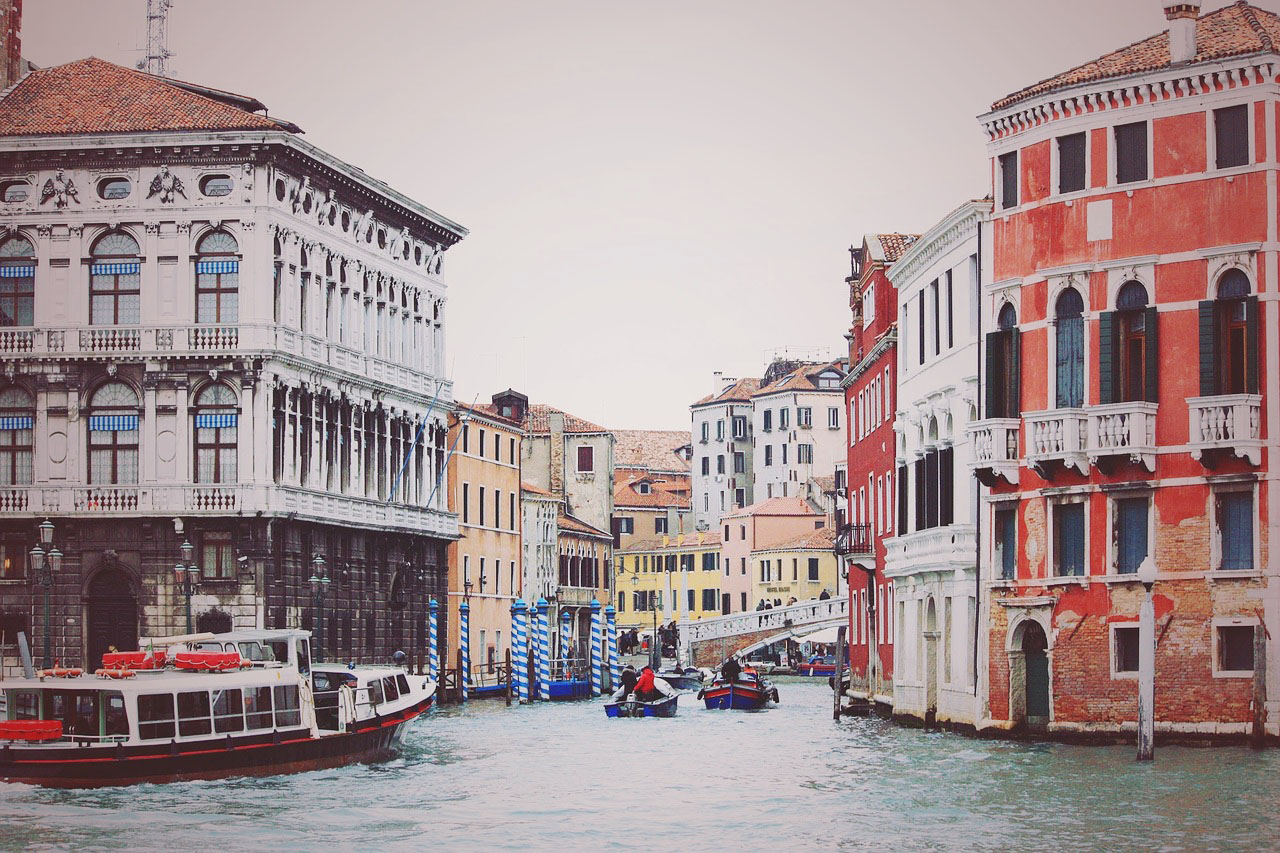
Personally, I was a little underwhelmed by my first attempt shown above, so I went back and experimented a bit, which is key to any good photoshop edit. In a matter of minutes, I was able to retry this technique from the beginning and got a much more satisfying result. I used a larger circle that went all the way to the left and right edges of the image, changed my “Feather” value to 50px, kept the opacity to 40%, and used a color that was closer to the water, giving the whole image a cooler tone. You can see the final result below.
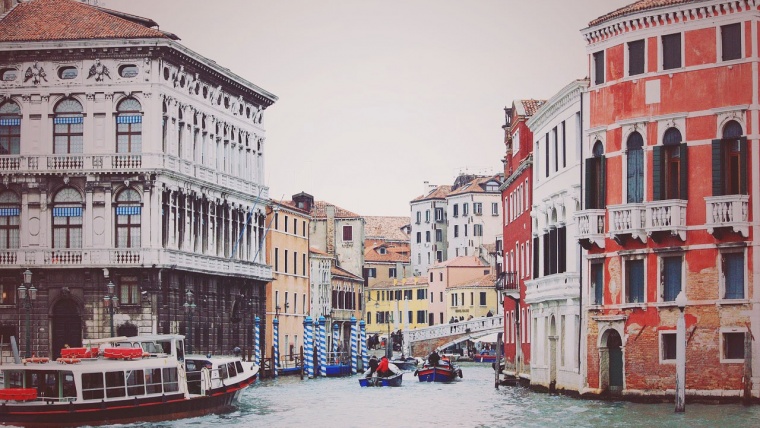
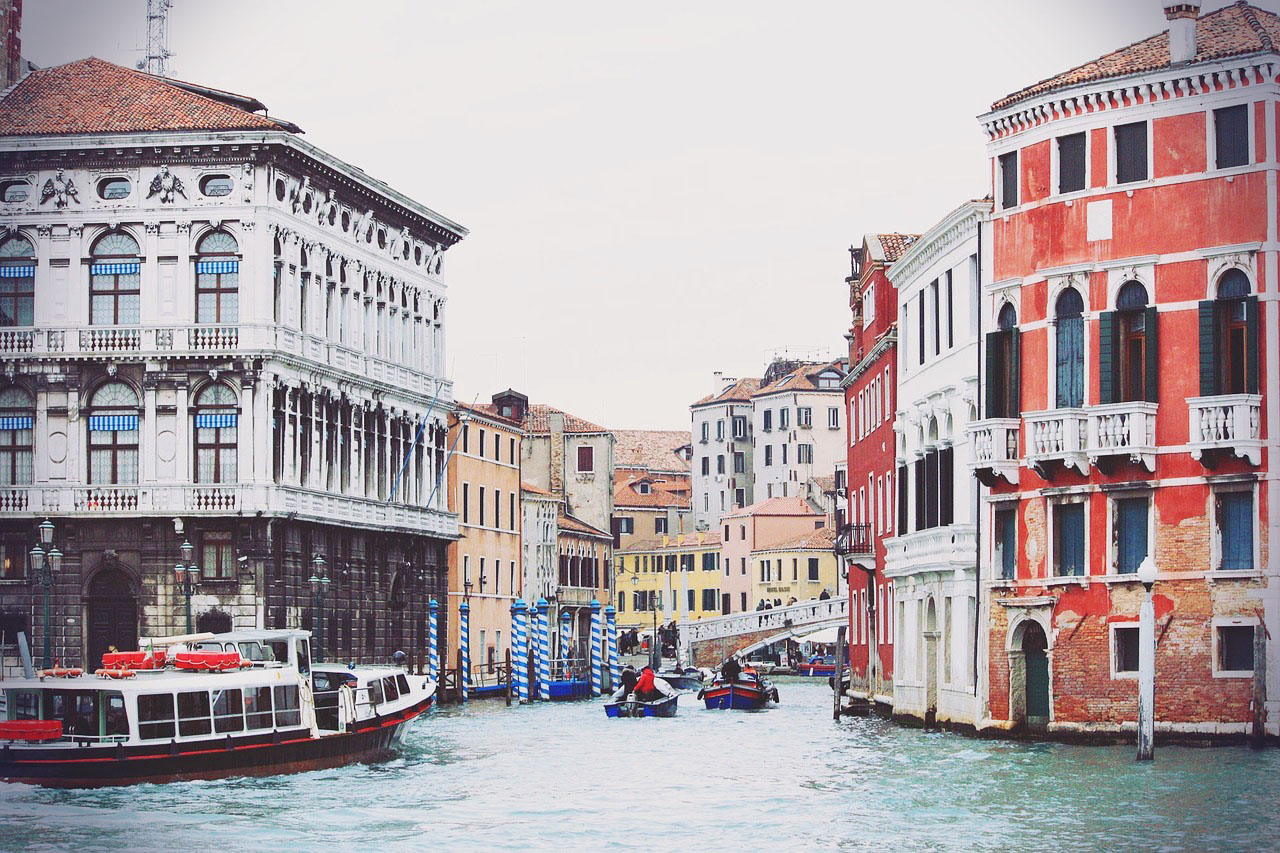
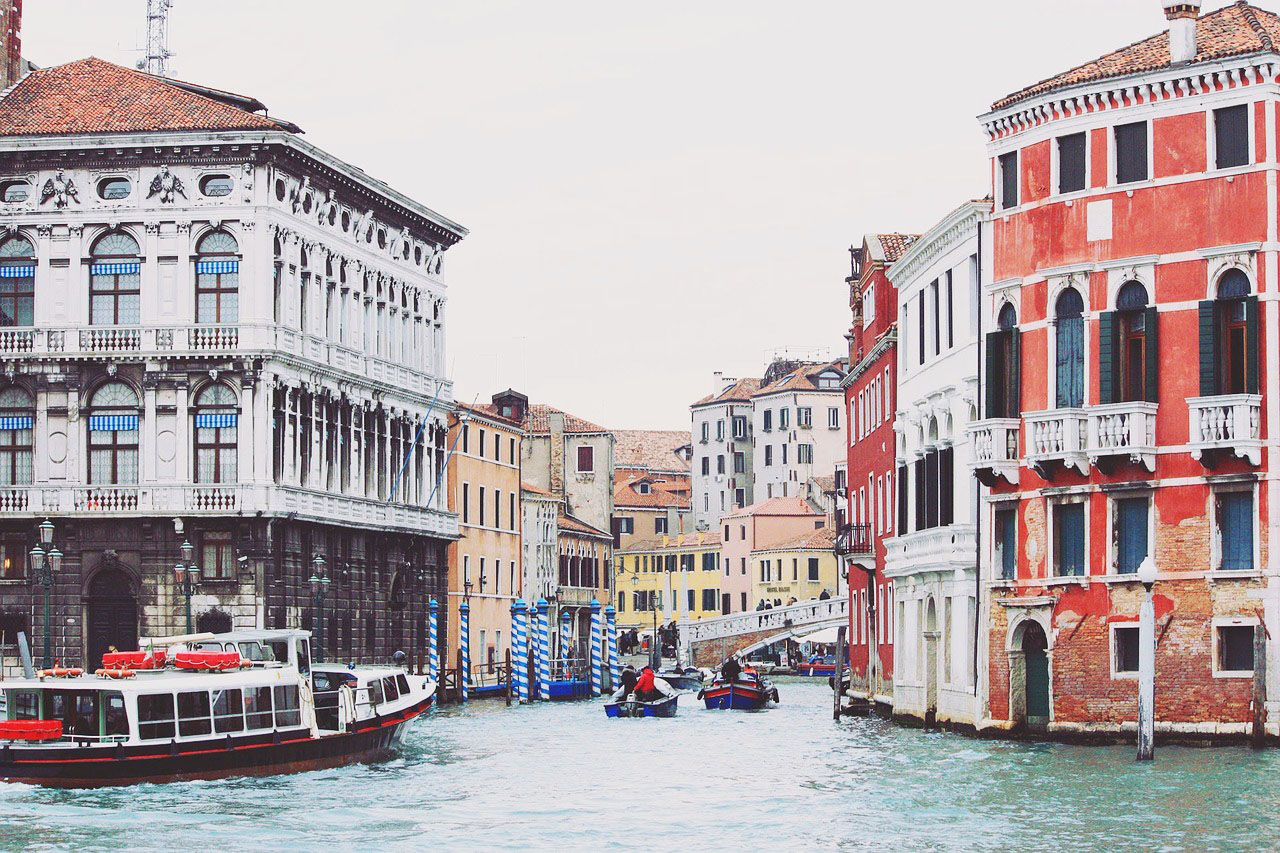
And here is the original image for comparison.
The key to this technique is experimentation. Because you can change the vignette size, feathering, color, and opacity pretty easily, there’s a lot to mess around with. Make sure not to go overboard with the colors, instead of keeping them close to black with a slight lean towards the color you want. Different colors, particularly warm vs cool colors, can drastically change the emotional effect of your image. Sleeklens offers some awesome plugins to adjust the coloring in Lightroom if you don’t want to use this technique. There are also plenty of other ways to give your photos that retro feels, but adding a slightly colored vignette can be a very effective way of altering the mood.
I'm a writer and photographer living in Brooklyn, specializing in product, architectural, and fine art photography. I have studied art in multiple mediums around the world and graduated with a degree in philosophy, art, and physics. Though I have been a practicing film photographer since I was 13 years old, I am also a tech-geek who keeps up-to-date on the latest advancements in the industry


 Facebook
 Google +
Comments (0)
There are no comments yet.