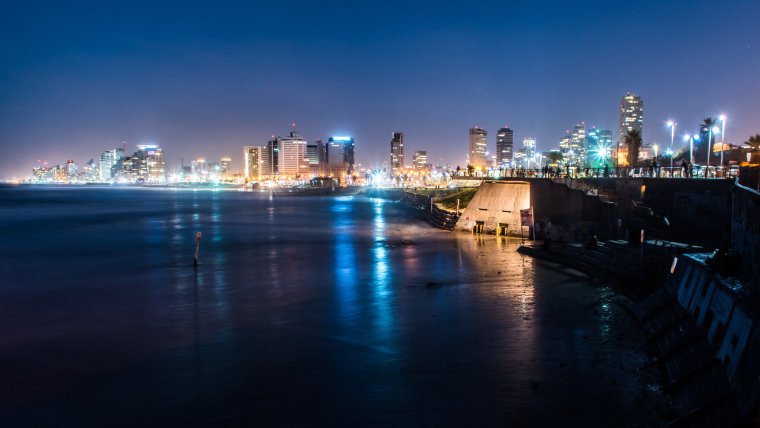
While most people have heard of the golden hour for photography – roughly an hour after sunrise and an hour before sunset – few people utilize the blue hour to take amazing cityscape photographs.
Cities are the ideal places to take breathtaking photographs and there is no better place to take advantage of the beauty of the blue hour than in a bustling city. In this post, you’ll learn what this underused hour is and how to take advantage of it.
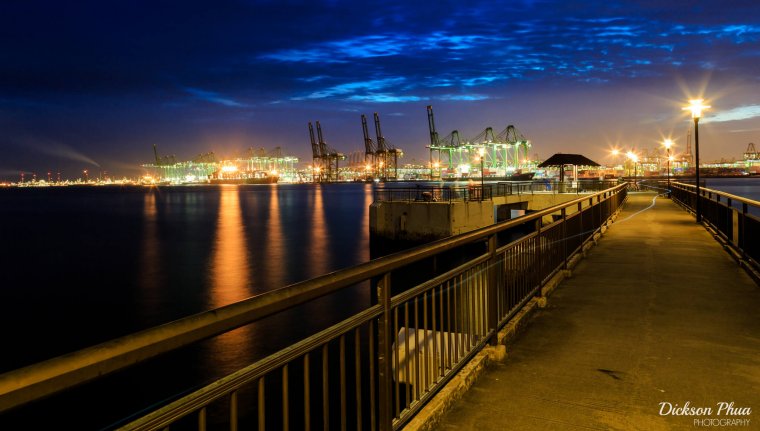
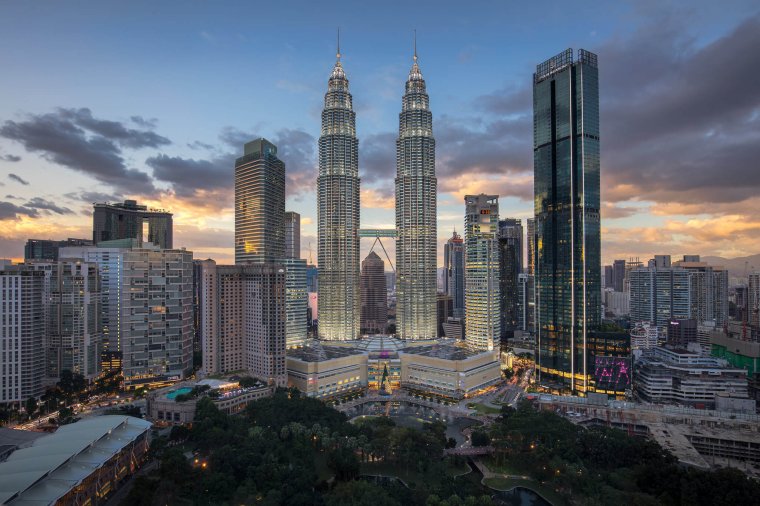
Photograph by Dickson Phua
Table of Contents
The blue hour occurs the hour before sunrise and the hour after sunset. As the sun sets below the horizon, before things get too dark and we venture into the night, the sky takes on a blue hue that can make for some spectacular images.
The blue hour is created by the atmospheric scattering effect. During this time, the Sun is far enough below the horizon that the atmosphere scatters short-wave blue light, giving a wonderful spectrum of blue hues.
It’s important to be quick to take photos at this time, however, as even though it’s referred to as the blue “hour”, the time between sundown and the darkness of night can be as little as twenty minutes, giving you precious little time to get the optimal shot, unlike normal night photography sessions. This makes planning your use of this time vital.
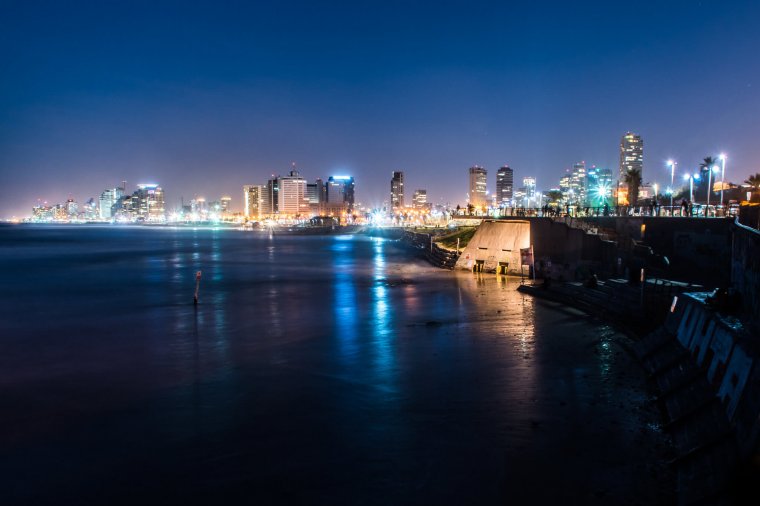
Photograph by Ralf Steinberger
The time you have to capture your shots will vary on where in the world you are and what time of year it is. But don’t worry, there are plenty of websites dedicated to providing you with this information, such as this one.
As time is of the essence, it’s essential to plan ahead to capture the best images. First, think about where you are going to shoot. Is it a busy spot and are there any obstructions?
This can be checked using google maps if you can’t get to the spot easily, but doing some actual reconnaissance is the best way to ensure you know exactly what you will encounter when you come to take your shots.
Go out in the daytime to choose your spot to give yourself plenty of time to get set up.
Keep each blue hour photography session to a single location. You don’t have time to travel a great distance, so it may take several nights to get all the shots you want. Waiting to get them right over several sessions is more important than rushing around.
Blue hour photography gives you more flexibility with what settings you can use. And the settings will be dictated by the type of shot you are going for.
When photographing cityscapes, you’ll want to keep the foreground and background sharp. This will mean that you need to alter your f-settings. Starting at f-8 and working up is a good place to begin.
As you go up, you will find your shutter speed begins to slow down and that is where you will start to capture the light trails of traffic.
If you want to have objects such as people and traffic clear and sharp, you will need to use faster shutter speed. This could mean setting your shutter speed to 1/200 of a second or higher if you want to get that freezeframe image.
This will require going as low as f-4 or maybe lower. You may also need to adjust and raise your ISO to properly capture the image.
There are plenty of settings that can be played to capture the shot you want but determining what shot that is will be necessary.
As you don’t have a lot of time to play around with your settings, giving yourself several sessions over different blue hours will help you get a great shot.
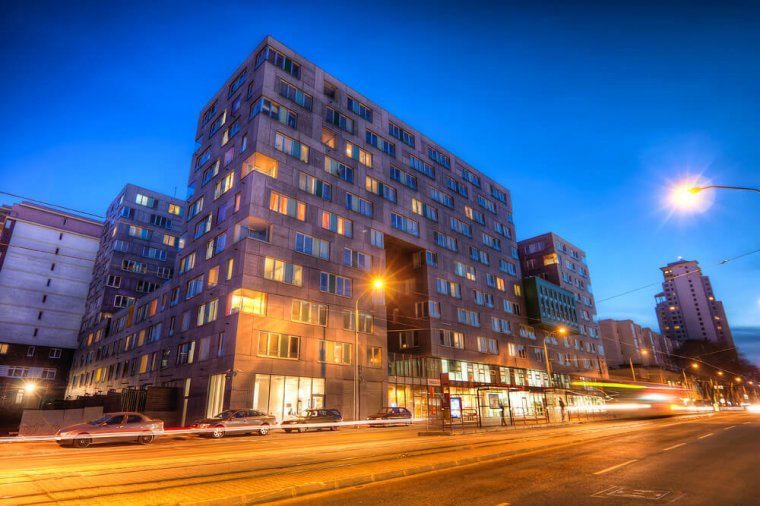
Photograph by Miroslav Petrasko
One vital piece of equipment to take is a tripod. You’ll struggle to hold the camera steady enough for long enough to capture images at slow shutter speeds. This will lead to camera shake in the images.
A remote shutter release can also complement the tripod and reduce the chance of camera shake.
It’s best to arrive early, scout out the best place for taking pictures and get the optimal setup prior to the blue hour, rather than rushing around in a limited timeframe.
Be patient as well. Don’t be fooled into thinking that you have some great pictures just after sunset – you’ll be able to capture an interesting range of pictures right up until nightfall.
When you take a picture, a small mirror flips in the camera. At slow shutter speeds, the camera can pick up the movement and cause a blurred image. By locking the camera in the settings or changing the camera mode to live mode (which flips and locks the mirror) you can avoid this mistake.
Because blue hour photography allows you to capture unique images, try out different angles, and try to look beyond the obvious image. Zoom in and zoom out as this can give some surreal images as well as playing with shutter speeds to get light trails.
Photograph by James Kerwin
All types of photographs can benefit from some postproduction, whether you like to do that or not. This can be as simple as adjusting the lines of the image or cropping it to highlight certain parts or can be as extensive as altering the saturation, contrast, or retouching parts of the image to get the best picture.
The minimum that you should do is to make sure the image is straight and that there are no blemishes in the photo. After this, the amount of postproduction is down to you, but subtlety is the key. Too much alteration and the image can appear fake, especially on top of the unusual hues the blue hour provides.
Ultimately, blue hour photography is easier to shoot as you don’t need to deal with harsh lighting and shadows, so there shouldn’t be the need for too much editing. A minimal approach is key.


Please verify your software version before proceeding.
 I’ve verified my software version


 Facebook
 Google +
Comments (0)
There are no comments yet.